How to Make Plant-Based Dyes

This is a story about how one thing led to another.

In April 2015, I wrote a post about using vegetables to make homemade dyes for Easter eggs. It seemed like everyone on Instagram was doing it and I wanted in on the action. You can read about it here. It was exciting to produce gorgeous colorful dyes from “scratch.”

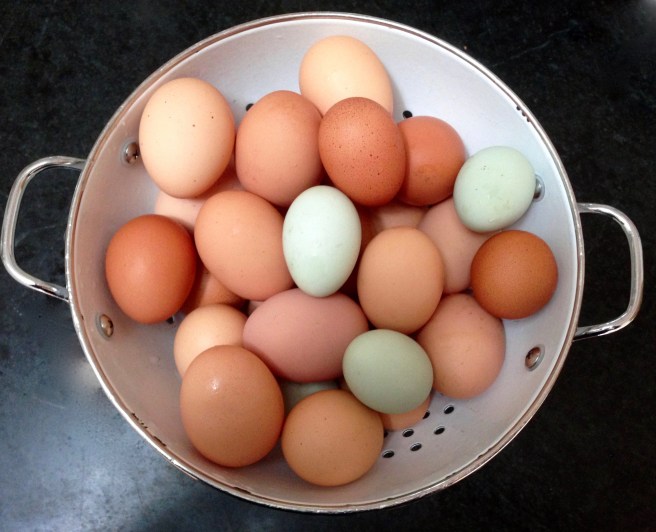
These are the colors I made by boiling vegetables in water.
Red/Purple cabbage produced the blue color. That was a nice surprise!
Yellow onion skins made the orange.
Red onion skins made the brownish-red color.
Red beets made the deep fuschia.

One analogous cooking tip I was able to learn from this egg-dyeing project was that yellow-skinned onions impart a nicer golden color to a pot of chicken stock than red onions.

Over the years, I invited my nieces over to dye eggs and we added ground turmeric to the mix. It produced yellow eggs.

I used some of the eggs in these Italian Easter bread baskets, a recipe I need to post!

One year, I didn’t make vegetable dyes and instead used powdered indigo I had purchased for another project to over-dye already colored eggs. I loved the different shades of blue that resulted. The commercial dye was lightfast, too, meaning the colors didn’t fade the way many of the eggs did.

This past February, while touring a block-printing factory in Jaipur, India, I learned from a young man named Ali, that their factory printed with natural dyes made from plants like tomatoes, pomegranates, turmeric, sugar cane, and indigo.

My takeaway was that you could pretty much make fabric dyes from anything that ever stained your clothes, aprons, or dish towels while you cooked.

Two months later, Easter 2018, was the year I went a little cuckoo with the egg dyes. I poked through my kitchen spices, vegetable bins, backyard garden (found daffodils and forsythia), and the grocery store, looking for foods and flowers I could potentially use to make dyes. In the end, I chose pomegranates, dark grapes, blueberries, tomatoes, cranberry juice, red cabbage, spinach, turmeric, yellow and red onion skins, paprika, apple skins, used coffee grounds, daffodils, forsythia, and tulips.

I was all in.

Crazy as this all seems, I got into the zone on this project. I laid down a long sheet of brown paper and filled fifteen bowls with food and flower samples, some of which I had pre-cooked. I couldn’t cook them all because I didn’t have enough pots or time.

I filled each bowl with boiling water and let the materials meld for a few hours. Afterward, I mashed the plant materials in each bowl, heated them in the microwave, and strained out the pulp.
 

I added hot, medium-sized, hard-boiled, white eggs into the strained warm liquid and let them sit for a while longer.

The results were mixed. Some of the dyes produced rich dark colors, some were pale, some were lightfast, some were not. My favorite new colors were a lovely chartreuse from the pomegranate, a golden yellow-brown from the daffodils and forsythia, a pretty mocha-brown from the coffee grounds, and a light orange from the paprika.

While I used the dyes for eggs, in my head I was thinking about how they might dye fabric. I could see how some of the colors in the swatch below could be created from the colorful dyes I had made over the years.


Making Dye from Indigo Plants

In my garden, I am growing a patch of indigo and hoping that this will be the year I finally try my hand at making dye. There are many complicated steps involved, including the addition of chemicals in calculated amounts and resting periods, all of which have kept me from taking the time to focus and learn how to do it.

Today, I signed up for a class at Hill & Hollow Farm in Breeding, KY, to learn how; how to harvest indigo leaves and create dye. When I went to sign up for the class, I realized I had bought my first indigo plants from Hill and Hollow at their booth at the Nashville Farmers Market. I started with four plants and those plants have self-seeded to create the plot I have now. It was an omen. Stay tuned for that post.

Coincidently, in May, my artist friend, Tallu Quinn, showed me how to make patterned blue and white fabric squares using an ancient dyeing technique known as Shibori. That process will be described in another story, too. As a teaser, here is a photo of the still wet squares we dyed.

Working on this Shibori project with Tallu sealed the learning-how-to-make-indigo-dye deal for me. Once the fabric squares are sewn together for a quilt, a group wedding gift, I will write a post.

Like I wrote in the beginning, one thing led to another.

Related Posts
Learning How to Block Print in Jaipur (India, Part 2)
To Dye For: Making Naturally Dyed Easter Eggs
Morning Rounds in the Garden, July
How to Tell If an Egg Is Fresh or Hard-Boiled

Don’t miss a recipe! Become a subscriber and have every post delivered to your Inbox.

Follow Judy’s Chickens on Instagram and Pinterest @JudysChickens.

Remember to always check this website for updated versions of a recipe.  

© 2014-2018 Judy Wright. All rights reserved. Photos, videos, and text may only be reproduced with the written consent of Judy Wright.

Eulogy for a Chicken

Treating our baby chicks like pets and naming them seemed like a good idea. At first. They were cute and cuddly like pets, and they kept us entertained with their constant chirping and the adorable way in which they climbed over one another to get to their food. We had fun choosing names for that first flock, too: the two brunette Plymouth Barred Rocks were named for my Sicilian grandmothers, Marion and Concetta, the blonde Buff Orpingtons for Hubby’s grandmothers, Alice and Mildred, and the Rhode Island Reds for my zany red-headed great aunts, Bridget and Josephine. Neighborhood children and adults visited every day. Life was good.

The chicks grew up to be a beautiful and sociable flock. They loved to climb the stairs to our back porch and hang outside the screen door while we humans visited inside. This was back in the Spring of 2012 when the Metropolitan Government of Nashville first passed the Domesticated Hen Ordinance allowing urban residents to keep up to six chickens in their fenced-in backyards.

Chickens at the Backdoor

In the beginning of our poultry husbandry, it was all cartoonish chickens running across the grass in their funky lopsided way, and chicken idioms come to life. After about five months, eggs started appearing in the nest box, and it seemed like a happy bonus rather than the original intent. A few years later, with the addition of blue-egger Ameracaunas to the flock, the variety of eggs became downright gorgeous.

img_3711

Eventually, the Circle of Life, Survival of the Fittest, Mother Nature, whatever, showed its hungry head and there was some attrition in the happy flock.

dsc_0311

I didn’t grow up on a circle of life farm, so when the hawk picked off the first few chickens, it took me a while to adjust. The chickens adapted to this menace better than I; they learned to run for cover whenever they heard the hawk’s whistling call or saw his shadow overhead. They also learned to make a beeline for the bushes when I let them out in the morning to avoid being out in the open where a hawk could easily spy them. They were smart chickens.

As there was more attrition to come, at some point, I had to stop naming the replacement chickens. Instead, I referred to them by their breed. That is, until last Spring, when I brought my newly acquired Golden Comet chicken to visit Glendale Elementary School in Nashville. There, a young girl in Ms. Meadors’ kindergarten class raised her hand and asked me the chicken’s name.  I hemmed and I hawed. How could I tell this darling child I didn’t name my chickens anymore because Mother Nature could be ruthless? “Comet,” I replied with a motherly smile. The name stuck.

img_7563

Last week, Comet, the only chicken in the flock who liked to be held, died. This is a tribute to her.

One Chicken’s Life

Comet was born on a rural farm in Kentucky that raised Golden Comets, a breed known for being good layers. Once the baby chicks were hatched, they were placed in an open field in movable cages known as “chicken tractors.” The chickens fed on the grass beneath their feet until it was all consumed and then the cages, with their big supporting wheels, were rolled to another area of the field.

dsc_0326

Once the chickens outgrew the tractors, they were moved to a fenced-in apple orchard for grazing. The canopy of apple tree branches helped protect the flock from hawks.

img_6937

I asked the farmer, whom I knew from previous visits to the farm to buy eggs, if he would sell me two of his young layers. He did so with some reluctance — I don’t think anyone had ever asked him that question before. He sent his son to fetch two chickens. The young boy, obviously adept at this task, snuck up on the chickens and grabbed them by the ankles.

dsc_0341

We brought the chickens home and waited until nightfall to introduce them to the established flock. This is a time-honored technique used to decrease the likelihood of new birds being hen-pecked by older girls in their society. The idea is that the birds all wake up together and are not as startled by the presence of the newbies among them. We’ve learned from experience this method doesn’t always work, so for added insurance, we bought a “flock block” and placed it in the enclosed run with them. We hoped it would give the birds something enjoyable to peck on rather than each other.

product_poultry_purina_flock-block

It worked; the older ladies left the new girls alone. We have since discovered that as long as we keep a second food source in the run, the chickens have less reason to be territorial. There is now peace in our small chicken kingdom.

dsc_0874

Comet’s life gets interesting.

As I mentioned earlier, last spring, I started bringing Comet to visit children in elementary school classrooms.

img_5639 img_6842 img_7573

img_6501 img_7164 img_7840

Comet got to visit many schools. There is no telling how many children stroked her golden-red feathers or touched her rubbery red comb.

img_7181

Here is Comet in Ms. Benson’s kindergarten classroom where children got to feed Comet leafy greens and pea shoots with their soft leaves and curly-cue tendrils.

image2

The Boy Scouts came to visit her.

img_7905

And, the Girl Scouts.

13217252_1804130223149390_7814533329477965568_o

The scouts all learned How to Tell If an Egg Is Fresh or Hard-Boiled. You can learn how, too, in the video located in that post.  

img_5869

Comet and I were featured in a photo shoot for a nationally known online knitting magazine called Mason Dixon Knitting. I adore this photo of Comet taken by my dear friend and neighbor, Ann Shayne. Ann later gifted me with the beautiful purple and raspberry colored handknit cowl.

img_2964

A few more remembrances of Comet.

Here she is eating her leafy greens and peas.

Tilling and munching in the compost pile.

img_3543

Visiting while I planted an asparagus bed.

dsc_0445

Taking in the scuttlebutt at the watercooler.

dsc_0453

Leading the charge as the flock followed me around the yard.

dsc_0477

Comet was one fantastic chicken.

img_7778

In Memory of Comet:
50 Ways to Make a Frittata
Quiche Lorraine with Bacon and Kale
Freshly Cooked Tortillas

Related Stories:
Family Dirt
Spring Planting Guide for Your Kitchen Garden
Fall Planting Guide for Your Kitchen Garden
How Canola Oil is Made (from plants grown locally)

LET’S STAY CONNECTED!

Follow my photos of vegetables growing, backyard chickens hanging out, and dinner preparations on Instagram at JudysChickens.

Never miss a post: sign up to become a follower of the Blog.

© 2014-2017 Judy Wright. All rights reserved. Photos and text may only be used with written consent.

How to Tell If an Egg Is Fresh or Hard-Boiled

IMG_8581

A few days ago my husband, the physics major, taught me a new trick: how to tell if an egg is hard-boiled without cracking it open. It’s hard to believe I’ve gotten this far in my life without knowing this.

Error
This video doesn’t exist

Now, go and give it a try!

LET’S STAY CONNECTED!

Follow my photos of vegetables growing, backyard chickens hanging out, and dinner preparations on Instagram at JudysChickens.

Never miss a post: sign up to become a follower of the Blog.

© 2014-2017 Judy Wright. All rights reserved. Photos and text may only be used with written consent.


Family Dirt

One morning, many years ago, while my sons were still in grade school, our family was sitting around the breakfast table, and the conversation went something like this:

One son makes a comment about periods, of the female kind. His brother responds by saying, “You shouldn’t talk about periods when you don’t know what they are. Uh, what are they, Dad?”

My husband, who is historically quick with a good analogy, said, “You know how your mom gets her garden ready to plant every spring? She weeds the beds, turns the soil, and smooths out the dirt. She does all this to get the beds ready to plant seeds. A woman’s body is like a garden. Every month, it prepares a lining in the womb for a seed to get planted. Depending on whether or not the seed is fertilized, the womb either keeps the lining or lets it go. When it goes away, that’s when the woman gets her period.”

Wow. That was beautiful.

Two weeks later, I was driving the afternoon lacrosse carpool of 7th-graders when something was said about sex in the way-back of the Suburban. Sex? My ears perked up. That’s when I heard my son say,  “All I can say, is don’t ask my Dad about sex; I asked him about periods, and he started talking about gardening.”

I think about that sweet conversation with longing and a smile that runs deep when I approach my scruffy garden every spring after a long winter’s absence. What to do first? When you raise vegetables, the first chore is to start getting your garden ready so you can get your peas in the ground around the first of March. How do farmers pick March 1 as the planting date? One method is to count back six weeks from the last average frost date which for our region is April 15th. Or, we can go by nature’s signals: when daffodils are in full bloom, plant potatoes, and when the forsythia starts to bloom, plant peas.

I knew the clean-up job would be more fun with company … My husband is a problem solver extraordinaire. My kids will tell you they grew up in a household where their Dad’s motto was, “Be a problem solver, not a problem identifier.” I grew up in a household with many problem identifiers, so ours was a perfect union. If I am manipulative in any way, it’s in the way I’ve learned to present projects to my husband as problems to be solved. I know I’ve succeeded when I see him pull out one of his pre-cut sections of an index card from his wallet. These homemade notecards are where he writes his to-do list. Once he starts making a list on these cards, I know the project is as good as done.

Here’s his list (the words in parentheses are mine):
Ethanol-free gas from Billy’s Corner (for tiller and pressure washer)
New spading fork (to turn leaves in beds)
Grass seed and straw (bare spots in yard)
8-inch galvanized spike nails (to remediate chicken problem)

Here’s mine: pea seeds, plants for front flower pots

Here is a picture of my husband installing spike nails into the railing of the vegetable garden fence. This is his solution to finding a way to keep our chickens out of the garden. He is using strands of fishing line, strung between tall nails, to work as an added “invisible” fence. The idea is to keep the chickens from flying up onto the railing, using it as a landing platform, and then hopping down into the garden. In the chickens’ defense –and the chickens must be defended — it is not their fault they don’t know the difference between a vegetable garden and a compost pile. Unfortunately, it only takes five minutes for six chickens to trash a garden.
IMG_5599

Kitty was not happy with the chicken remediation project. She now has to slither along under the fishing line fence to get to where she is going, which let’s face it, is nowhere in particular. I consider that a very small price to pay to keep the chickens out of the garden. My friend, Kim Matthews, a massage therapist, says it probably feels good on her back, so no worries there.
IMG_5606 IMG_5611

Good Dirt

Much of what I did to get my soil ready “to plant the seed” occurred last fall when I mulched the beds with leaves. I typically pick up bags of leaves from the homes of friends. You can see from the middle photo that the back garden was still very productive on November 16th when I spread the leaf mulch. In the beds where greens were still growing, I tucked leaf mulch in between the plants and those crops lasted all the way to New Year’s Day when I harvested them for “prosperity”.
IMG_3971 IMG_3976 IMG_3977

I got these bags of leaves from my next door neighbor. You can see steam coming off the bags just three weeks later indicating they already had started composting in the bag.
DSC_0314 DSC_0099

I worked the leaves into the beds using a broadfork and a spading fork.
DSC_0099 

I use these tools instead of a tiller on established beds because I’m trying not to disturb the wormhole tunnels and root tracks left by old, pulled plants. These tunnels are nature’s way of building pathways into the soil that new roots in the future will follow as they grow. Remember, the looser the soil, the more extensive the root formation, and the more productive the plants will be.

Tools for loosening, turning, and leveling dirt: (left to right) Bow Leveling Rake,  Spading Fork, Johnny’s Broadfork, Mantis Mini-Tiller and Cultivator
DSC_0408

I use our mini-tiller to mix up the compost pile which is filled with dirt, vegetable scraps, egg shells, coffee grinds, chicken manure, shredded paper, and leaves. The compost pile is one of the few places I still use a tiller and welcome the chickens and their chicken-scratching ways.
DSC_0273

In the Master Gardeners of Davidson County program, we learned that dirt is made up of the following components: 50% water and air, 48.5% mineral matter (sand, clay) 1% organic matter (plant residue) and .5% living organisms (worms, fungi). If you think of dirt in terms of its components, it helps you to figure out what you need to do to amend your soil. You need microbes and organic matter in your soil to break down organic matter, and the microbes need water and air to do their job of enriching the growing medium for your plants.

Necessary Minerals in Soil:
Nitrogen is good for vegetative growth; it’s what make leaves turn green.
Phosphorous helps create new root growth and blooms. Blooms lead to seeds.
Potassium is good for stem and stalk strength, vigor and disease resistance.
Calcium is good for root formation.
Magnesium helps with the uptake of other elements.
Sulfur helps with protein formation and dark green color of plants.

Soil pH. The pH stands for potential Hydrogen:
Soil pH refers to the amount of hydrogen ions or acidity in the soil. As acid levels (Hydrogen ions) increase, soil pH decreases.The pH scale ranges from 0-14. Seven is neutral, <7 is acidic, >7 is alkaline. The average pH for Davidson County soil is 6.2, so our soil is on the acidic side, which is great if you are growing vegetables which prefer an acidic soil of 6 to 6.5. To increase the soil ph, you add lime. To decrease soil ph, you add sulfur. Plants need the pH to be correct so osmosis can occur at the cellular level allowing nutrients to travel from water into the plant.

Old Dirt

When my husband and I first got married, we lived in a third-floor walk-up on the top of Beacon Hill in Boston. We grew herbs in window boxes and tomatoes in buckets on the roof of the bow window of the unit below ours.  I’m sure when famed architect, Gridley J.F. Bryant designed our building in 1846, he did not intend for future residents to do this. God love our neighbor and building manager, Curtis Phelps for not putting the nix on our newlywed exuberance for gardening.
KellyGardeningPinckneyBoston judy pinckney garden boston

When we bought our first home in Nashville, we built a garden, using a reclaimed fence from our neighbors, the Bartholomews, and bricks for a pathway from our neighbors, the Robinsons. The chicken manure for the garden came from our friends, the Hudson’s chicken farm.
firstvegtablegardensneed firstvegtablegardensneed

New Dirt

My garden beds are now ready to receive seeds and seedlings. The hardest work is done, and now it is time for the fun part: planting.
IMG_2105 DSC_0450
DSC_0404 DSC_0392

I think Gridley J.F. Bryant, having designed the overall grid-based street plan of Back Bay in Boston, would have at least approved of the orderliness of my vegetable gardens, if not the placement of tomato plants on his bow windows. As for my boys, now men, they’ve learned their Dad knows what he’s talking about and he’s their first text when they need advice. I, on the other hand, am the first person people call for family dirt.

Other Kitchen Garden Stories
Eulogy for a Chicken
Herb Porch Pots!
Spring Planting Guide for Your Kitchen Garden
Fall Planting Guide for Your Kitchen Garden
WWMD? A Bucket of Spring Veggies as a Centerpiece

LET’S STAY CONNECTED!

Follow my photos of vegetables growing, backyard chickens hanging out, and dinner preparations on Instagram at JudysChickens.

Never miss a post: sign up to become a follower of the Blog.

© 2014-2017 Judy Wright. All rights reserved. Photos and text may only be used with written consent.