Roasted Fig Preserves with Lemon and Thyme

This is what a lush, ripe Brown Turkey fig looks like. Notice the stretch marks. That means it is bursting with flavor.

During fig season, I can see these dark, plump jewels sunning themselves on the tree from every vantage point in my backyard. First, they tempt and then they taunt me until I finally find myself risking life and limb to get to them. Often, I  have to climb a ladder and use a long garden tool like a bow rake to grab and pull down a limb, and then reach even further to pluck one from a branch. This all happens first thing in the morning while the outside temperatures are still tolerable. My friend Linda calls it #pajamagardening.

There are others who desire the same figs. I am in constant competition with small birds, the squirrels in the neighborhood, and my chickens. They know they can eat figs to their heart’s content without fear of being seen by predatory hawks when under the canopy of the broad, palmate-shaped fig leaves.

Here’s a video of one of my chickens reaching for a fig. It is best watched in full screen mode. My friend Carrington calls it #rubberchicken.


Ina would use the big leaves to line a cheese platter. Just sayin’.
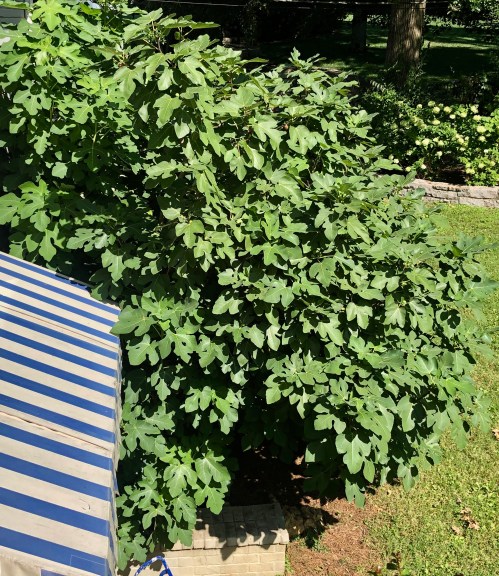
Growing Figs

Fig trees are native to tropical climates, but a few varieties, such as Brown Turkey and Chicago Hardy, have been cultivated to grow in cooler climes (zones 6-11). We planted our tree in front of a southern-facing brick wall so the heat stored in the bricks could warm the tree during winter. Additionally, and this was purely happenstance, our air-conditioner’s condensate pipe drips over the roots all summer long keeping the tree well-hydrated.

Our fig production and access capabilities quadrupled after I pruned the tallest limbs by almost half last March. Later, in April, my husband fertilized the roots with chicken manure. Now the tree is shaped like a sprawling ball and is loaded with figs.

Everything you wanted to know about fig reproduction, but were afraid to ask.

One of my hobbies is studying plant reproduction. All fruits and vegetables start with a flower that once pollinated starts to grow a pod with either one seed in it, like a peach, or many seeds, such as apples and tomatoes. Botanically, the seed pod is known as an ovary. Aggravating as it may feel when a squirrel or chipmunk runs off with a peach or a tomato you have patiently watched ripen, they are doing what nature intended — they are dispersing seeds. Mother Nature doesn’t care if we like our fruits and vegetables. She cares about plant reproduction and species survival.

With that in mind, the first thing I noticed when my tree started producing fruit was the absence of flowers. This photo was taken on April 7th as fig pods and leaves appeared. The pods emerged from the branches but were never preceded by a flower.

This begged the question, How does the fig reproduce without flowers? It turns out the flowers are inside the fig. Hundreds of them! The color inside a fig comes from its flowers.

Last summer, the producer and host of Nashville Public Television’s The Volunteer Gardener came to my garden to film a segment featuring Jeremy Lekich, an expert on edible landscapes and owner of Nashville Foodscapes.   In the show, Jeremy takes viewers around my yard and introduces them to many unusual edibles and explains fig pollination. You can watch the segment here.

By virtue of where the flowers are located, pollination needs to take place inside the fig. To move pollen from a male fig to a female requires the presence of specialized fig wasps who enjoy a symbiotic relationship with figs. The wasps get a place to reproduce and the figs get access to highly specific pollinators. I found this awesome video that shows how microscopic wasps crawl into figs. This other video from PBS’s Gross Science takes it from there describing what happens next in reproduction.

New varieties of common figs, like my Brown Turkey, have been cultivated to not need a wasp for pollination. The female trees are asexual, and the seeds produced are not viable — they are empty seeds. You will see lots of them when we finally get around to cooking the figs!

Every Christmas I make my grandmother’s Sicilian fig cookies. The recipe calls for dried Calimyrna figs. Calimyrnas are a Californian cultivar of the Turkish Smyrna fig (Calimyrna = California + Smyrna) that does require a wasp for pollination. They produce “true seeds” — seeds that are viable for reproduction. Fertile seeds are thick and crunchy, and have a nutty flavor preferred by bakers. They are the figs used to make Fig Newtons.

How to Make Fig Preserves

I cooked many not-so-delicious batches of fig preserves  on the stove before it occurred to me to try roasting them with herbs as I do my strawberry jam. The results were amazing. Roasting intensified the depth of flavor exponentially. They were so good, I took all my reject batches, mixed them together, and roasted two trays for about an hour. Suddenly, they were all tastier, too.

Ingredients:

4-5 pounds fresh figs (12 cups, once stemmed and quartered)*
5 cups granulated sugar
⅓ cup freshly squeezed lemon juice
1 tablespoon balsamic vinegar
one bunch of thyme sprigs (⅓ ounce) or 3-4 long stems of fresh rosemary

*Today, I saw four varieties of figs for sale at Trader Joe’s!

Instructions:

Remove stems and quarter figs.

Place in a lightly-greased heavy-bottomed pot.

Add sugar and acids and stir. The amount of sugar sounds like a lot, but you need sugar to preserve fruit. Acids help fruit release its naturally occurring pectin. Once mixed, place in refrigerator and allow to macerate for a minimum of two hours or overnight.

When ready to cook, preheat oven to 175º. Add thyme or rosemary and simmer on low heat for about twenty minutes. If using thyme, strip leaves before stirring in. If using rosemary, do not strip leaves; leave stems intact and remove before bottling.

Pour hot figs into two rimmed sheet pans and roast for about 4-5 hours.

One way to tell if they have cooked long enough to gel once cooled is to draw a path through the figs and see if the two sides stay separated. If they do, they are ready. You should be able to smell them if they are sufficiently roasted. If you overcook them, they will become thick and gummy when cool. Better to undercook than to overcook.

Pour hot preserves into clean jars, wipe the rims, cover with screw top lids, and turn upside down while they cool. I store them in the fridge, where they should be good for two months.,

I’ll end this story with one last video of my chickens eating figs in the early morning hours.


What are my favorite ways to enjoy fig preserves?

By the spoonful — just out of the oven.

My cousin, Marion, served the fig preserves over a delicious blend of cow, sheep, and goat milk cheeses called Rochetta. It was delish. As soon as I got home, I bought a similar cheese called La Tur at Whole Foods.

I often have fig preserves spread over Homemade Ricotta on toast for breakfast, or I’ll make an almond butter and fig sandwich for lunch.

I love brie and fig paninis. Hard to get a photo of the finished product with these crazy-good sandwiches, though.

Please let me know if you make the preserves!

Related Posts:
How to Make Homemade Whole Milk Ricotta
Oven-Roasted Strawberry and Rosemary Jam
Homemade Grape Jelly
Crab Apple Jelly

LET’S STAY CONNECTED!

Don’t miss a recipe! Become a subscriber and have every post delivered to your Inbox.

Follow my stories about how to grow vegetables in your backyard, raise a small flock of chickens, or come up with healthy ideas for dinner on Instagram and Pinterest at JudysChickens

Always check this website for the most up-to-date version of a recipe.

© 2014-2019 Judy Wright. All rights reserved. Photos, videos, and text may only be reproduced with the written consent of Judy Wright.

Edible Landscaping with Nashville Foodscapes

When I was ten, I planted my first packet of seeds in a thin strip of dirt bordering the back of our house. I remember asking my mother what germination meant. In my twenties, my husband and I grew vegetables on the roof and in the window boxes of our first apartment as newlyweds in downtown Boston.

When we bought our first house in Nashville, my husband built me a fenced-in vegetable garden. He used white picket fencing recovered from a neighbor’s backyard. As a transplanted New Englander, I felt so … Southern Living.

For Valentine’s Day, he borrowed a truck and went to a friend’s chicken farm to get me a load of chicken poop. Later, Mary Hance, a columnist for The Tennessean, wrote a story about it for her “Ms. Cheap” column, “Sometimes even chicken manure is a gift of love.” In 2018, re-using scrap wood and hauling in chicken poop is considered PC and falls under the category of “keeping stuff out of the landfill.” Back then, it was known as plain old saving money, and another example of my husband’s mantra for our children, “Be a problem solver, not a problem identifier.”

I thought about all of this as I watched this week’s episode of Volunteer Gardener [episode 2713], an educational gardening show on Nashville Public Television.  It was filmed in my backyard.

My friend, Jeremy Lekich, owner of Nashville Foodscapes was interviewed by the show’s host, Phillipe Chadwick, to talk about growing edible backyard spaces, Jeremy’s specialty. I’ve got to warn you, Jeremy’s passion for edible foodscapes is contagious! He gets booked up in April when folks get the urge to plant. Now is the time to call him to plan and build next year’s vegetable gardening space.

Here is a clip about how figs reproduce. It didn’t make the show but is a great example of how Jeremy inspires people to become curious and productive gardeners.

You will never look at the inside of a fig in the same way.

Thank you to Greta Requierme, producer of Volunteer Gardener, for bringing her crew to visit my garden and to my dear friend, Jeremy, for all the ways he inspires me to grow more food. Here is Jeremy’s mission statement from his website:

“Nashville Foodscapes connects people with their food source by growing food where people live. We achieve this by offering creative food solutions through landscaping. We create custom designs of our clients’ yards, homes, and living spaces allowing food to be grown in a way that pleases the eyes and taste buds: a fusion of aesthetics and function in a landscape.”

Yes, I adore him!

Related Stories


Don’t miss a recipe! Become a subscriber and have every post delivered to your Inbox.

Follow Judy’s Chickens on Instagram and Pinterest @JudysChickens.

Remember to always check this website for updated versions of a recipe.  

© 2014-2018 Judy Wright. All rights reserved. Photos, videos, and text may only be reproduced with the written consent of Judy Wright.

Morning Rounds in the Garden, April

My favorite time of day is when dawn breaks. It doesn’t matter the season or the place, the beginning of a new day holds the promise of a cup of coffee, a new way of looking at the natural world depending on the morning light, and during the growing season, an opportunity to inspect my vegetable plants for new growth.

This morning, I thought I’d take you on a walkabout of the different garden beds in my backyard.

The Lower Garden

In the spring, planted within a wine bottle necklace (that creates a border between planting spaces and garden paths) are cold-hardy vegetables like peas, lettuces, spinach, radishes, chard, turnips, grapevines along the back fence.

There are six raised beds that are reserved for this Italian cook’s favorite vegetables: tomatoes, eggplants, peppers, and zucchini. These plants will go in the ground in mid-April or early May depending on when the ground warms up.

The raised beds were built by Nashville Foodscapes last spring. They have made a huge difference in the amount of time I spend on garden maintenance because 1) the soil in the beds no longer gets compacted from being walked on and thus there is now no reason to till, and 2) the thick woodchip pathways keep the weeds down to a minimum.

The Back Garden 

This garden has six raised beds in the interior. It is enclosed by a four-foot “rabbit” fence that is laced with blackberry branches on three sides and two espaliered pear trees on the tall side.

There are six raised beds. Four beds are planted with herbs and spring crops, and two are not yet planted. I have left them open to plant commercial crops such as cotton, tobacco, peanuts, sorghum, indigo, and rice. I plant these for the children who come by to visit the chickens.

Here are photos of what is growing in the four beds this morning.

Herbs and Garlic
 

Spring Onions

Beets, Radishes, and Carrots
 

Salad Greens and Kale

Rain Garden
This is where water run-off from an underground 12-inch drainage pipe empties. I’ve planted it with blueberry bushes and native flowers to attract bees. You can see the crabapple trees in the background.

Berry Garden
This bed was created to help control water run-off. Growing in it are cherry bushes, currants, raspberries, and an apricot tree.

Fruit Trees
On the southern wall of our house, we have a fig tree. It is watered by the condensate that drips from an air-conditioner. Around the perimeter of the backyard, we have a muscadine vine, a plum tree, four apple trees, one mulberry tree, and two crabapple trees.

Three years ago the two crabapple trees had apple limbs grafted on to them by a technique known as bark-grafting. We know which limbs are the apple grafts because they haven’t leafed out yet. Apple trees are about a month behind crabapple trees.

Chicken Coop
We’ve been keeping six chickens in our backyard coop for six years. We do it for the eggs and for the simple joy of watching the chickens strut around our fenced-in backyard.


Herb Porch Pots
For the last three years, I’ve been planting two planters on my front porch with herbs and edible flowers. I do it because they are beautiful to look at and because they are convenient to snip from when cooking. I plant them every February. When they start to look scraggly in late June, I transplant the plants to the herb garden.

Compost Corner
Every morning, I empty the compost bucket from the previous day’s kitchen scraps into the compost heap behind the white fence. There is a mulberry tree planted in the compost to hide the chickens from the hawks who circle overhead. The chickens spend a good deal of their day in the compost pile.

You can follow the progress of these gardens on Instagram @judyschickens.

Related Gardening Posts
Spring Planting Guide for Your Kitchen Garden
Family Dirt
Herb Porch Pots!
Eulogy for a Chicken
WWMD? A Bucket of Spring Veggies as a Centerpiece
How to Make Crab Apple Jelly (and grow the crab apples)
How to Make Grape Jelly (and grow the grapes)

Don’t miss a recipe! Become a subscriber and have every post delivered to your Inbox.

Follow Judy’s Chickens on Instagram and Pinterest @JudysChickens.

Remember to always check this website for updated versions of a recipe.  

© 2014-2018 Judy Wright. All rights reserved. Photos, videos, and text may only be reproduced with the written consent of Judy Wright.

Winter Floral Arrangements Using Greenery from the Yard

My friend Lou Ann and I like to make pretty things. We’ll be out walking, notice an abundance of pine cones on the ground, and the next thing you know we are making bright red pinecone wreaths together in her backyard. All of our joint projects using plant materials are under Lou Ann’s tutelage. She’s the design and DIY girl.

img_3967

This year, Lou Ann came over, and we made a holiday arrangement for my foyer. I photographed how she did it step-by-step, plant choice-by-plant choice.

I’ve included each step from cutting the plant stems in my yard to designing the arrangement on my kitchen table. All the greenery came from common foundation plants; nothing is extra-special or hard to find.

dsc_0628

Our first stopover in the yard was my rain garden which is full of perennials meant to attract pollinators for the vegetable garden. The rain garden was created by my talented friend, Jeremy Lekich, owner of Nashville Foodscapes. If you are interested in growing food and doing it in an attractive way using best permaculture practices, Jeremy is your man.

Lou Ann was instantly drawn to these dried stems of anise hyssop. Anise Hyssop is a “top three” plant for producing nectar and attracting bees, and as Jeremy informed me, it makes a wonderful tea used to cure low spirits or a broken heart according to Native American herbalism. Noted.

dsc_0564

The evergreen, Mahonia, with its striking, statuesque stalks topped by a whorl of prickly, hollylike leaves, was next. Mahonia is one of many drought-resistant [read, plants that can be ignored and still survive] evergreens in my yard. Lou Ann cut down one tall stalk.

dsc_0568 dsc_0572

Nandina is located nearby. It provides year-round interest in the garden because of its lacy sprays of shiny green leaves with a six-inch center stem full of red or gold berries. It, too, is drought-resistant. Lou Ann took a stem of each color.

dsc_0573 dsc_0574

Limelight Hydrangea: fresh or dried, it’s one of my favorite shrubs. Its pale limey-green flowers change from shades of pink to burgundy as they age during the summer and fall.

dsc_0579

Eleagnus:  I planted this evergreen two years ago after I saw it in a flower arrangement. I was drawn to the shimmering taupey-gray underbelly of the olive green leaves. The coloring of the underside of the leaves works magic light wise in an arrangement. Sadly, the nurseryman from whom I bought the plant referred to it as Ugly Agnes (perhaps because of the unruly way in which it grows) and that name has stuck.

dsc_0581

We picked stems of Sage from the herb bed for their silvery contrasting color.

dsc_0587

Next up was the wall of English Ivy, another evergreen. When Lou Ann had her floral design business, known as Sprig, she would often come by to pick a few of these extra-large leaves to line the vases of floral arrangements.

dsc_0592

Lenten Rose (aka Hellebore), Holly, and Pine: more evergreens. We used a few stems of each.

dsc_0595

dsc_0598

dsc_0600

Burning Bush: this deciduous flowering shrub has pretty red berries on pale grayish-brown stems. More contrast and color. Lou Ann cut a few stems of these, too.

dsc_0795

Deciduous Japanese Magnolia: this type of magnolia loses its leaves in the winter and begins the spring season with large pink flowers. The silvery, velvet-like buds for these flowers set in December. The buds add a pretty, soft color to the arrangement.

dsc_0607

Okra Pods: I am a huge fan of both burgundy and green okra, so I always grow both varieties in the veggie garden. Okra is a draught-resistant plant that gives you tasty food in the summer and strikingly pretty seed pods in the winter. More interest for the arrangement.

dsc_0614

Here is our collection of plant materials.

dsc_0611

We laid it all out on the kitchen floor.

dsc_0625

And then Lou Ann got busy.

dsc_0640

dsc_0652

dsc_0657

dsc_0659

dsc_0669

Ta Da!

dsc_0702

Next, we had to move the arrangement into the foyer. We decided it would be fun to add a few stems of Poinsettia flowers. When the stem of the poinsettia plant is cut, it leaks a milky white substance that can be irritating to skin. Lou Ann uses a lighter to cauterize the tip of the stem and stop the drips.

dsc_0721

Happy Holidays from Judy’s Chickens!

dsc_0732

You can follow Lou Ann and her fabulous photos of flowers, complete with their botanical names, on Instagram @labbrown

Other posts about floral arrangements made with plant materials picked fresh from the yard:

WWMD? A Bucket of Spring Veggies as a Centerpiece
DSC_0855

How to Make Crab Apple Jelly (and grow the crab apples)
Elephant Painting

LET’S STAY CONNECTED!

Follow my photos of vegetables growing, backyard chickens hanging out, and dinner preparations on Instagram at JudysChickens.

Never miss a post: sign up to become a follower of the Blog.

© 2014-2017 Judy Wright. All rights reserved. Photos and text may only be used with written consent.