Spring Planting Guide for Your Kitchen Garden

A hot pink and green salad. Mother Nature is a creative genius.
DSC_0342This is a close up of the salad we had for dinner this week. We call it the Lily Pulitzer Salad. Every part of it came out of our garden: lettuce, radishes, pea pods, dill, green onions, and tasty radish flowers. I am beaming with delight! To think, these vegetables all started as SEEDS that grew in DIRT, and now they’ve become something delicious, nutritious, and gorgeous! #whywedoit

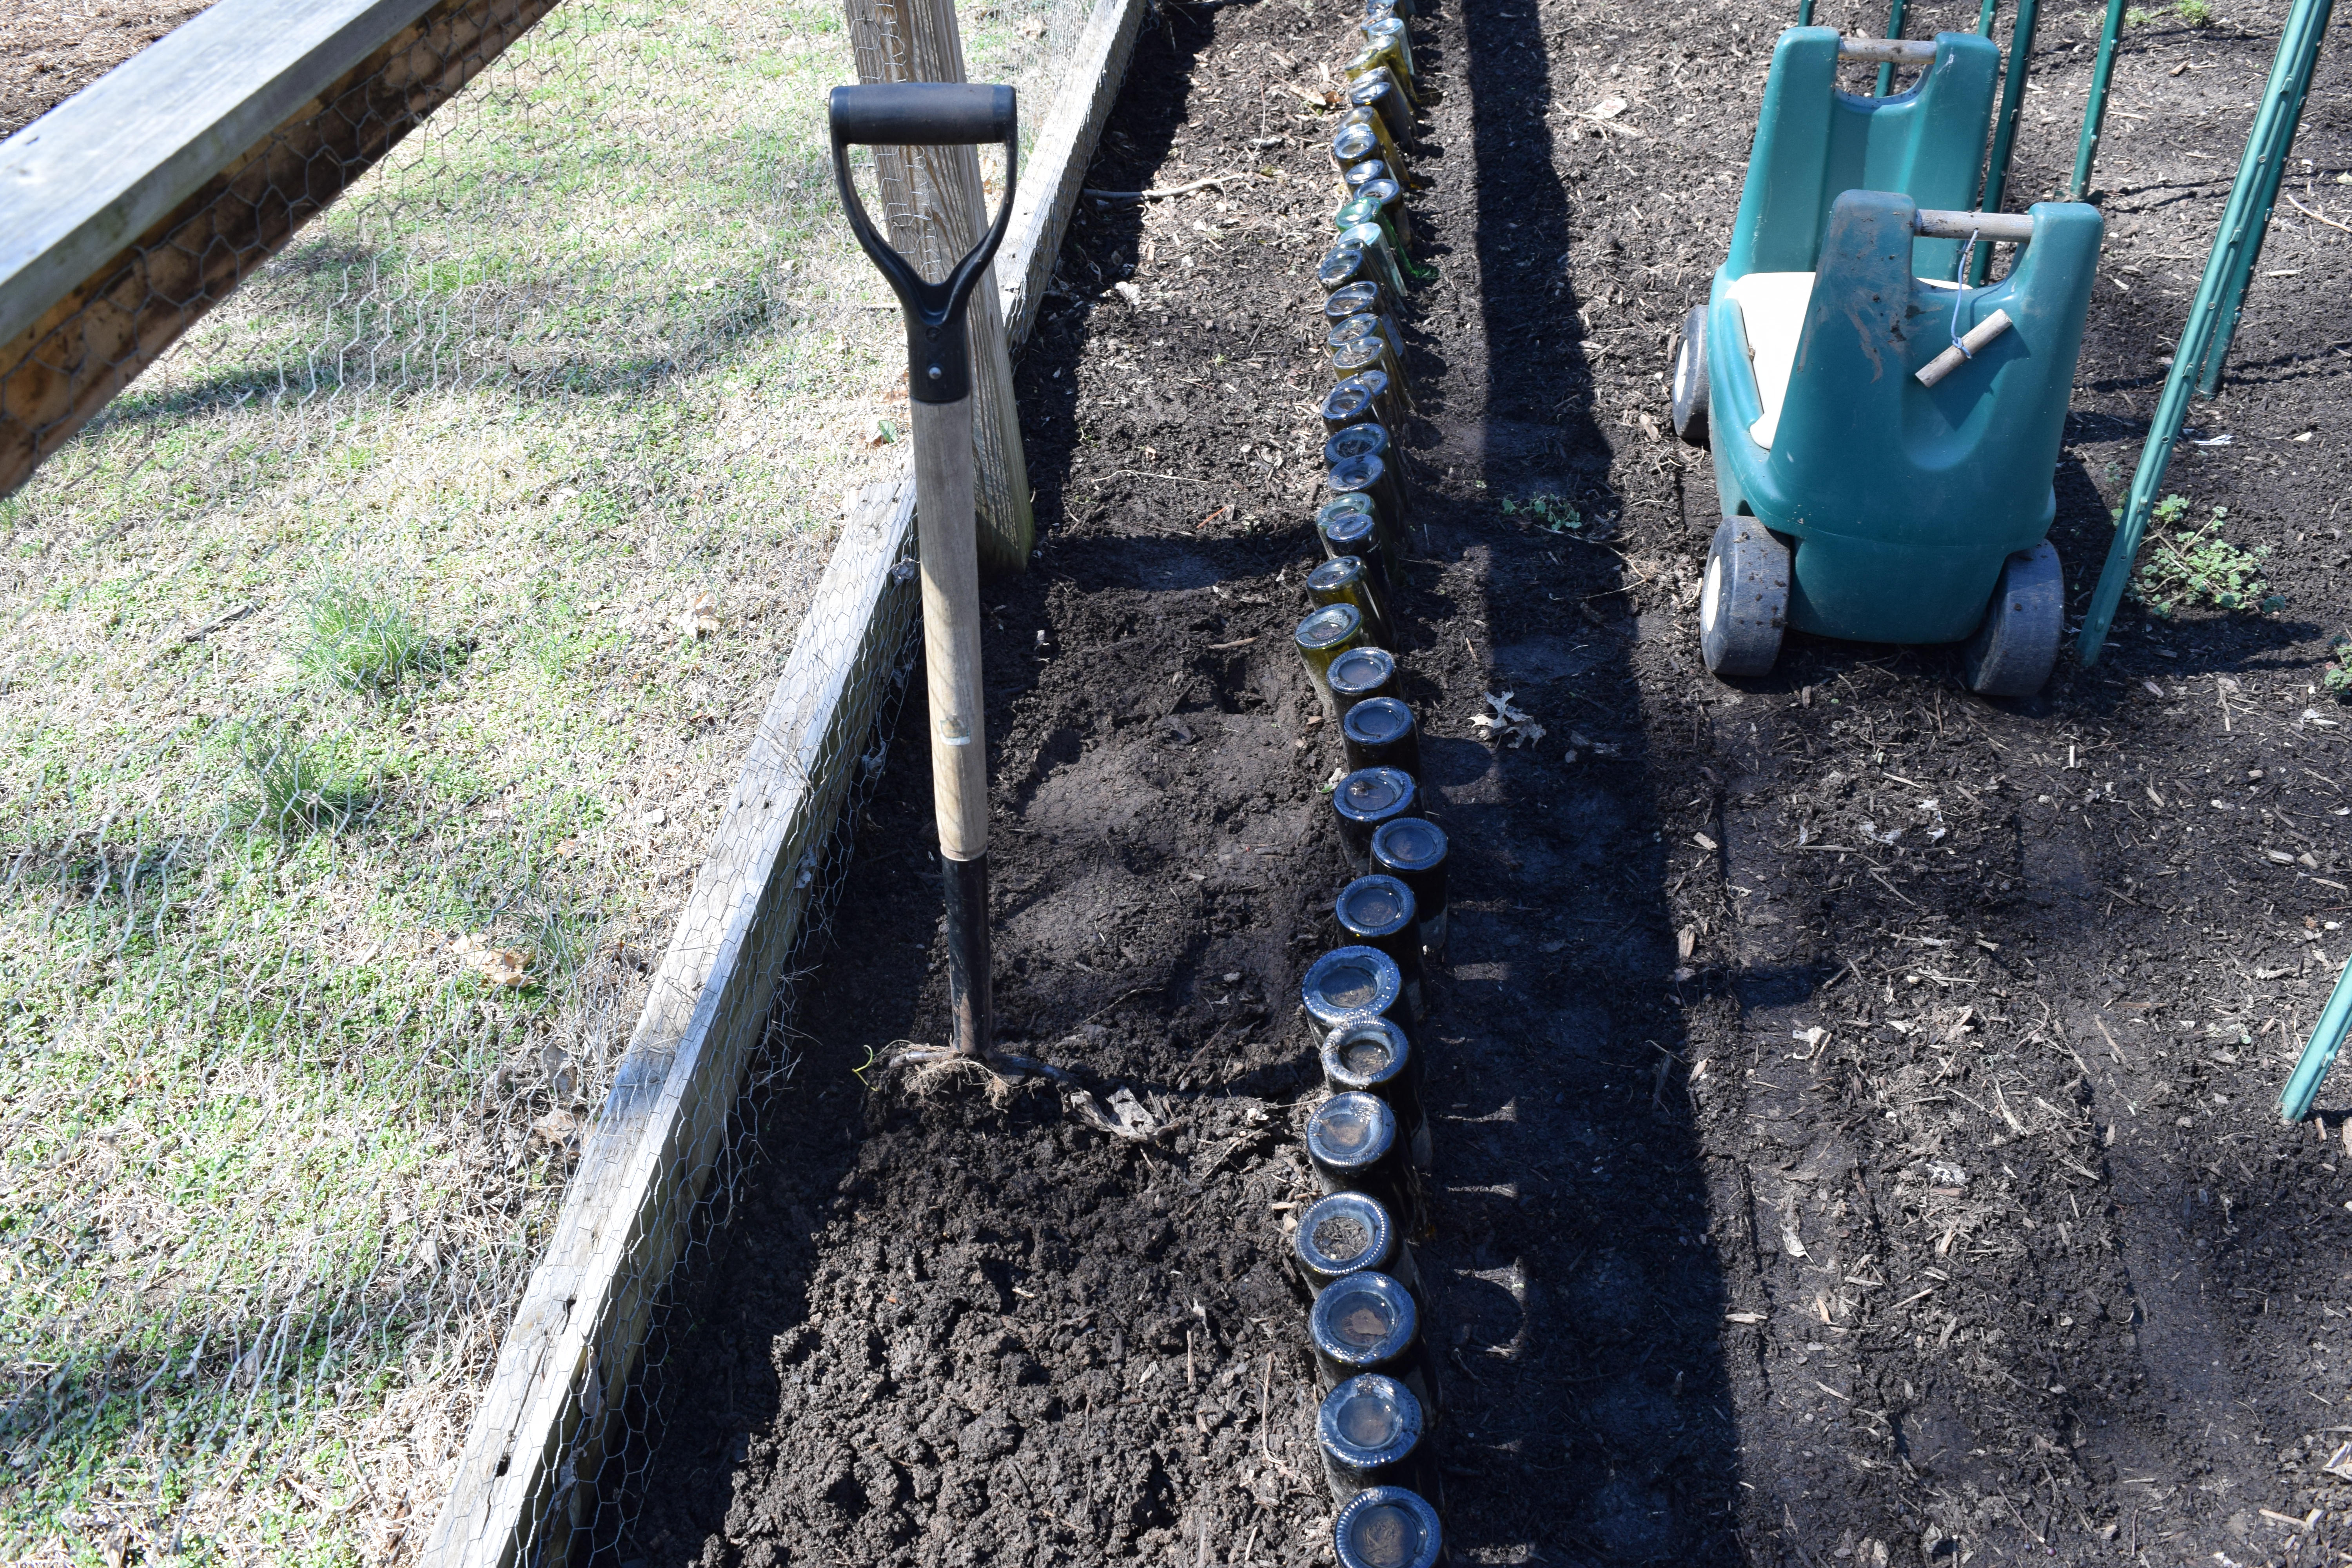
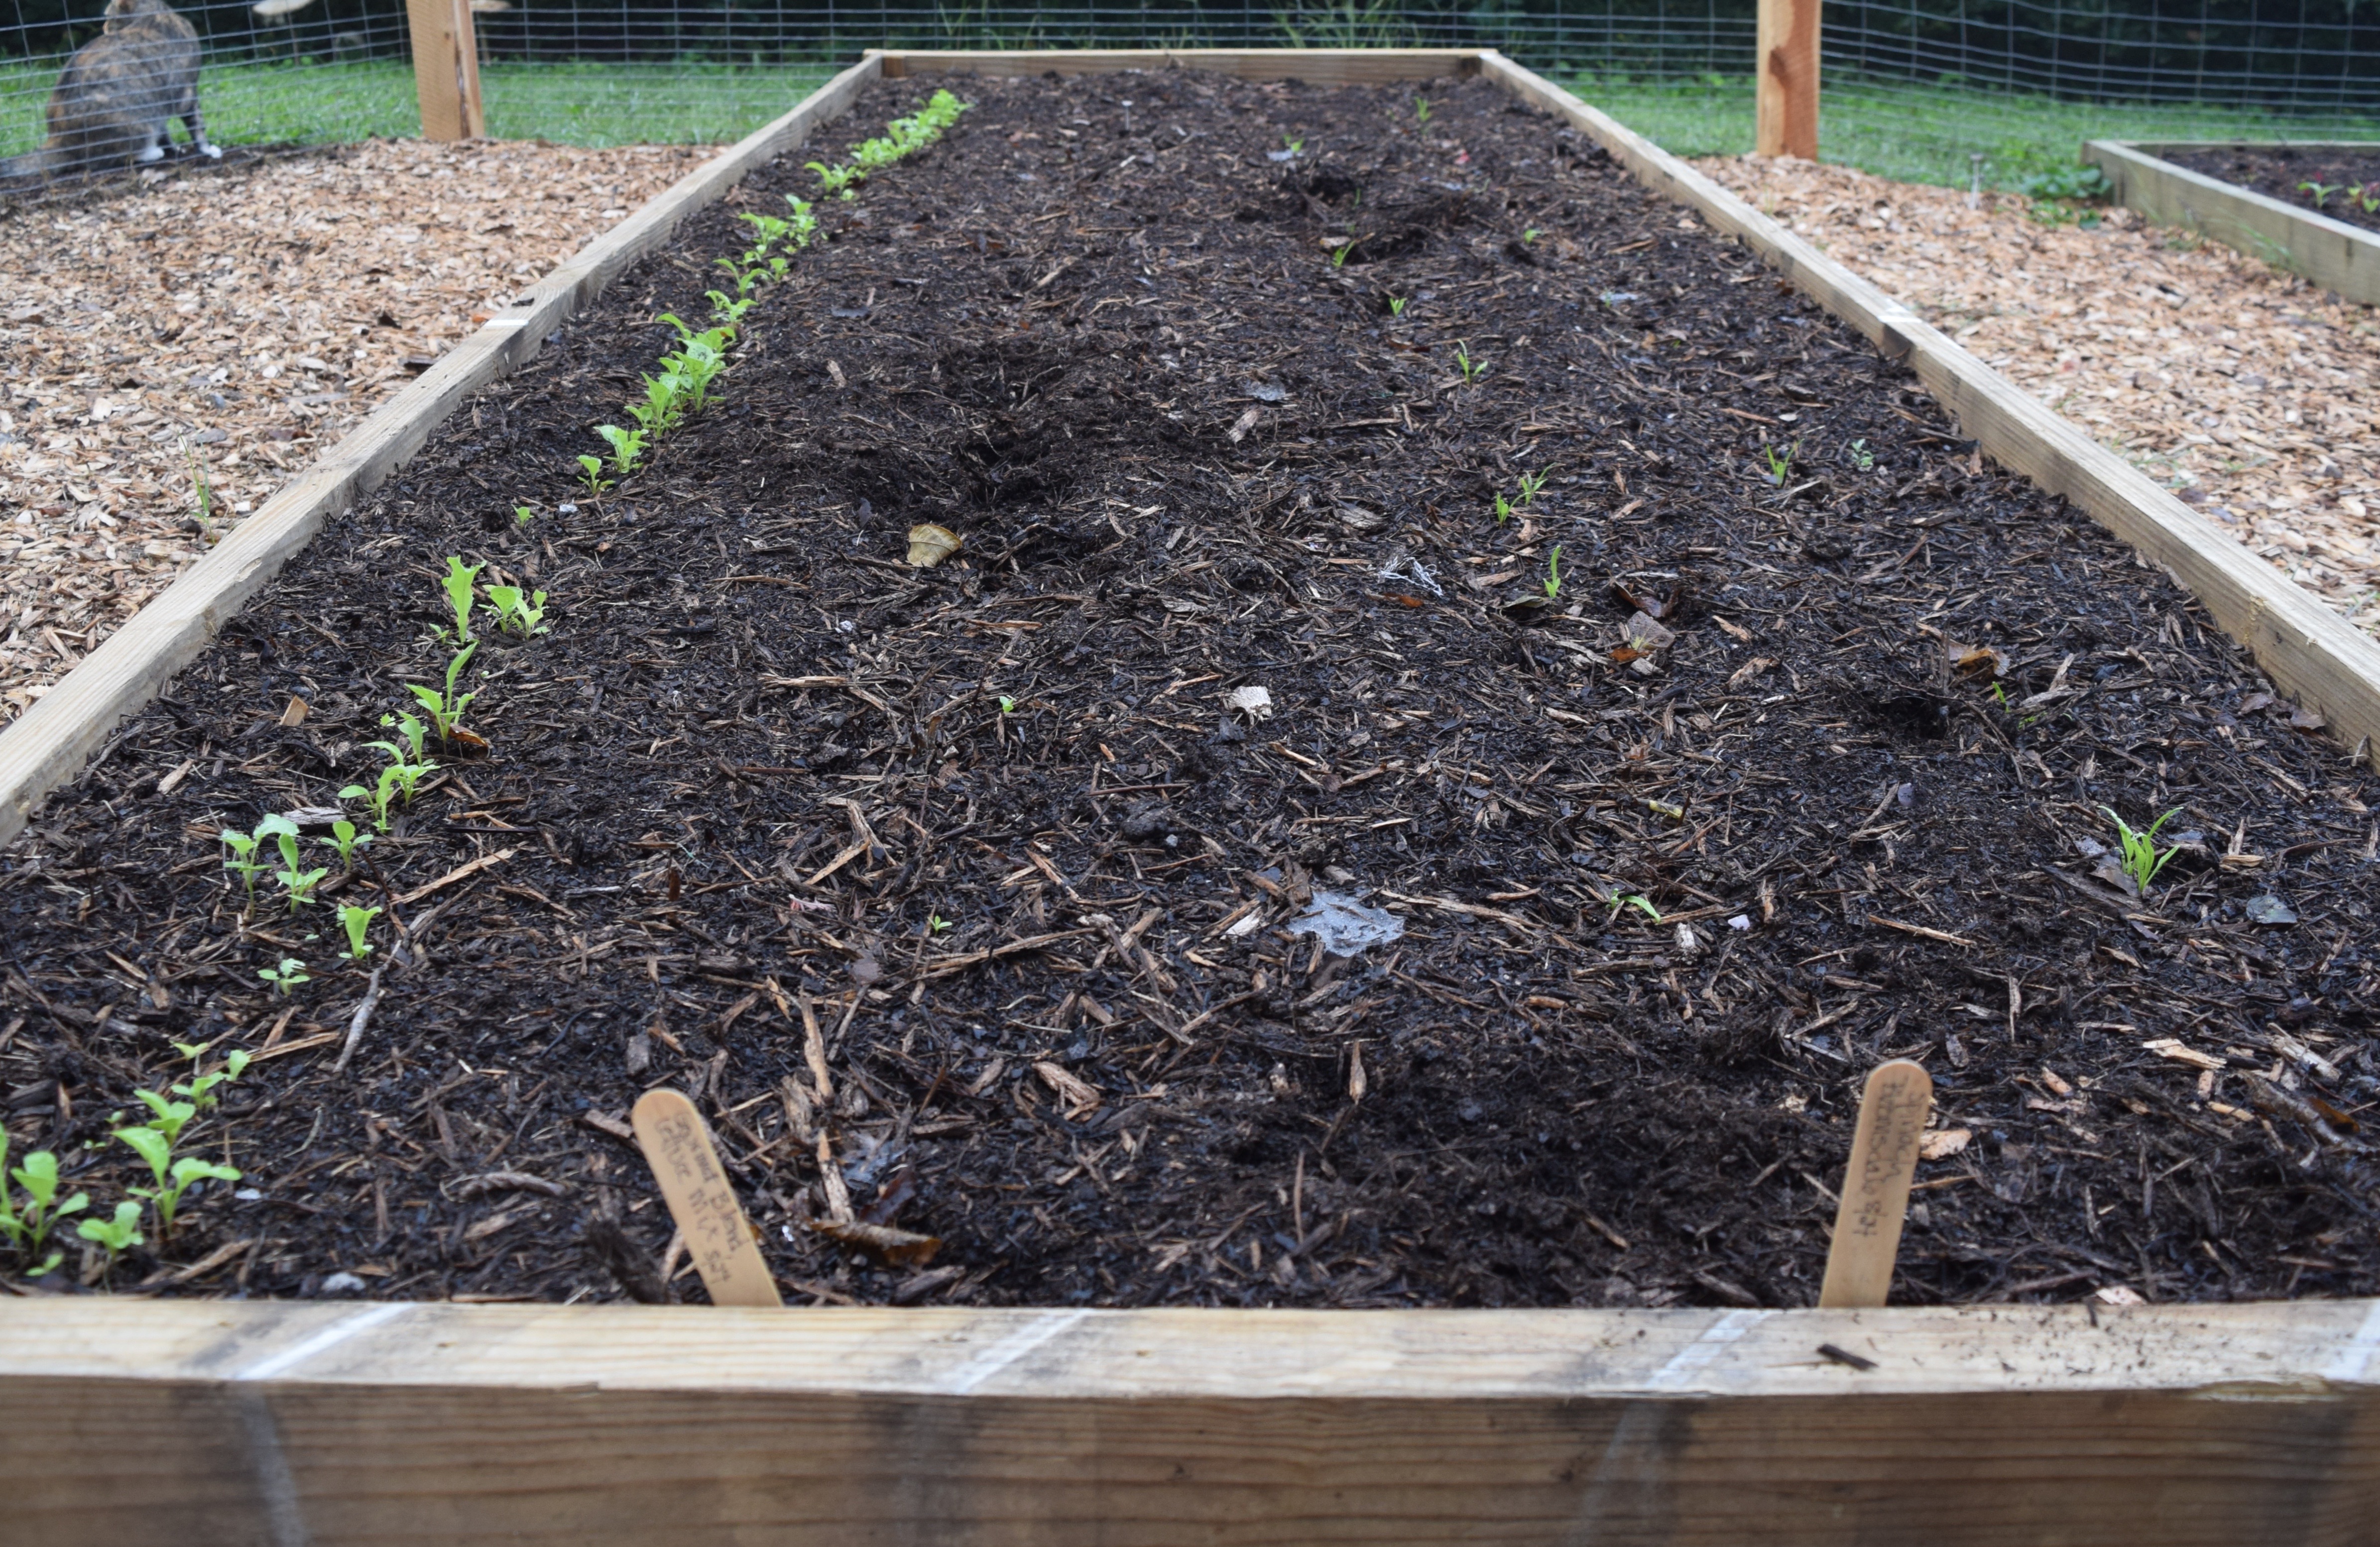
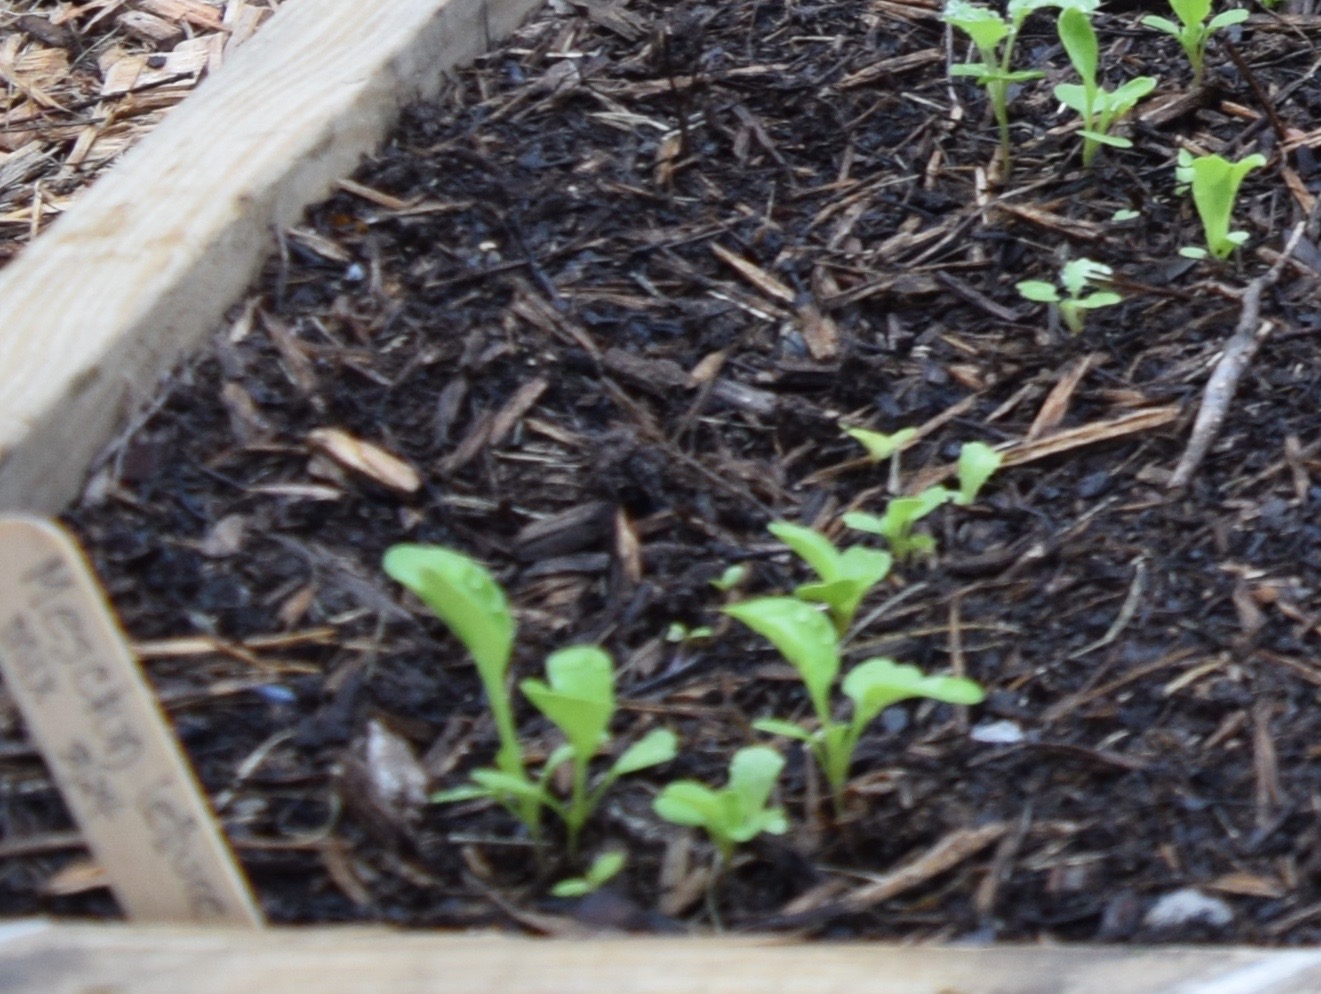
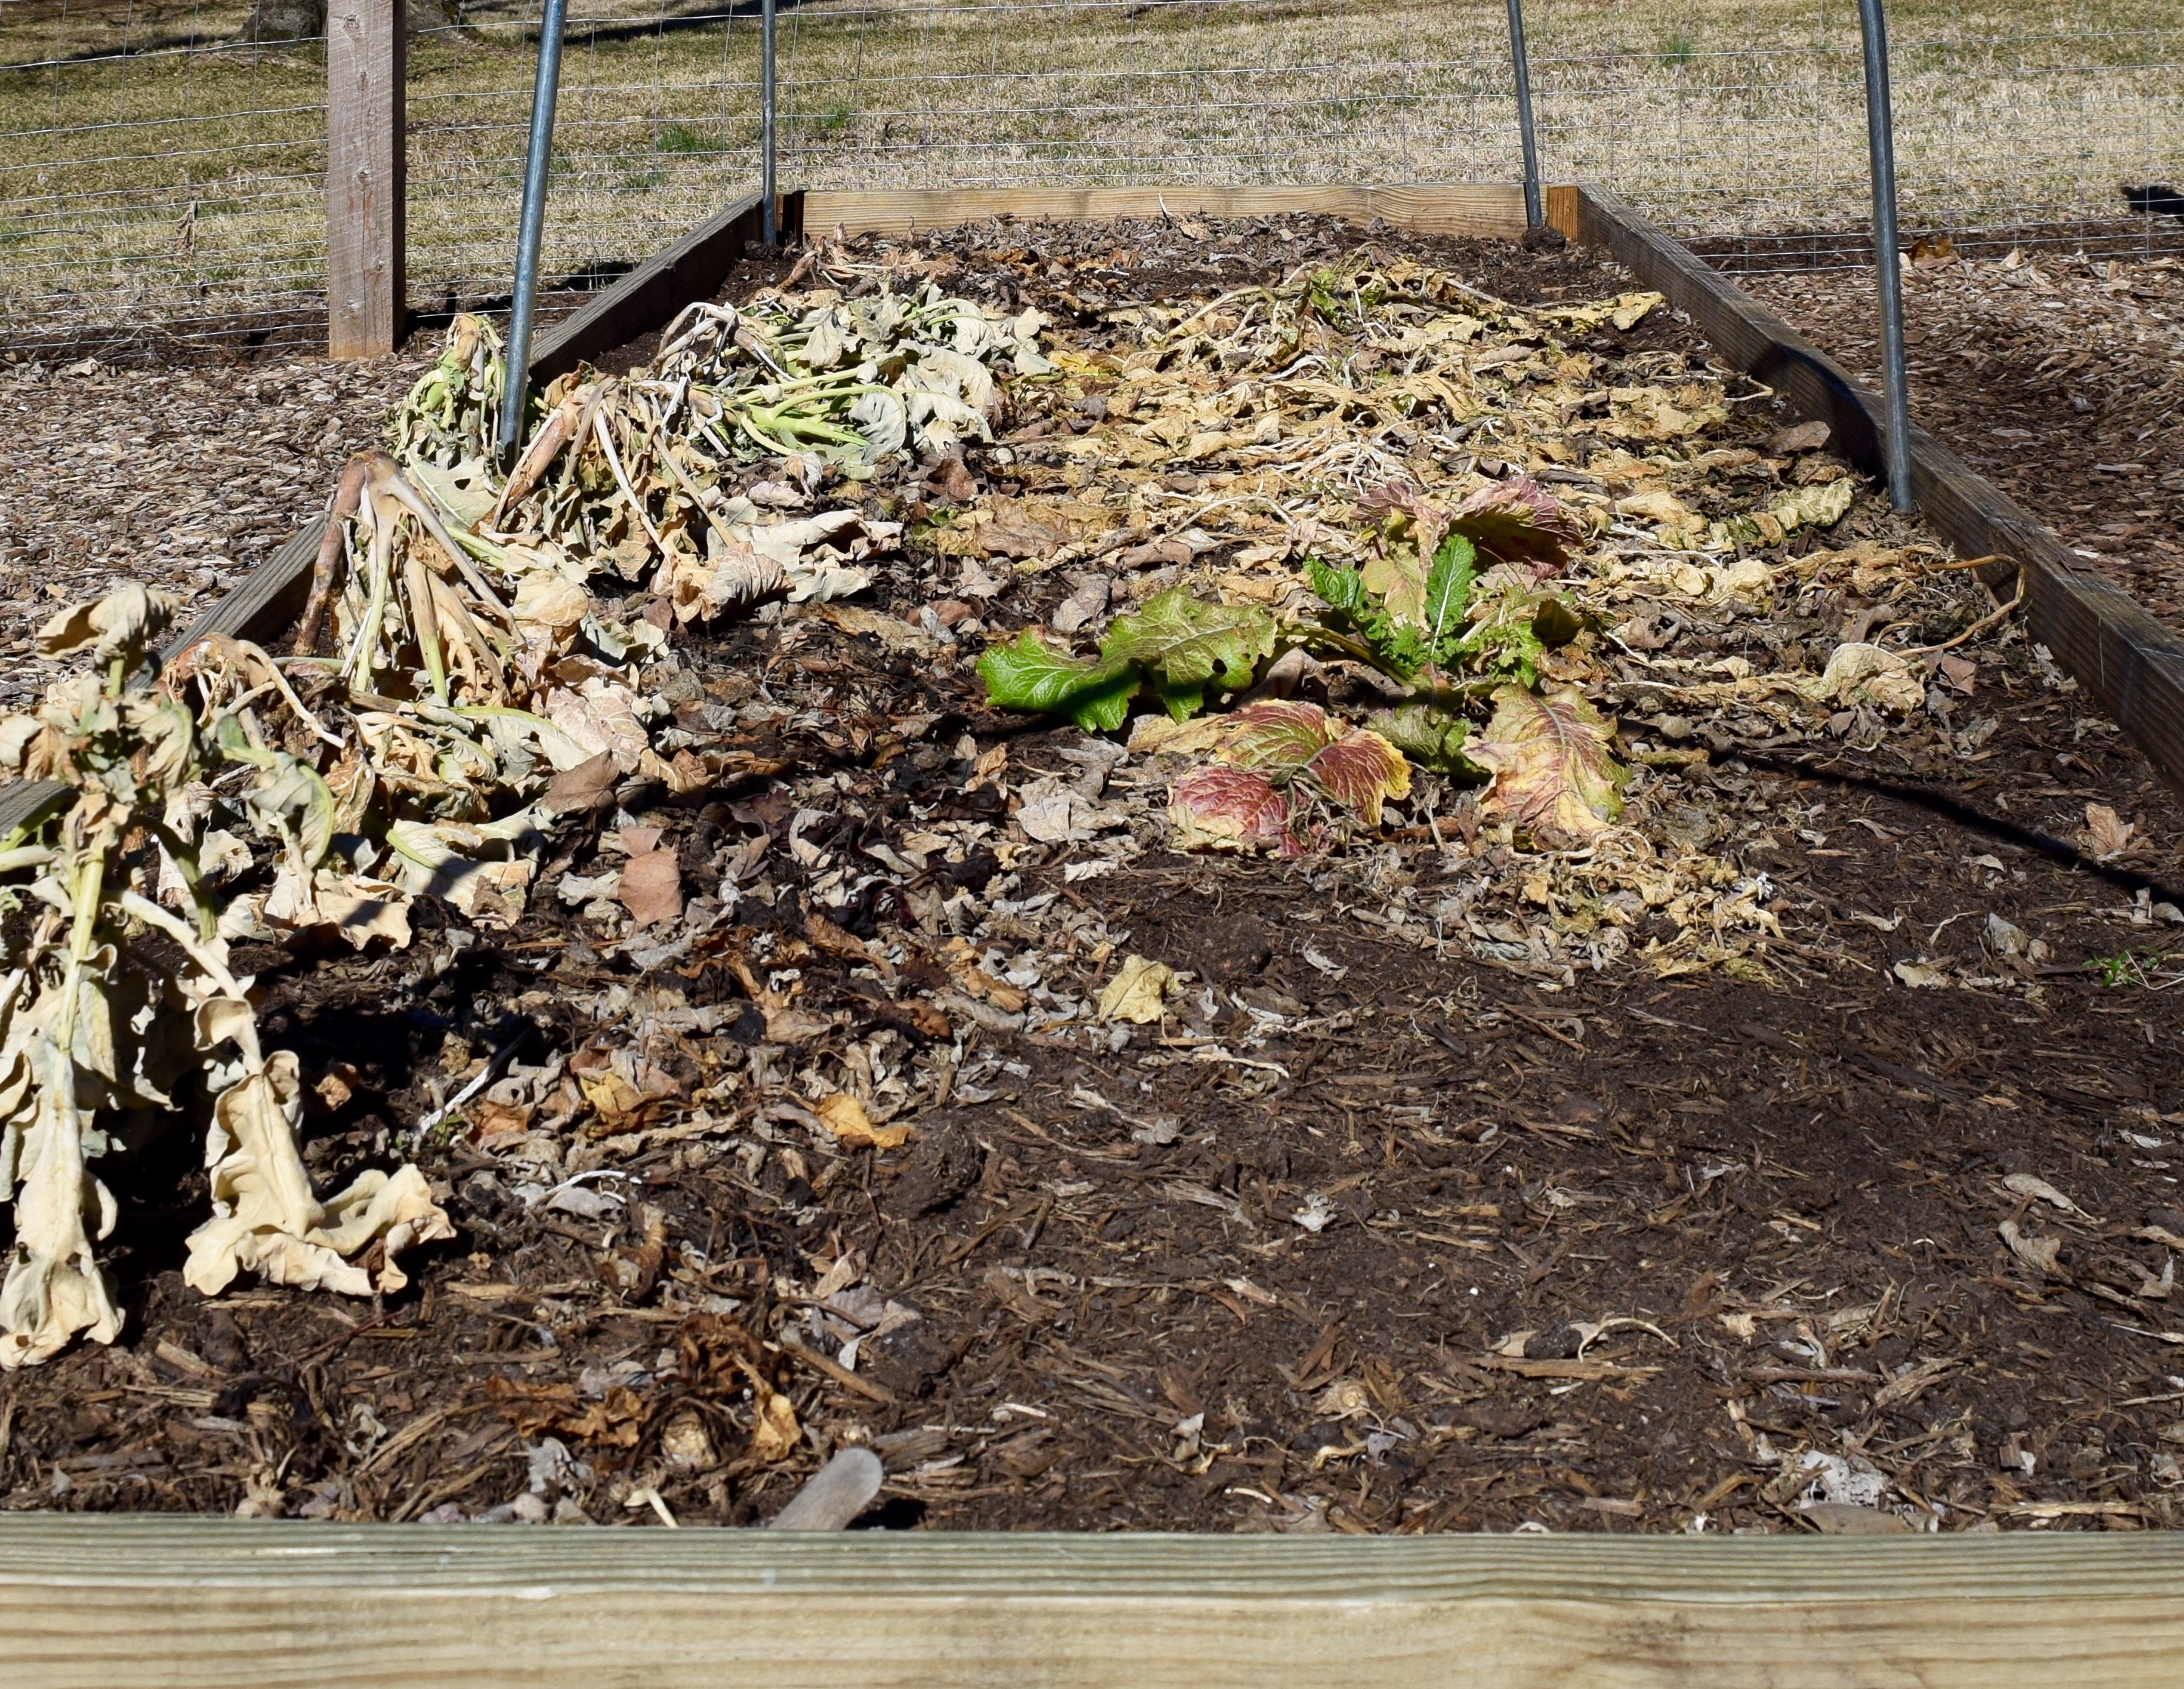
Here is the newly seeded front garden on Sunday, March 15th.
DSC_0042

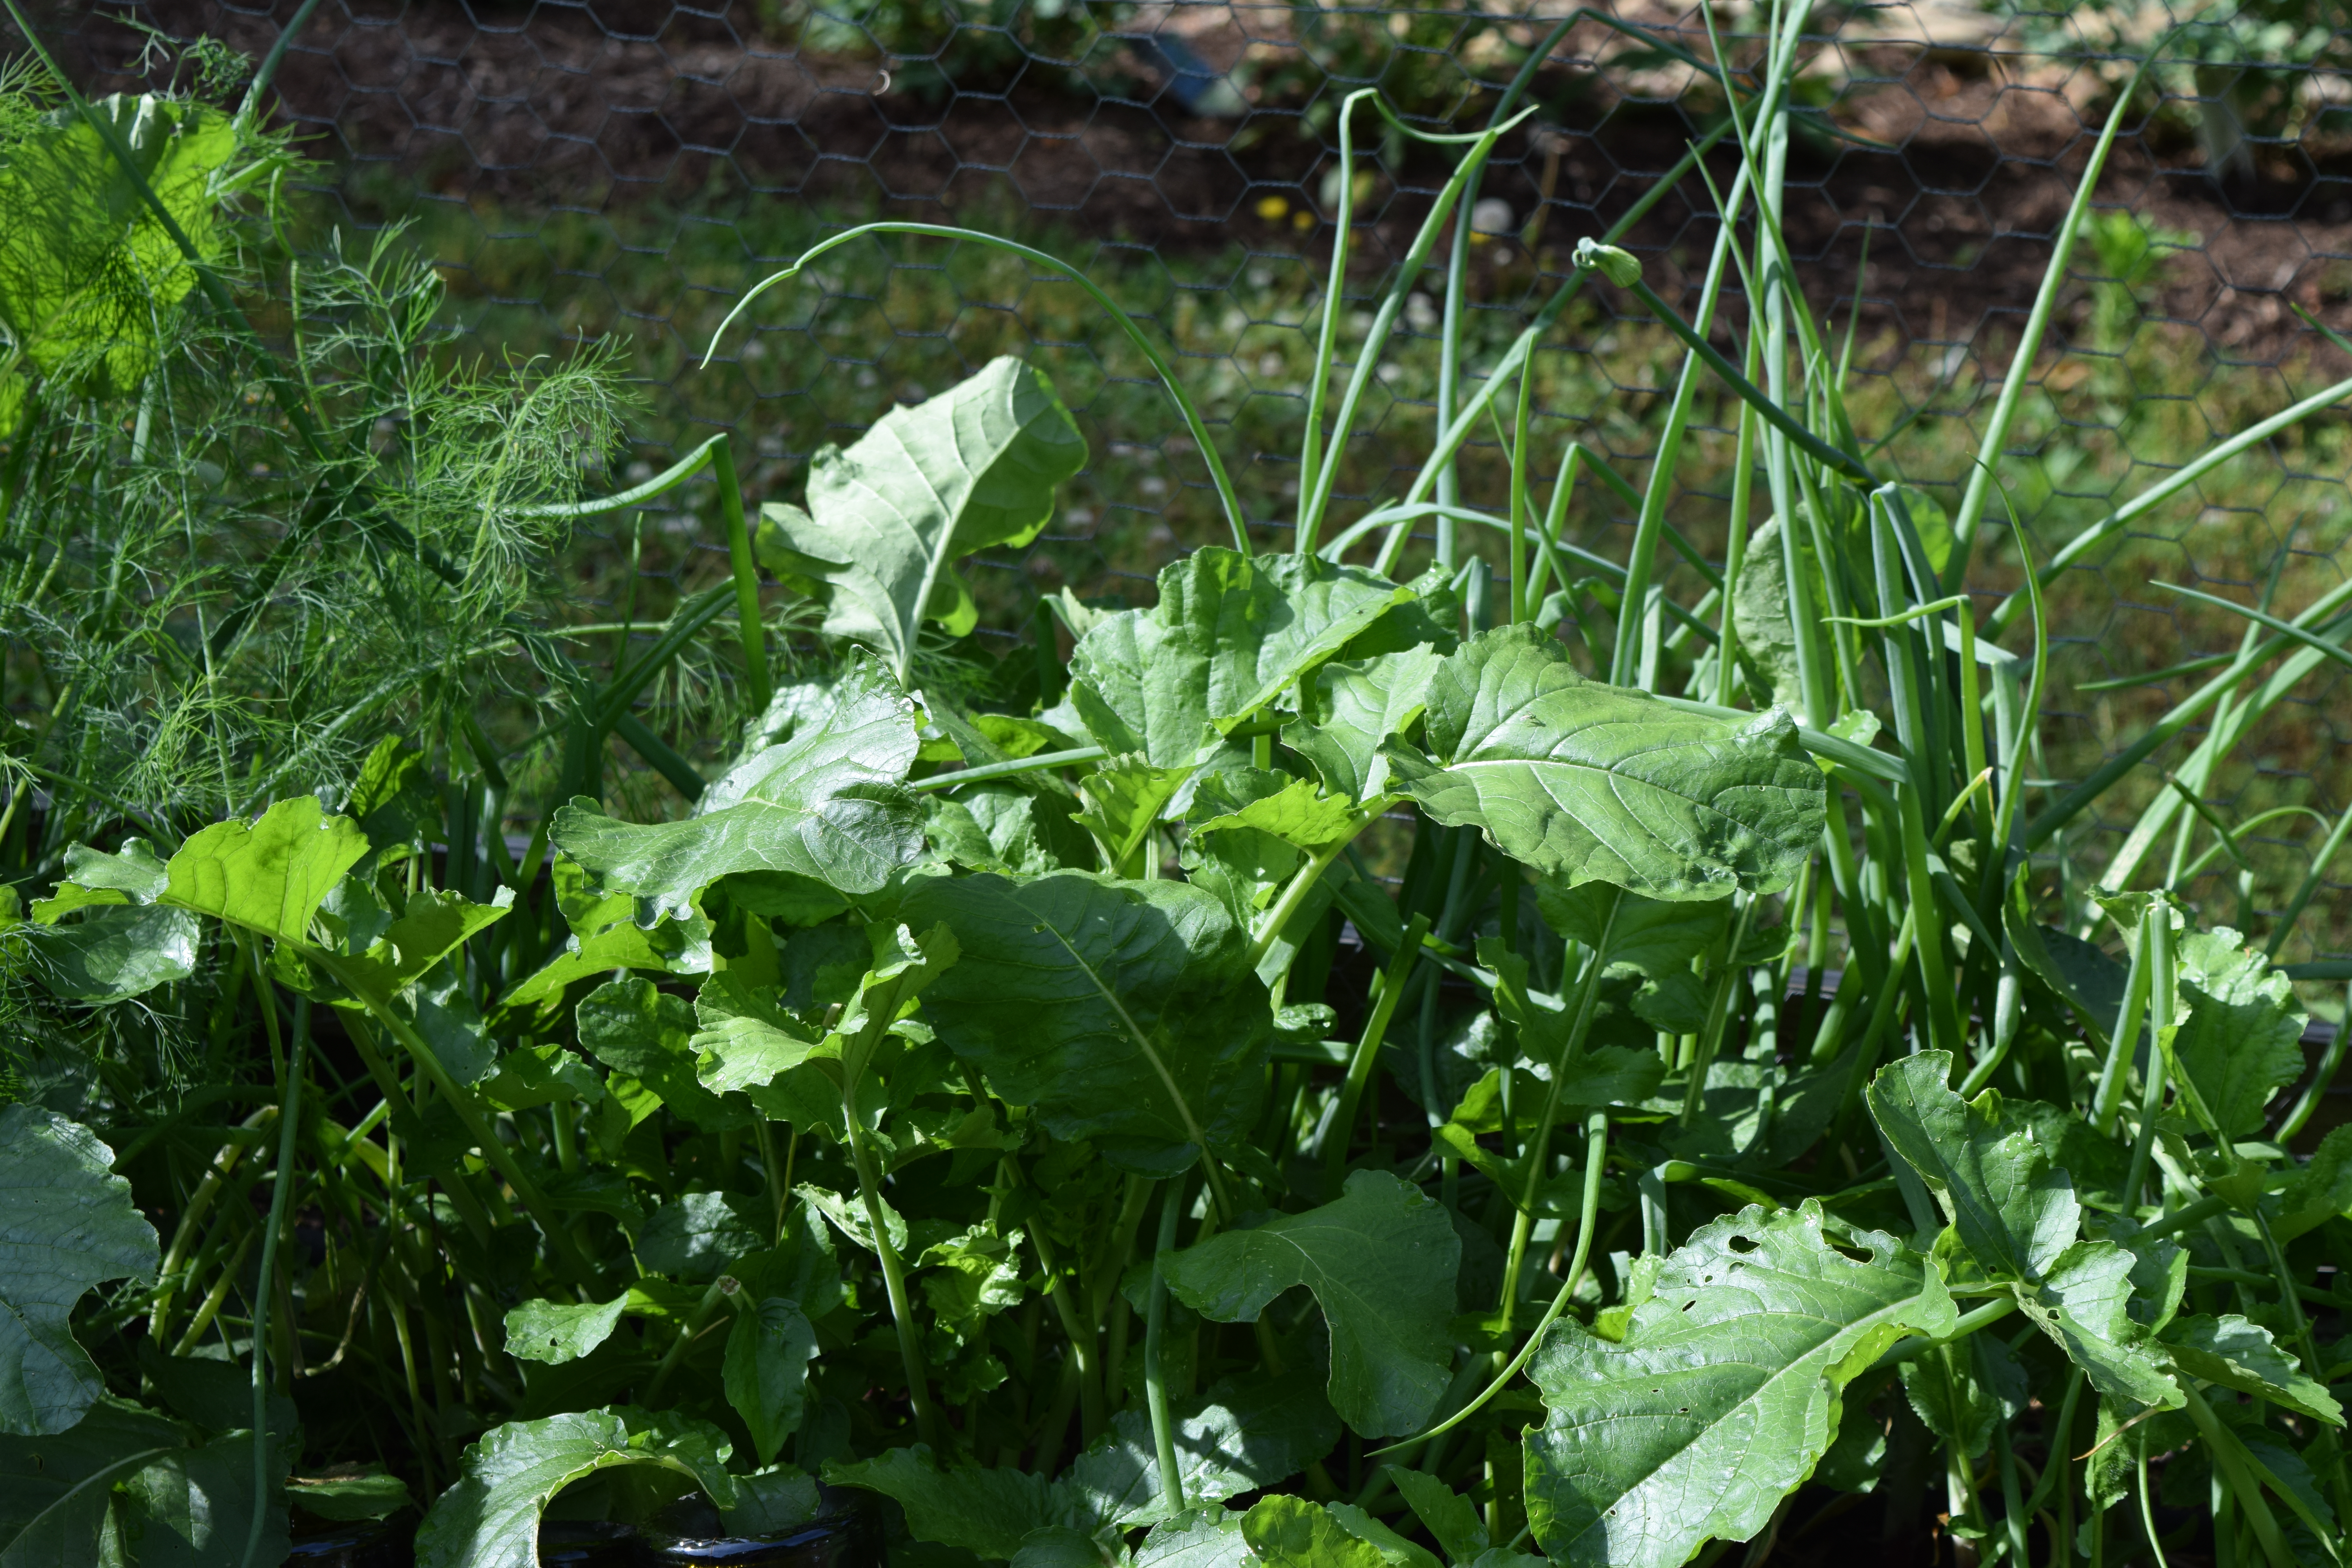
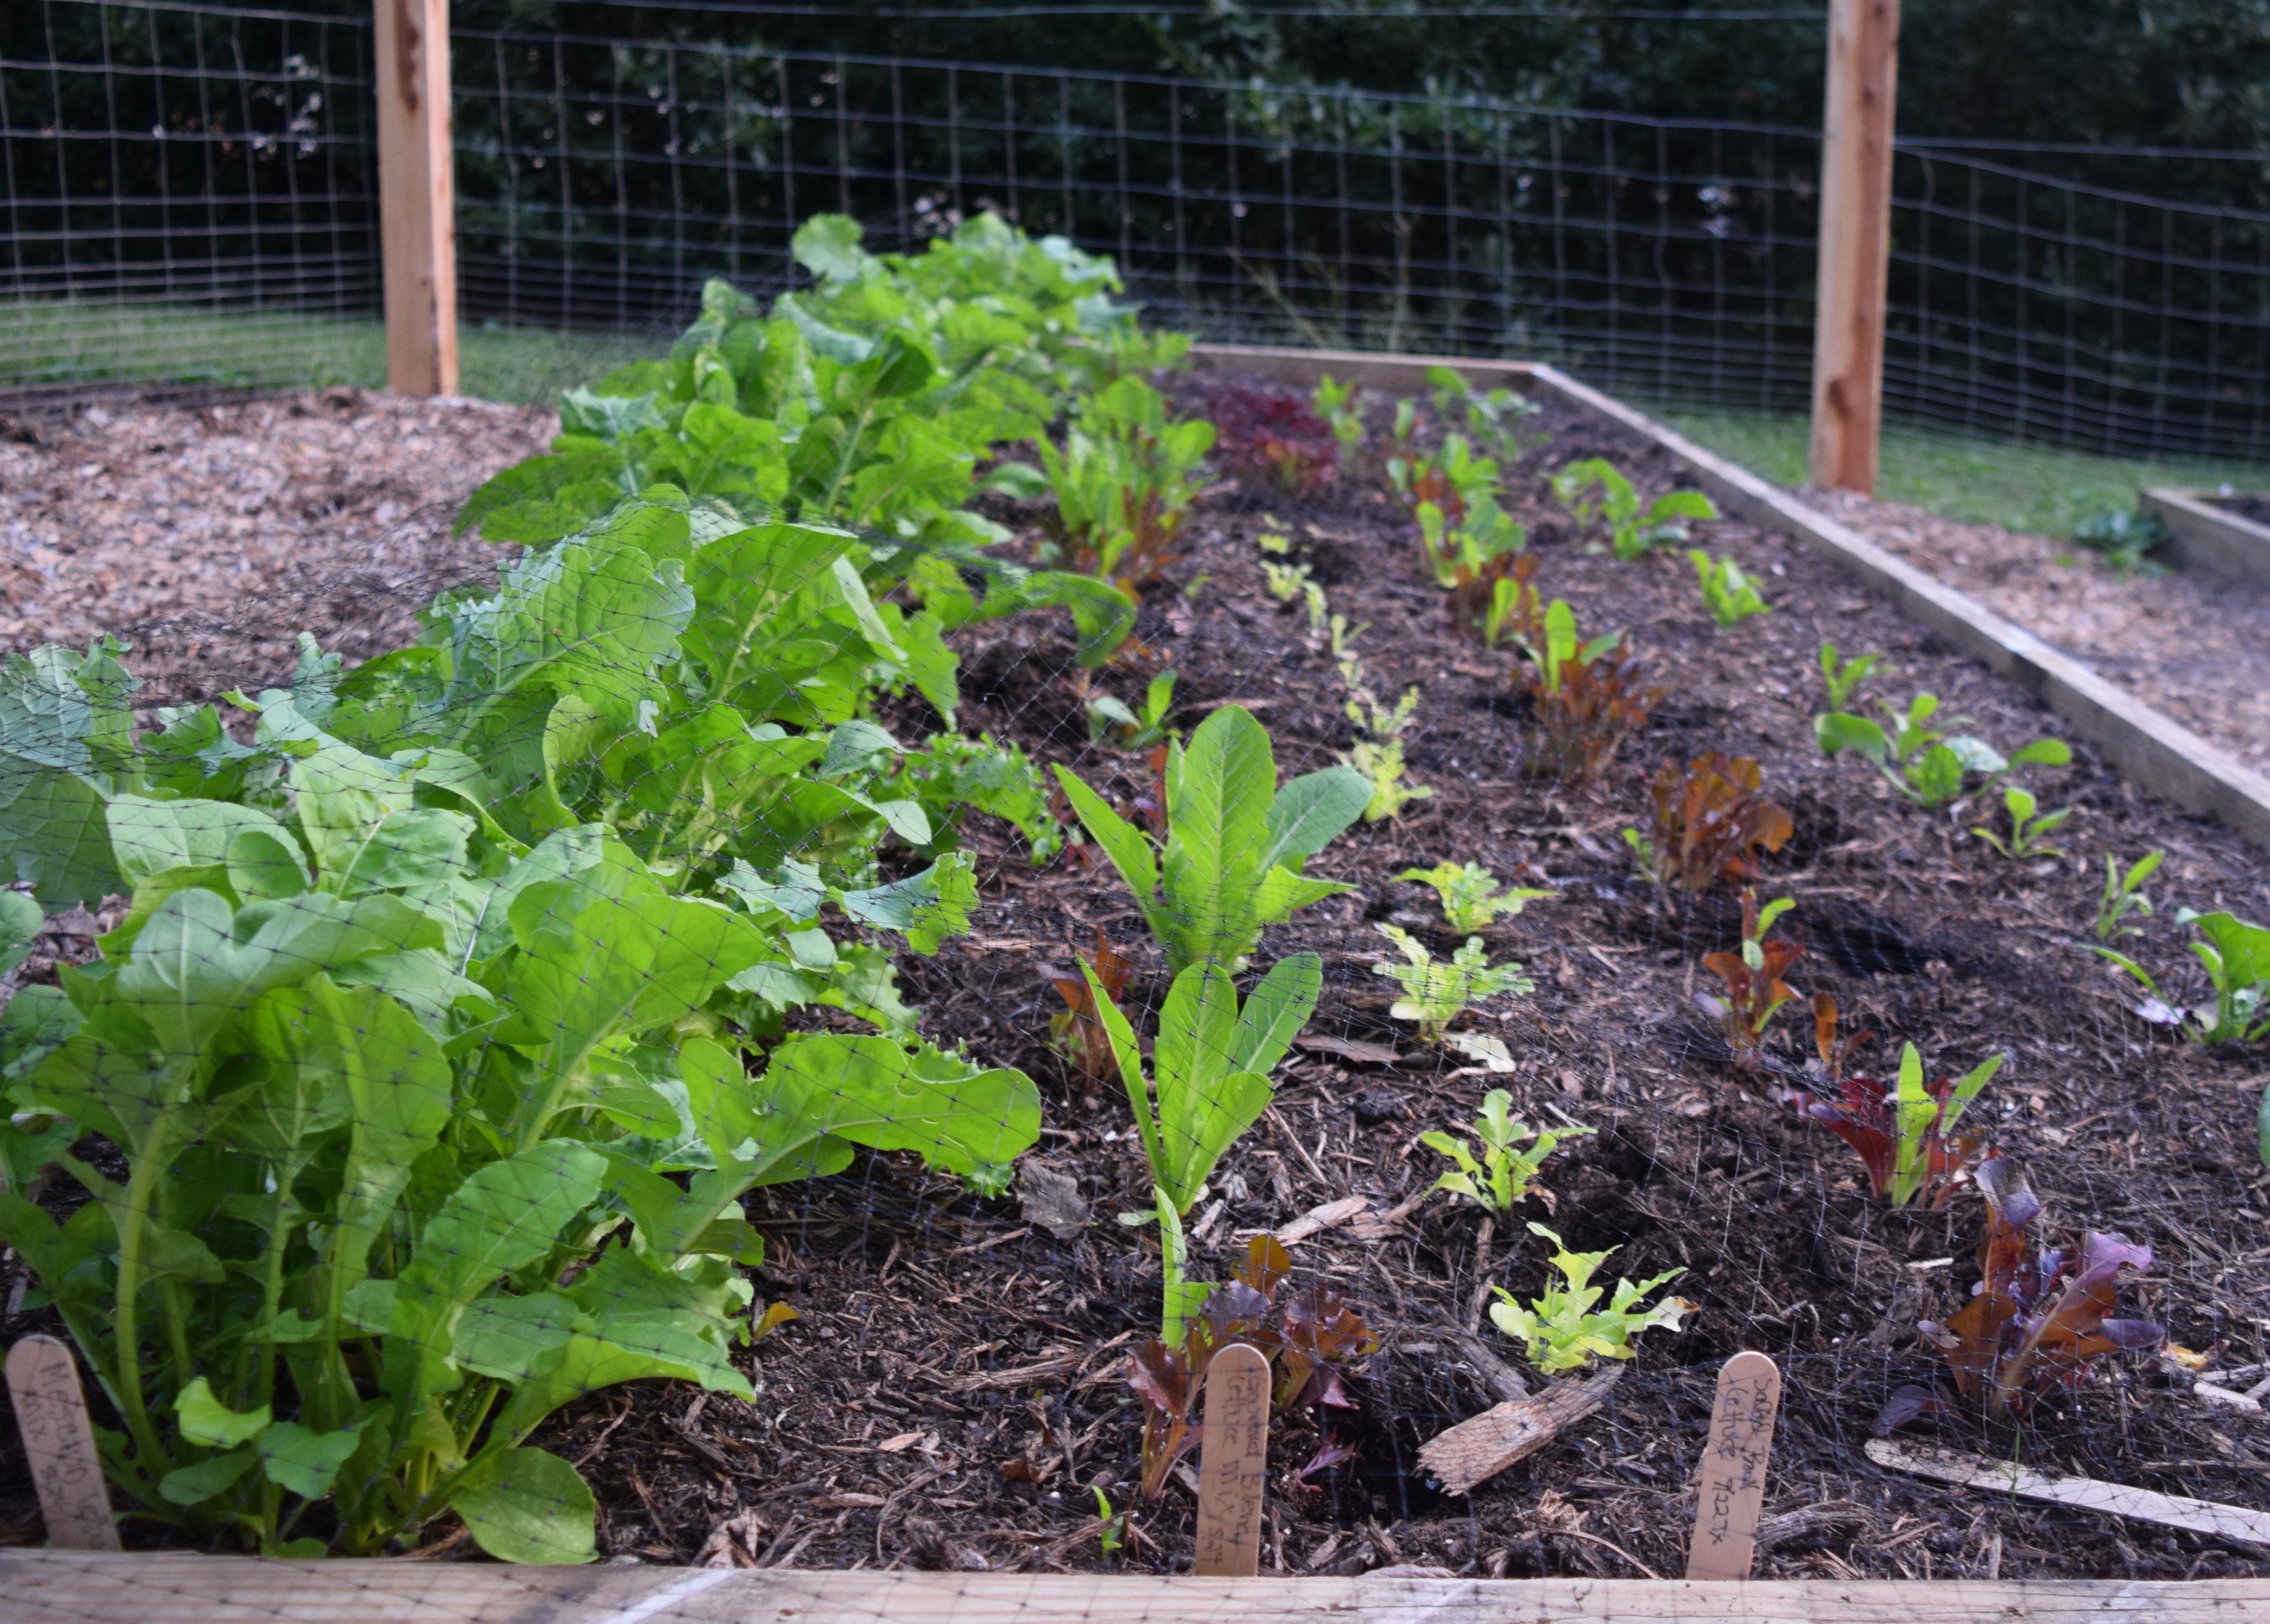
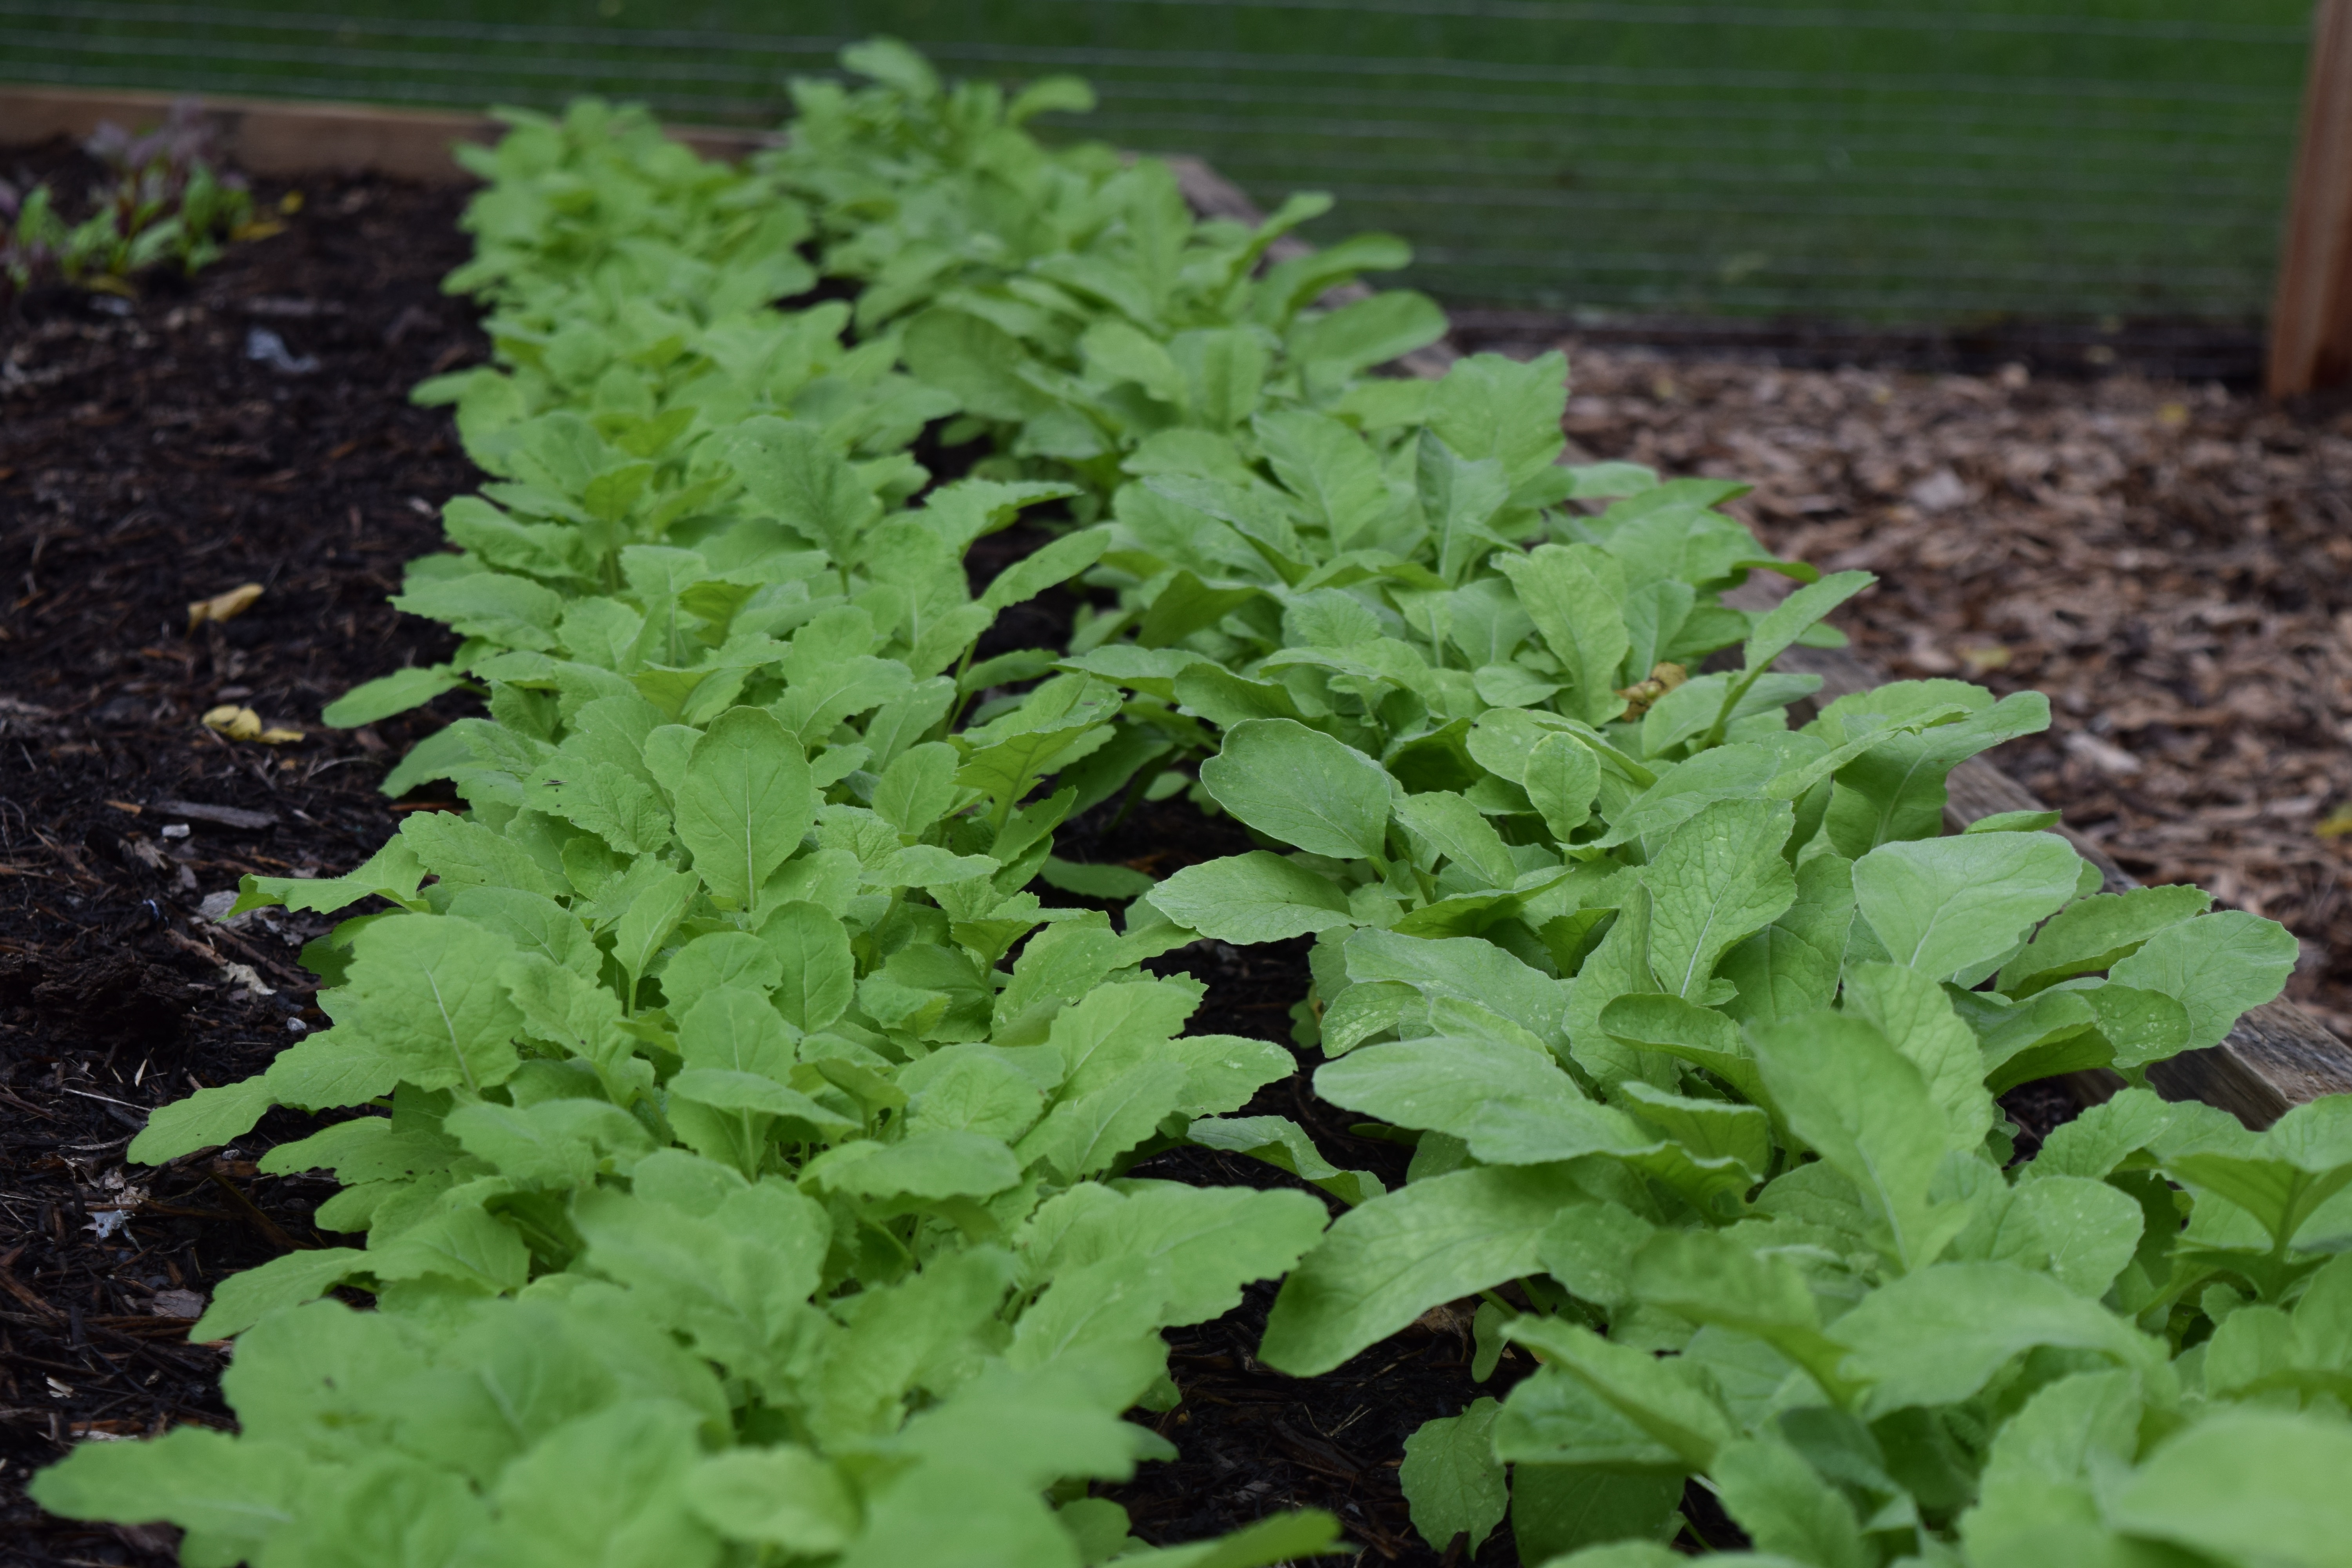
Here it is ten weeks later.
DSC_0451

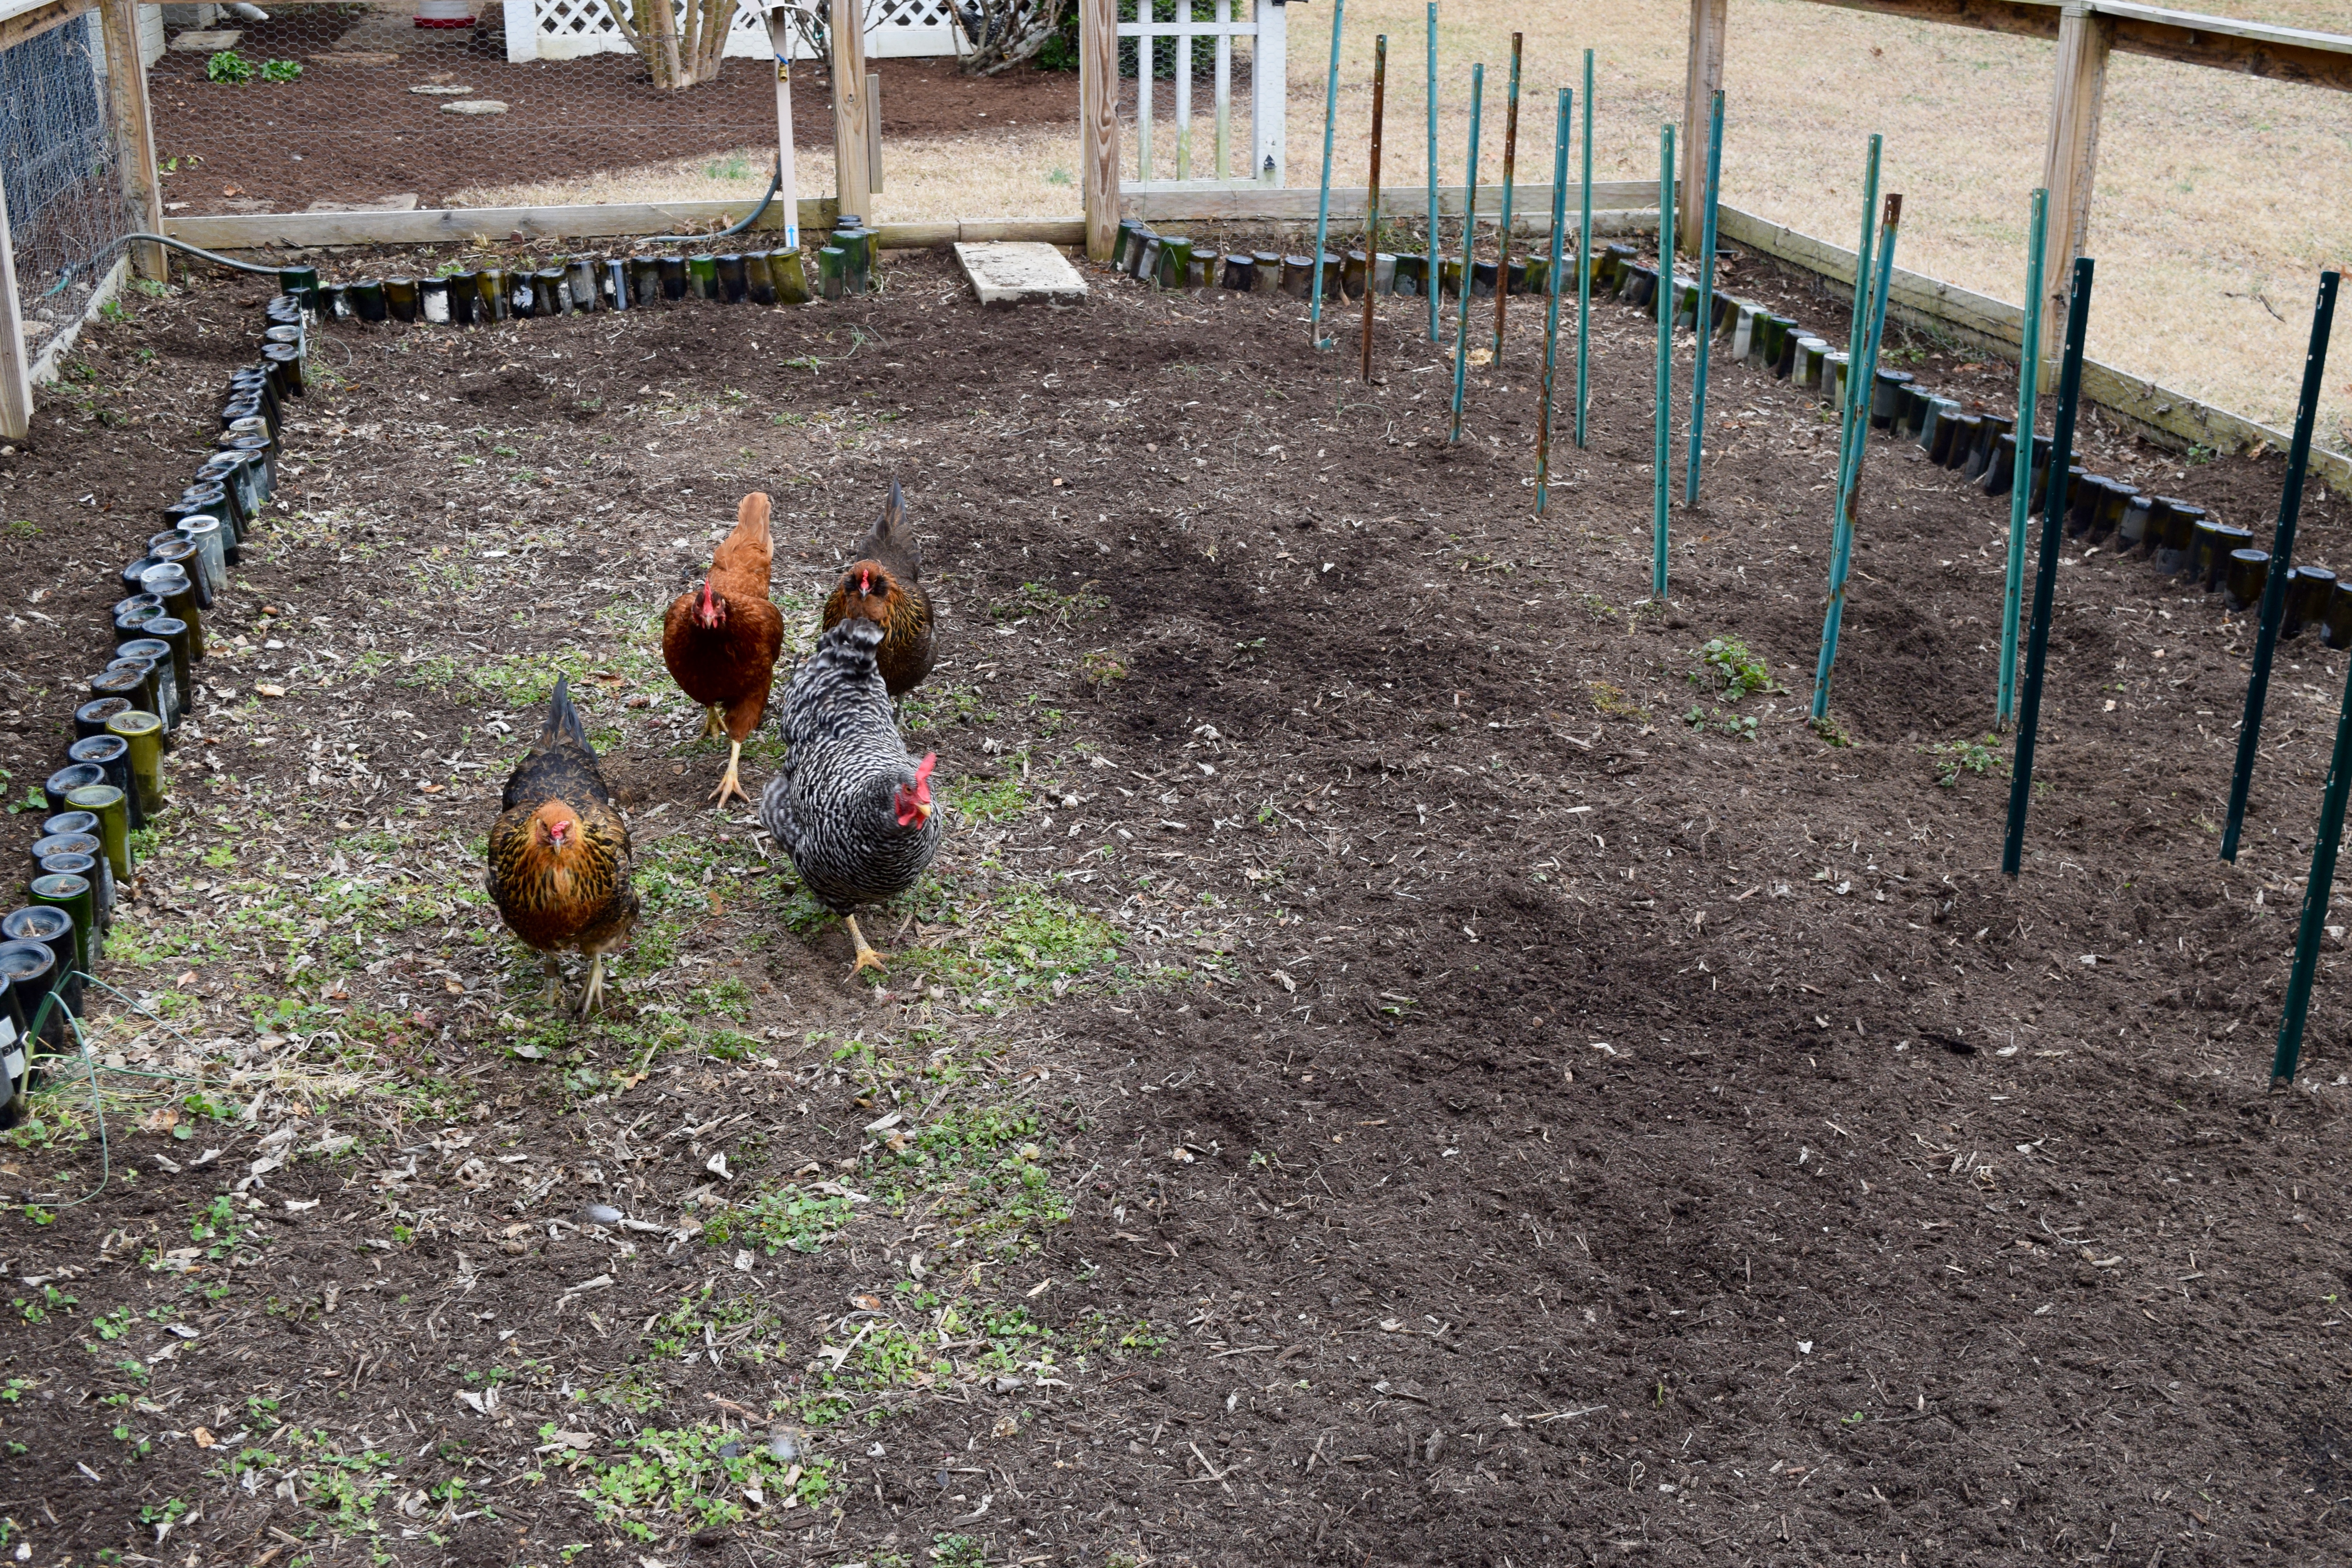
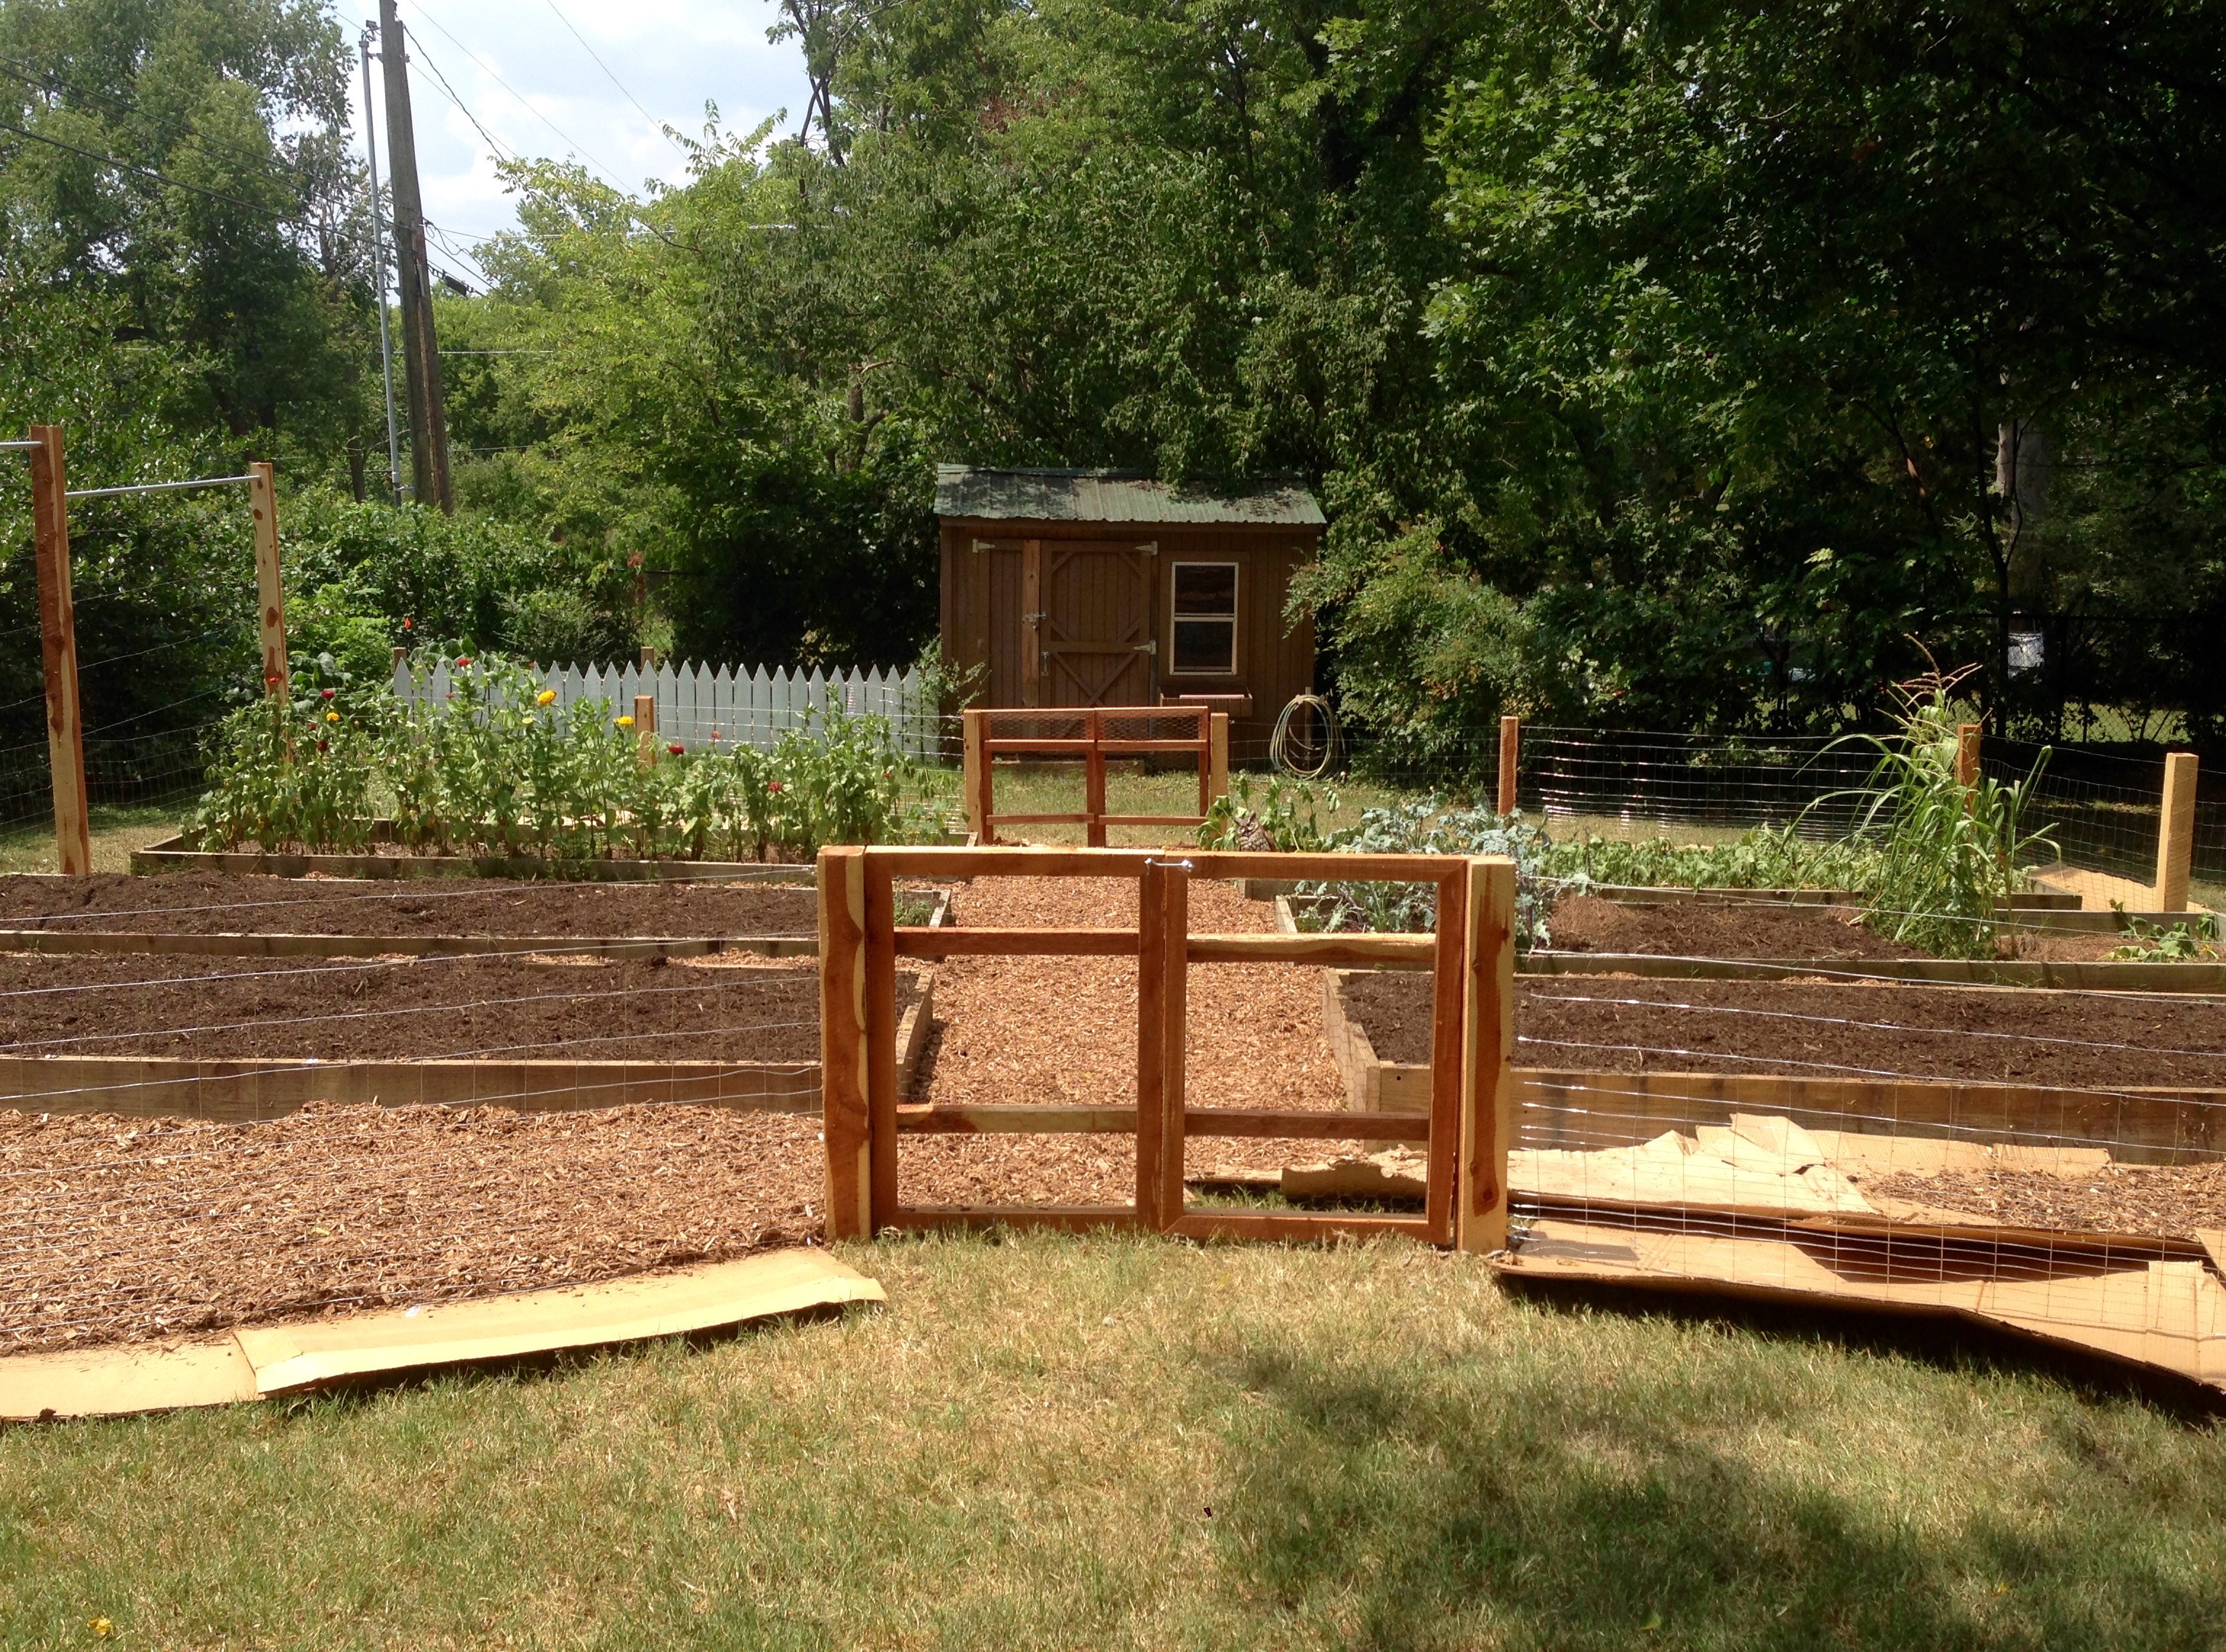
This garden space is 20 by 30 feet. The fence was made using a roll of four-foot chicken-wire framed by wooden posts. Eighteen-inches in from the fencing, I “planted” a necklace of recycled upside-down wine bottles to separate the planting space from the footpath. Because this garden space is never walked on, there is no soil compaction, thus no need for tilling. I reserve the center of the garden for summer crops.

The first vegetable I plant is always peas. I plant them sometime between Valentine’s Day and March 15th, depending on the weather. A few weeks before planting, I invite the chickens inside to scratch up the dirt as they look for bugs (tilling), eat the CHICKweed (weeding), and leave their nutrient-rich poop (fertilizer) — a free-for-all for them and a bonanza for me!
Veg garden

To prepare the necklace for planting, I use a pitchfork to lightly aerate the soil, trying to not disturb old roots and worms who do the bulk of the work of loosening the soil during the winter.
DSC_0528

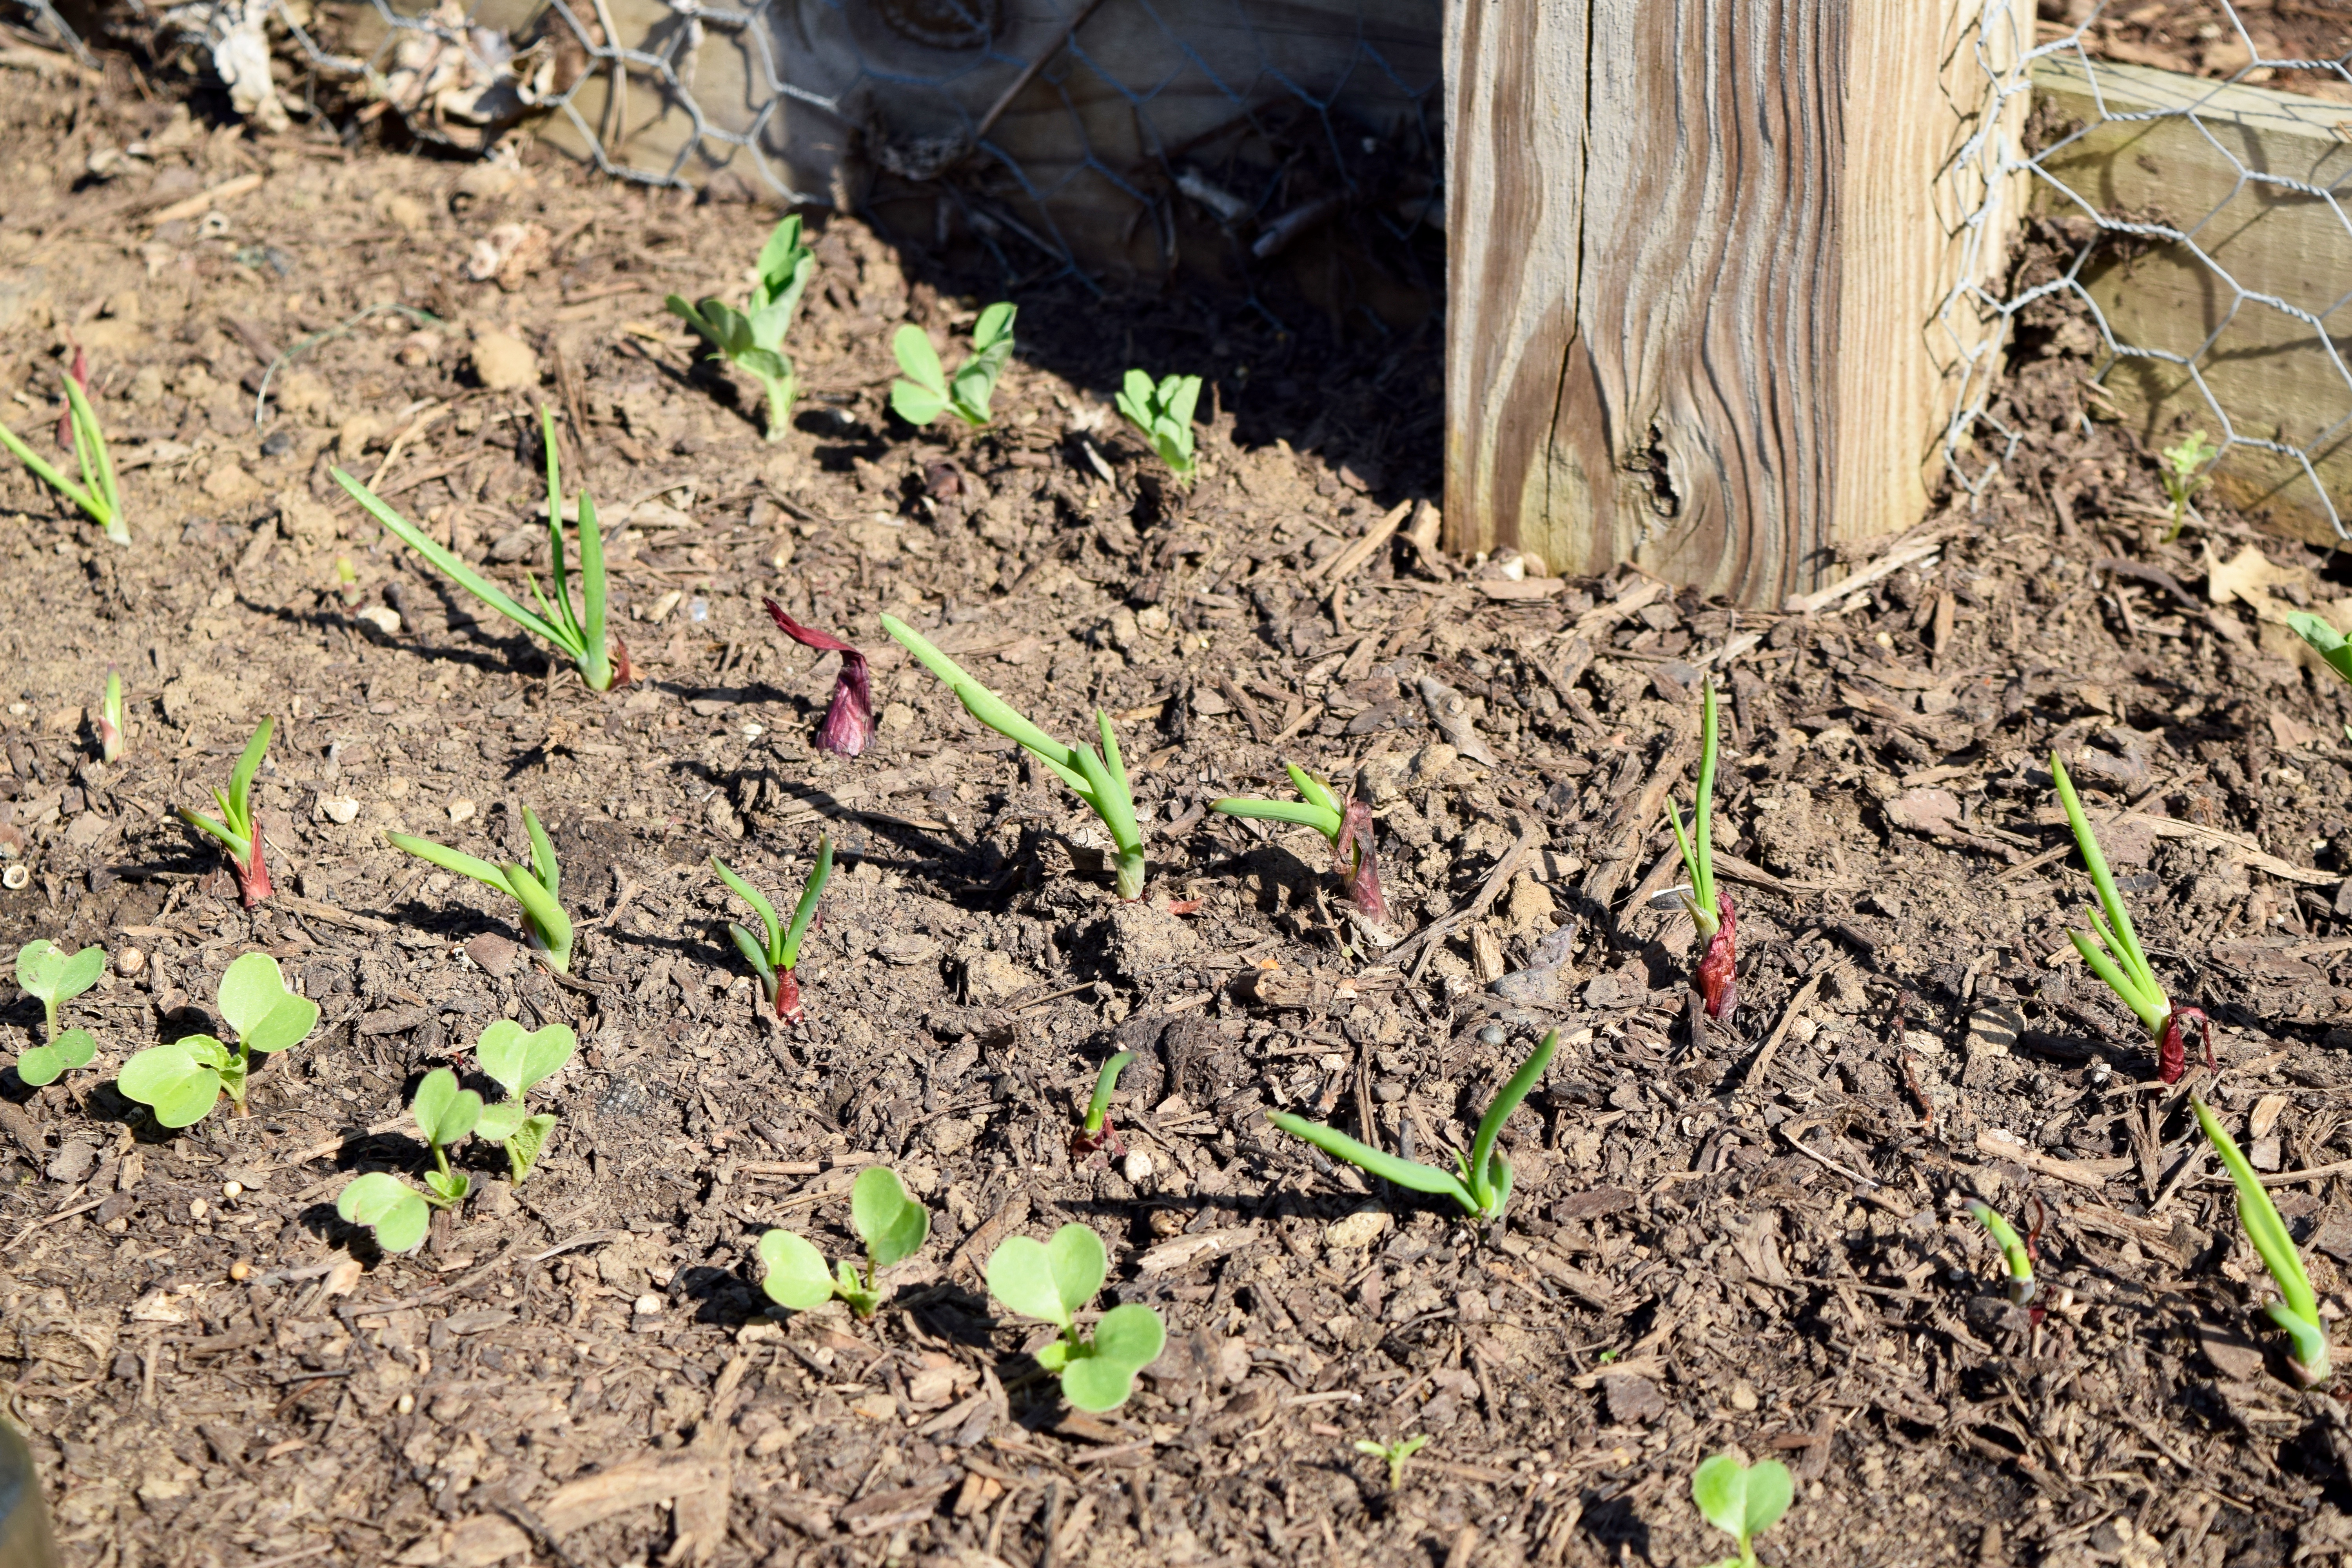
Next, I plant peas along the fence for support, spring onion sets in the middle, and one row of radishes next to the bottles. I was careful to space the radish seeds four inches apart for better root formation this season. I planted many different varieties of radishes.

March 15th

March 30th

April 17th

April 30th

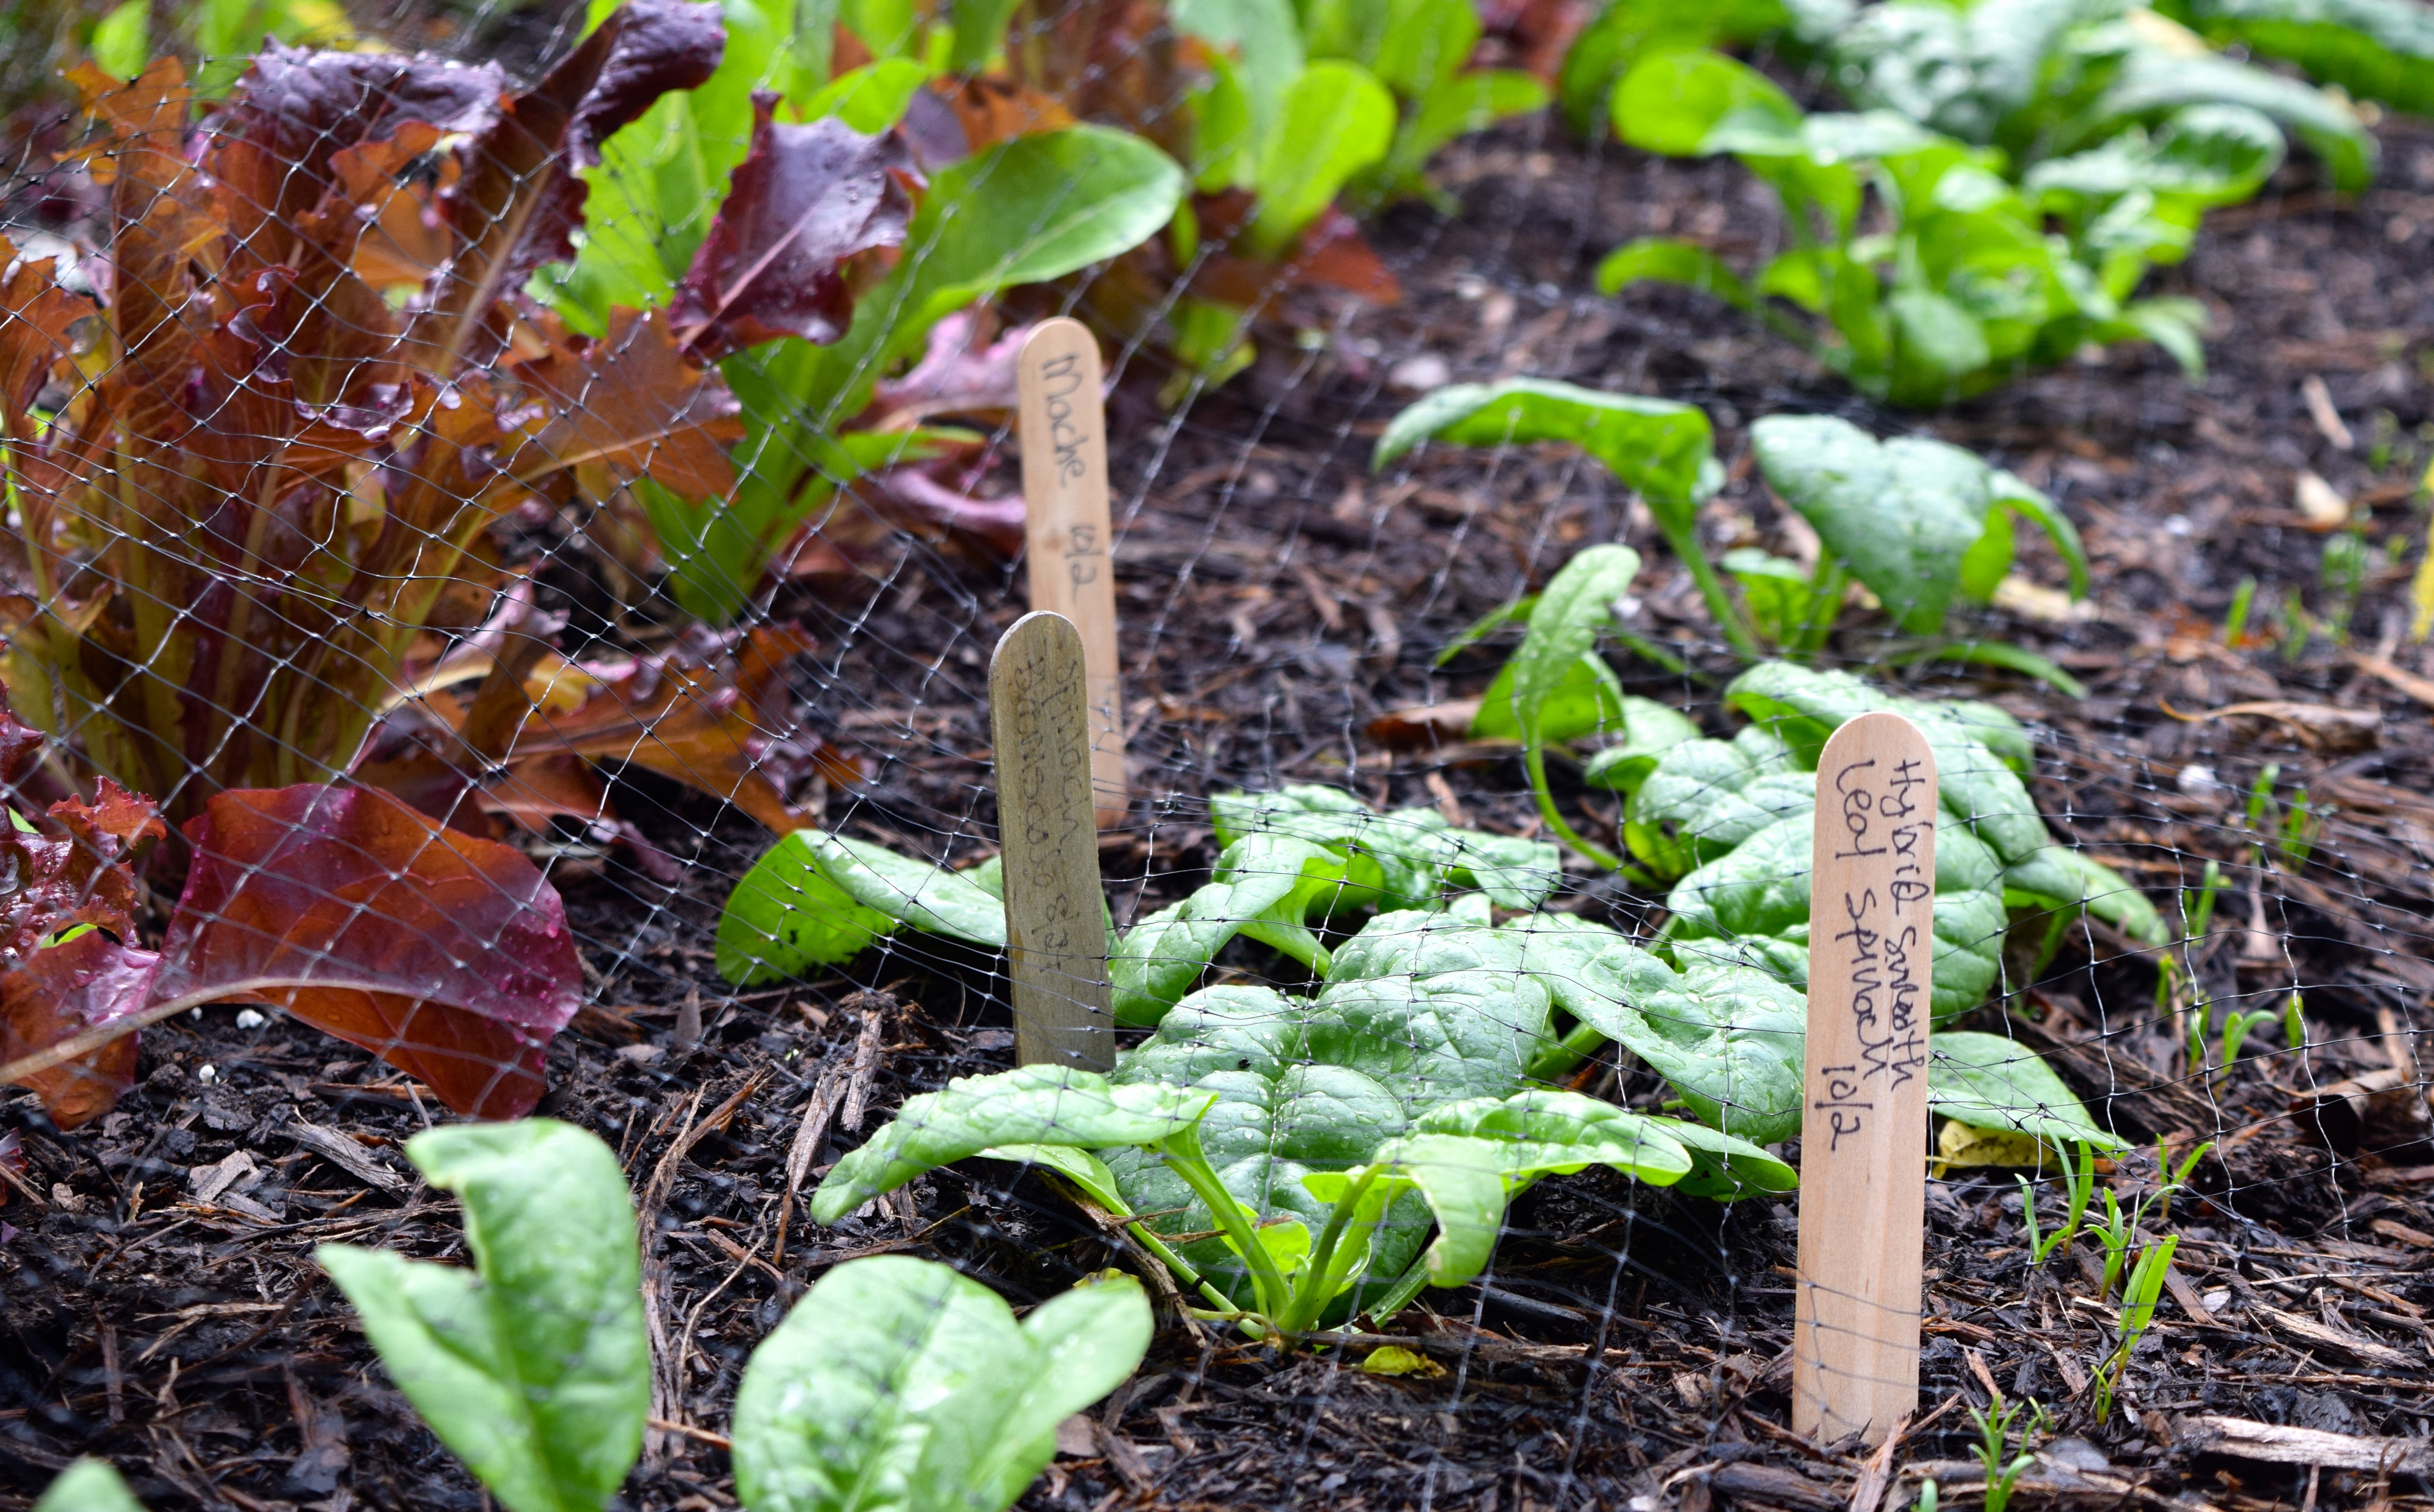
Here is What I Planted Inside the Front Necklace Garden:

Sugar Ann Peas
There is an old gardening tradition that says to plant your peas on Valentine’s Day. That is always the goal, but seldom the reality. This year was no exception. In fact, we were iced-in for most of February, and I didn’t get to plant anything until mid-March. This may be the reason my Sugar Ann peas failed so miserably. The other reason is they probably got crowded out by the quick growth of the onions and radishes in front of them. Next year, I may start the peas two weeks earlier than the onions and radishes or soak the peas before planting for quicker germination.

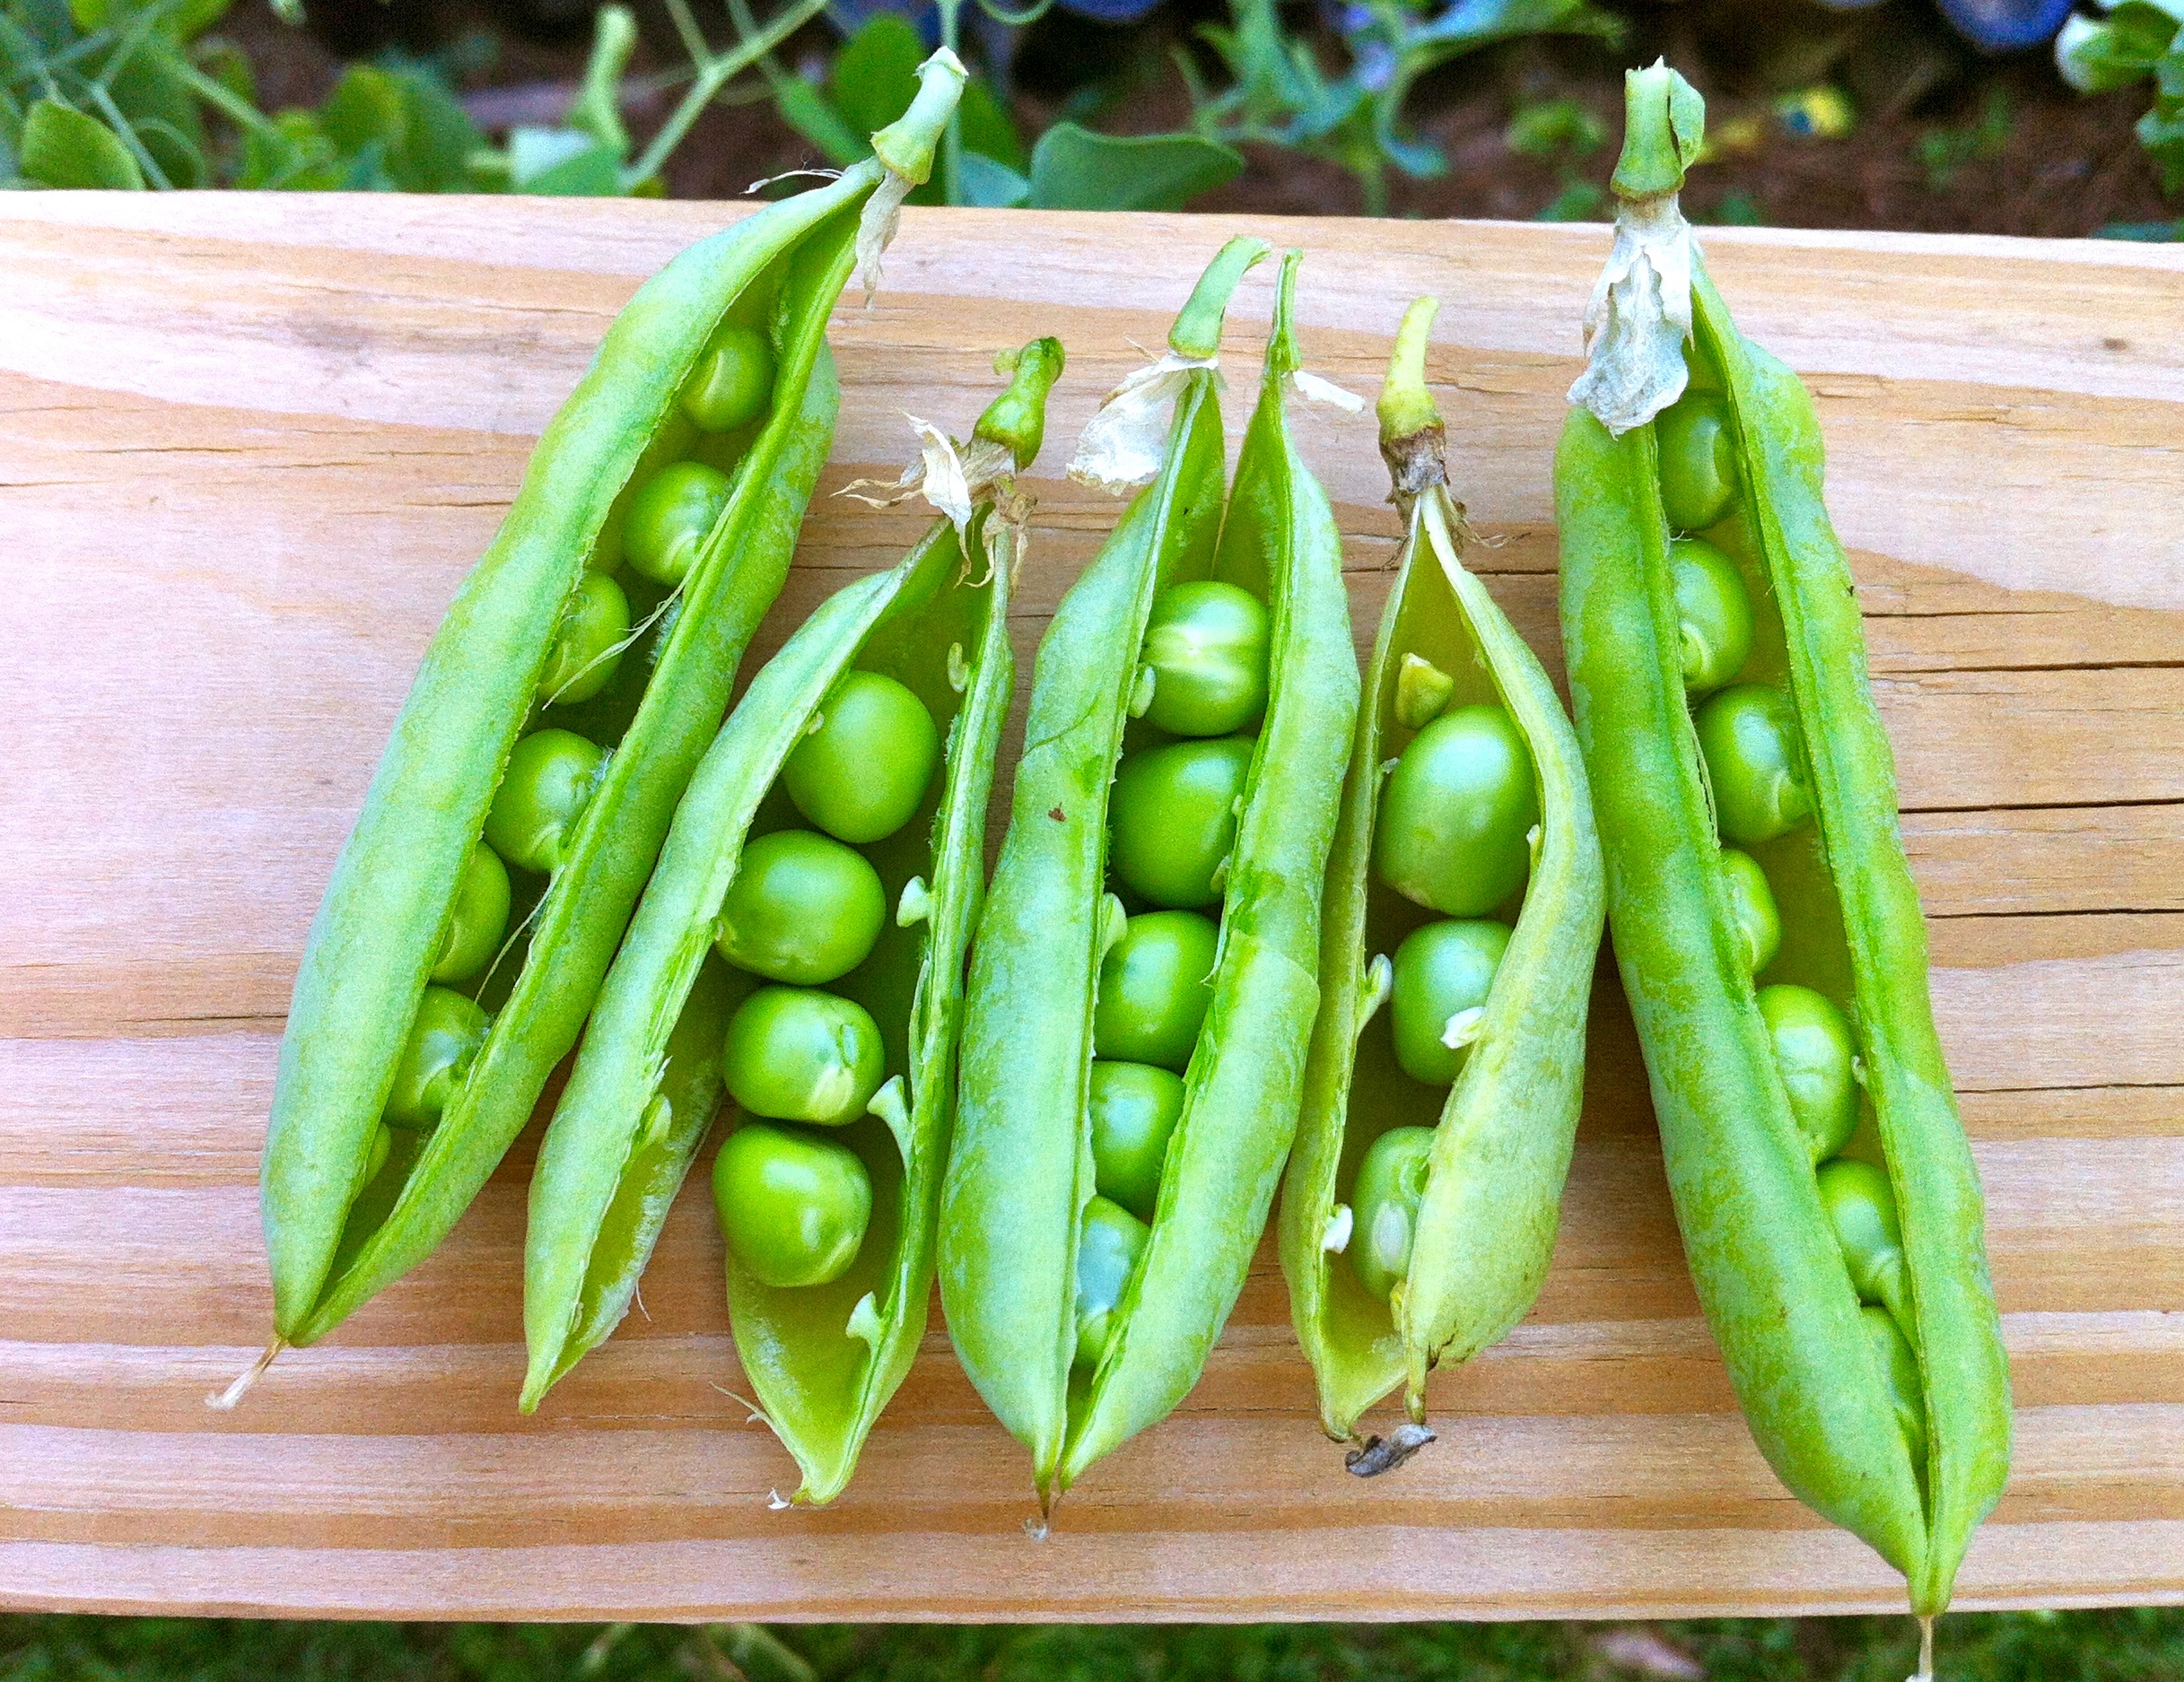
I typically plant two varieties of peas: a sugar snap and a snow pea. They grow in the same way. And both need vine support.

May 21

Sugar Snaps are an edible-podded cultivar that have plump peas inside. They are a cross between shelling English peas and snow peas. They are super sweet and hardly ever make it to the kitchen.

vegetable gardens vegetable gardening

Snow peas also have flat edible pods and are not as sweet as snap peas.

5:28meltingsugar

They are often used in Asian cooking. Look for a “stringless” variety. The chickens love pea plants and often eat whatever pokes out of the fencing.


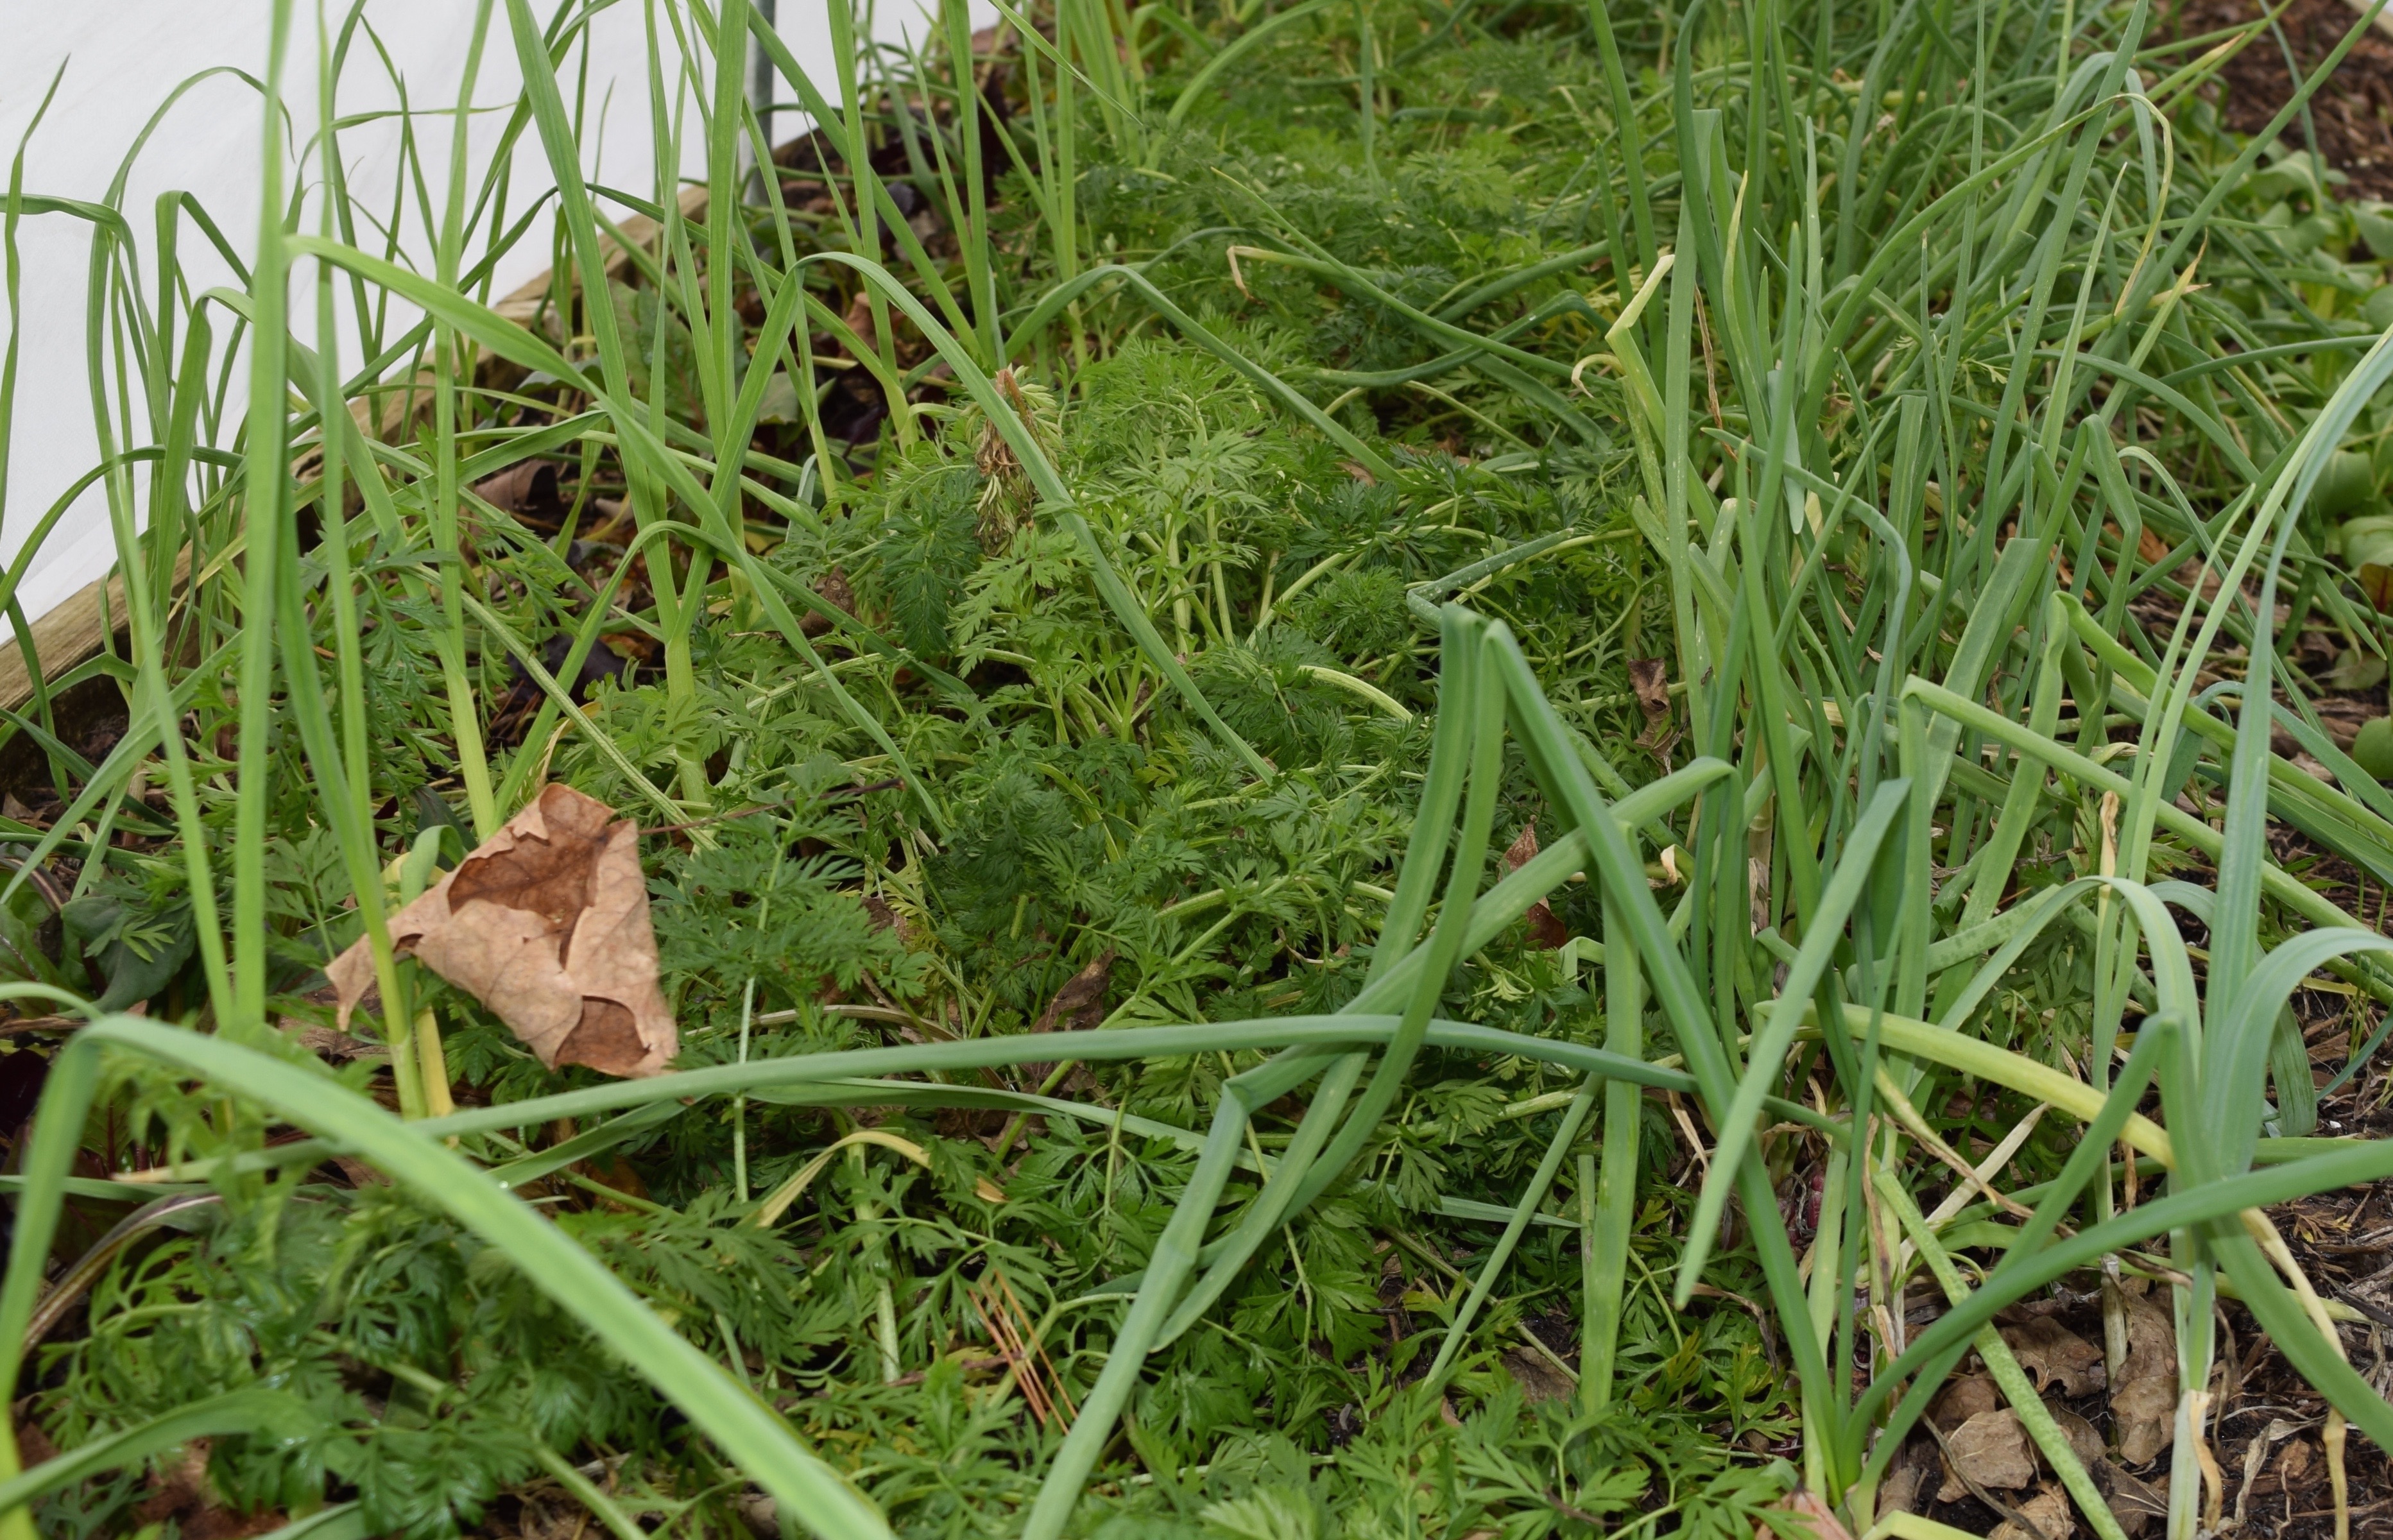
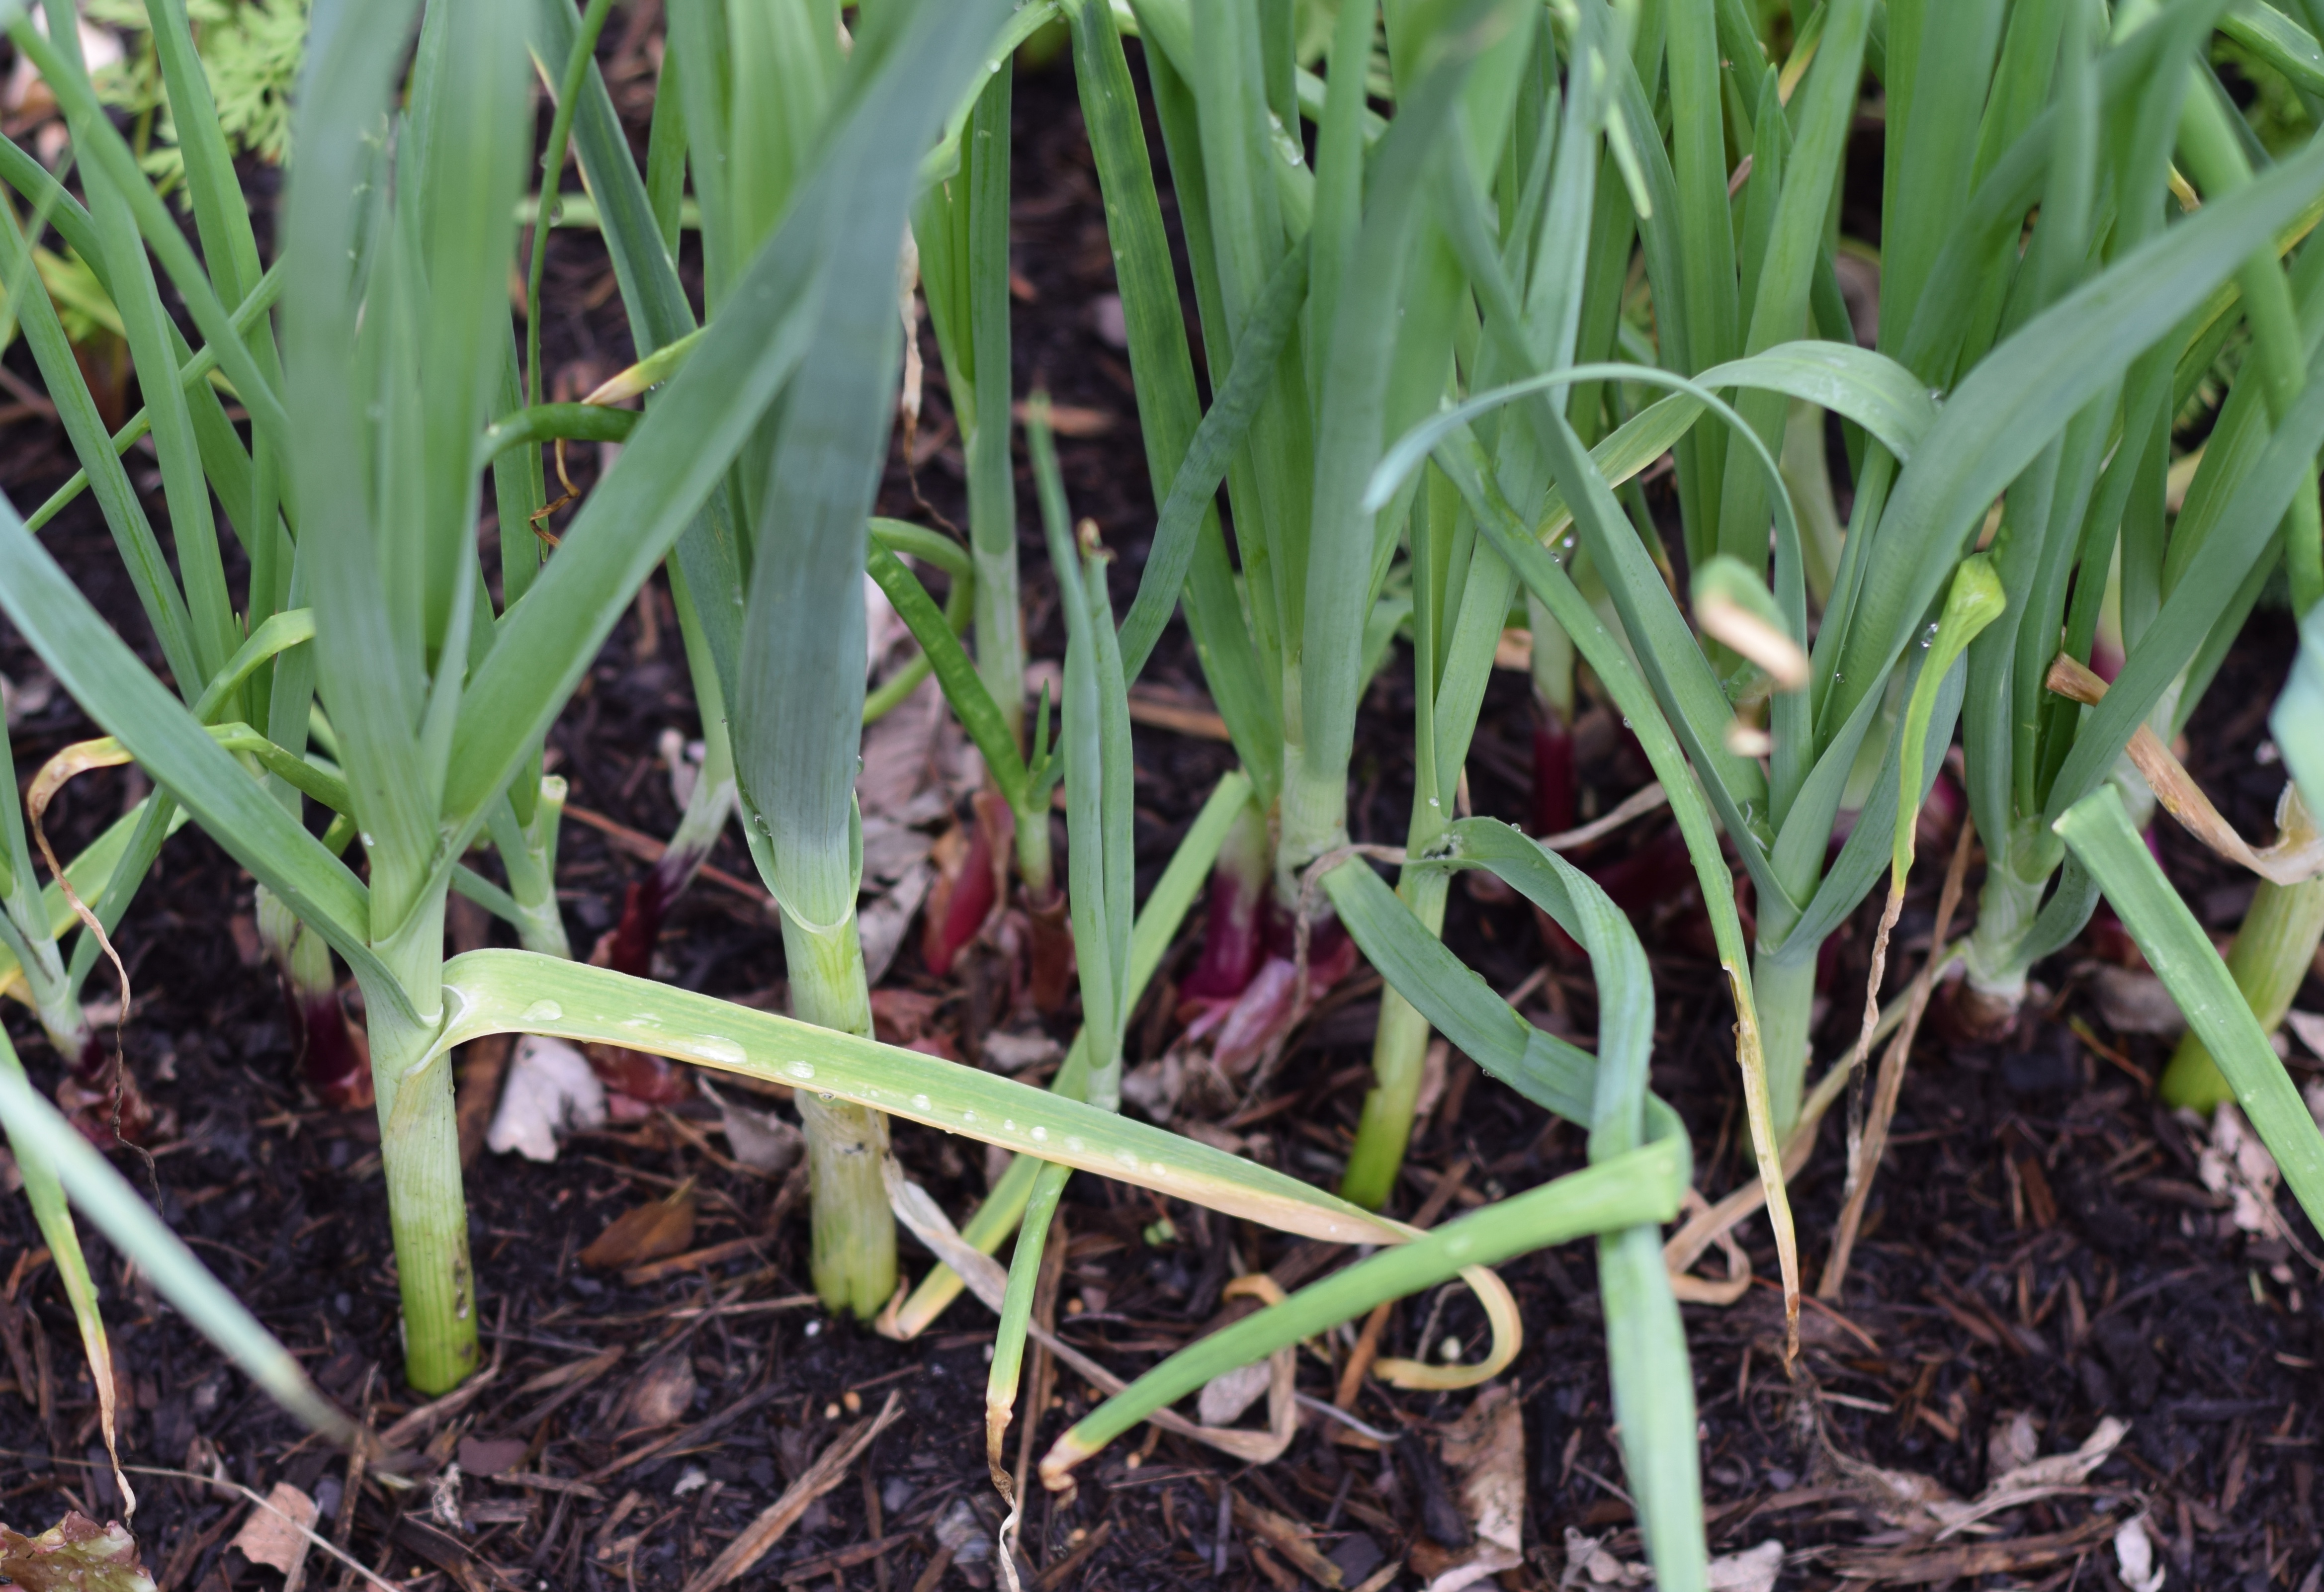
Spring Onions (aka Scallions or Green Onions)
Sets planted 3/15. Harvest started six weeks later and is ongoing. I plant the purple variety because I love the color, and you can’t find them in a grocery store. I planted 200 sets this year; I cannot get enough of spring onions.

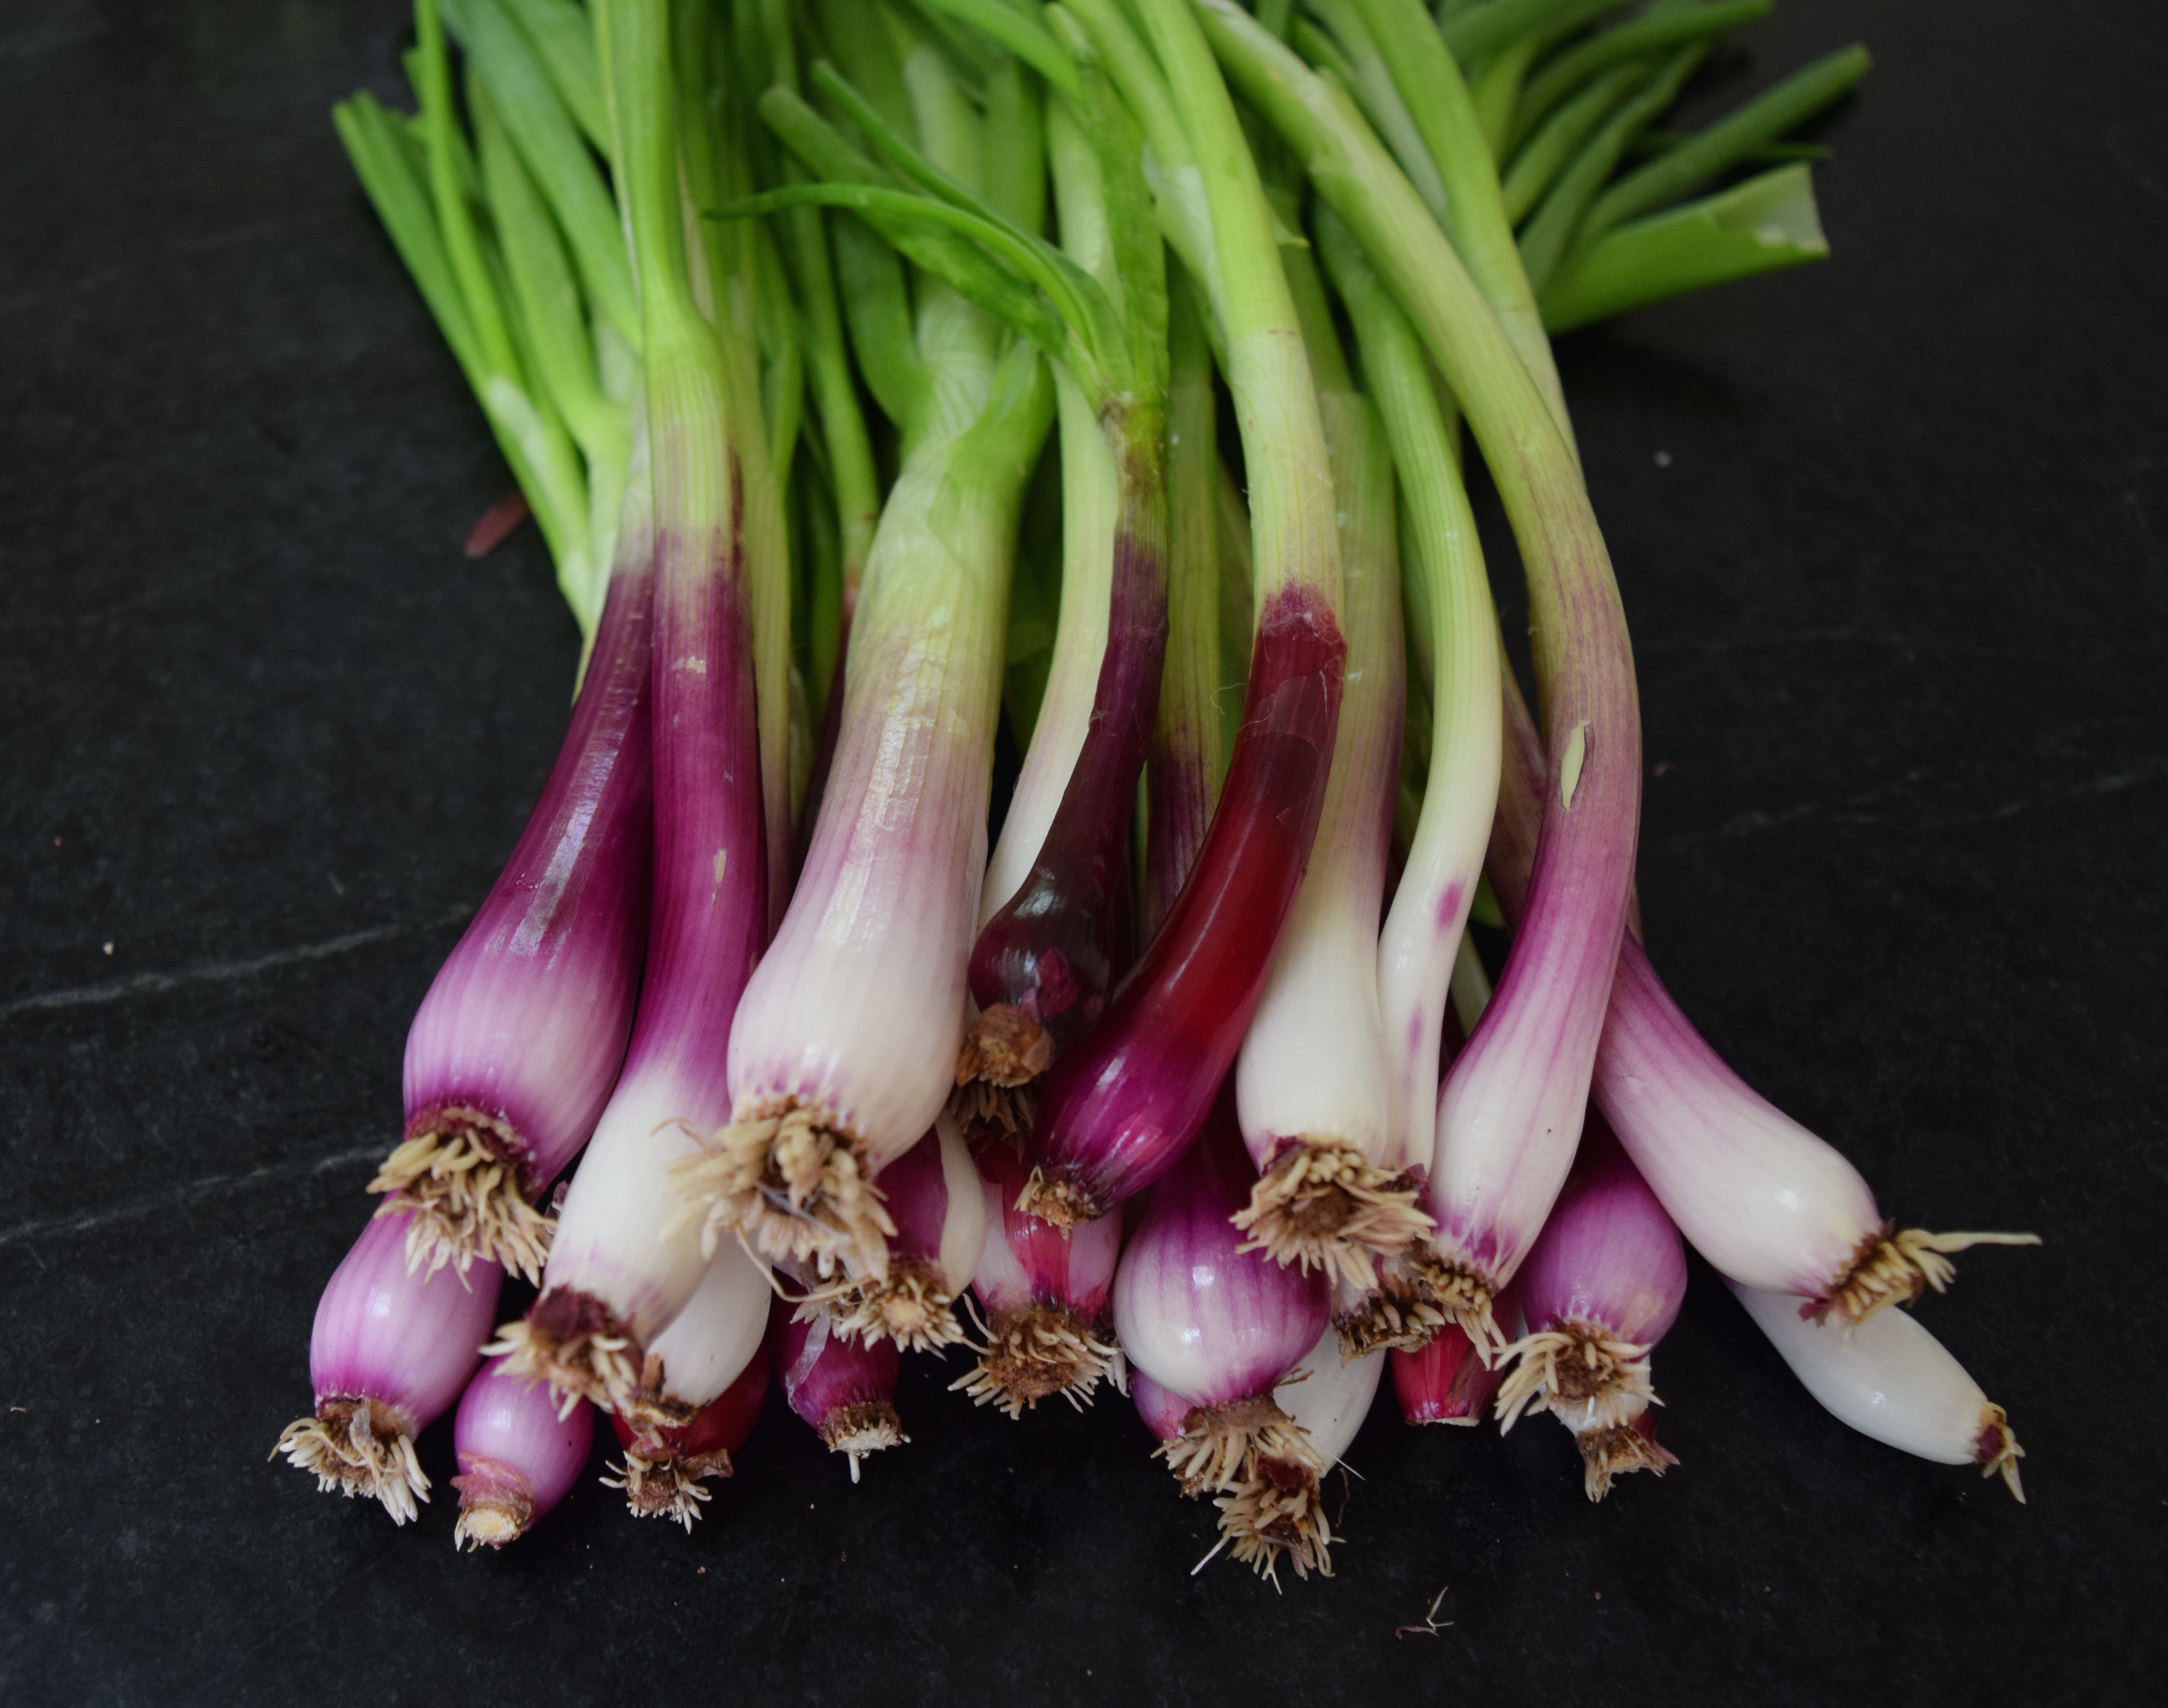
For more information on growing spring onions, radishes, and turnips, go to my blog post, Urban Farming Part 1: Fall Planting.

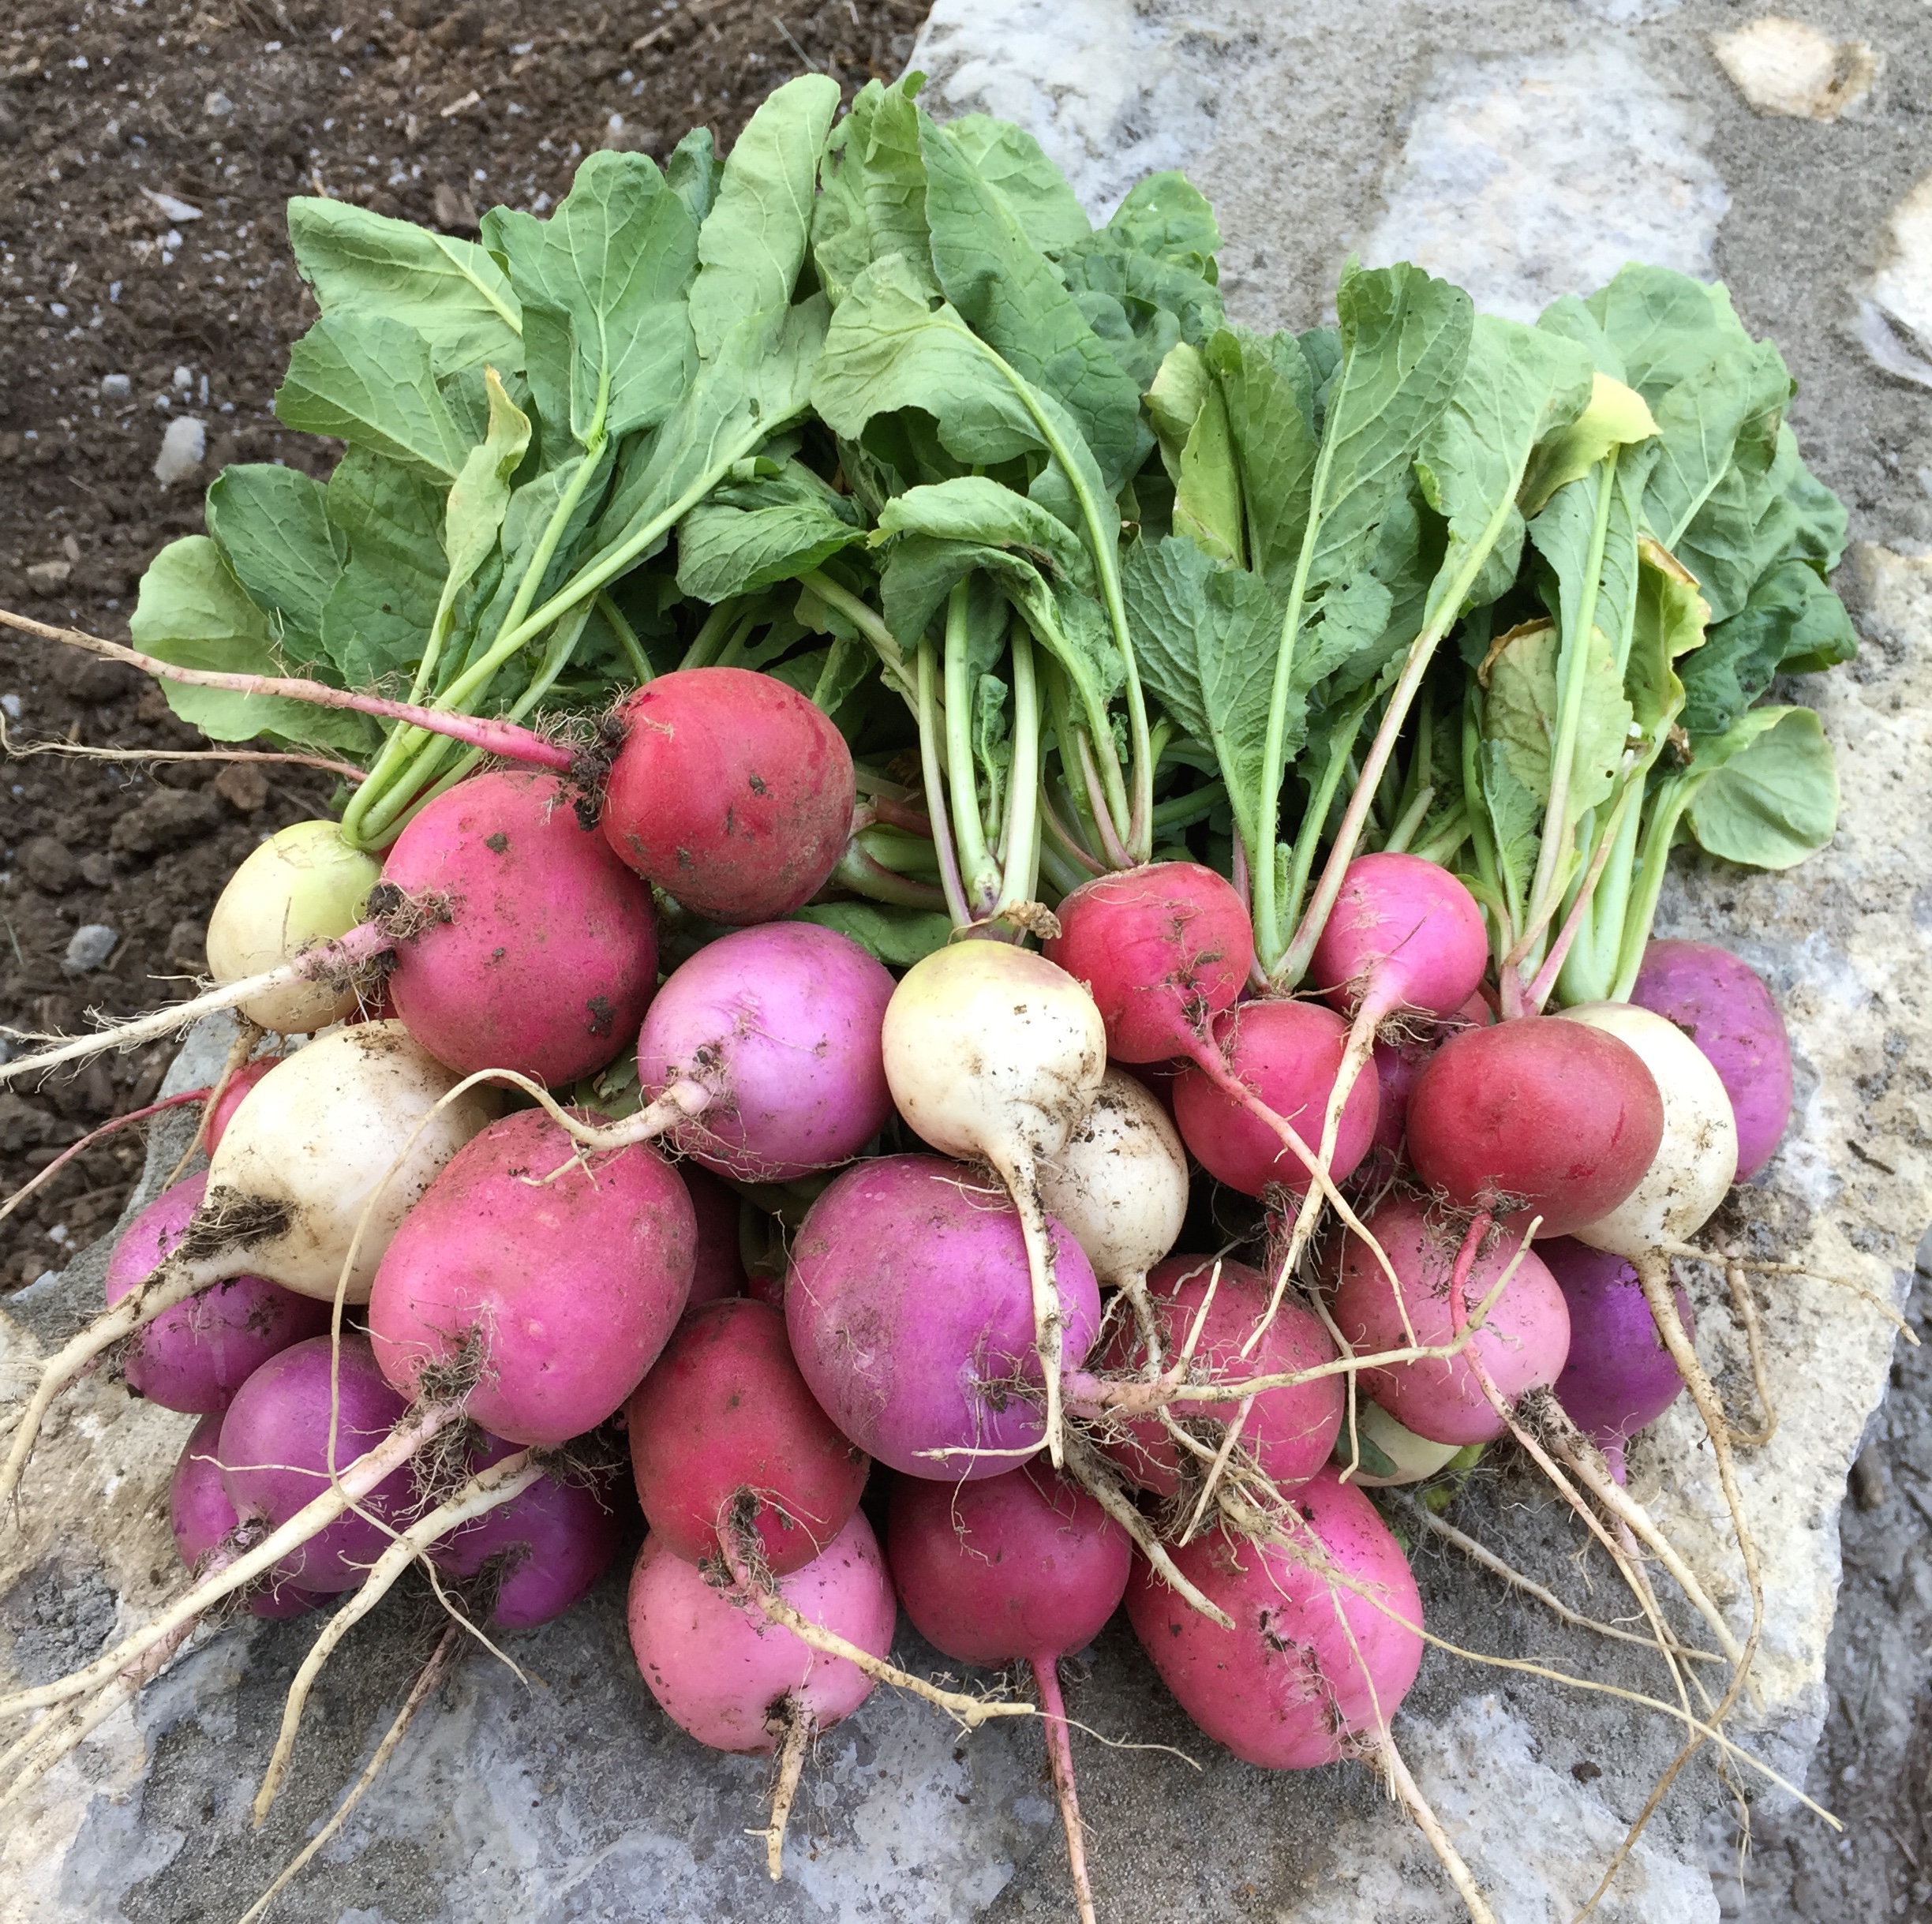
“Easter Egg” Radishes
Seeds planted 3/15. 30 days to maturity. Started harvesting on 4/17. Sweet, mild, crispy, and colorful. Flowers and leaves are edible.

spring garden

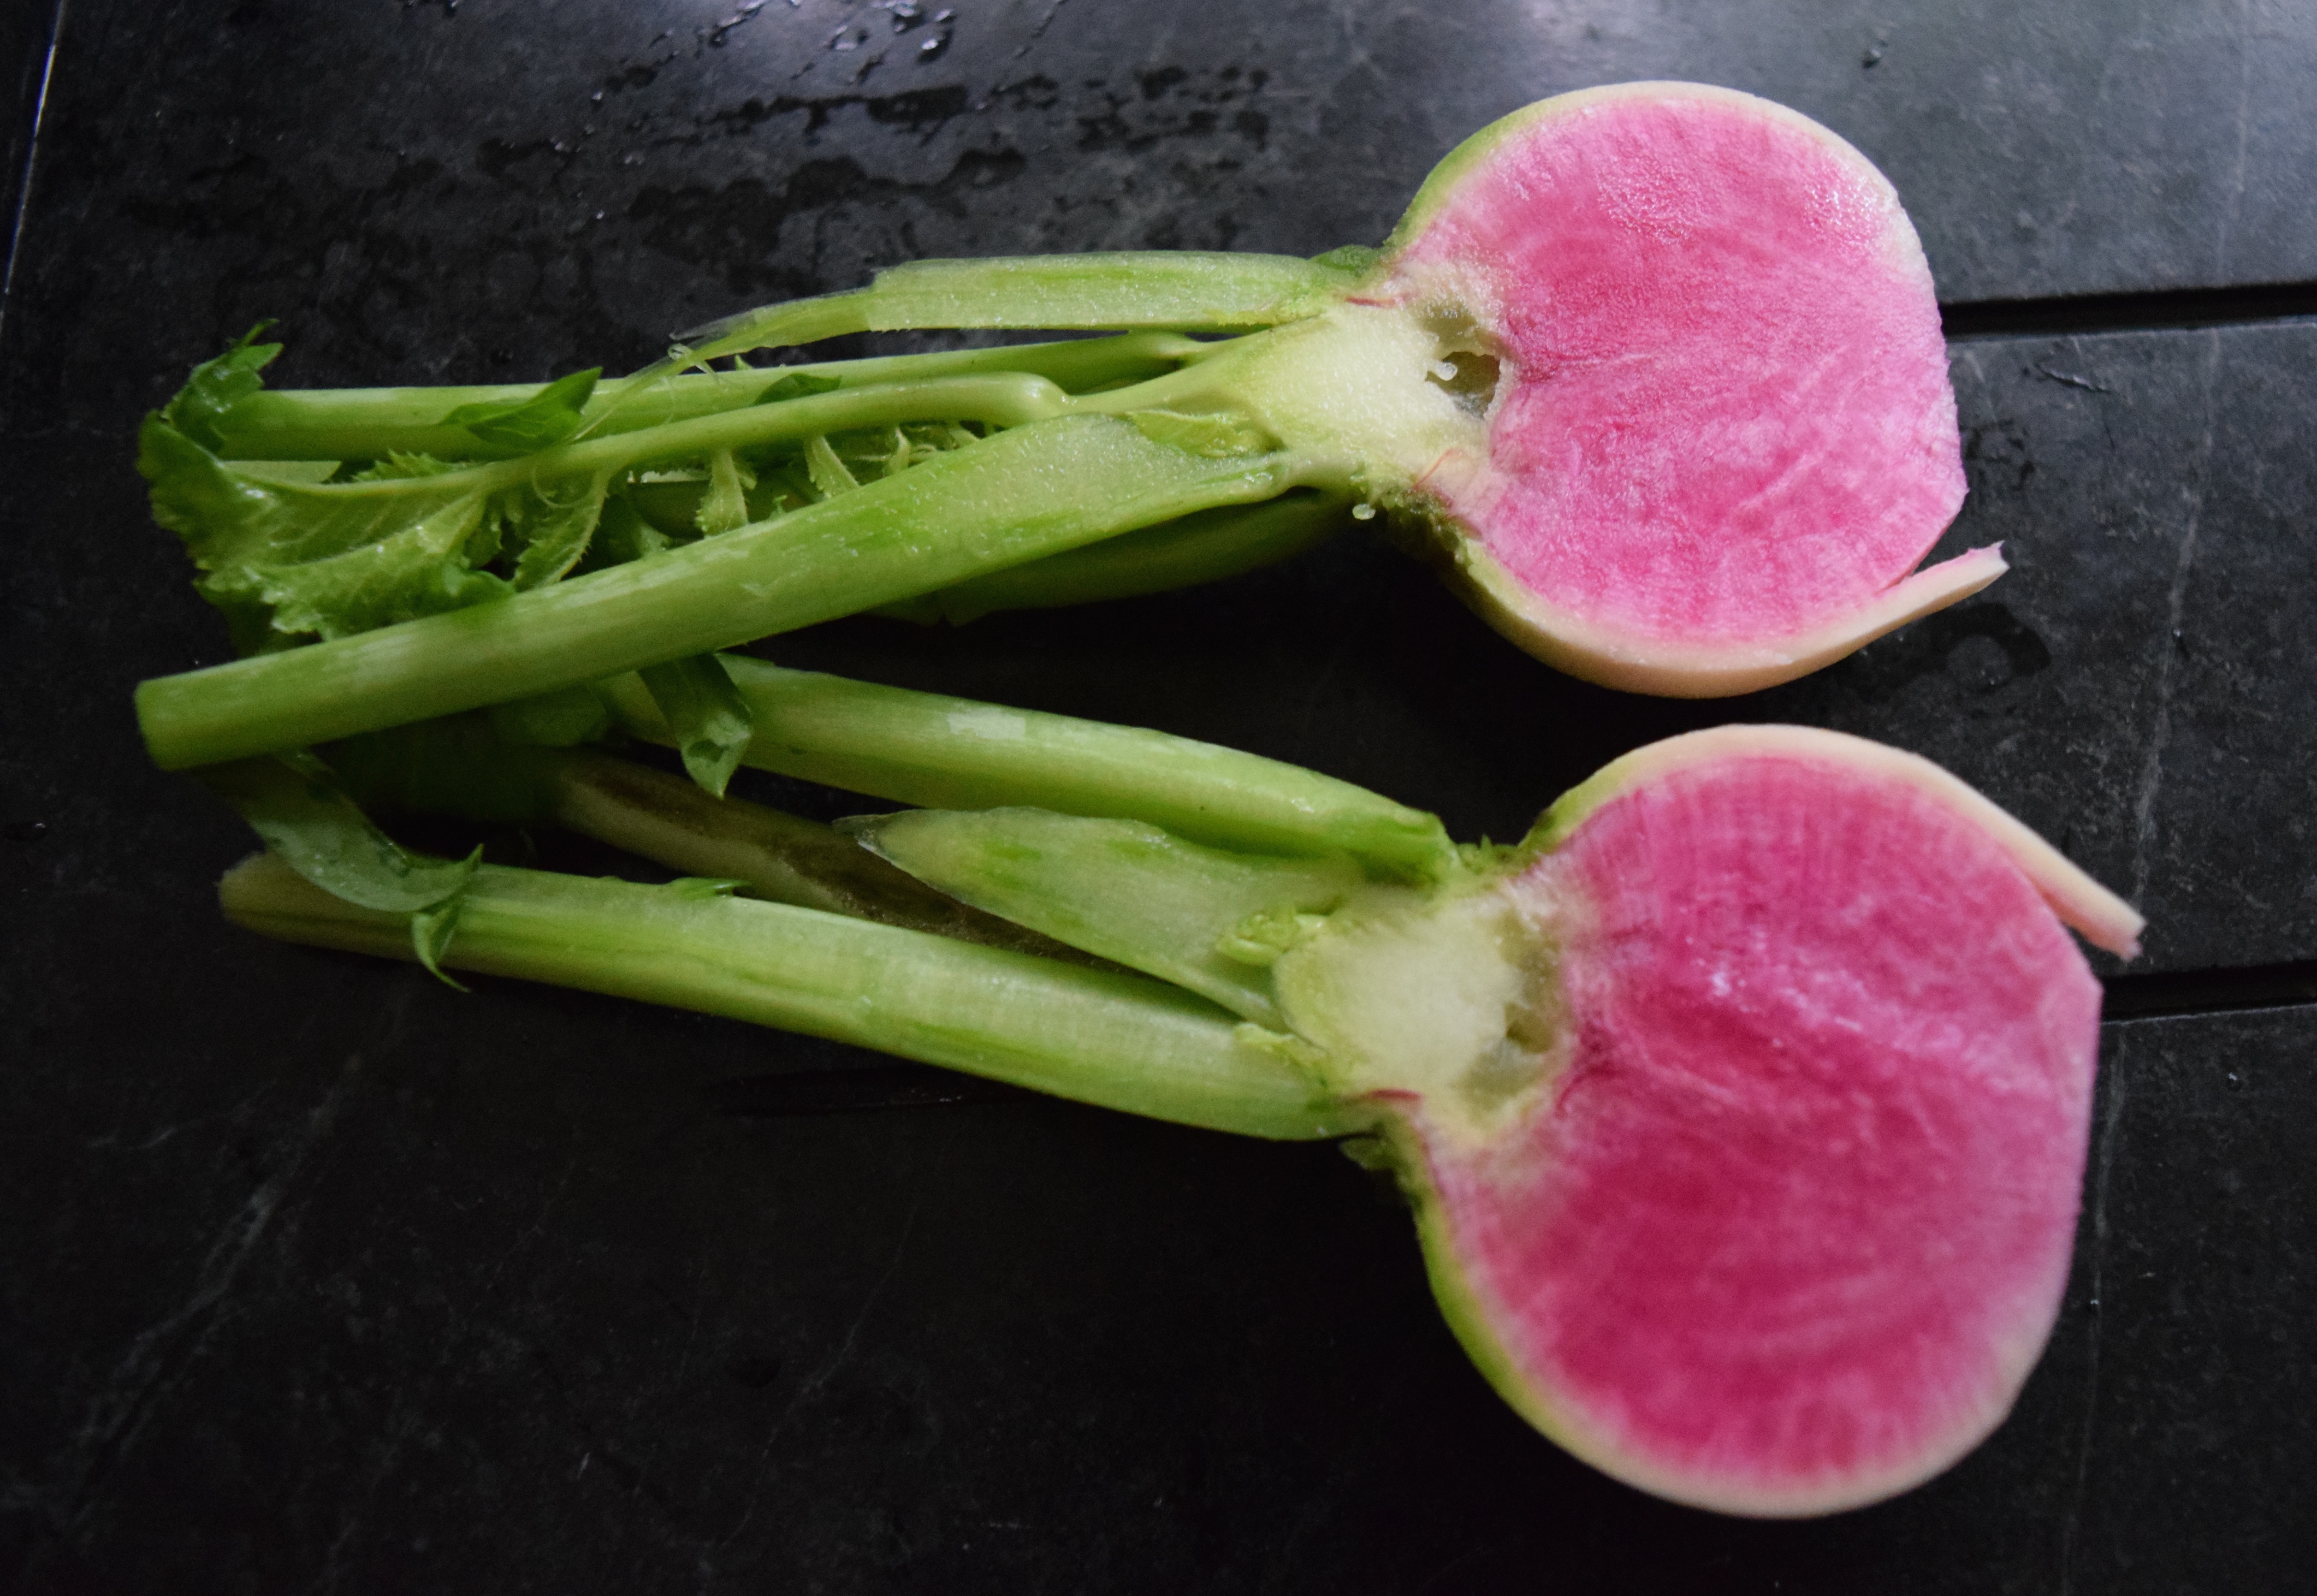
“Red Meat” Radish (aka “Watermelon” Radish)
Planted 3/15. 50 days to maturity. Started harvesting on May 18. Crisp, have more of a bite, and have a beautiful hot pink color inside. Their leaves and flowers are edible, too.

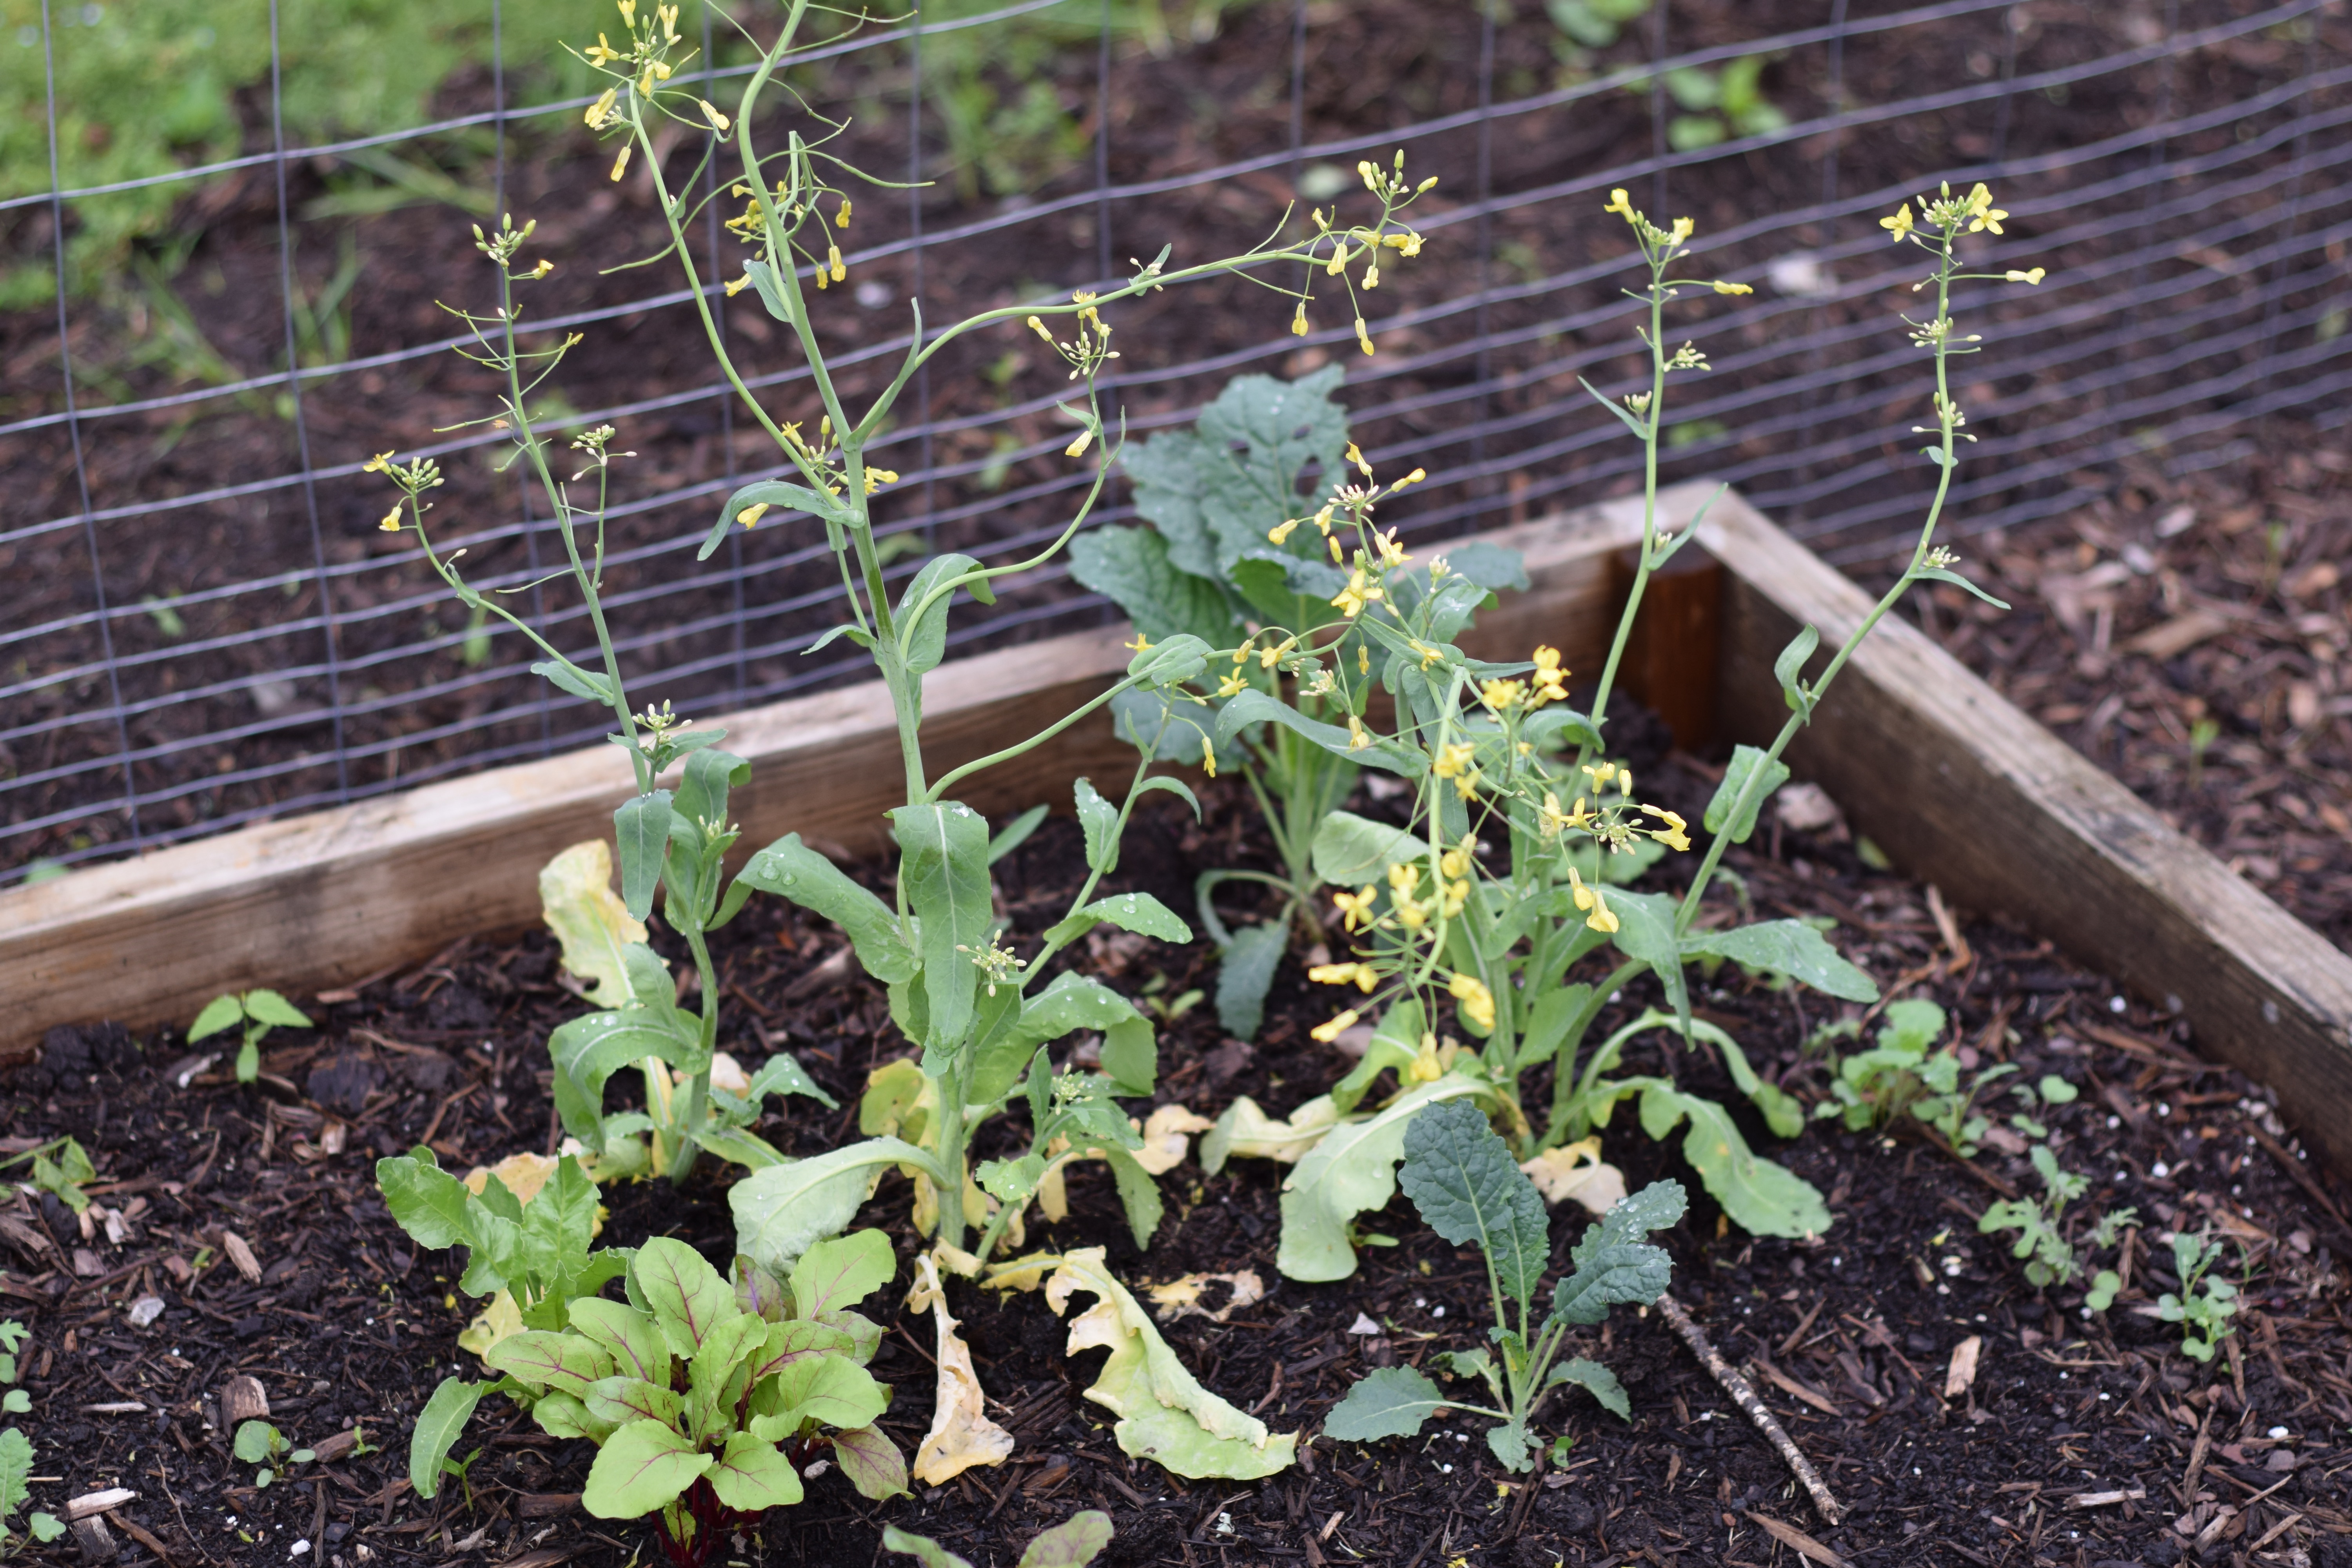
Cauliflower and Broccoli
On each end of the rectangular garden, I planted cauliflower and broccoli seedlings. Both crops were a failure. Something ate all the leaves within one week of planting. Every spring, I swear I will not grow these two vegetables, and every year I cave when I see them at the garden center. I remember the glory days when I grew gorgeous broccoli plants but forget about the pesticides I used to keep insects away. Now that I have free-range chickens, I do not use any insecticides (or herbicides) in my backyard. I often joke that my hens keep me honest whenever I get tempted.

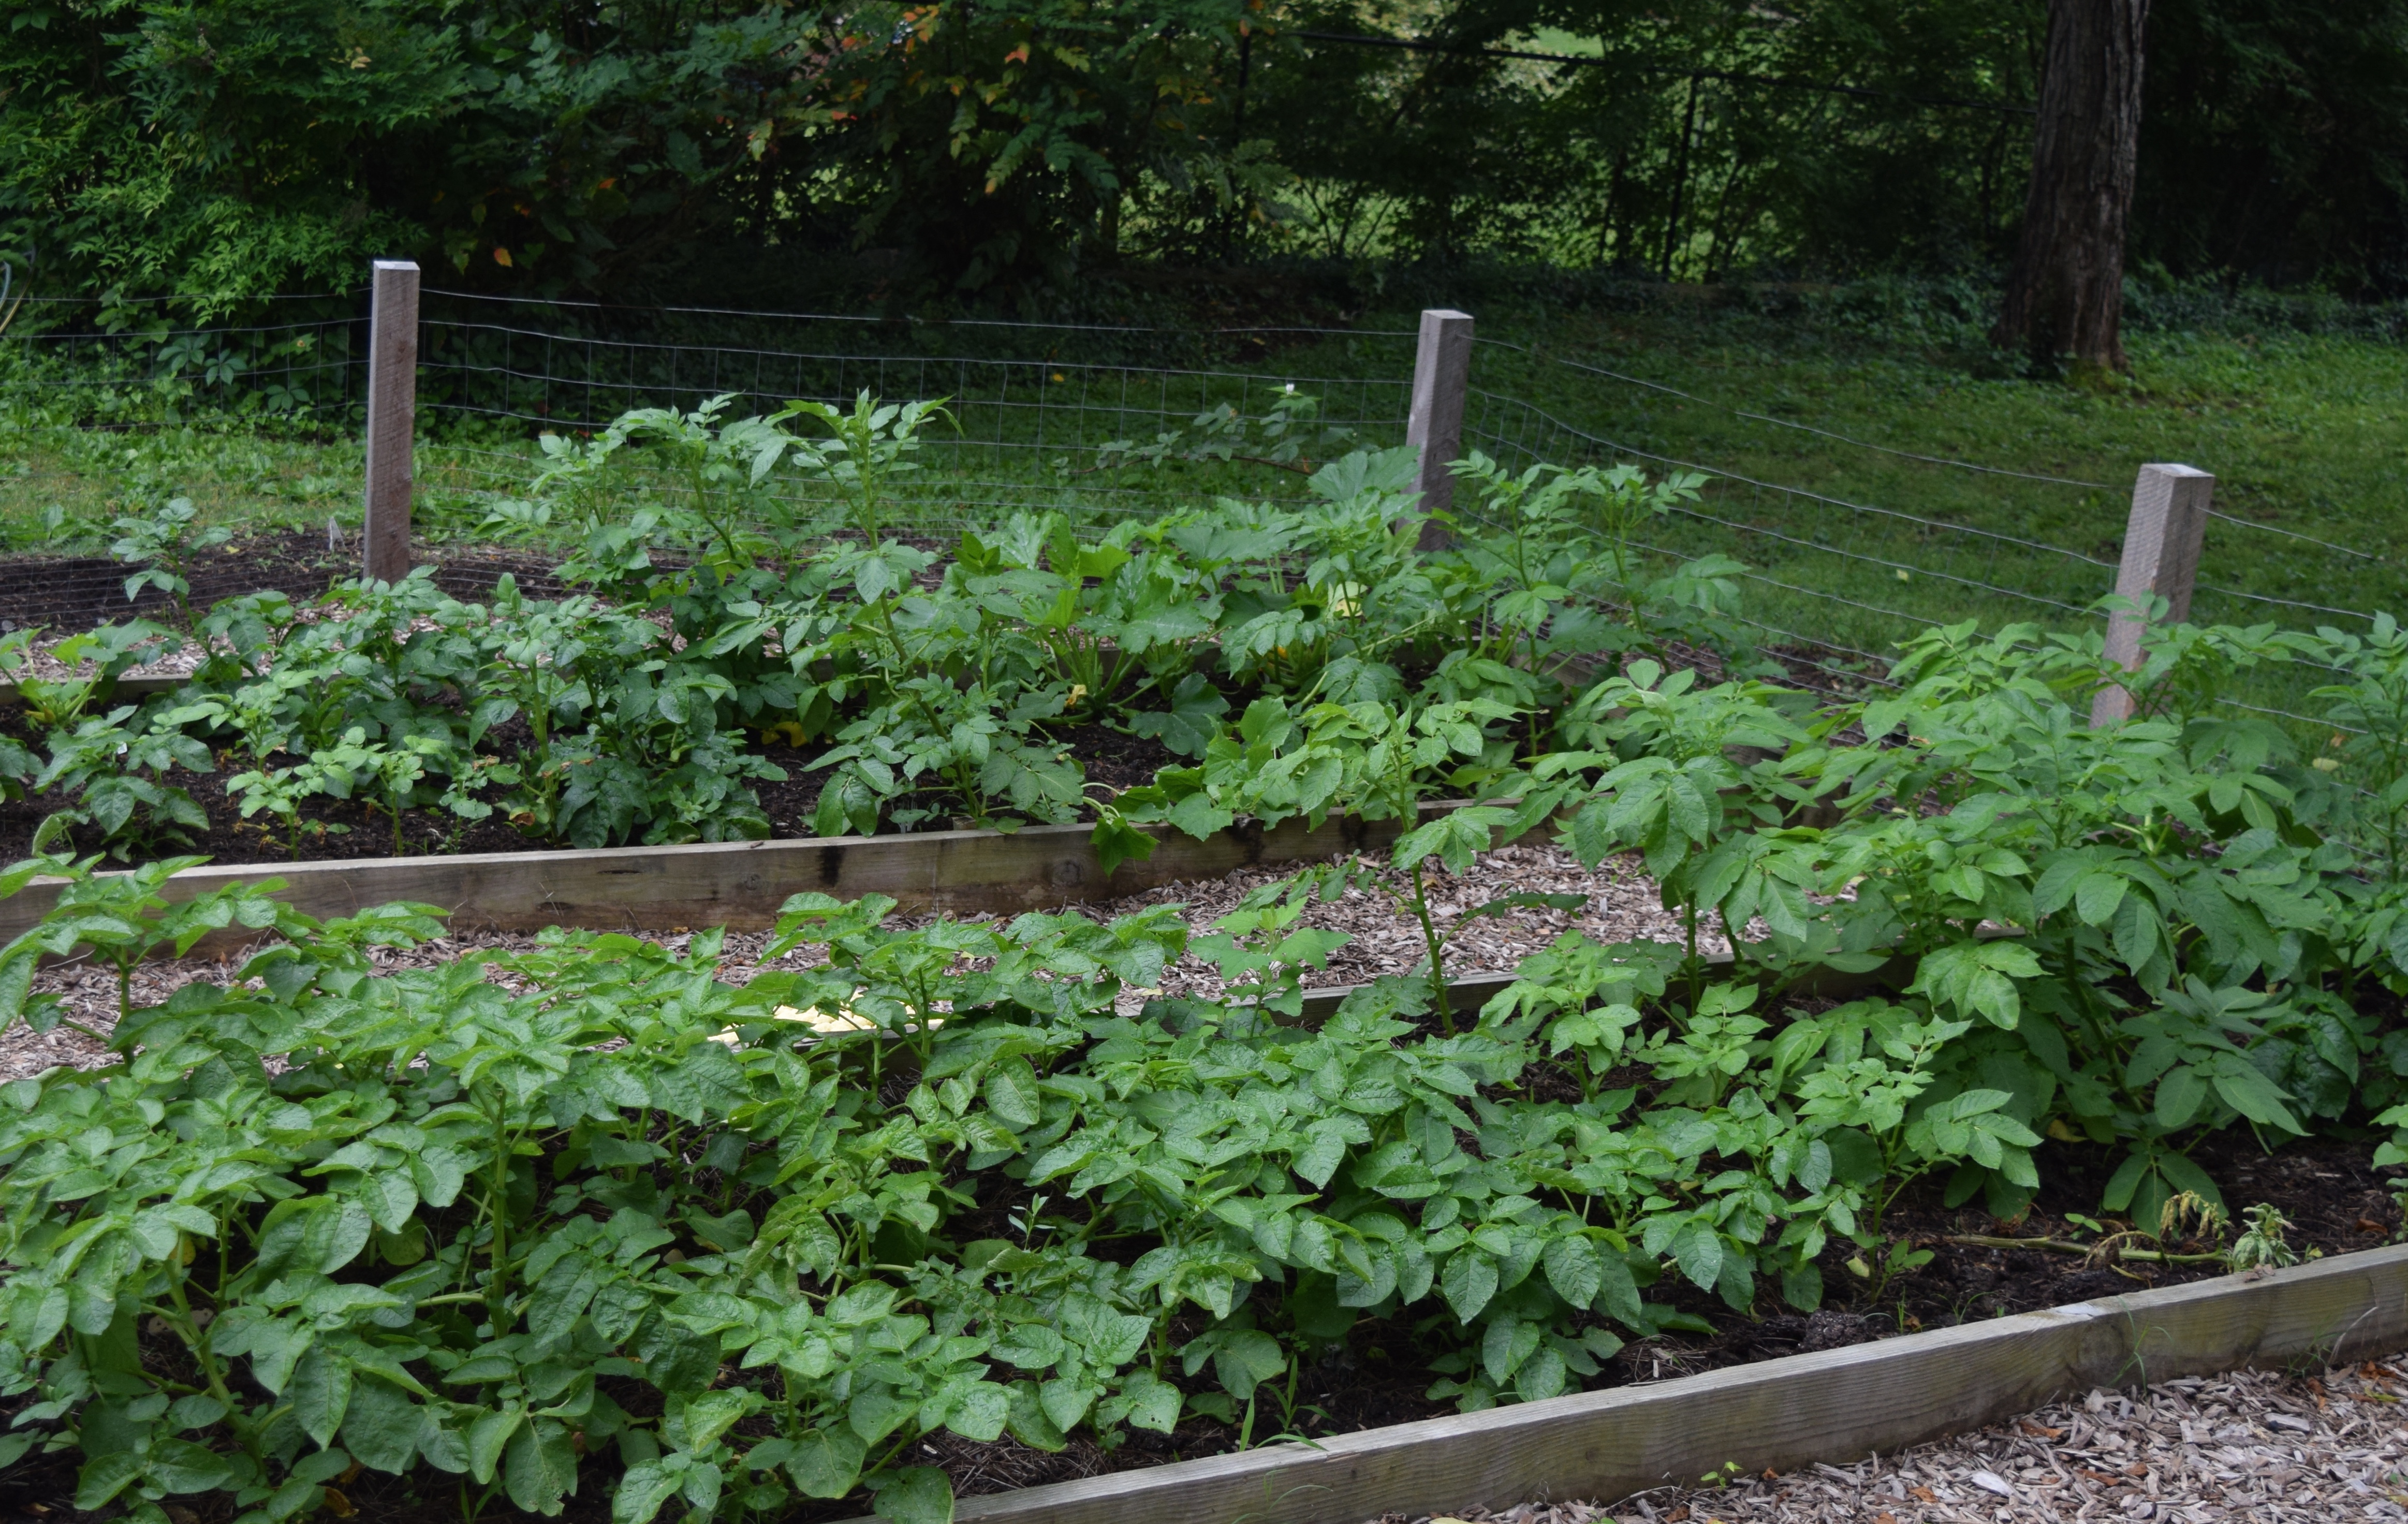
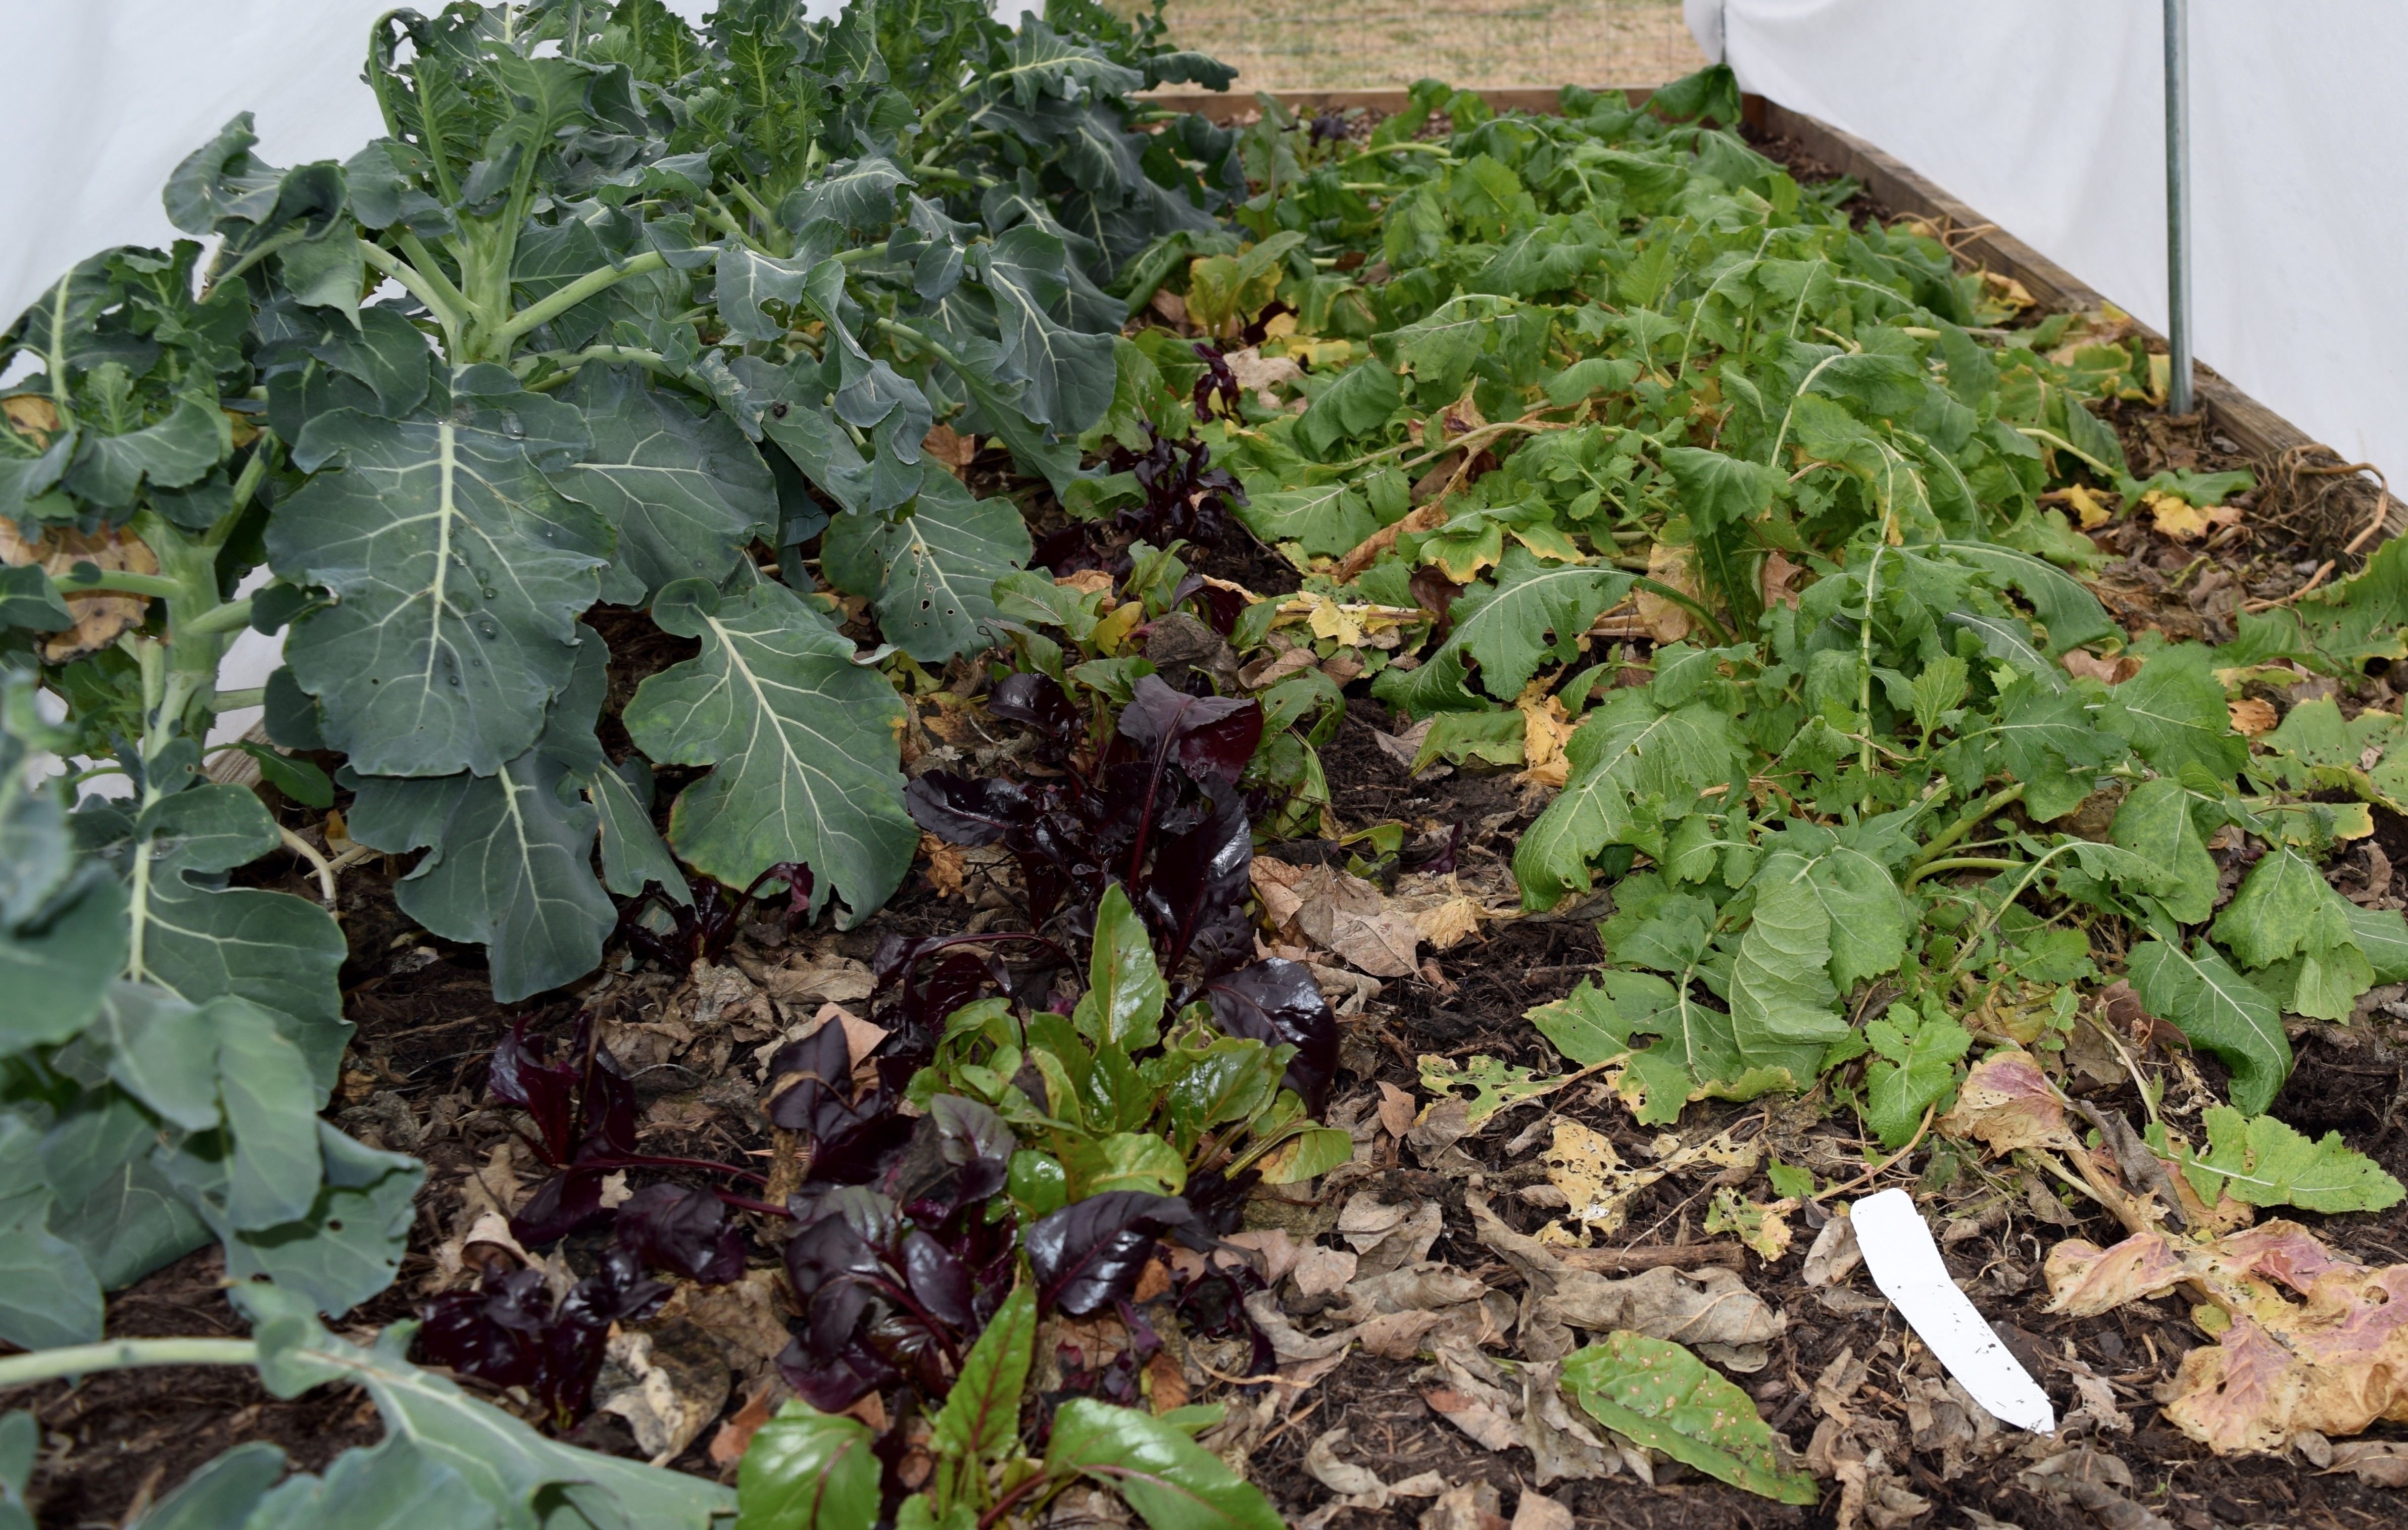
Here is What I Planted in the Back Raised Bed Garden:

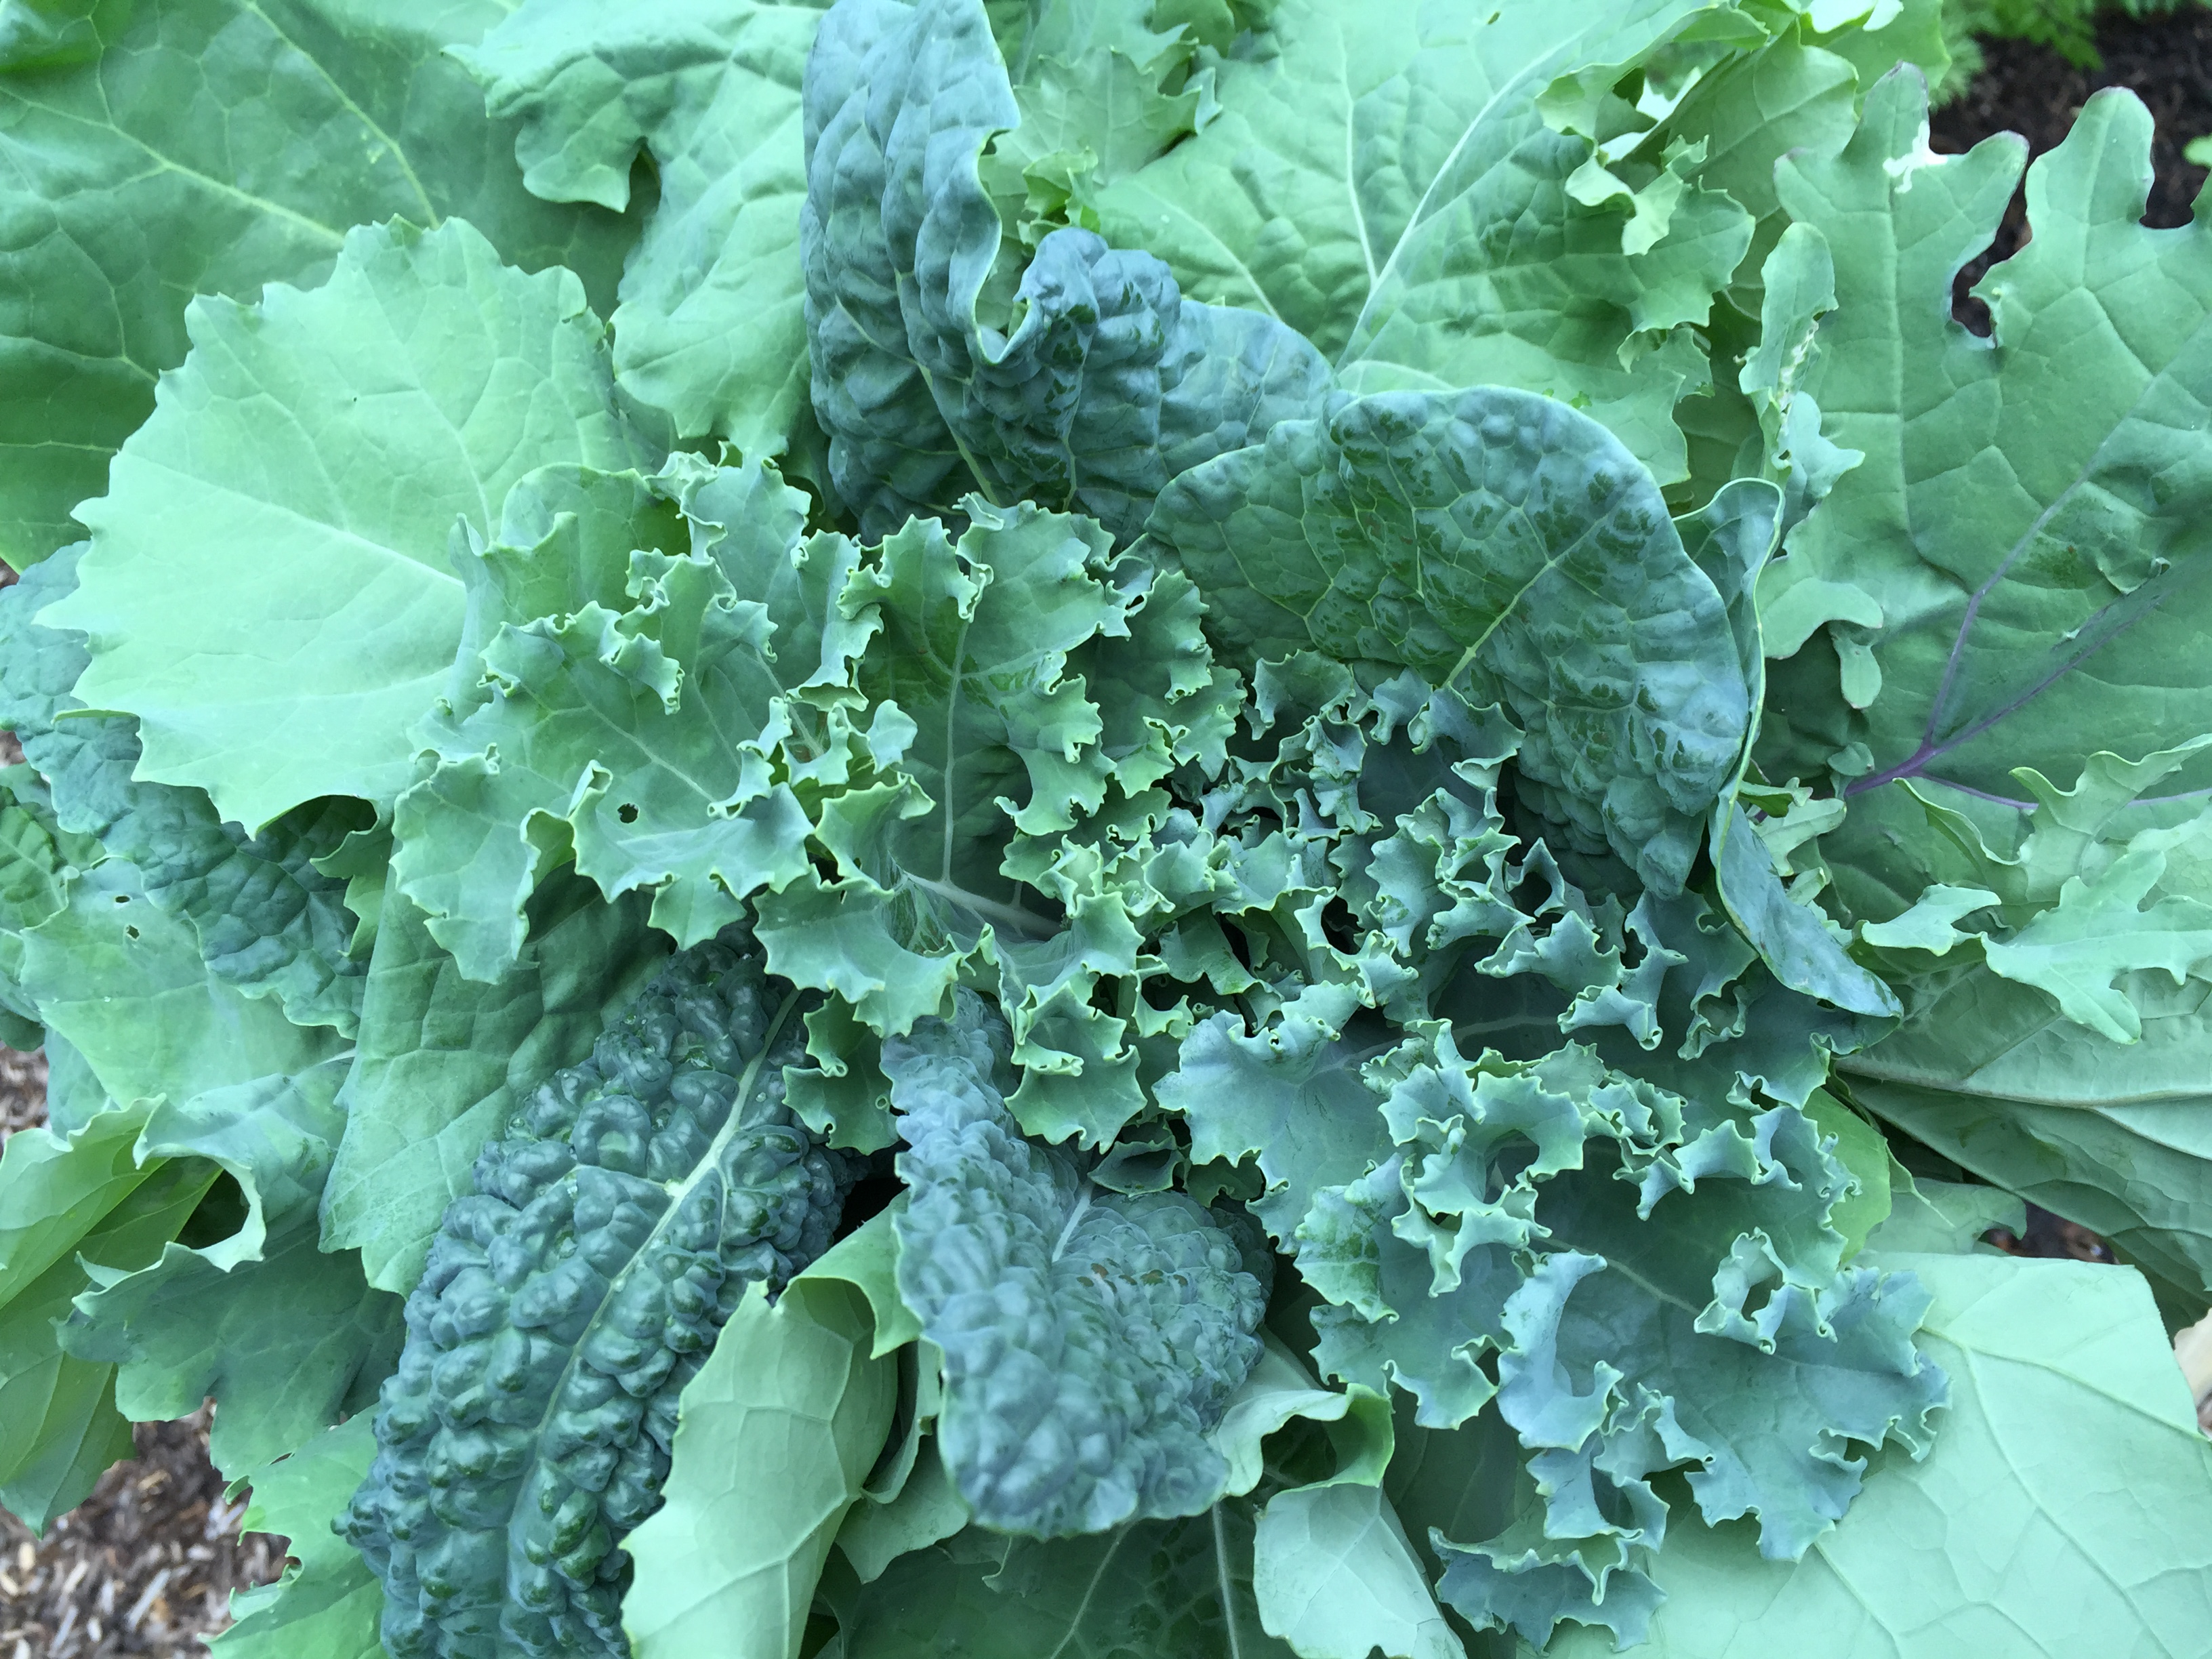
“Premier Blend” Kale
Seeds planted March 23. Days to maturity: 28 baby-size, 55 bunching. Harvesting began in late April.
IMG_0607

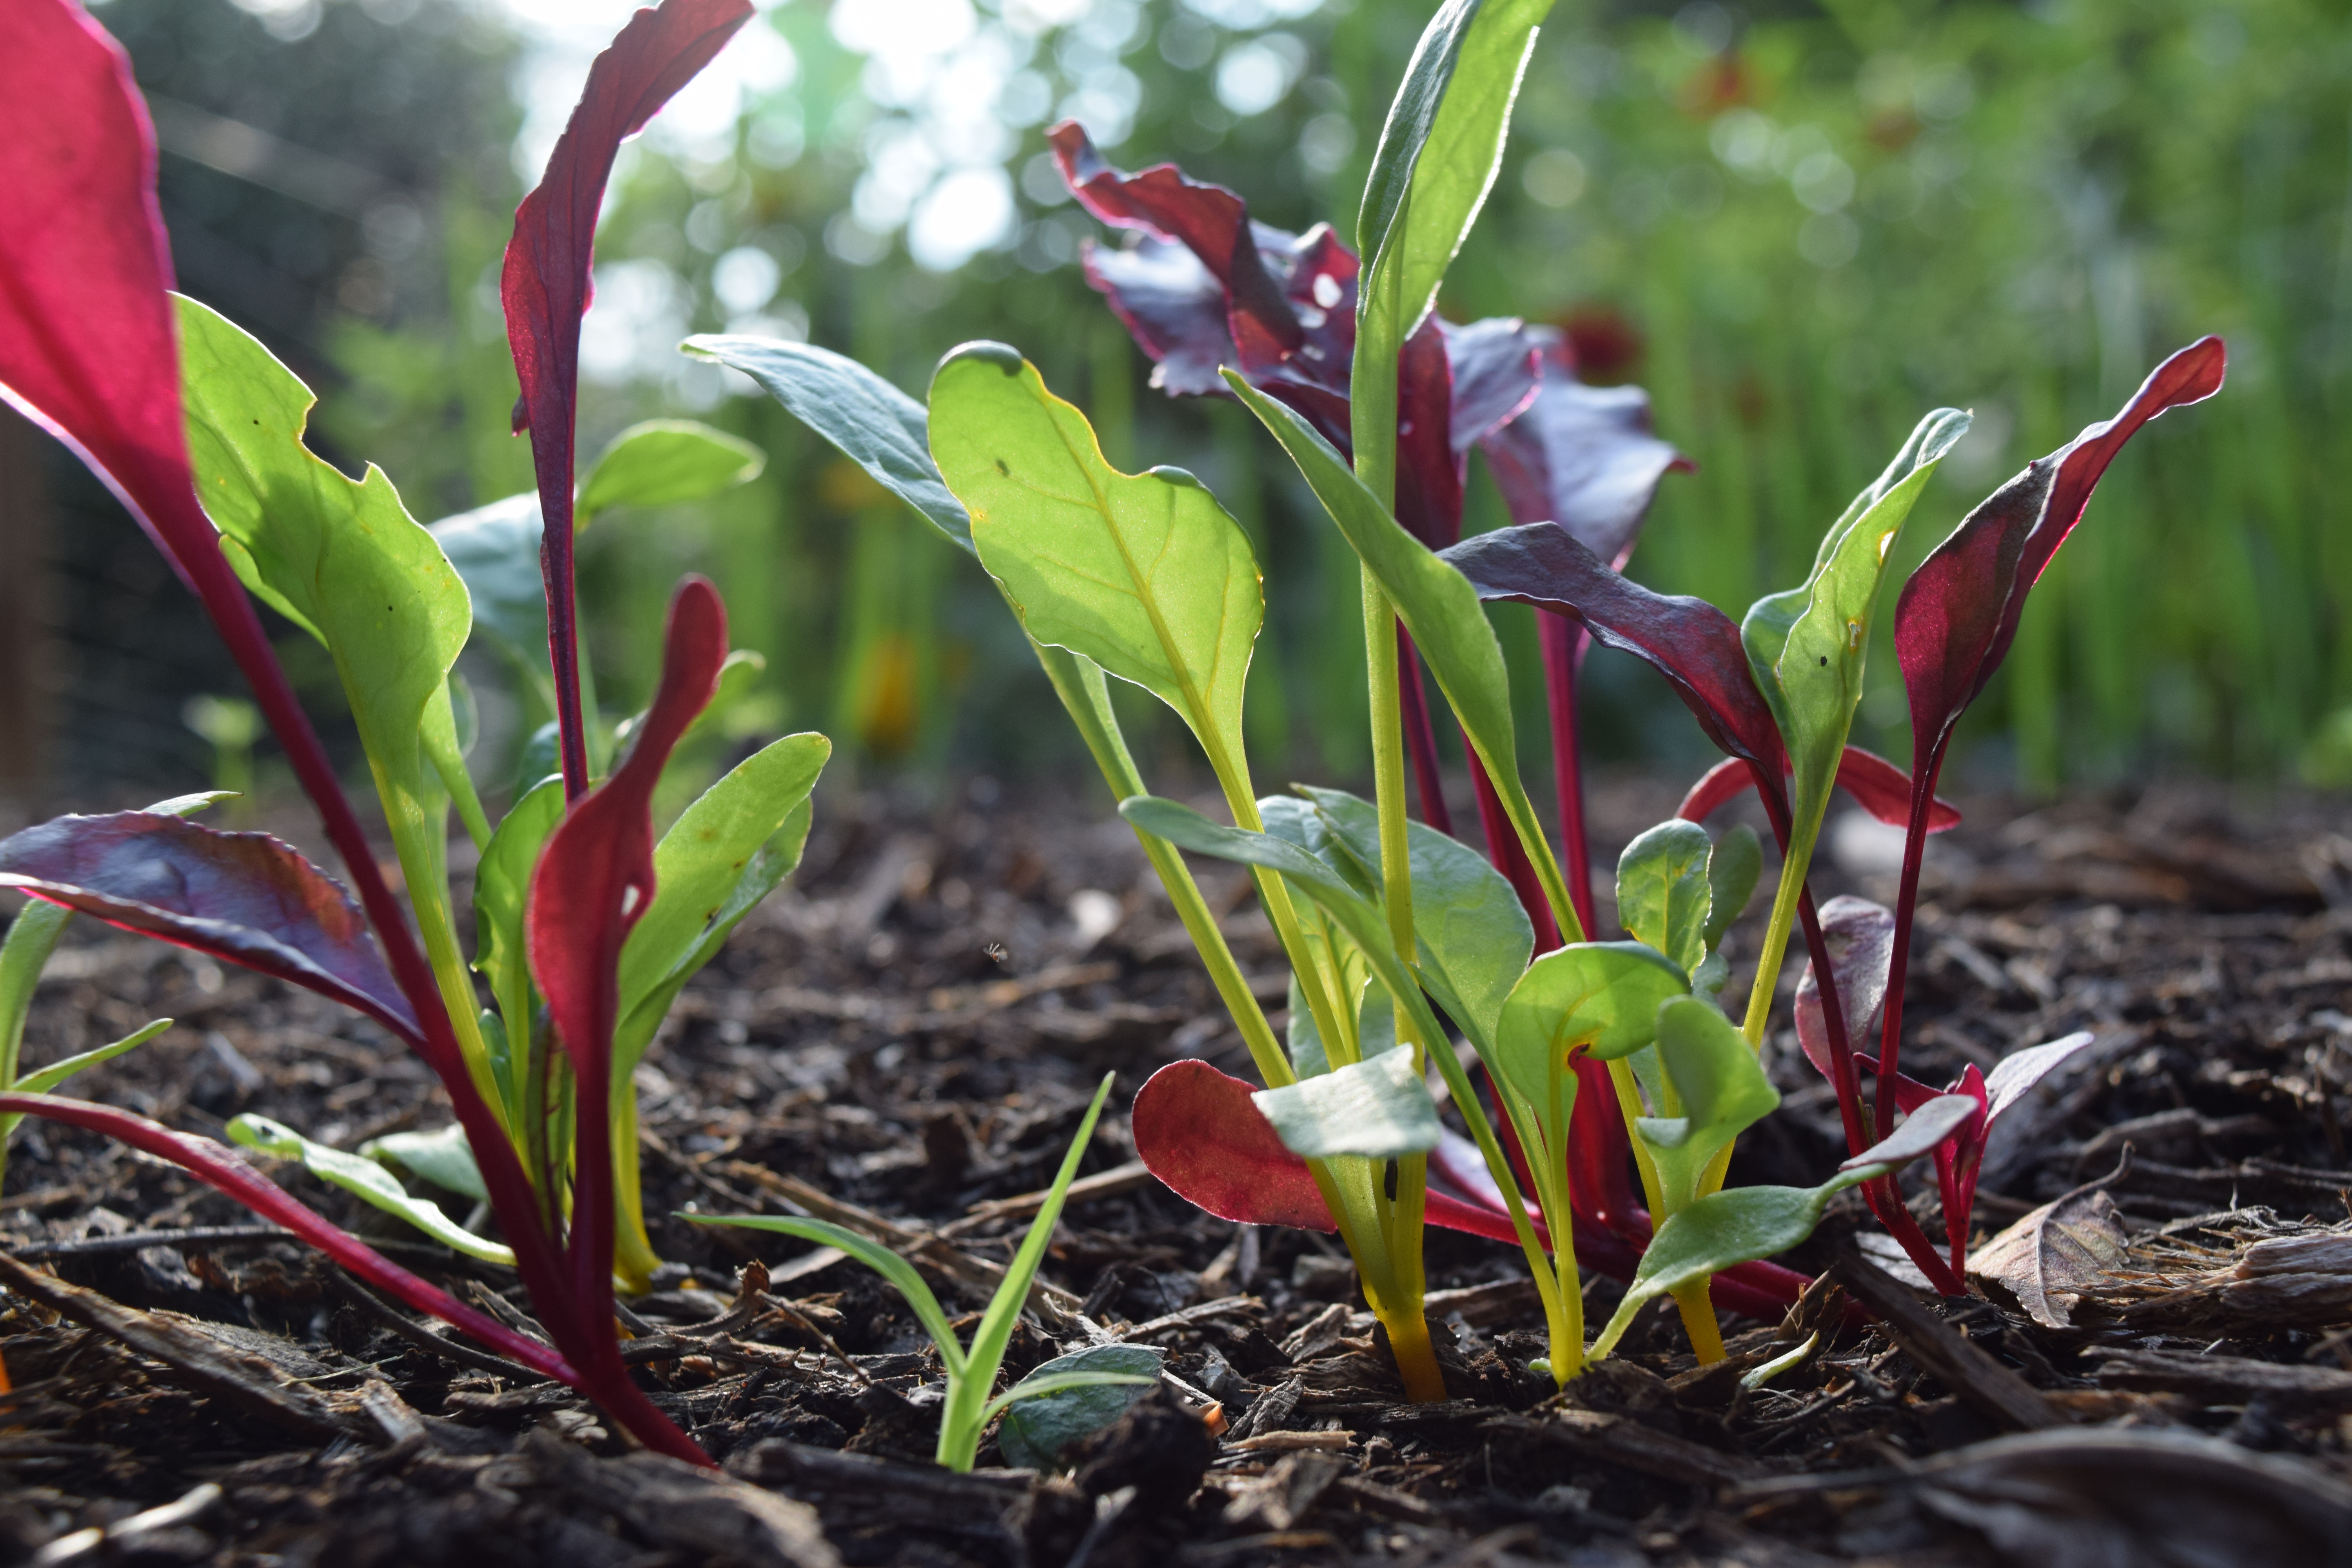
“Bright Lights” Swiss Chard
Seeds planted 3/23. Days to maturity: 28 baby-size, 55 bunching. Harvesting began 5/26
IMG_0588

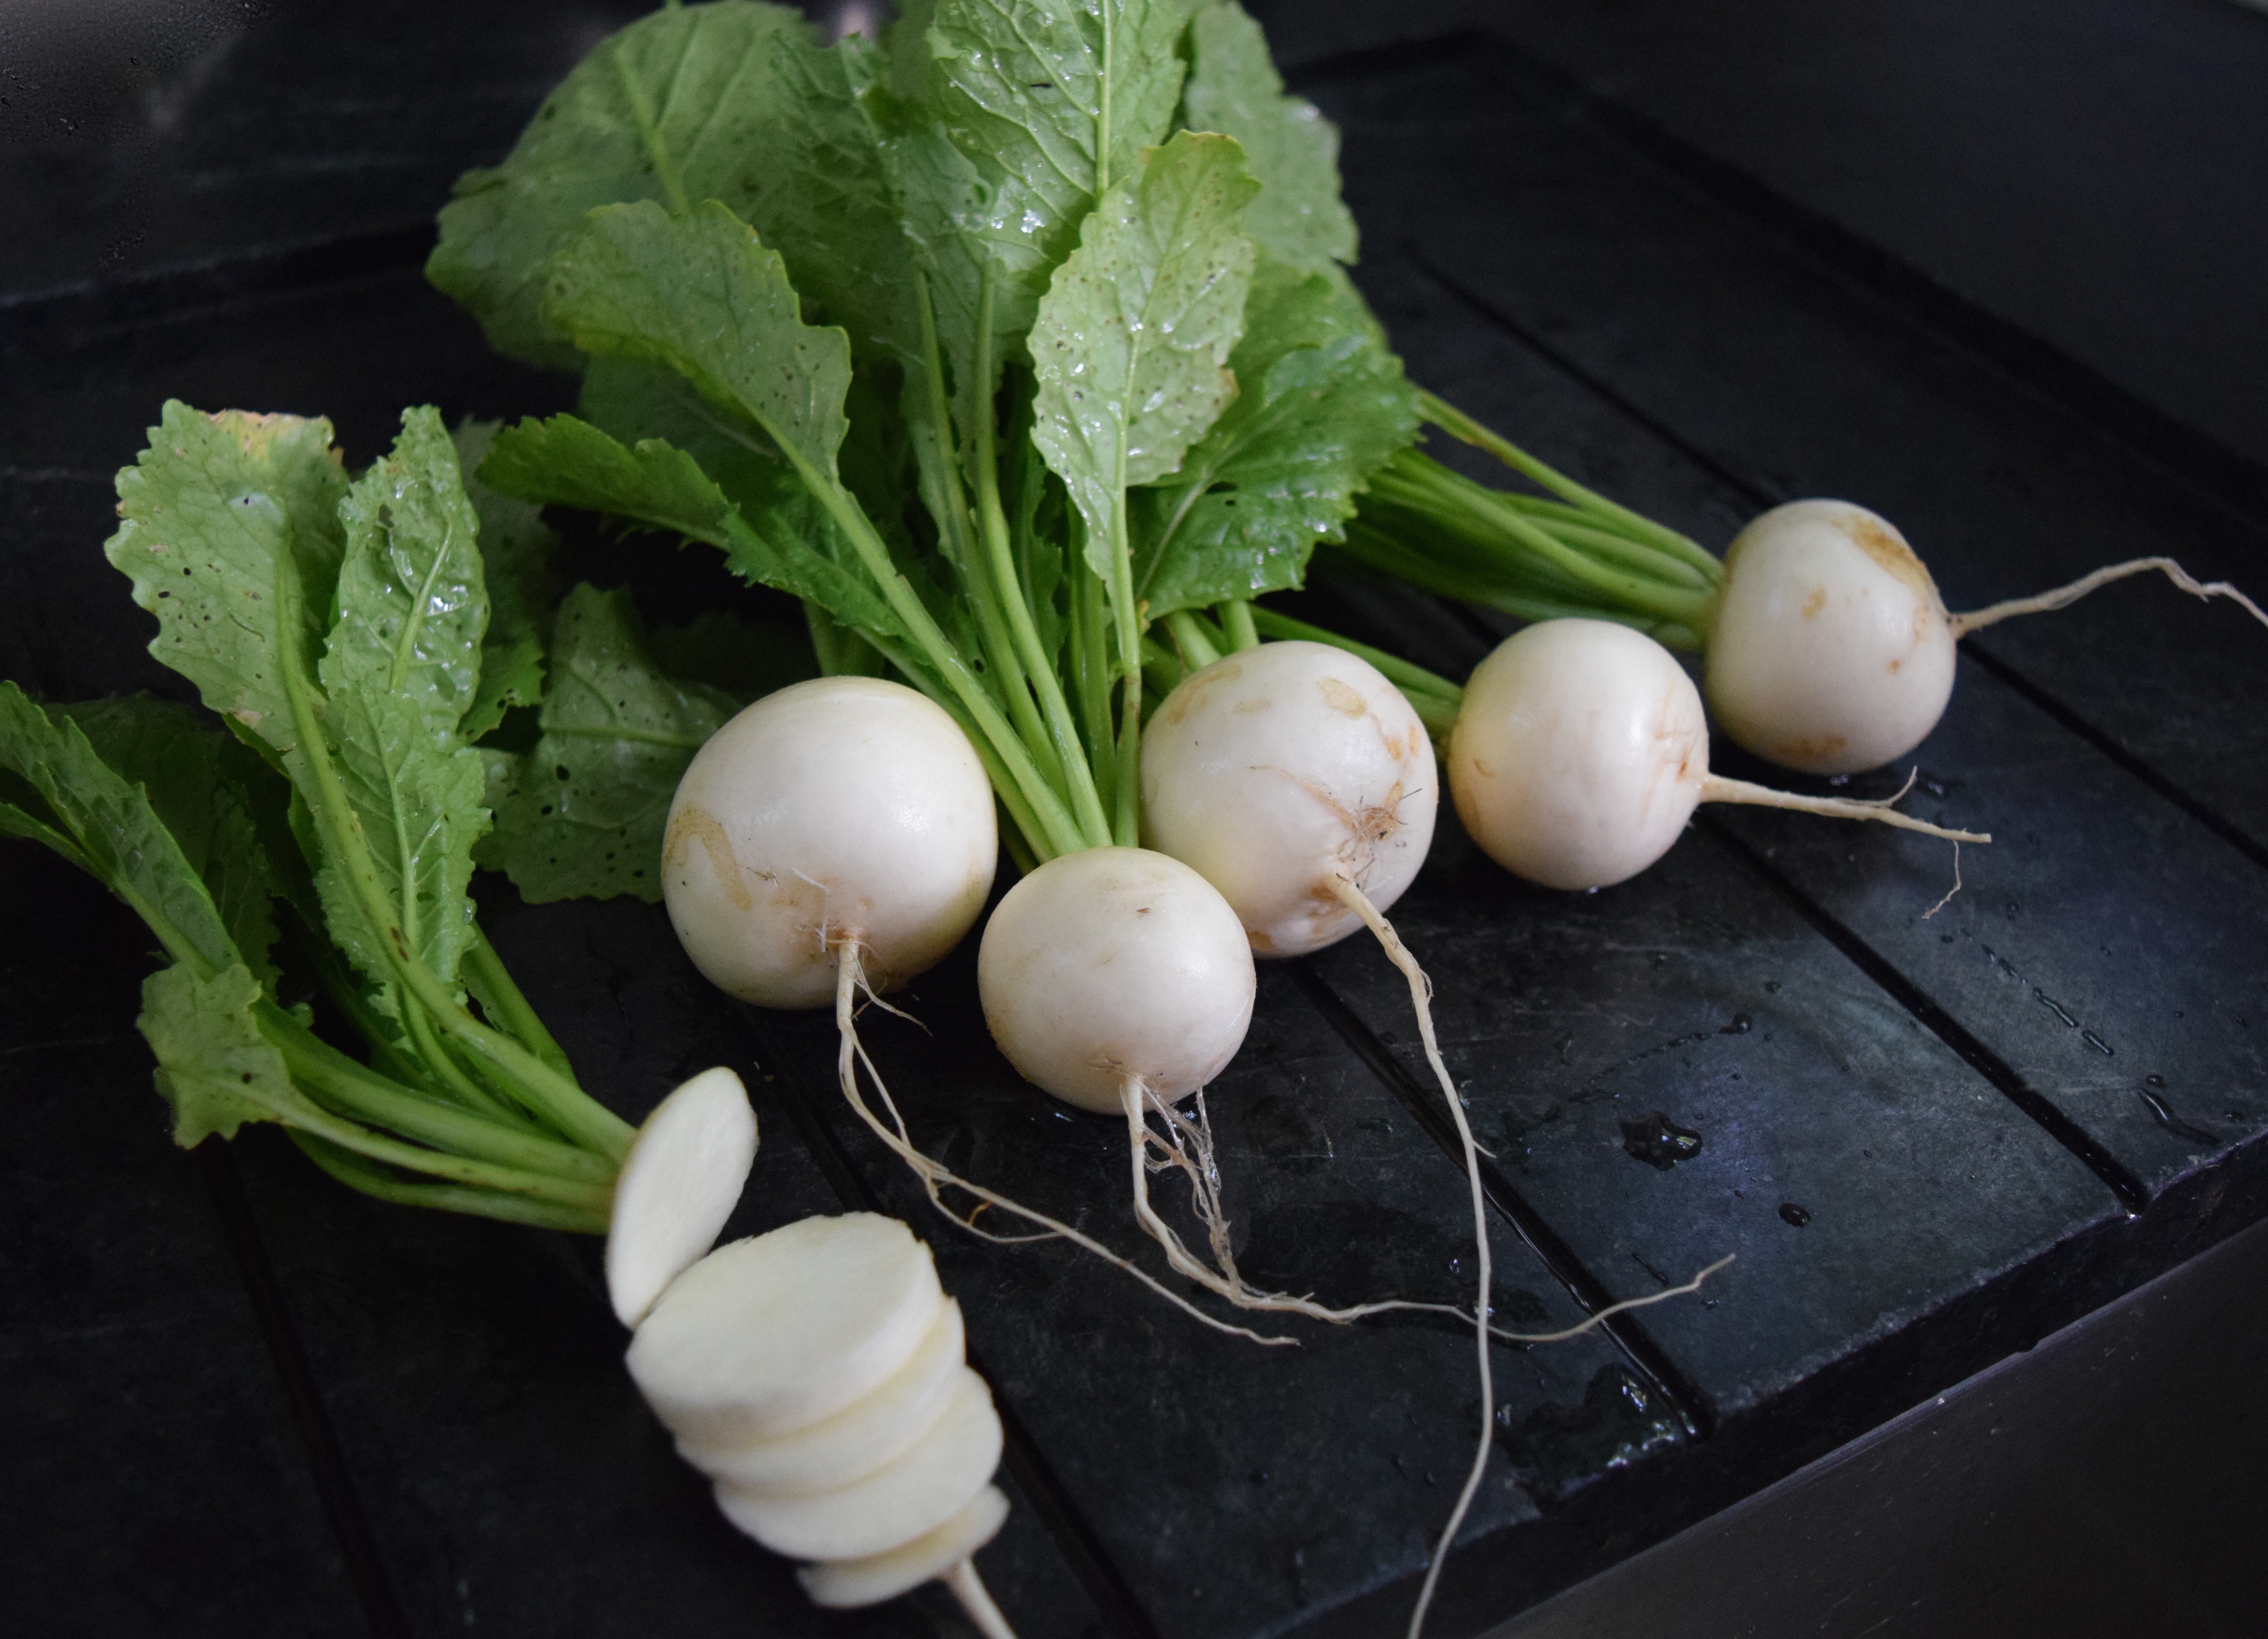
“Hakurei Hybrid” Turnips
Seeds planted 3/23. Days to maturity: 38. Harvesting began 5/26

These small, white, crisp, sweetish turnips have been the tastiest surprise of all the vegetables growing in my garden. When sliced, they can be used as low-cal scoops for dips like hummus. As with other turnip varieties (and radishes), you can cook the greens. I like to sauté them with green onions and garlic in olive oil.

Beets 
Planted as seedlings 4/2. Days to maturity 55. I haven’t started harvesting the beets yet because they are still small. I have, however, been harvesting the beet greens. I should have separated the seedlings when I first planted them for better root ball formation. New gardening rule: all plants with edible roots need to be planted with sufficient space around them for root ball formation!
DSC_0447

“Red Norland” and “Yukon Gold” Seed Potatoes
Sets planted 3/16. Harvesting began 5/26.  To prep seed potatoes for planting, slice the potatoes into 2″ chunks with 1-2 “eyes” each. This is called “chitting.”

vegetable gardening

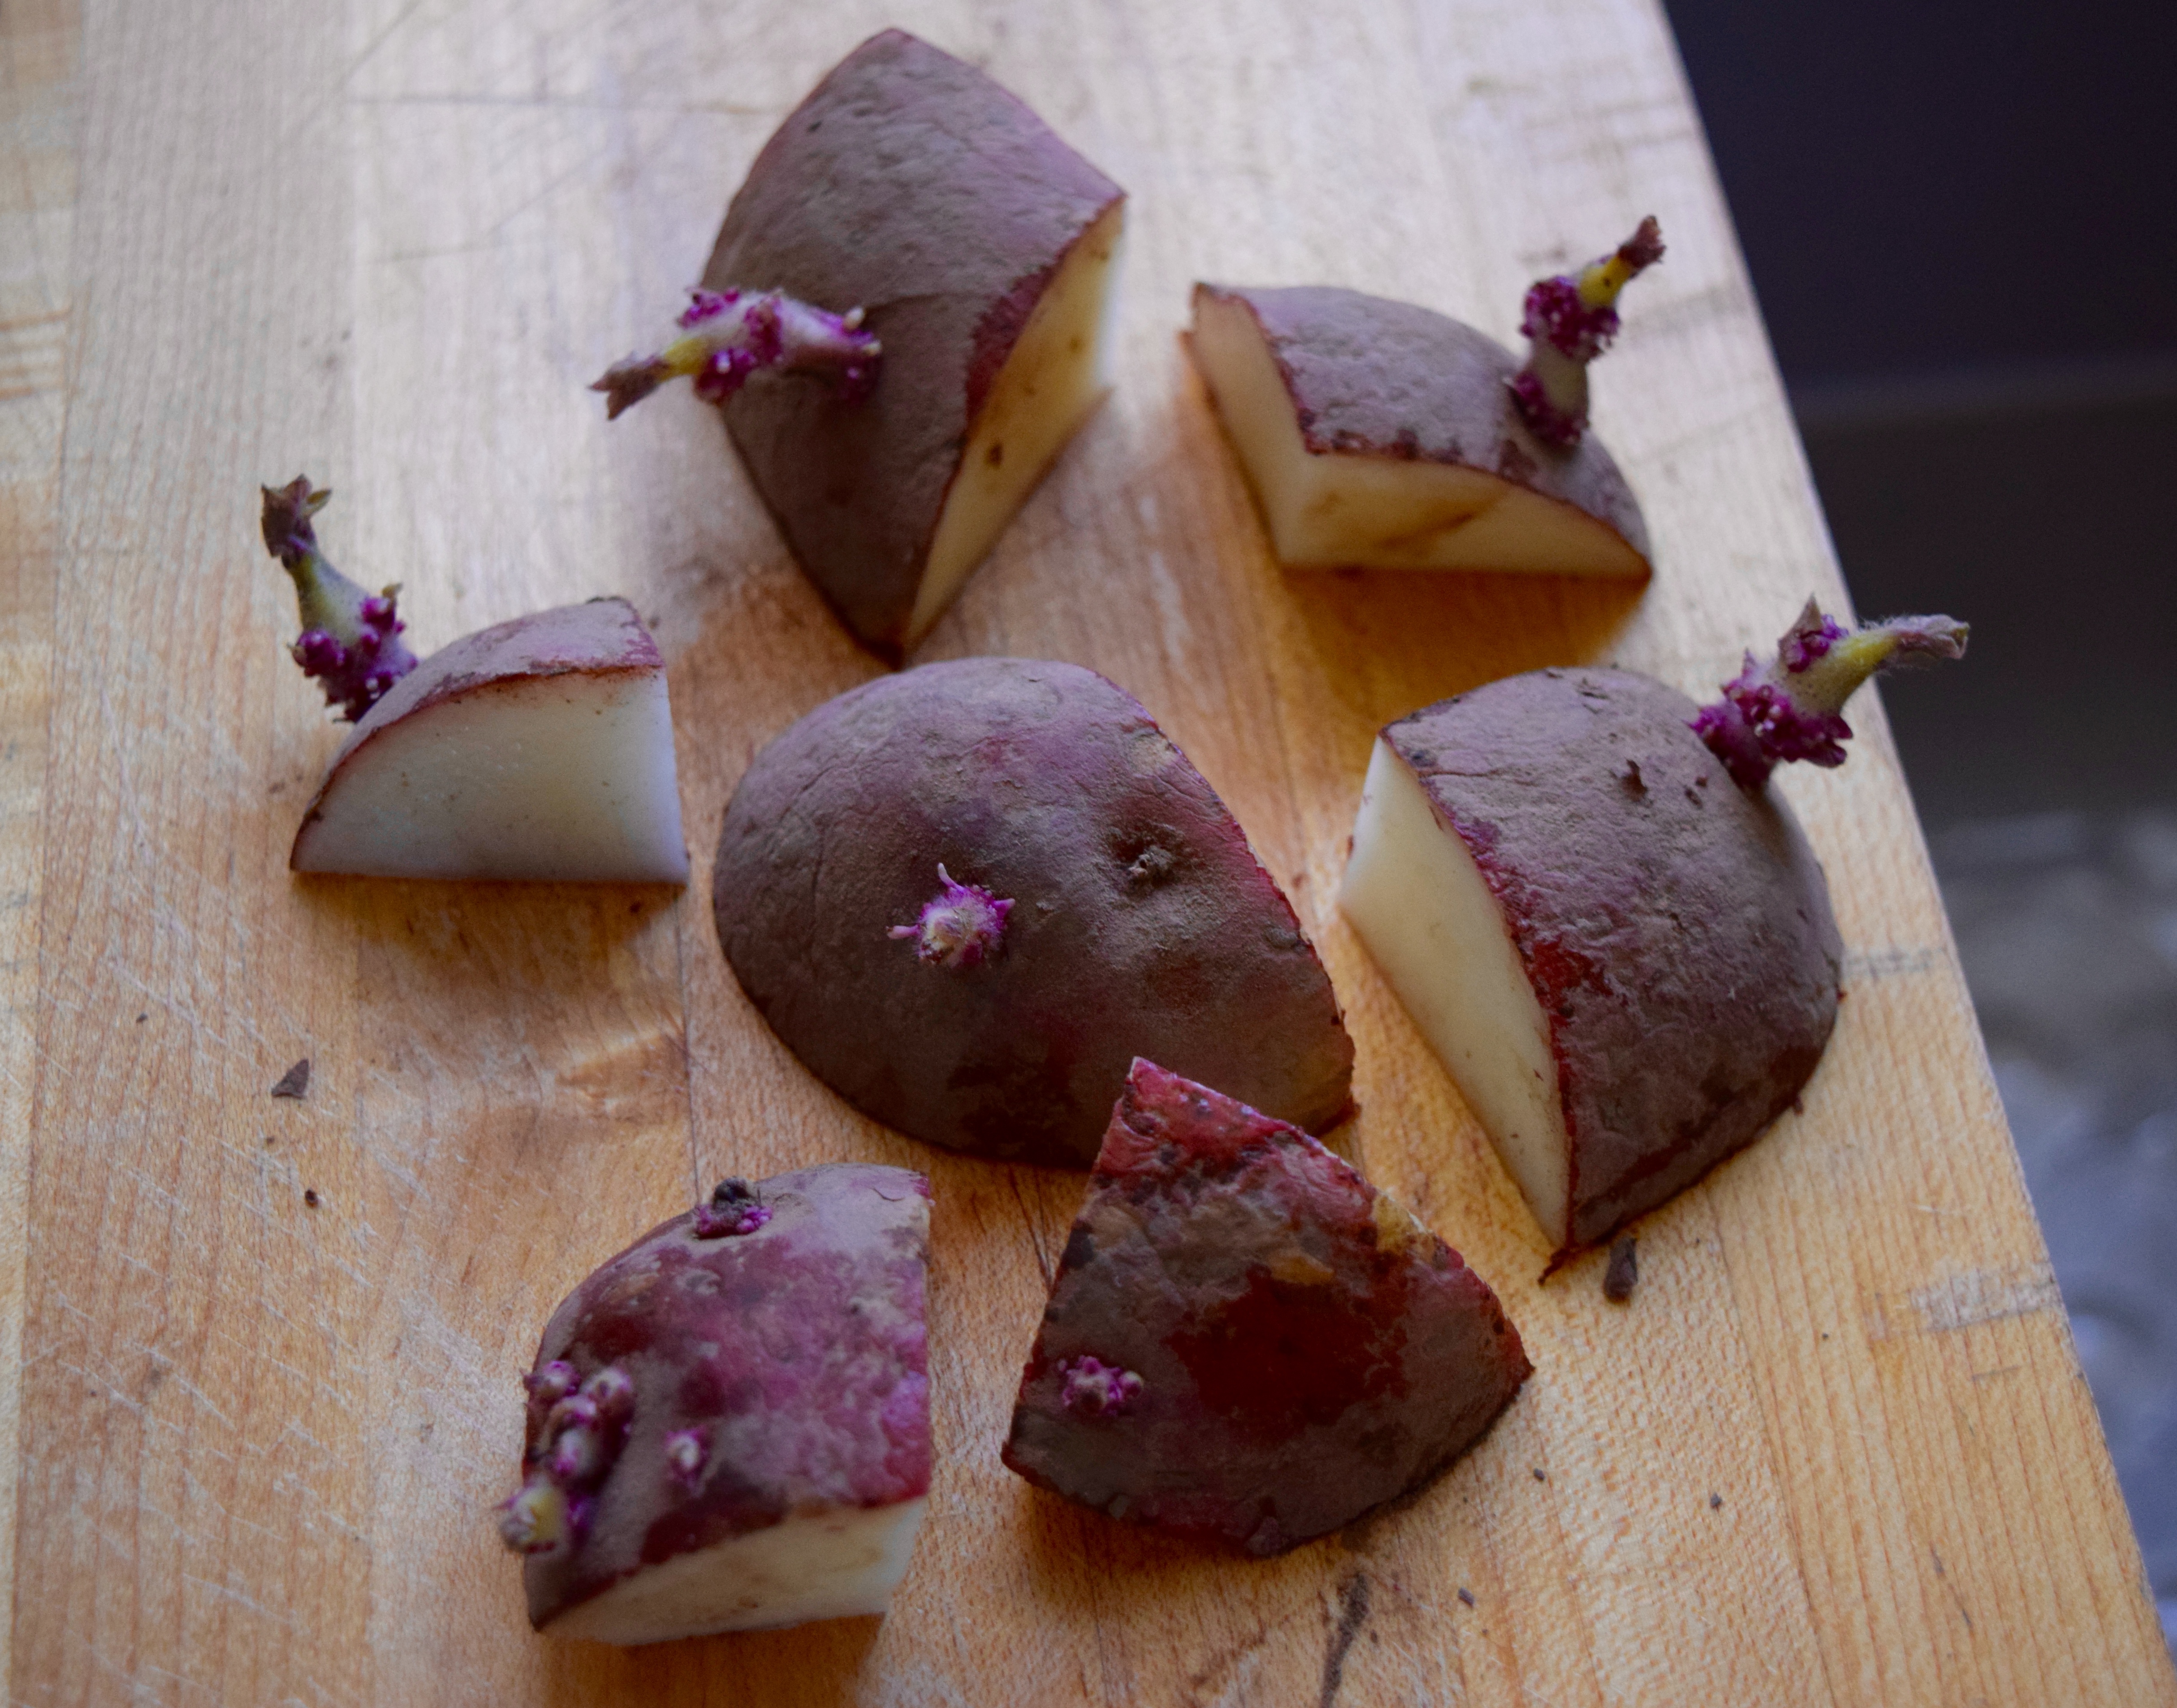
Allow to dry out for a couple of days to form calluses to help prevent sets from rotting in the soil.

vegetable gardening

When the potato leaves turn yellow, it’s time to harvest, but you can start digging for “new potatoes” long before that.

April 4th

May 19th
garden 5/19

May 25th
IMG_0585

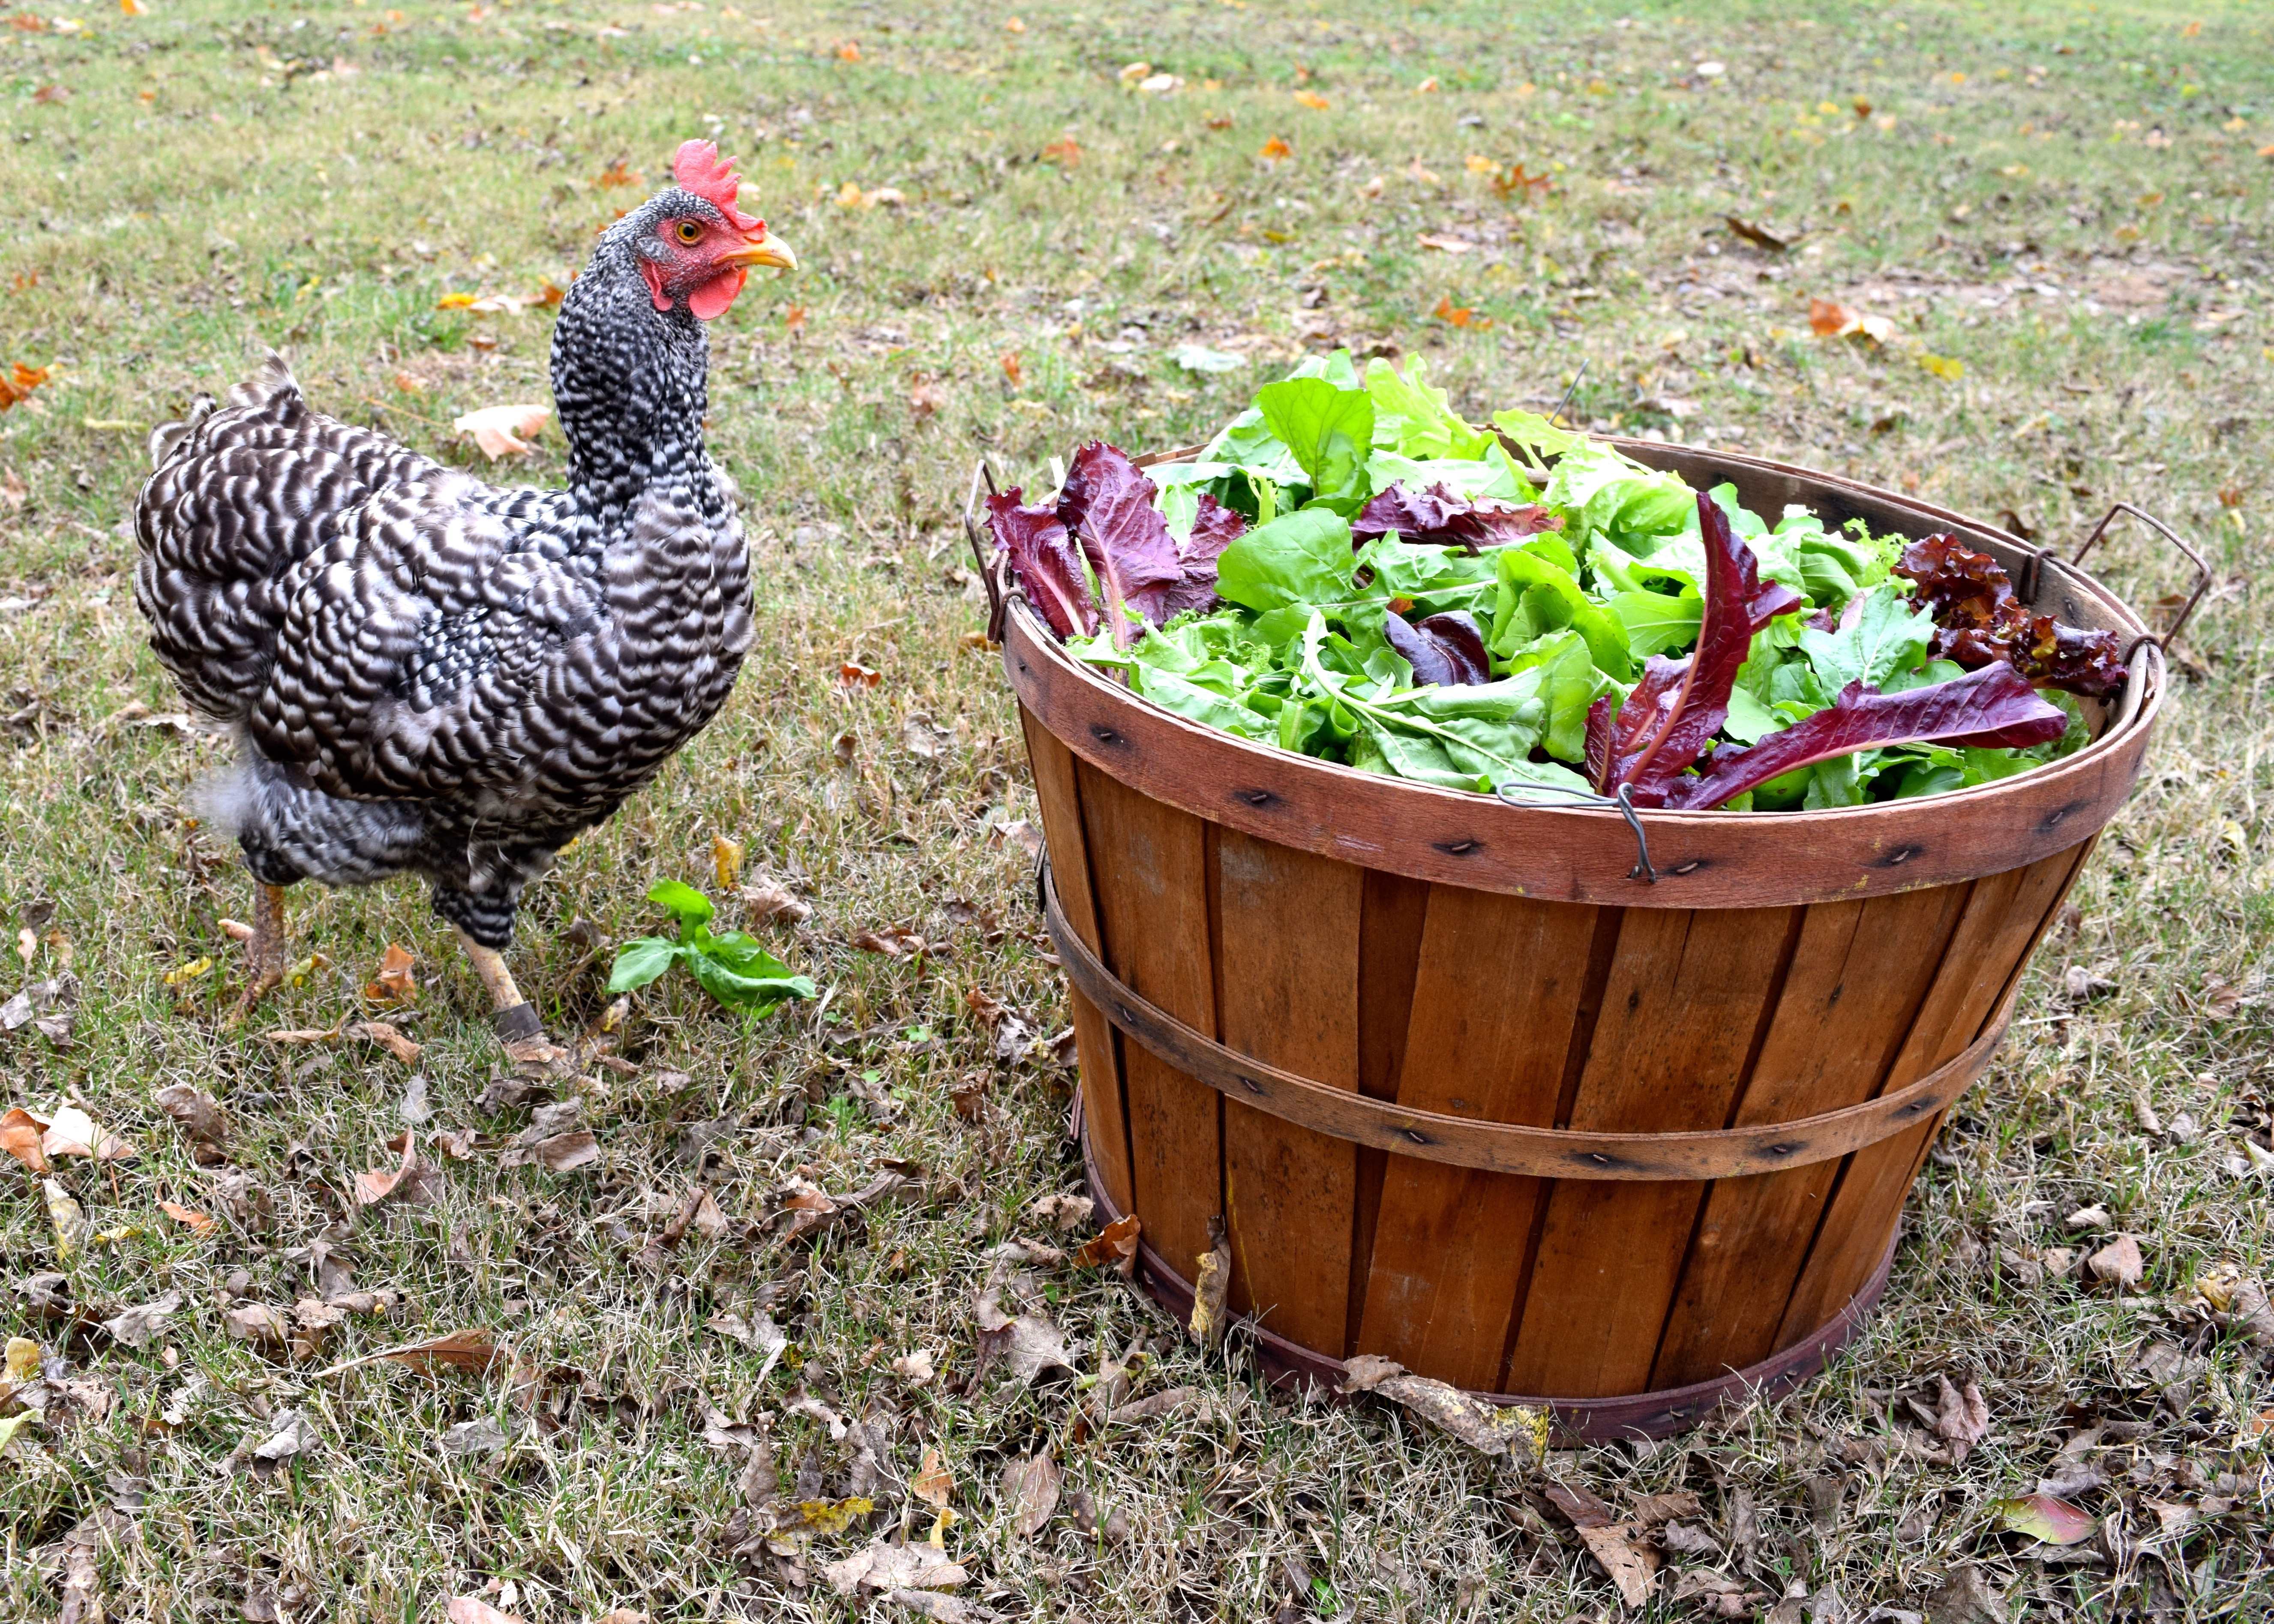
Every bit of this colorful food was harvested on April 17th!

DSC_0504

Related Articles:
Seed Starting in Recycled Milk Jugs @judyschickens
How to Build a 4 x 4 Raised Garden Bed
Spring Porch Pots!
Morning Rounds in the Garden, April
Morning Rounds in the Garden, May
Fall Planting Guide for Your Kitchen Garden
WWMD? A Bucket of Spring Veggies as a Centerpiece
Edible Landscaping with Nashville Foodscapes

LET’S STAY CONNECTED!

Follow Judy’s Chickens on Instagram and Pinterest @JudysChickens.

If you enjoyed this post, consider becoming a follower. Be sure to press “confirm” on the follow-up letter sent to your email address.

© 2014-2021 Judy Wright. All rights reserved. Photos, videos, and text may not be reproduced without the written consent of Judy Wright.

Fall Planting Guide for Your Kitchen Garden

About 10 years ago, we had the deck on the side of our home dismantled. The contractor who did the work asked if he could have the twenty 12 x 2 x 13-foot pressure treated wood boards that had previously supported the deck floor. I didn’t know much about reclaiming used wood, but I remember thinking, If he wants it, maybe I should want it. I had him put the boards under our porch until I could figure out another use for them.

Many years later, I was looking at a barren, sunny area in my backyard and had a vision for a way to get more garden space for my vegetables — make raised beds using those old boards. I had a handyman build four 4 x 13-foot beds for me. Last summer, Jeremy Lekich, owner of Nashville Foodscapes, built two more raised beds and filled all six of them with his gorgeous, dark, chocolate-colored compost. Next, Jeremy and his team built a beautiful, simple, chicken-proof fence around the beds.

My compost bed is located behind the white picket fence in the photo above. The chickens have open access to it and it’s the first place they run to when I let them out in the morning.

Here is a photo of the same garden taken September 25, 2015

img_1900

I love the way Jeremy used inch-thick cardboard to smother and kill the crabgrass underneath the woodchip-covered paths in the new garden rather than using chemicals to do the same job. Now that I’ve become more educated by the fabulous education department of The Cumberland River Compact regarding water quality, runoff and watershed issues, I’m much more conscious about the use of chemicals that can leach into our soil and eventually into our ground water.

fall garden

On August 24, 2014, I planted a fall vegetable garden in three of the raised boxes with the intention of using hoops and agriculture cloth to protect the beds as we moved into winter. It was one big experiment and it was fun. First of all, I loved checking the garden beds every morning to see if seedlings had pushed through the dirt and unfurled their first leaves. Just knowing they were under there getting ready to pop kept me in a state of happy anticipation; I have been known to get on my hands and knees to inspect the earth in search of those first glimmers of green. Later, as it became colder in the winter, it was thrilling to go to the back garden and pick green onions and spinach from those same beds when a recipe called for them. Even with this year’s harsh winter: an early freeze in November, another one in January, and then a two-week freeze in February, many of the vegetables survived and perked up in March for an abundant spring harvest.


For those of you who are thinking of planting a fall/winter garden, I kept a photo journal of the project knowing a picture is worth many words. For each raised bed, I used four sequential pictures of how the plants looked as the weather temperature changed.

The raised bed series of photos were taken on 9/4, 10/9, 12/31 (taken from inside the covered garden, opposite direction), and 3/15, the day I took the protective cloth off.

Raised Bed #1, Root Vegetables
Left to Right: garlic, beets, garlic, carrots, green onions, leeks

fall garden  DSC_0117 winter vegetable garden  vegetable garden

Garlic
Garlic cloves planted 9/15. Only about 15% of the plants survived the February freeze. The ones that survived are still forming their bulbs. In March, I added more garlic cloves. They should all be ready for harvest in August. Next year, I will mulch them with straw.

IMG_7567  IMG_0158

“Colorful Beet Mix”
Seeds planted 8/24. We started snipping leaves for salads in October. None of the plants survived the February freeze. Next year, I will mulch them with straw.

fall garden  DSC_0962

Green Onions (aka Scallions or Spring Onions)
I planted two rows of onion “sets” on 9/1 and two rows of onion seeds on 8/24 (on the right side). If you look closely, you can see the faint strands of green seedlings. Unfortunately, the young seedlings didn’t make it through the winter. We started harvesting green onions from the sets in November and continue to do so even now.

fall garden  DSC_0950

“Kaleidoscope Carrots”
Seeds planted 8/24. Harvested through early May. The carrots had beautiful color, but were thin and not as flavorful as I had hoped.

fall garden  Version 2

Leeks
Seedlings planted 9/15. Harvesting now.

IMG_0565  DSC_0113

Raised Bed #2, Greens
Left to right: many lettuce varieties, mache, and spinach

fall garden  Fall garden winter vegetable garden  Veg garden

“Mesclun Lettuce Mix”
Seeds planted 8/24. This was the first seed to germinate in my fall garden. I pretty much watched it unfurl.

fall garden  fall garden

“Gourmet Blend Lettuce Mix”
2 rows of seeds planted 8/24. By 9/18 only a third of the seeds had germinated. A huge difference from the Mesclun Mix on the left in the second photo.

fall garden  fall garden

On 9/22  I bought “Salad Bowl Mix” seedlings and filled in the empty spaces created by the spotty germination of the Gourmet Blend Mix. We started eating lettuce by mid-October. Surprisingly, many of the red oak leaf lettuce plants survived the hard freezes. Note to self, plant more red, oak leaf lettuce plants in the fall!

fall garden  greens fall garden

“Bloomsdale Spinach”
2 rows of seeds planted 8/24. Only half the seeds germinated so I consolidated the two rows into one. We harvested the Bloomsdale crinkly spinach leaves all winter. The plants started to bolt May 3rd and I pulled them.

Seeds planted. new garden beds  vegetable gardening

“Hybrid Smooth Leaf Spinach” 
Seeds planted 10/2 to the right of the Bloomsdale spinach. We continue to harvest this variety now. Note those smooth leaves. Just sayin’.

 Fall garden  bridget soup

Mache (aka Corn Salad)
Seeds planted 10/2. Harvested March-April. Plants started flowering in late April and I pulled them. Mache is a good cold weather lettuce alternative.

greens new gardens plants  

Raised Bed #3, Root Vegetables with Edible Tops
Left to right: Broccoli, beets, turnips, radishes

fall garden  DSC_0655  winter vegetable garden  Veg garden

“Sparkle” & “Champion” Radishes
Seeds planted on 8/24. The crop failed because radish seeds were planted too close to one another and a ball couldn’t form. I should have thinned them out when they were seedlings. At the time, I didn’t think thinning mattered. I’ve learned my lesson. The same problem happened with the turnips — no ball formation. The crop wasn’t a total failure because I was able to harvest greens from each plant. Yes, you can eat the tops of radishes. Some varieties taste better than others.

fall garden  

“Purple Top White Globe Turnips”
Seeds planted 8/24 (on left). Started harvesting turnip greens just one month later! As mentioned above, the plant did not form a turnip ball in its root. Instead, the roots were long and thin as in the picture above.

fall garden  fall garden

“Colorful Beet Mix”
Seeds planted 8/24.  None of these plants survived the freeze.

Broccoli
Seedlings planted 10/2. The broccoli did not make it through the freeze.

What I learned
-I now know which plants are the most cold-hardy: spinach, mache (corn salad), green onions, leeks, and carrots. I think the beets, kale*, and garlic could have made it, had I mulched them with straw.

– When you plant tiny seeds, such as radishes and turnips, plant them separately, each a few inches apart, OR, direct seed them haphazardly and thin them as they mature, OR, as The Barefoot Farmer suggested to me, mix them with sand and scatter them in the row.

-Kale* I had a 4th bed with kale in it that I threw a tarp over at the last minute when it turned cold. It didn’t stand a chance with the blue tarp, as the sunlight was totally occluded. This fall, I will do a better job of planning which plants I put under the protective cloths. For example, I’d like to add a few hardy herbs to the mix, such as rosemary, parsley, and sage.

-When I bought the protective cloth, I didn’t plan on the extra amount of cloth it would take to cover the ends of each “tunnel” which was about another six feet of fabric per tunnel. I covered the first two beds just fine, but ran out of fabric by the third tunnel. That last bed, the one with the broccoli, had open ends and nothing survived in it because of the draft. If you are purchasing protective cloth for the winter, remember to add extra fabric for the ends. I bought the ag cloth and hoops, as well as many of the seeds and seedlings, at Gardens of Babylon next to the Farmers Market.

DSC_0266

How cold was it?
Even the eggs froze!

Frozen egg  IMG_7034

I harvested this basket of greens on November 12th, the night before our first hard freeze.

chicken greens fall garden chicken greens fall garden chicken greens fall garden chicken greens fall garden

Other Posts About Farming
Spring Planting Guide for Your Kitchen Garden
Family Dirt
Herb Porch Pots!
How to Make Grape Jelly (and grow the grapes)
WWMD? A Bucket of Spring Veggies as a Centerpiece
How Canola Oil is Made (from plants grown locally)
The Tobacco Barns of Trigg County


LET’S STAY CONNECTED!

Follow my photos of vegetables growing, backyard chickens hanging out, and dinner preparations on Instagram at JudysChickens.

Never miss a post: sign up to become a follower of the Blog.

© 2014-2017 Judy Wright. All rights reserved. Photos and text may only be used with written consent.

How Local Canola Crops are Grown

We were driving down the highway and saw this beautiful view.DSC_0631 
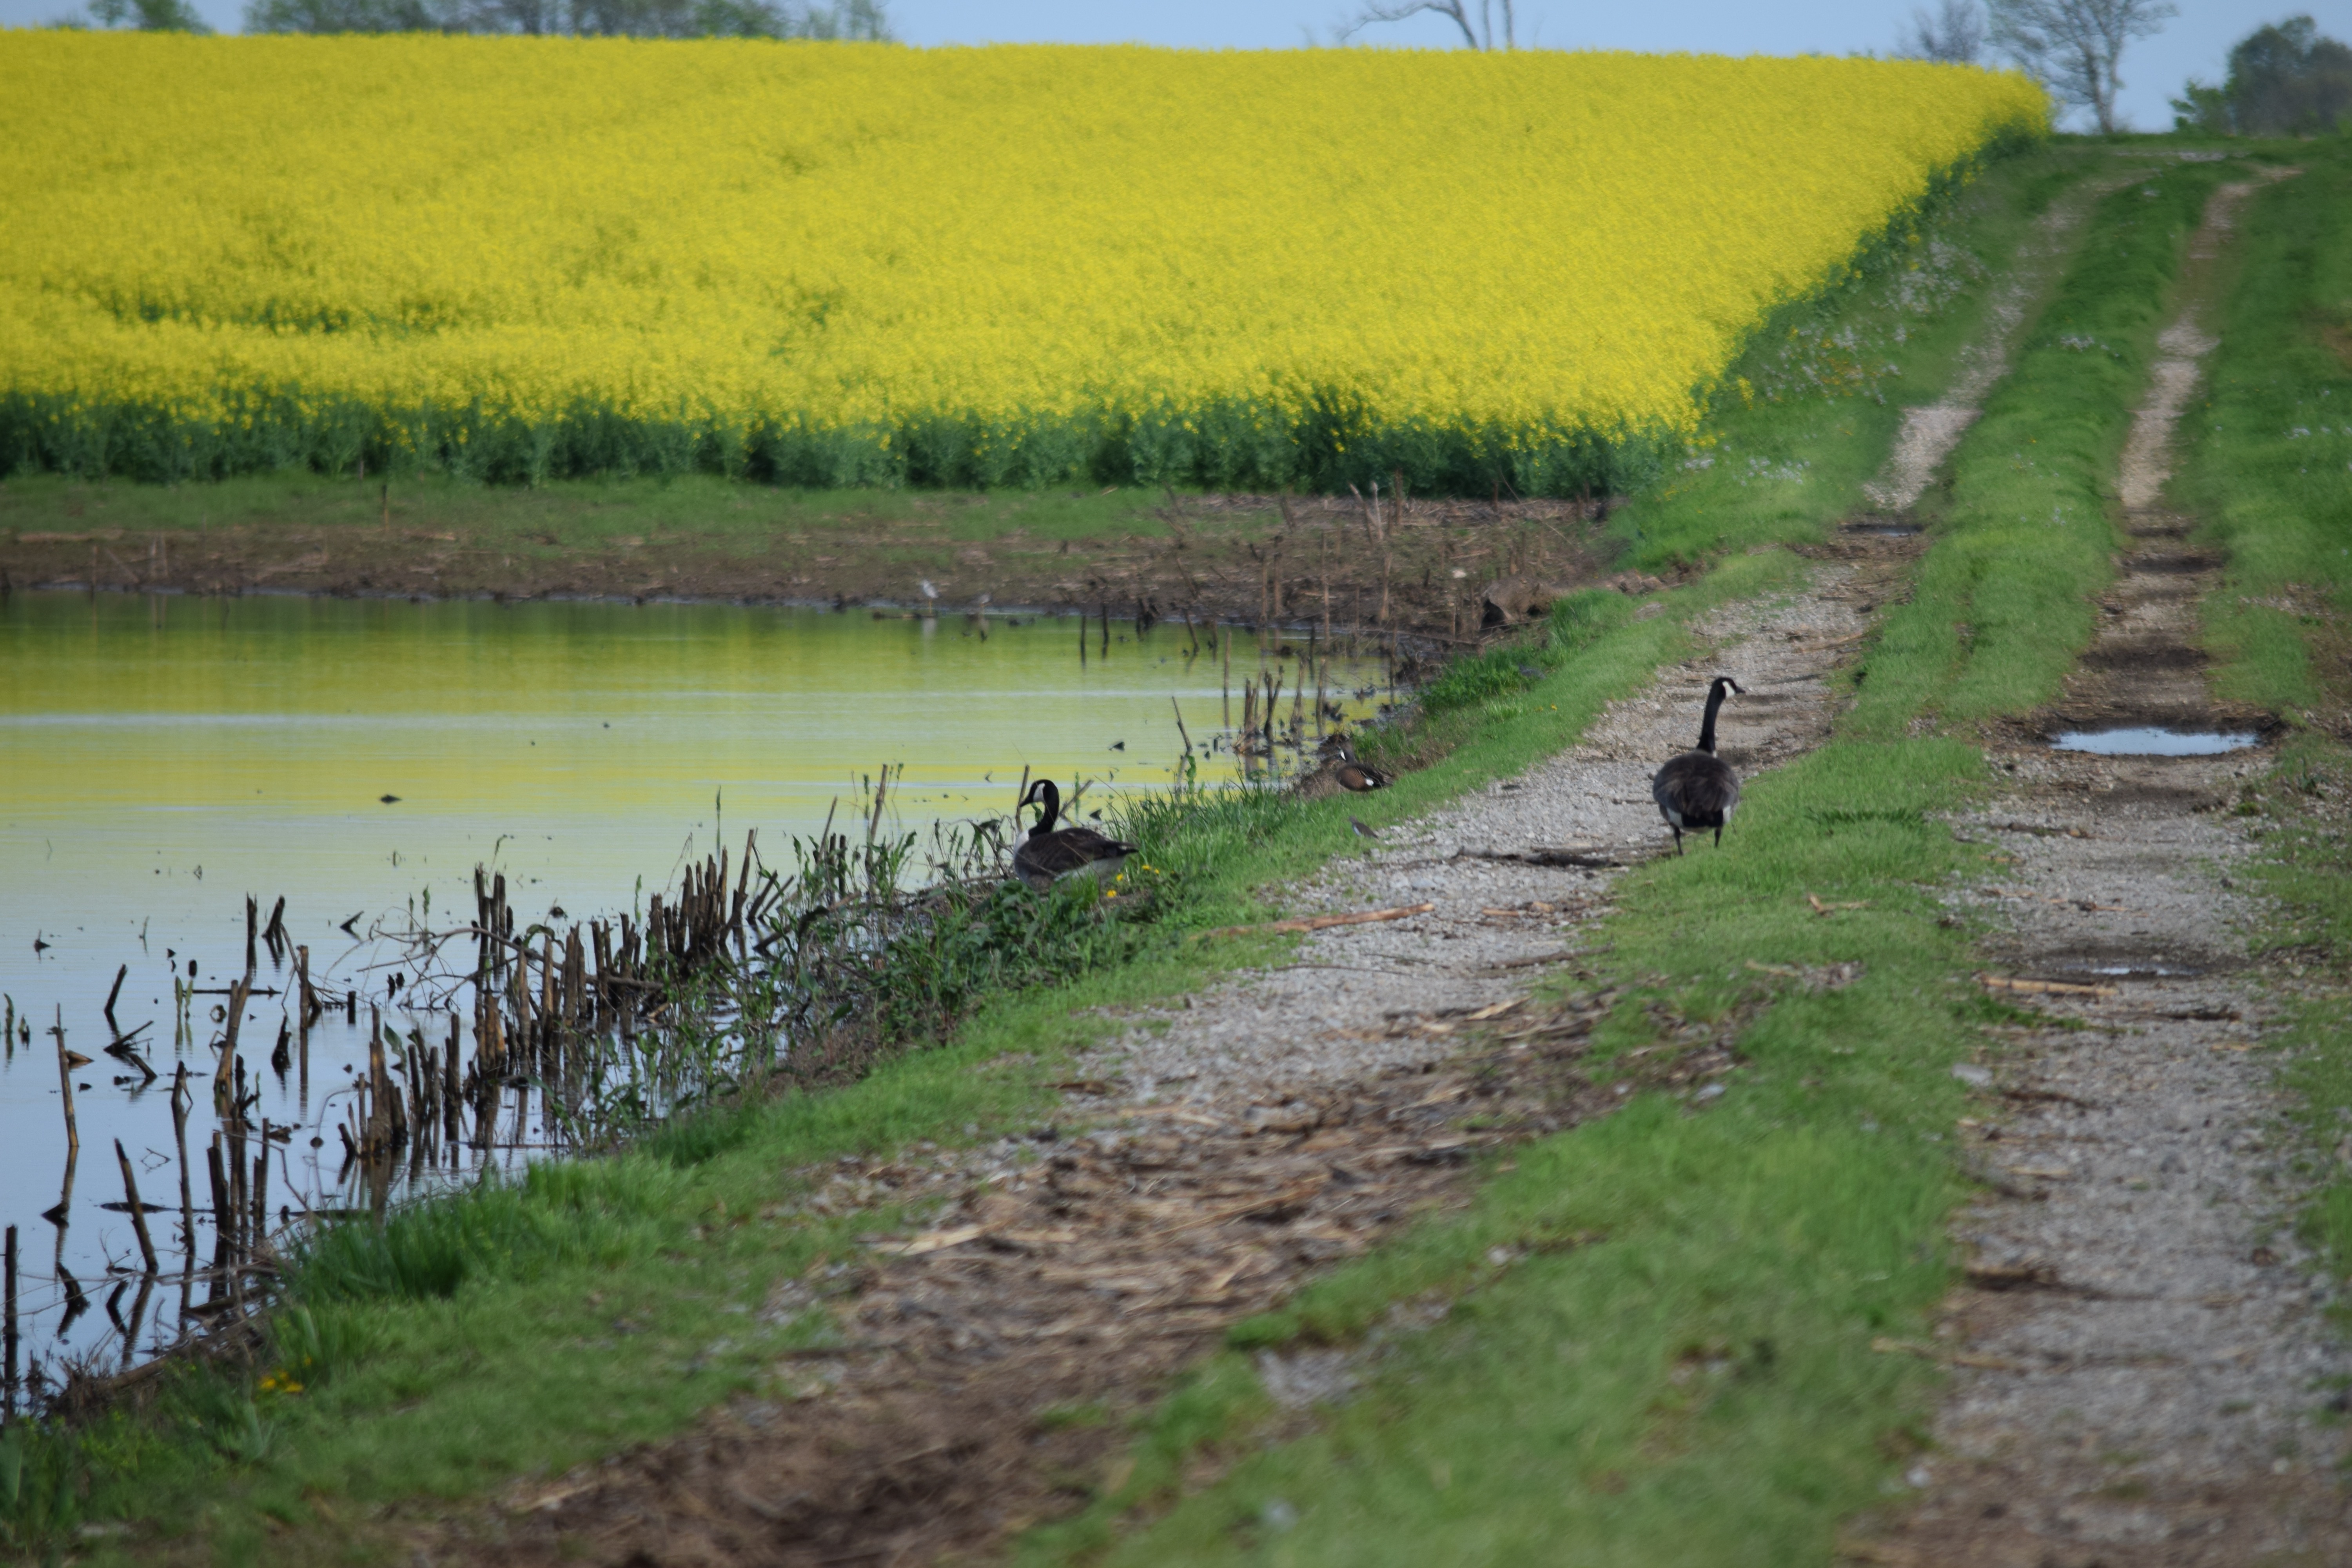
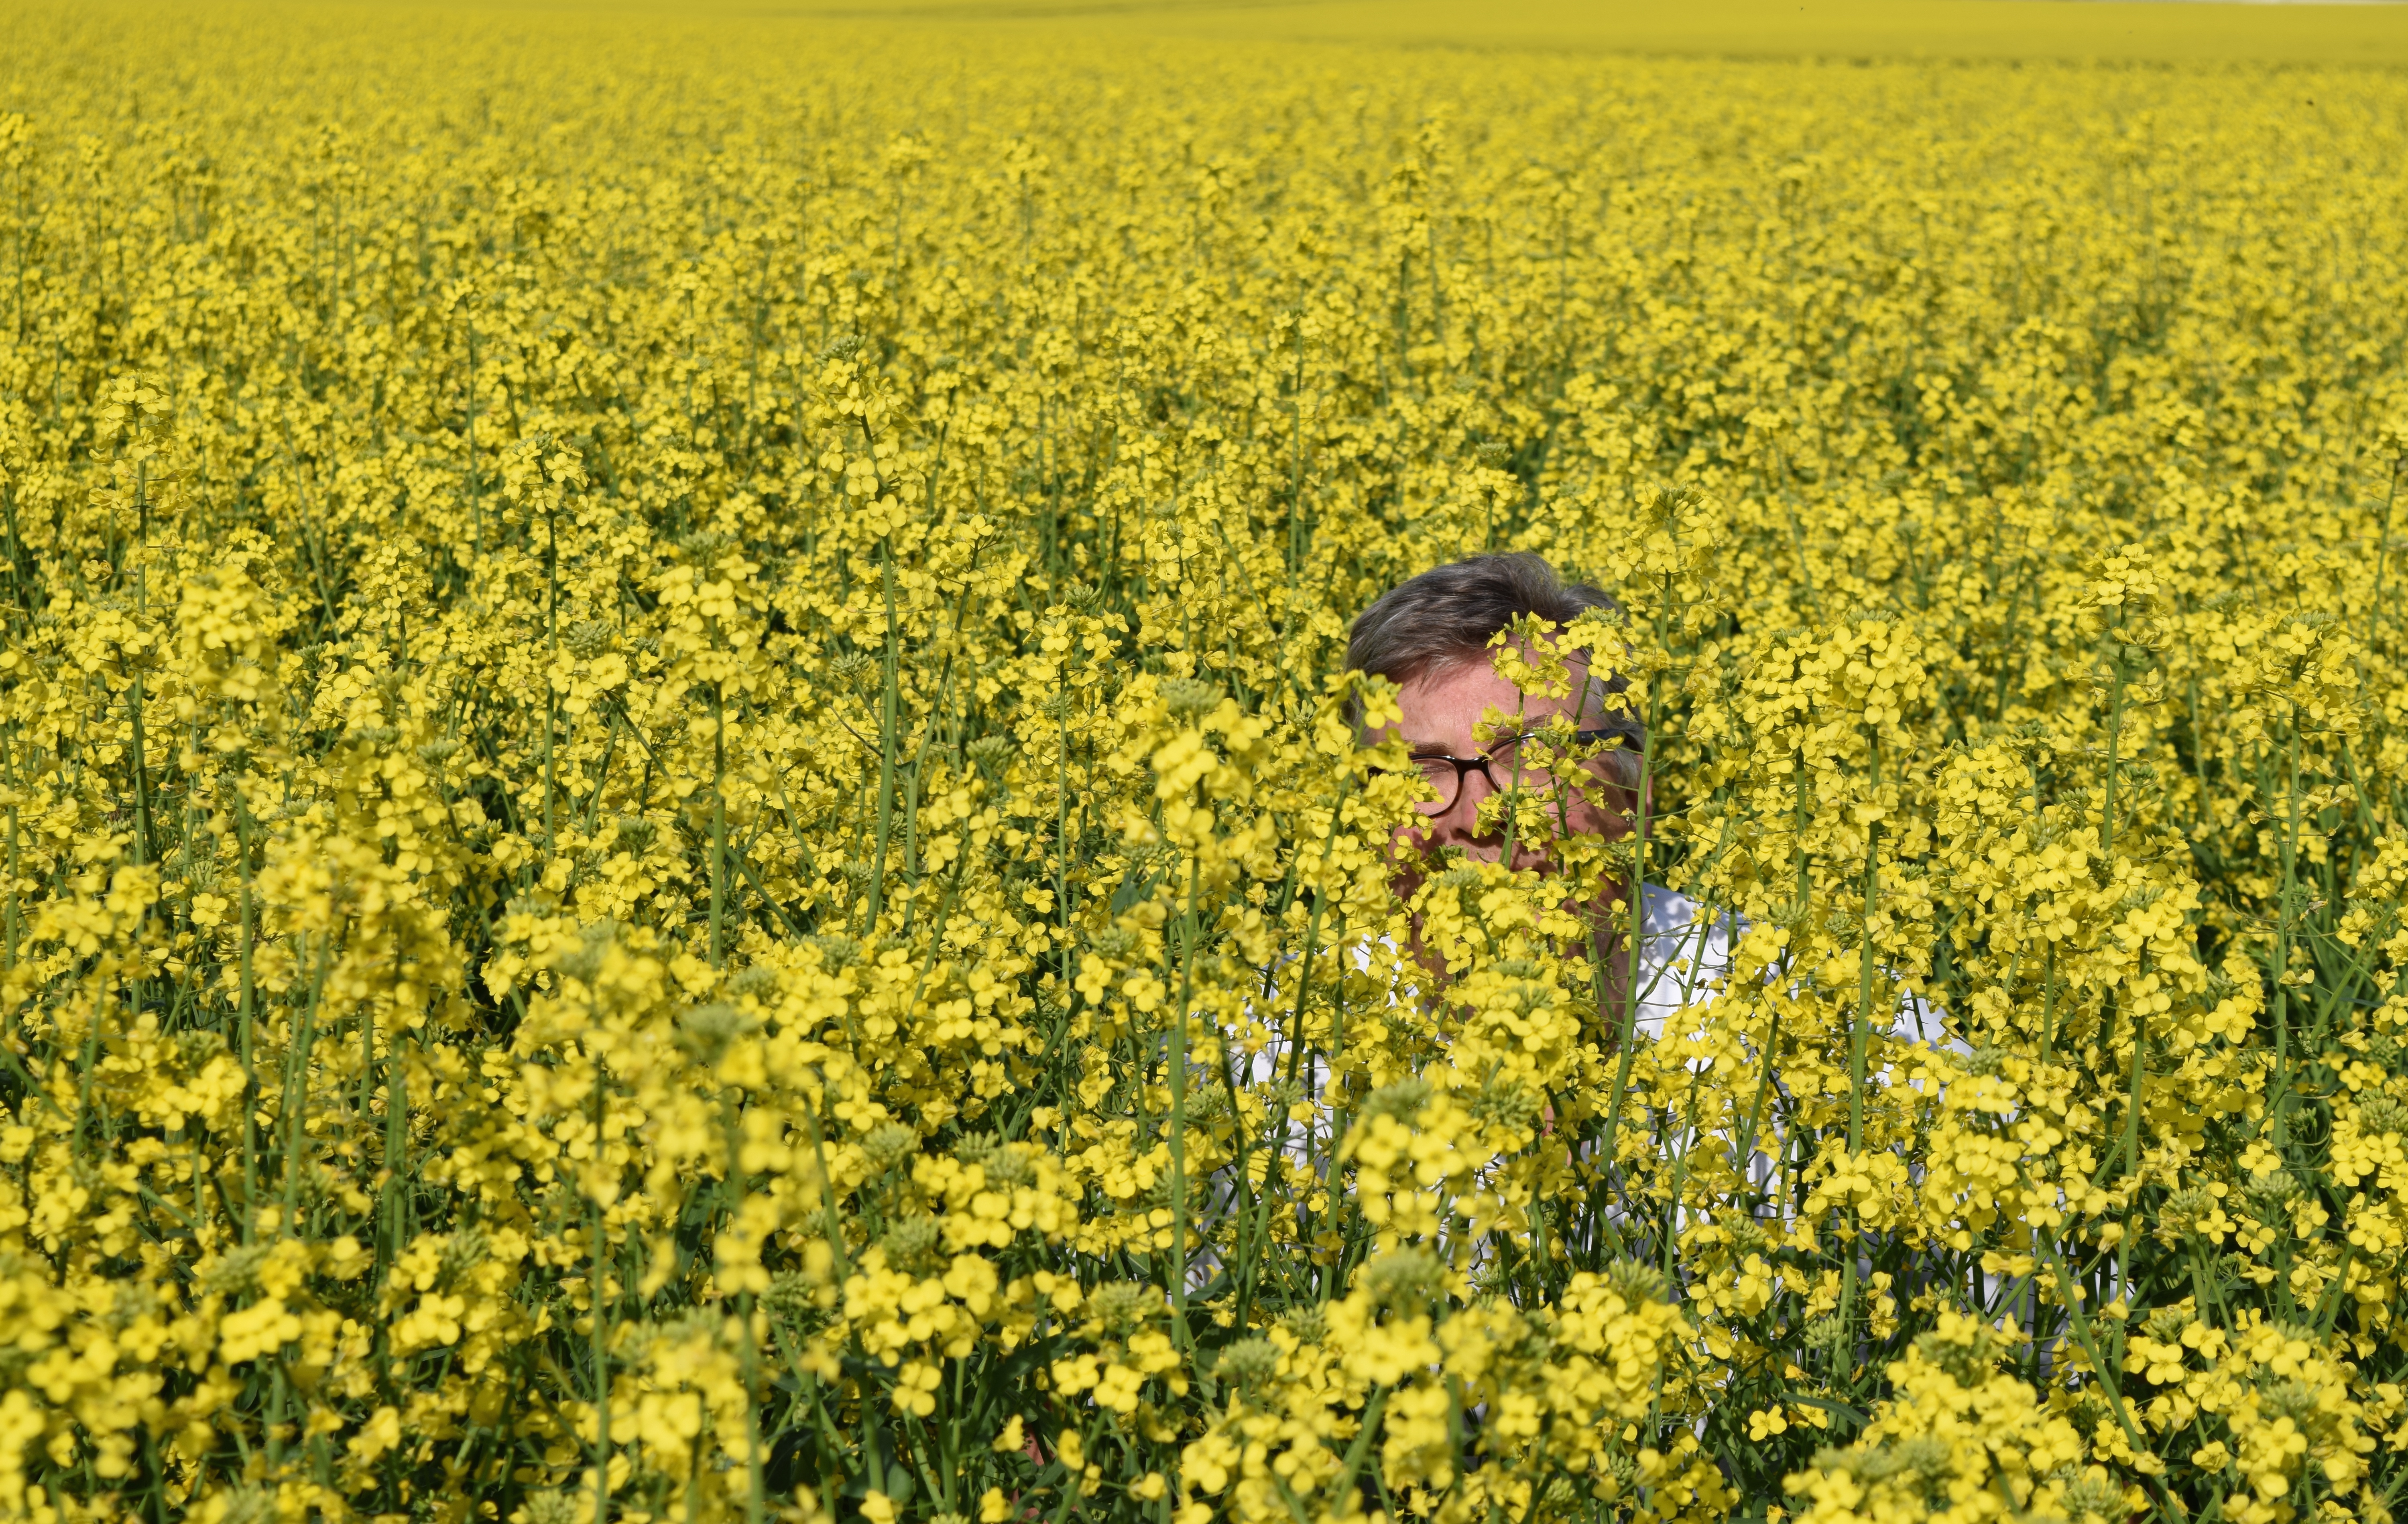
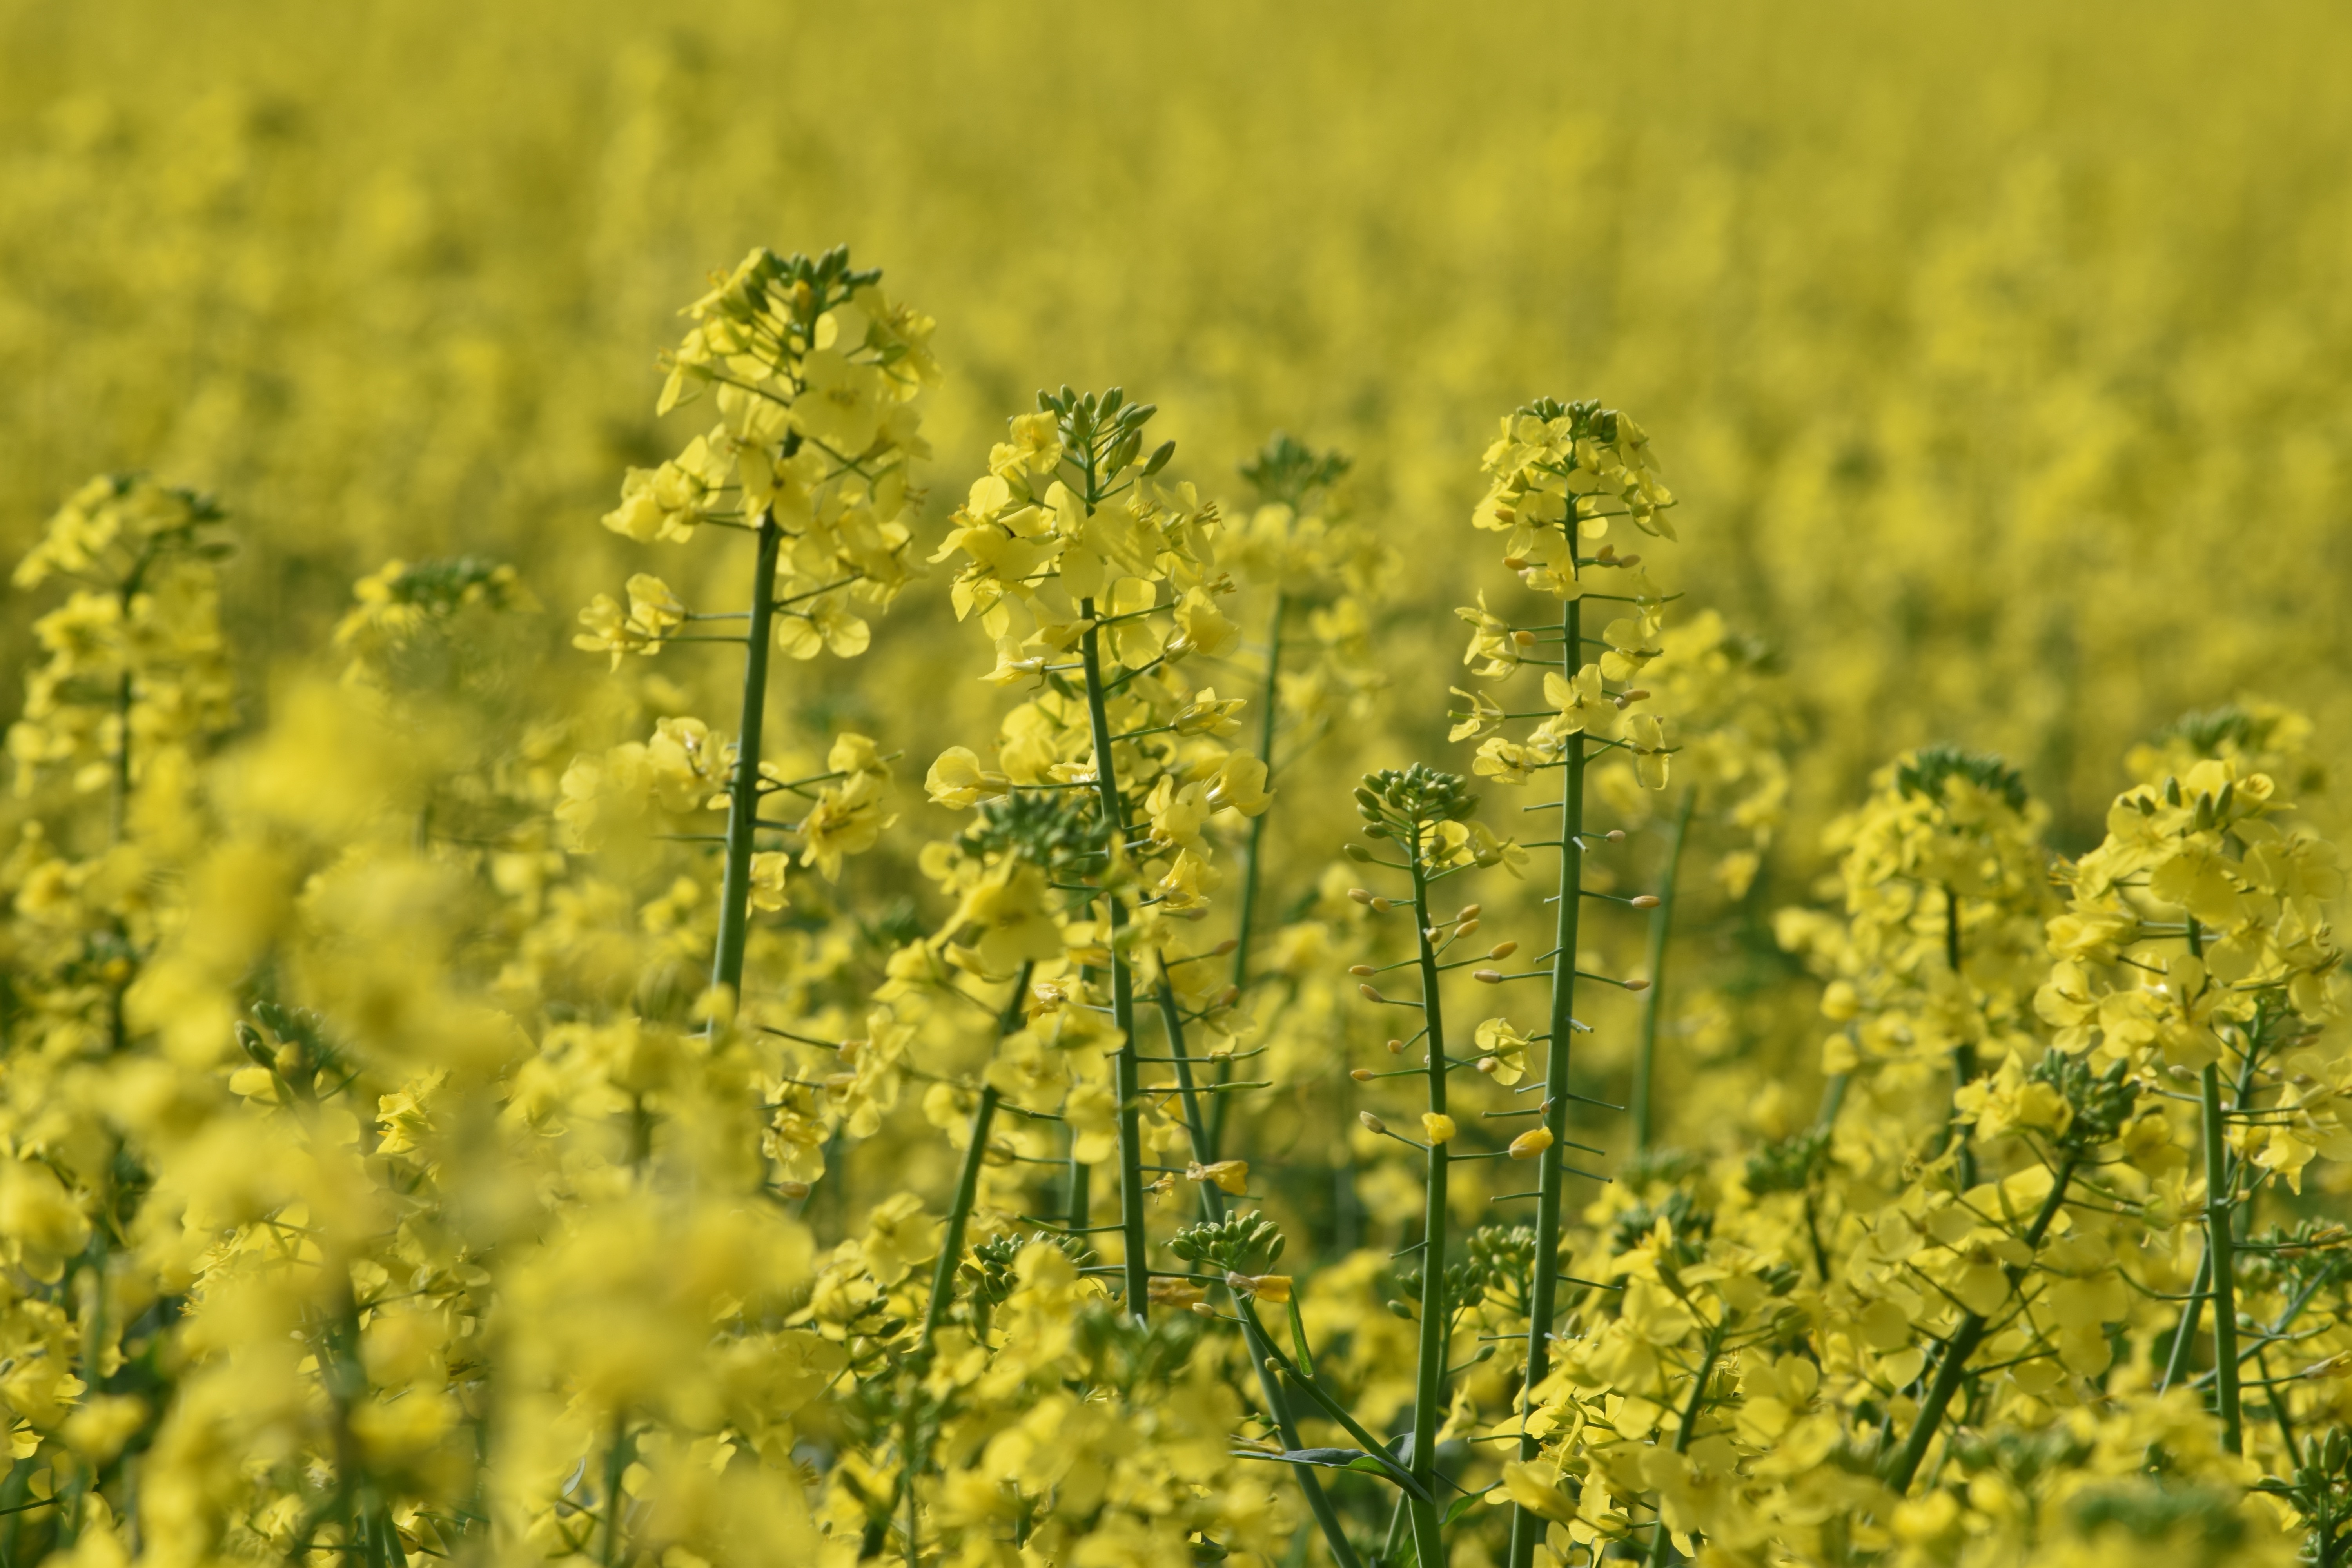
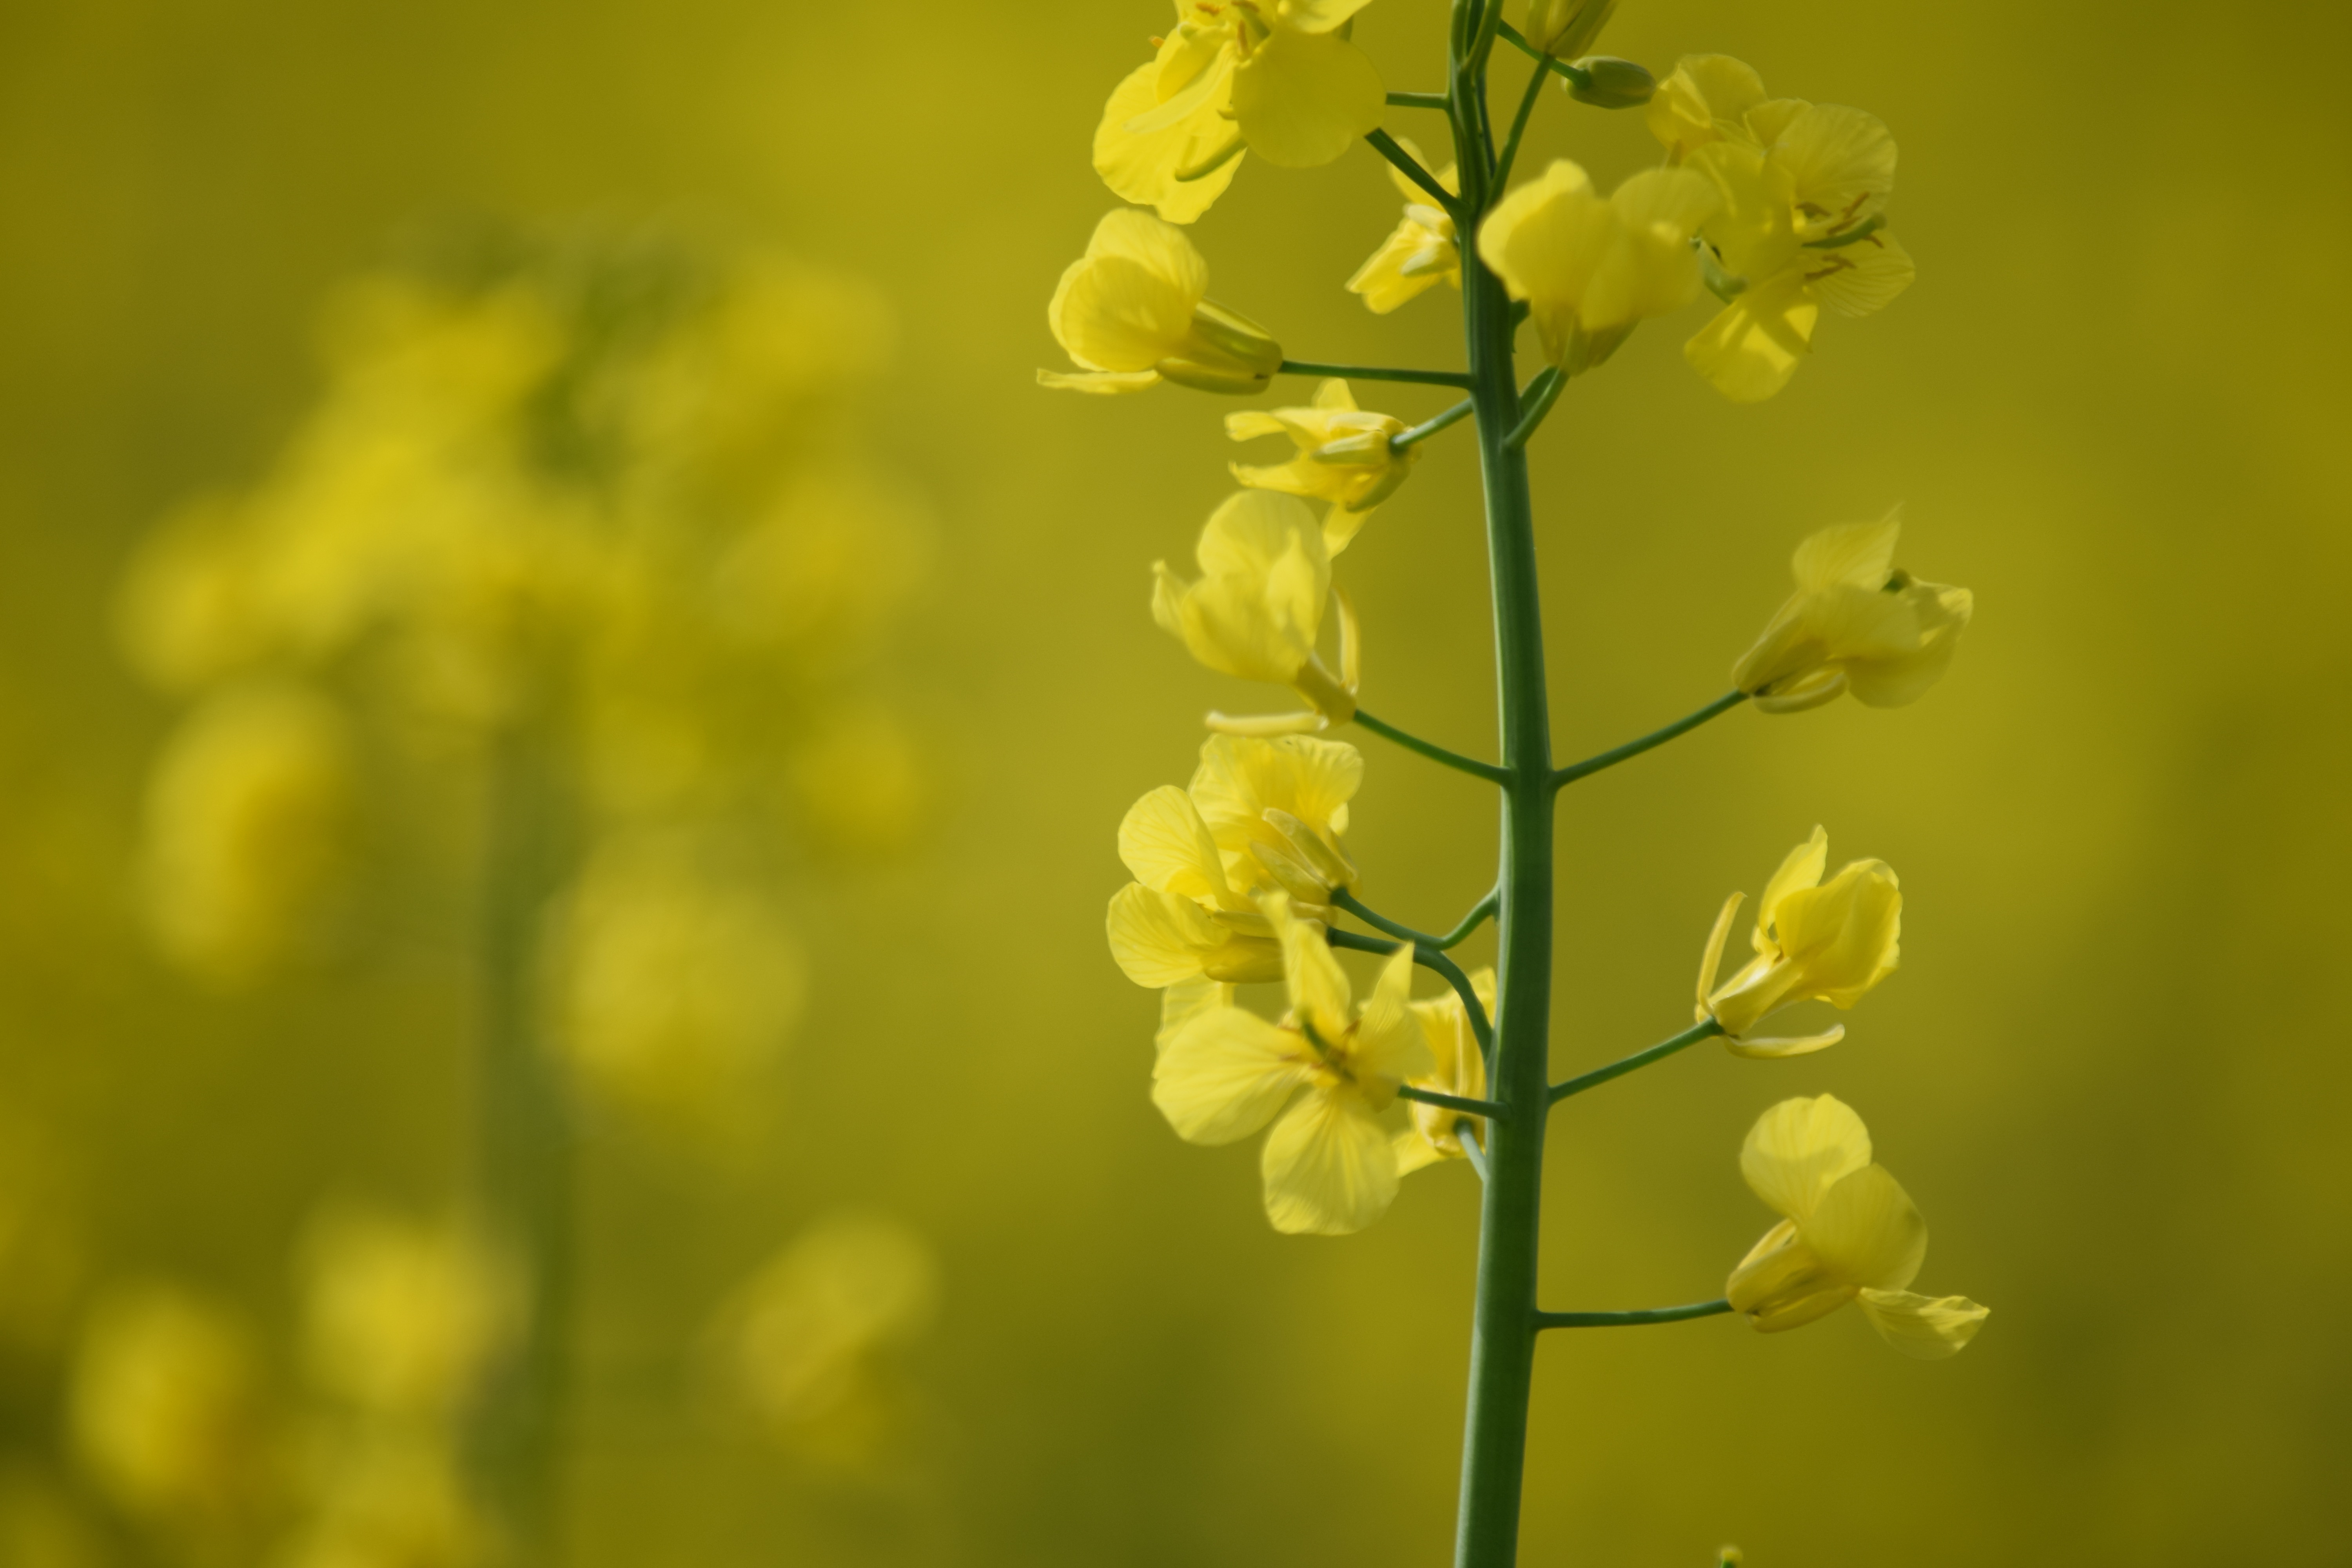
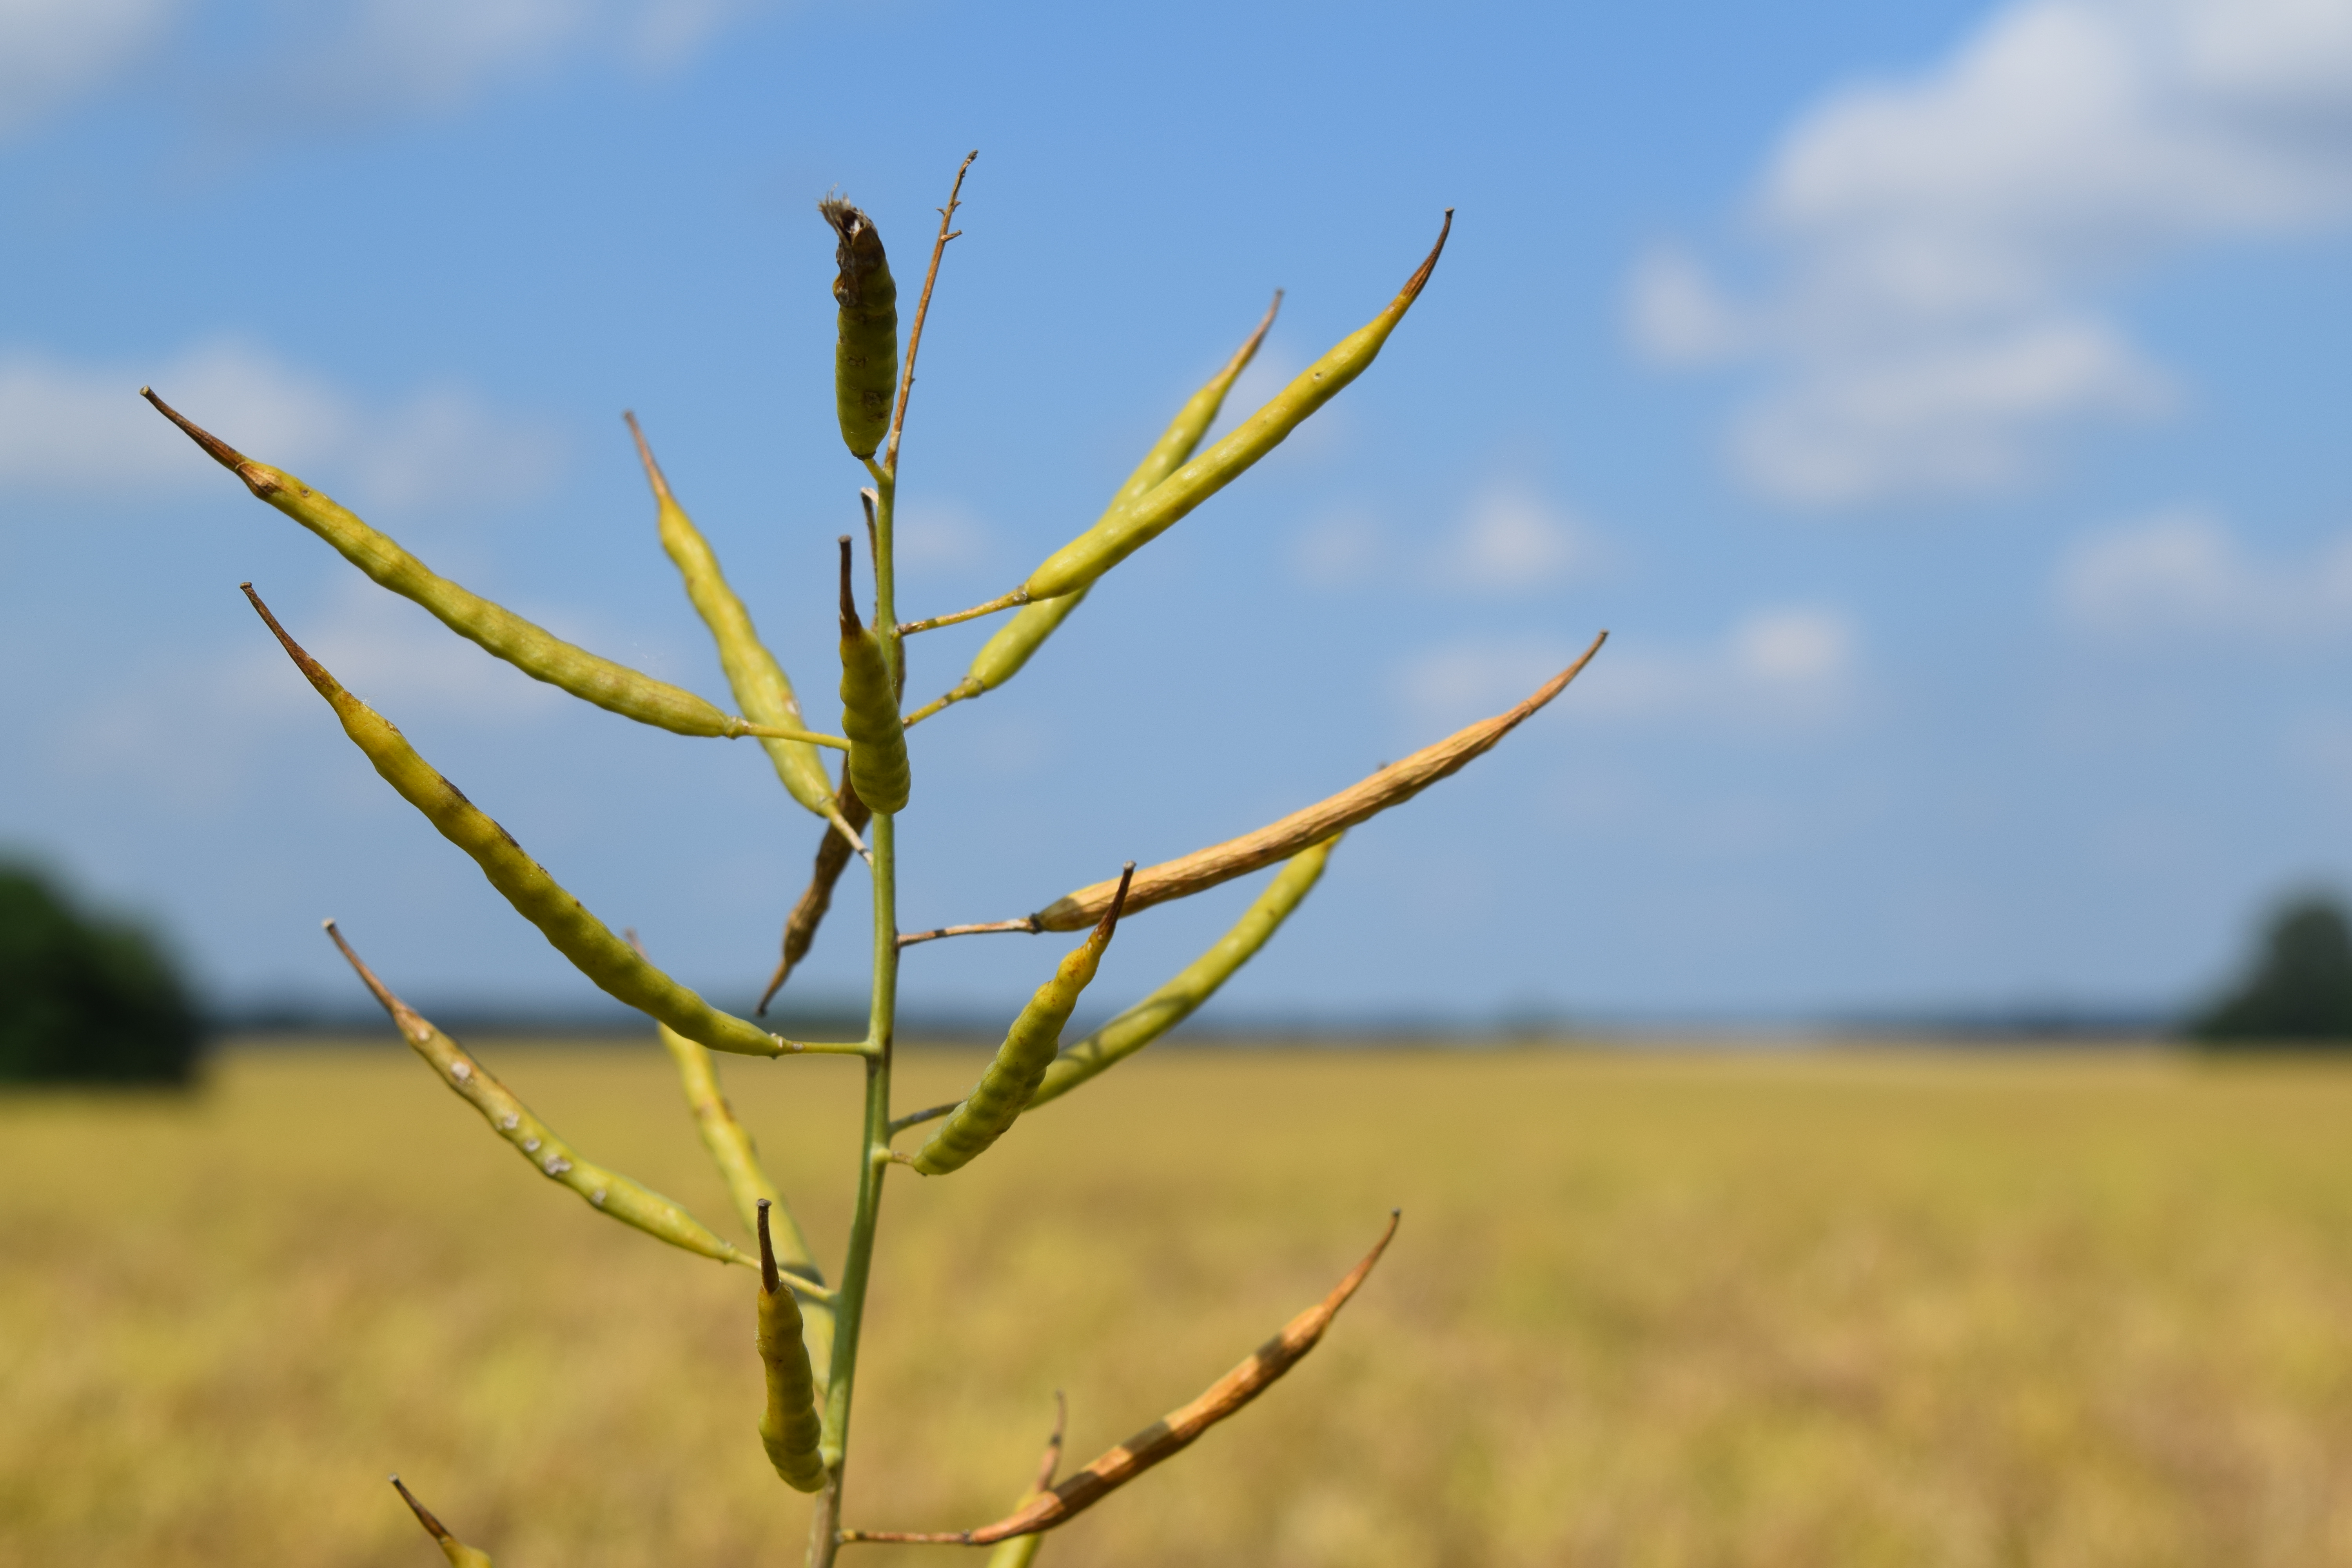
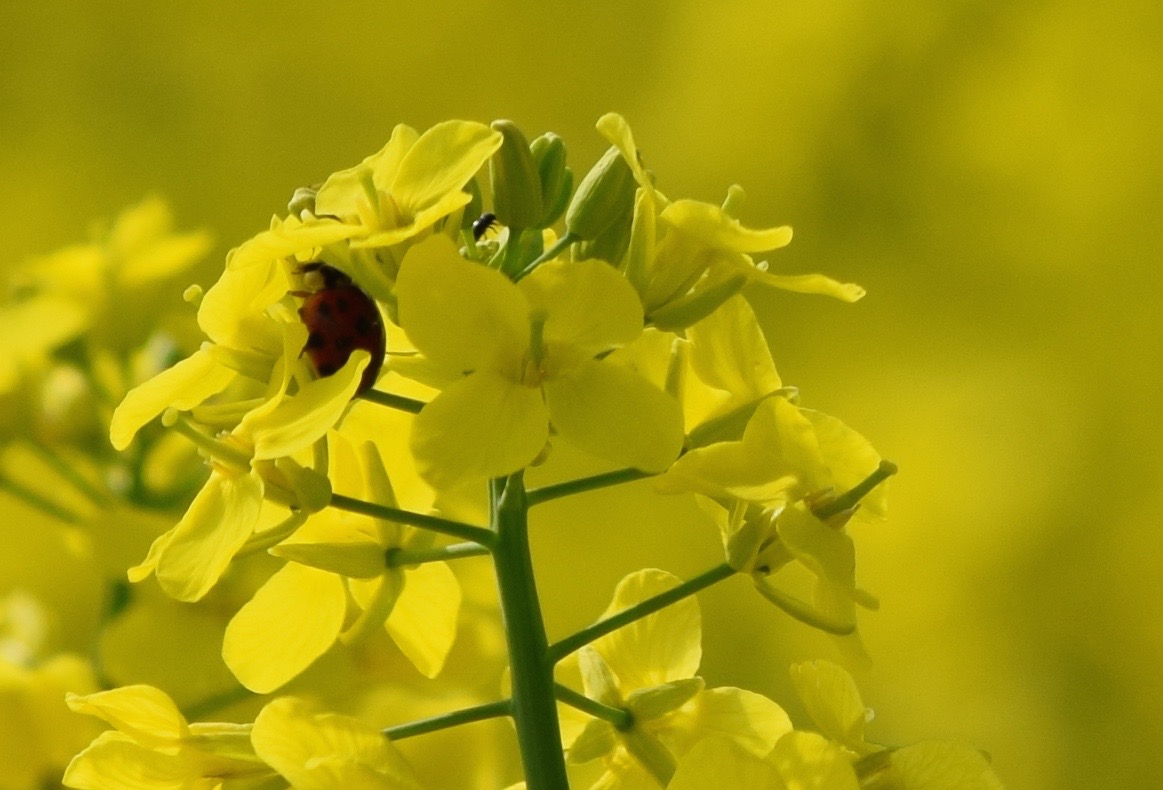
We pulled off the road and Googled “What are the yellow flowers growing in the fields?” Wikipedia knew exactly what we were talking about; its first response was, It’s a field of rapeseed (Brassica napus — in the same plant family as mustard, cabbage, and kale). The seeds produced by these plants are crushed to make rapeseed oil.

We had seen this yellow field and barn the week before on the road between Hopkinsville and Cadiz, KY and had pulled over to photograph it.

DSC_0221

We had no idea how yellow it was to become. Here it is a week later.

DSC_0637

Spectacular as this barn on the side of the highway was, we saw more and bigger yellow fields on the horizon and got back into the car to explore them.

DSC_0574

We saw a road with geese strutting across it.

DSC_0562

I egged my husband on, “Go down the road. We have four wheel drive. Don’t we?”

He’s curious, too. That’s why I married him. I knew he’d take the road. We drove a little further and what we saw was unbelievable.

DSC_0520

In our entire lives, we’d never seen a yellow as yellow as this yellow. We both jumped out of the car to marvel at the fields and then he did something I would never think to do because I am wise and I always consider the snakes, creepy crawlers, and axe-murderers of the world — he waded into the sea of yellow just to see how tall the plants were.

DSC_0545

He was kidding, but still.

DSC_0548

I told him to move out of the way. A sprayer was coming.

DSC_0624

By now I’ve taken a hundred pictures, but the color and light are tantalizing, and I want more. I can’t help myself; I want to capture it all. So I say, “Just a few more pictures and I’ll be done. I promise.” This field was a photographer’s playground; I could have shot in it all day.

DSC_0617 DSC_0602

I read a more about rapeseed. I learned that in the 1970s, a group of Canadian plant breeders sought to develop an edible, nutritious oil that would grow well in the prairies. They succeeded — the seeds they developed from the rapeseed plant are 44% oil, more than double the oil content of soybeans, and only 7% saturated fat, the lowest of any vegetable oil. The other 56% of the seed is milled to make a high-protein meal used to feed livestock.

The Canadians needed a new, more respectable name for their cultivar. They came up with can-o-l-a, Canada-oil-low-acid. Canola is the most profitable crop grown in Canada, and Canada remains the global center for research on their “Made in Canada” crop.

I saw this sign on the side of the road of a canola fields in Cadiz.

IMG_7716

This looks like the flowering heads of kale and broccoli growing in my garden.

IMG_7707

I like to see how plants grow and seeds form, so I uprooted a few plants from the side of the road (roadsideya, as I call it) and planted them in my garden.

DSC_0250 DSC_0125

A follow-up:

This is a photo of canola seed pods taken on June 12. The seeds start to grow inside the pods once the flowers are pollinated and the blooms drop.

DSC_0495  DSC_0602

Here are the canola seeds from inside the seed pods I grew in my back yard.

DSC_0150

This photo from the Internet shows a combine harvesting desiccated canola. Crop desiccation means to apply an herbicide shortly before harvest to aid in uniform crop dry down. Herbicides reduce the green material on a plant so it won’t clog up the combine when it comes time to harvest the seeds and grains.

winter-canola-in-oklahoma-by-brian-caldbeck-msc-64-728 

All of the photos used for this post are untouched (no color enhancements added) except for cropping. In other words, Isn’t the yellow awesome?!

Version 3

There is now a follow-up to this story: How Canola Oil is Made (from plants grown locally)

Related Posts on Commercial Farming:

LET’S STAY CONNECTED!

Follow my photos of vegetables growing, backyard chickens hanging out, and dinner preparations on Instagram at JudysChickens.

Never miss a post: sign up to become a follower of the Blog.

© 2014-2017 Judy Wright. All rights reserved. Photos and text may only be used with written consent.

Test Your Sense of Smell

This is so cool. Pinch your nose and, then, place a jellybean on your tongue. Start chewing it. You can tell that it is sweet, but can you tell what flavor it is? Heck no! That’s what I discovered when a docent at the marvelous, wish-it-would-come-to-Nashville exhibit, Food: Our Global Kitchenhanded me a cinnamon jellybean and asked me to do likewise. I tasted nothing. Then she told me to unplug my nose and suddenly a burst of flavor hit me. It was startling and very much an “aha” moment. All those years of telling children to hold their noses so they wouldn’t taste yucky meds and I never once questioned why that advice worked.

This traveling exhibit, curated by the American Museum of Natural History in New York, is all about the history and culture of growing and preparing food explored from a global perspective. The exhibit needs to come to Nashville with all of its farm to table restaurants, a climate conducive to growing vegetables almost year round, and a growing population of immigrants. Here’s the link to info on getting the exhibit to a space near you!

DSC_0267

So what happened?

Here’s a scientific explanation from Newton’s Apple,  “Seventy to seventy-five percent of what we perceive as taste actually comes from our sense of smell. Taste buds allow us to perceive only bitter, salty, sweet, and sour flavors. It’s the odor molecules from food that give us most of our taste sensation. When you put food in your mouth, odor molecules from that food travel through the passage between your nose and mouth to olfactory receptor cells at the top of your nasal cavity. If mucus in your nasal passages becomes too thick, air and odor molecules can’t reach your olfactory receptor cells.”  That’s why when you are sick with a stuffy nose almost everything tastes the same; your brain can’t receive any signal identifying the odor and the odor molecules remain trapped in your mouth. [That’s when you should pray that someone brings you a nice bowl of Sick Soup.]

And a graphic from Planet-Science:

smell and taste_304x323

The more you know–an old wives tale about plugging your nose to take your medicine, explained.

LET’S STAY CONNECTED!

Follow my photos of vegetables growing, backyard chickens hanging out, and dinner preparations on Instagram at JudysChickens.

Never miss a post: sign up to become a follower of the Blog.

© 2014-2020 Judy Wright. All rights reserved. Photos and text may only be used with written consent.