My Kids’ Favorite Sautéed Carrots

Carrots are naturally sweet, have glorious color, and are tasty raw or cooked. What more could you ask for in a vegetable? More often than not, I use carrots as an aromatic to build layers of flavor into stews and soups, but if I’m going to serve them as a side dish, this is how I prepare them. While not necessary, adding the tablespoon of sugar or honey at the end will enhance the natural sweetness of the carrots.  The red wine vinegar provides the acidic bite. Together, the sugar and vinegar, create a sweet and sour taste that makes these carrots addictive!

Ingredients:
DSC_0805

3 pounds carrots (weight before prepping)
1 pound sweet onions, thinly sliced
3 tablespoons extra virgin olive oil
2 tablespoons butter
½ teaspoon sea salt
2 tablespoons red wine vinegar
2 tablespoon sugar or honey

Mise en Place:
DSC_0858

Instructions:

Prep the vegetables:

Wash, peel and remove the root end from each carrot. Slice carrots about ¼-inch thick.
DSC_0828

Wash, peel and remove the root end from each onion. Slice thinly. I do it all the slicing in a food processor.
DSC_0842

Food processor blade care:

I’m terrified of sharp blades, especially this one from the food processor.
DSC_0821 DSC_0848

I once cut myself while handling it and still shudder whenever I think about that cut. It is the reason I am meticulous about how I store the blade. I always place the red “danger” label over it  and store it in its own plastic bag.
DSC_0813 DSC_0815

Cook the vegetables:

Coat the bottom of a deep 12-inch sauté pan with olive oil and butter. Heat until hot but not smoking and add carrots and onions. Mix.
DSC_0860

Sauté covered for 30 minutes, stirring every five minutes. When done cooking, add salt, vinegar, and a little sugar and mix well. Let rest for 15 minutes in the pan to allow flavors to meld. Stir and serve.
DSC_0875

These carrots are good served hot, at room temperature, or cold.

Kids will love them. I promise.

DSC_0908

LET’S STAY CONNECTED!

Follow my photos of vegetables growing, backyard chickens hanging out, and dinner preparations on Instagram at JudysChickens.

Never miss a post: sign up to become a follower of the Blog.

© 2014-2019 Judy Wright. All rights reserved. Photos and text may only be used with written consent.

How to Make Chicken Stock

Last year, about the time I started stockpiling turkey carcasses in the freezer to make Bruce’s Turkey and Sausage Gumbo, I had the idea to start freezing rotisserie chicken bones, too. To prepare my first batch of chicken stock, I thawed and then cooked the stored carcasses for about five hours in a pot of plain water, no vegetables, just as we did for the turkey stock in the gumbo. The stock was good, and by good, I mean adequate.

To make it more flavorful, I started simmering aromatic vegetables and herbs with my stash of frozen bones following the ingredients list from my recipe for Aunt Bridget’s Chicken Soup. Much better.

bridget's chicken soup

It’s a little more work, but the results are a flavorful stock. While it doesn’t gel up as much as the stock made from using the ten collagen-laden thigh bones in Aunt Bridget’s recipe, the flavor is rich and delicious. You should know the seasoning used to flavor the rotisserie chicken does carry over into the stock so it isn’t as pure as the more neutral tasting stock you might want for a delicate sauce, but it is perfect for making a hearty soup.

DSC_0315

Last week, I was at Costco and bought two freshly made rotisserie chickens to have in the fridge for “weekend food.” When I got home and heard there might be a lot of snow on the way, I decided to go ahead and use the rotisserie chickens to make soup since nothing says Snow Day like the smell and warmth of soup simmering on the stove.

At $4.99 each, Costco’s rotisserie chickens are considered “loss leaders” in the grocery industry; Costco knows they are going to lose money on them, but they also know they are going to draw shoppers into the store. Costco happily assumes that risk. I know I, for one, have never been able to leave Costco with just one food item in my cart.

I once spoke to a Costco butcher who told me each of their rotisserie chickens weighs a minimum of three pounds. Anything smaller is used to make food items such as chicken salad or chicken pot pie. The good news for consumers is that most of their roasted chickens weigh a lot more than three pounds, sometimes up to six pounds! Look for a chicken whose breast meat is touching the top of the packaging, and you’ll know you’ve picked a big one.

To give you an idea of how much meat you can get from a rotisserie chicken, I pulled off 2 pounds, 6 ounces from a chicken that weighed 4 pounds, 5 ounces. These results are consistent with those I described here.
DSC_0965

Between the two chickens, I bought that day I had five pounds of meat. That’s a deal for $10, even better when you consider the added benefit of getting stock from the carcasses.
DSC_0976

As I carved off the meat, I collected the bones, skin and even the gelled chicken juice from the bottom of the packaging.
DSC_0966 DSC_0991

How to Make Chicken Stock from Bones

Ingredients:
DSC_0945
2-3 large cooked rotisserie chickens, or 2-3 frozen carcasses
5 quarts water
1 large unpeeled onion (1 pound), quartered
1/3 head celery, with leaves (½ pound)
4 unpeeled carrots (½ pound)
6 cloves unpeeled garlic (½ ounce), smashed
10 whole stems Italian flat-leafed parsley
3 bay leaves
1 teaspoon pepper, no salt
2 tablespoons cider vinegar or lemon juice

Mise en Place:
DSC_0997

Instructions:
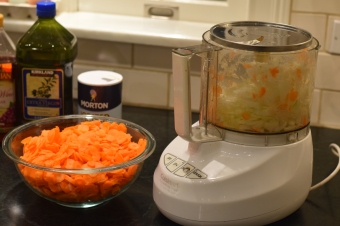
Remove meat from bones as described in this post. Or, use 2-4 thawed carcasses from the freezer. These carcasses are from rotisserie chickens from Whole Foods. I used the saved stems from parsley instead of the leaves. Also had lots of singlet garlic cloves that I threw in there.

IMG_3220

Place carcasses and water in a large soup pot and bring to a boil. The water should cover the bones. Add a little more water if you need to. Remove the scum that boils to the top, if any.

Add the vegetables and other ingredients all at once. There is no need to peel the vegetables, not even the garlic. Just smash it with a food mallet and throw it in the pot. Bring to a boil and then reduce heat to a slow simmer. The acid in the vinegar helps to break down the cartilage in the bones and pull out the minerals, such as calcium. Allow to simmer, barely bubbling, for about seven hours. I found that if you simmer stock slowly, instead of boiling, the finished stock will be less cloudy. Cool for 30 minutes before handling.

Pour soup through a colander. Discard contents of the colander. Pour it a second time through a sieve or cheesecloth to remove tiny bones and food particles that remain.
DSC_0299 DSC_0590

Store stock overnight in the refrigerator or outside, if it is cold enough. The next morning, scrape off the layer of hardened, yellowish fat that has risen to the surface and congealed. You should end up with about 4 quarts, or 16 cups, of chicken stock. If you are not going to use the stock within the next couple of days, it is best to freeze it.

DSC_3307

But, you might just want to start having a cup of bone broth a day to keep the doctor away.

DSC_0117

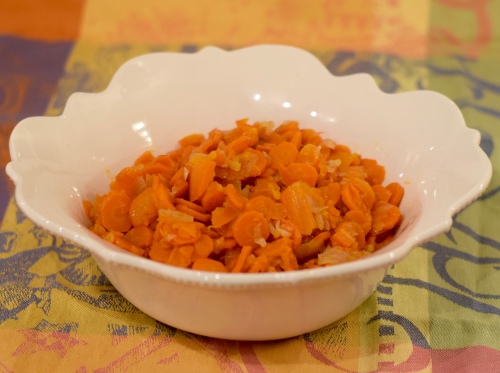
Or, make a big container of Sick Soup for an ailing friend. Recipe here.

DSC_0160

An FYI: A way to carve a chicken or turkey breast:

Carve out the full breast from each side of the sternum, cutting as close to the bone as possible. I often just pull the meat away with my fingers. Slice the breast meat as shown in the photo below. Each breast ways about 11 ounces.

DSC_0968 DSC_0970 DSC_0980

I usually reserve the dark meat for soup and save the white breast meat for salads and sandwiches.

Start saving dem bones in the freezer!

IMG_0262

Related Posts:
Kelly’s Duck Stew
Bruce’s Turkey and Sausage Gumbo
Lisa’s Award Winning Buffalo Chicken Chili
Aunt Bridget’s Chicken Soup with Little Meatballs
Rotisserie Chicken Soup, Revisited

LET’S STAY CONNECTED!

Follow my photos of vegetables growing, backyard chickens hanging out, and dinner preparations on Instagram at JudysChickens.

Never miss a post: sign up to become a follower of the Blog.

© 2014-2019 Judy Wright. All rights reserved. Photos and text may only be used with written consent.

Auntie Terry’s Italian Fried Cauliflower

“Granddaddy ate them by the bucketful,” said his daughter, Rachelle.  I know for a fact that my Mom’s cousins, Mary Lou, Angela, Phil, Jeannie, and Paula, will be making them on Christmas Eve. I have wonderful memories of going to my Auntie Terry’s house on holidays and eating them. I’m talking about fried cauliflower. We are a family that loves fried cauliflower and fried celery, broccoli, and carduna if we are lucky enough to find it.

This is a family favorite. When my children gush over something I’ve made and then ask how to make it, I know it is time to blog it. I want the next generation to learn how to make the family favorites.

Here is my grandmother’s recipe given to me by Mom’s sister, Auntie Terry.

Yield: 18 Fried Cauliflower Patties

Ingredients:
DSC_0385
1 head cauliflower
6 large eggs
1 teaspoon sea salt
½ teaspoon ground pepper
1 teaspoon baking powder
2 teaspoons minced garlic
¼ cup chopped parsley (or 2 tablespoons each, parsley and basil)
3/4 cup (3½ ounces) grated Parmigiano-Reggiano or Romano
¾ cup all-purpose flour
½ olive oil mixed with ½ canola oil for frying
Lemon slices (optional)

Mise en Place:
DSC_0431

Prep the Cauliflower for Cooking:
DSC_0337

Cut cauliflower into half-inch slices. Cut out the center stem. This will leave you with many small, sliced florets.
DSC_0338 DSC_0339

Blanch Cauliflower:
Fill a medium-large pot with 3 quarts of hot water. Add 2 tablespoons of salt. Bring to a boil. Add florets and bring to a rolling boil. Allow to boil vigorously for 1½ minutes.
DSC_0340

Remove florets from heat and drain through a colander. Leave florets in the colander and cover. Allow to steam, covered, for at least five minutes. The beauty of this method of cooking the florets is they will be uniformly cooked and not mushy or waterlogged.
DSC_0393

Prepare the Egg Batter:
First, add eggs to a mixing bowl and beat. Add everything else but the flour and mix for about 30 seconds.
DSC_0432

Add flour and mix for about 15 seconds more. The reason to add the flour last is you don’t want to “awaken” the flour’s gluten by mixing it too much.
DSC_0435

Add cooked and cooled cauliflower to the egg mixture and gently stir with a spatula until the cauliflower is well coated.
DSC_0440

Fill a 12-inch sauté pan with about one cup of olive oil. You will be sautéing the vegetables, not deep-frying them. Set the heating temperature to medium. Let oil heat for a few minutes. Do not let the oil get smoking hot.

How to Test for Correct Oil Temperature
The best way to test if the oil is hot enough is to dribble batter into it. If the batter sizzles, the oil is hot enough. If the batter immediately turns brown, it is too hot. In that case, remove the pan from heat and let the oil cool down some.
DSC_0415 DSC_0416

If the oil is too hot, the patties’ interior will remain doughy while the exterior turns crisp. If the temperature isn’t hot enough, the batter will become like a sponge, sop up the oil, and the patties will taste bland. Plan on the patties cooking for a total of four to five minutes.
DSC_0444 DSC_0447

Remove cauliflower from pan with a slotted spoon. I tap the spoon against the inside edge of the pan to release as much oil as possible. Drain cauliflower on paper towels. This recipe makes three batches of six cauliflower patties.
DSC_0367

Serve hot, warm, or cold. They are amazing at any temperature. When they are still warm, I like to squeeze lemon juice on each one before I eat it. I think it catapults the flavor to another level of deliciousness!
DSC_0505

My relatives, who have made these for a lifetime, have assured me there will come a time when I will be able to make the batter without measuring it, as they do. Paula gave me the best advice about the consistency of the batter: “the batter should be thick enough to coat the cauliflower and still allow it to run off slowly like pancake batter would.” She also starts off each batch by frying a little of the batter (without cauliflower) to taste test if she’s gotten the batter’s seasonings correct since she makes her batter with Bisquick and without measuring the ingredients.

A photo of my grandparents. Grandma made all of her aprons.

Hollywood fl ? date

Other yummy veggies:
Roasted Ratatouille
Cauliflower Three Ways: Roasted, Blanched and Mashed
Roasted Butternut Squash, Brussels Sprouts, and Cranberries
Amazingly Delicious Sautéed Carrots
Roasted Spaghetti Squash with Asparagus and Chicken

LET’S STAY CONNECTED!

Follow my photos of vegetables growing, backyard chickens hanging out, and dinner preparations on Instagram at JudysChickens.

Never miss a post: sign up to become a follower of the Blog.

© 2014-2020 Judy Wright. All rights reserved. Photos and text may only be used with written consent.

Mrs. Walker’s Cranberry Nut Pie

Sometimes it happens this way: you’re perusing Facebook and see a picture of a pie that looks just like what you and your mom used to make for dessert on Thanksgiving morning!
DSC_0224

You read a little further and realize the person who posted the pie photo is an old childhood neighbor, Erin McHugh, whom you haven’t seen in forty years. Erin calls her pie Cranberry Surprise. You call yours Mrs.Walker’s Cranberry Pie.
DSC_0160

I messaged Erin, “Hey, it’s Judy Culotta from Bay View! Mom and I used to make a cranberry pie that looked just like yours. Is that Mrs. Walker’s recipe?” Erin sent me a link to her pie recipe. At first glance, the ingredients looked quite different, and then I realized Erin’s recipe, written for a 9-inch pie plate, was simply a doubled version of Mrs. Walker’s recipe written for a shallow 8-inch pie pan.

Mrs. Walker’s recipe called for a combination of oleo and shortening, while Erin’s recipe called for butter. Whenever you see old recipes that call for “oleo,” know it was a shortened name for “oleomargarine,” a solid form of vegetable oil (oleic acid). Originally, oleo was sold as a white-colored fat. Home cooks were instructed to mix in a yellow food coloring capsule to make it look like butter. Please write a comment if you remember doing that. Consumers had to mix in the dye because dairy lobbyists worked to keep margarine white and butter yellow. Yellow margarine finally became available in 1969.

Hearing from Erin and making this recipe again was delightful! It sent me down Memory Lane. I found these old photos of our home taken in 1964 before my grandfather renovated the house and turned it into a year-round dwelling. The cottage was known as “The Eye of Bay View” because an eye-shaped window faced the entrance to this small and magical Monteagle-like summer community.

The farmhouse was built in 1894 by Ida Tripp, mother of Hazel Atkinson. Hazel lived there with her daughters, Ruth and Hope. It turns out, Erin’s family and the Atkinsons were dear friends. Erin wrote a tender story about them and Surprise Pie in her recently published book, One Good Deed. Here is an excerpt.

Here are photos of the farmhouse from the early 1900s.
IMG_4307

Before 1980, recipes calling for “a bag of cranberries” meant a 16-ounce bag, not the 12-ounce bags sold now. In 1980, there was a shortage of cranberries and the cranberry growers’ consortium changed to smaller-sized packaging to keep up with demand. They never went back to the 16-ounce bag. A 12-ounce bag has 3½ cups of berries.

Ingredients:
DSC_0132

Cranberry Filling:
12-ounce bag fresh cranberries (about 3½ cups),
½ cup chopped pecans or walnuts
½ cup granulated sugar

Cake Batter:
2 large eggs, beaten
1 cup granulated sugar
1 teaspoon vanilla extract
3/4 cup butter, melted (1½ sticks)
1 cup all-purpose flour

Instructions:
Preheat oven to 350º. Grease a 9-inch pie plate with butter.

Spread cranberries over the bottom of the pan and sprinkle with nuts.
DSC_0144

Add the ½ cup portion of sugar.
DSC_0145

Add eggs to the mixing bowl and beat well. Add the 1 cup portion of sugar, the vanilla, butter, and flour and beat for another 30 seconds. Use a spatula to scrape the sides and base of the bowl.
DSC_0148

Spoon batter over the cranberry mixture. Use an icing knife to spread it across the top.
DSC_0152

Bake for 45 minutes on the center oven rack. Test center of pie with a knife for doneness. If there is still batter on the knife, set the timer for five more minutes and check again. Continue in this way until knife comes out clean.

Use an “edge protector” if needed to keep the crust’s rim from burning.
DSC_0157

Serve warm with freshly made whipped cream or vanilla ice cream.

Triple this recipe for a Crowd-Pleasing Dessert (24 people)

Filling: 9 cups fresh cranberries, 1½ cups chopped nuts, 1½ cups sugar. Spread cranberries and nuts over a greased half baking sheet (13″ by 18″ by 1″). Sprinkle with sugar.
DSC_0553

Topping: Mix together 4½ sticks of melted butter, 3 cups sugar, 1 tablespoon vanilla extract, and 6 eggs. Add 3 cups of flour. Mix for 30 seconds until smooth. Use a stainless icing spatula to spread the batter over the cranberries, starting in the pan’s center and moving outward. Don’t bring the batter all the way to the edges. Don’t want the batter to spill over the side of the pan as it cooks.
DSC_0555

Bake in a 350º oven for 45 minutes. Just made it — no batter dripped over the edge of the pan!
DSC_0563

While the cake is warm, use a 3-inch biscuit cutter to cut disks to plate individual servings.
DSC_0594

Place each warm disk in the center of a plate and top with freshly made whipped cream or ice cream.
IMG_4690

Wondering how cranberries are grown and harvested? I wrote a fun story about it here.
img_6101

Favorite Thanksgiving Desserts
Pumpkin Bread Pudding (with caramel sauce and whipped cream on top!)
Mom’s Pumpkin Pie
Mom’s Apple Pie with a Cheddar Streusel Topping
Pumpkin Cheesecake Pie
Marion’s Crazy Good Pumpkin Bread with Chocolate Chips

Thanksgiving Day Side Dishes We Love
Melissa’s Sweet Potato Casserole
Grandma’s Cranberry Chutney
Auntie Martha’s Spicy Spinach (aka Spinach Madeleine)
Roasted Butternut Squash, Brussels Sprouts, and Cranberries
Amazingly Delicious Sautéed Carrots

LET’S STAY CONNECTED!

Follow my photos of vegetables growing, backyard chickens hanging out, and dinner preparations on Instagram at JudysChickens.

Never miss a post: sign up to become a follower of the Blog.

© 2014-2020 Judy Wright. All rights reserved. Photos and text may only be used with written consent.