My grandson turned one this week, and in celebration, I wanted to make a birthday dinner full of foods he could eat by himself with his adorable little hands. I chose Judy’s Mom’s Meatloaf, Amazingly Delicious Sautéed Carrots, mashed potatoes and a funfetti cake.
He loved everything and entertained us all as he picked away at his food with focus and determination.
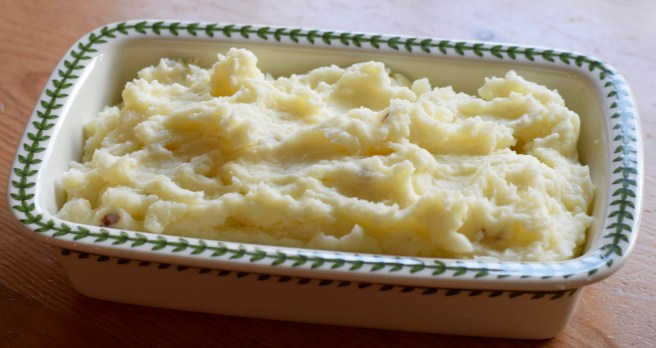
It has been easily five years since I last made a bowl of creamy, mashed potatoes. I’ve been roasting them for so long it hardly ever occurs to me to mash them anymore, but have I ever been missing out. They were good. The calorie count wasn’t too bad, either. I only used six tablespoons of butter and one-half cup of milk for three pounds of potatoes. I like to make mashed potatoes with a combination of Russets and Yukon Golds if I have both in the potato bin; Russets for their high starch content and Yukons for their great flavor.
When I looked at a photo of my dinner plate, its plainness brought back memories of my childhood dinners: starch, vegetable, protein. That threesome was a religion for my mother.
Ingredients
3 pounds potatoes (5-6 large), peeled and quartered
½ cup milk, whole or 2% reduced fat
6 tablespoons butter
Salt, to taste. I used ¾ teaspoon (plus the tablespoon that went into the potato water)
Pepper (optional)
Mise en Place
Instructions
Fill an 8-quart pot with water and one handful (1 tablespoon) of salt. Bring to a boil. You will want enough water to cover the potatoes by about an inch.
While waiting for the water to boil, peel and quarter the potatoes. Cut potatoes into uniform chunks, so that they will cook evenly.
When the water comes to a boil, add potatoes. Bring water back to a boil and set a timer for 15 minutes. After 15 minutes of cooking, check for doneness by piercing a potato with a sharp knife. It should go in easily. If it doesn’t, add 5 more minutes of cooking time and test again. If you are not sure if they have cooked enough, just taste one. When finished cooking, drain potatoes in a colander and allow the steam to dry them. You want the potatoes to be hot and dry when you add the butter mixture.
Heat butter and milk in either a microwave or a saucepan until the butter is melted and the milk is hot, but not boiling.
Place potatoes in a bowl and mix for about 20 seconds on slow speed. Add the hot butter/milk mixture and ½ teaspoon of salt. Mix until potatoes reach the consistency you desire — lumpy or whipped.
“Salt to taste” Add more salt according to your taste preferences, realizing that the interior of the potatoes have already been salted while they were boiling and there is salt in the butter. To adjust salt: add salt in increments of ¼ teaspoon. For this batch, I only needed to add ¼ teaspoon more for a total of ¾ teaspoon.
Serve hot. They do not taste as delicious reheated. Better to store prepped, uncooked potatoes in a bowl of cold water until dinnertime and then cook, rather than make them earlier in the day.
Kitchen Tip: When you smell something bad or rotten, in the kitchen always check the potato bin first. That happened to me this week and sure enough, there was a rotting potato in my basket of homegrown new potatoes.
Recently, I sent each of my sons a text asking them to name three foods they HAD to have on Thanksgiving Day. All three responded with Auntie Martha’s Spicy Spinach. I don’t think a recipe can get a better recommendation than that. Meanwhile, my children, adults that they now are, have spoken; it’s time for me to get this time-honored family recipe up on the blog.
My sister-in-law, Martha, and her siblings have been enjoying this side dish since they were children. My mother-in-law gave me the recipe when my husband and I married in 1983. I recently learned from Martha and her twin sister, Terry, that the original version was known as Spinach Madeleine, and first appeared in the popular Junior League of Baton Rouge cookbook, River Road Recipes: The Textbook of Louisiana Cooking in 1959. The recipe was created by a woman named Madeline Wright from South Louisiana when she got the idea to squeeze a tube of Kraft’s Jalapeno Cheese into a creamed spinach dish for a luncheon with her bridge friends. It was a hit. She submitted the recipe for the newly conceived River Road Recipes cookbook, and it was an even bigger hit. It has been showing up as an elegant side dish on Southern dining tables ever since.
The main ingredients are spinach and Velveeta cheese. What exactly is Velveeta? Velveeta is a processed cheese product that when melted is velvety smooth. It was invented in 1923 while a cheese processing plant employees experimented with ways to use up pieces of cheese that broke off of cheese wheels while being trimmed. They mixed the cheese trimmings with whey, a byproduct from cheese-making, and Velveeta was born.
You will not find Velveeta in the refrigerated section of the grocery store. It took me many searches to figure this out. It is in the Dry Cheese section of the grocery store next to the tall, skinny green boxes of grated parmesan cheese.
Yield: 3½ cups (very easily doubled or tripled)
Ingredients:
20 ounces frozen chopped spinach, thawed and drained, save liquor
4 tablespoons butter
1 cup (4 ounces) onion, chopped
2 tablespoons all-purpose flour
½ cup milk
½ cup spinach liquor saved from drained spinach
1 teaspoon celery salt
¼ teaspoon ground black pepper
½ teaspoon garlic powder
1 teaspoon Worcestershire sauce
6 ounces Kraft Velveeta Jalapeno Cheese
Mise en Place:
Instructions:
Preheat oven to 350º
Defrost spinach in a sieve over a bowl so you can save the liquid that drains out. It should amount to a half a cup. You could use three pounds of fresh spinach, sautéed in butter for the frozen spinach and substitute chicken broth for the spinach liquor.
Melt butter in a saucepan. Add onions and sauté for 10 minutes over low heat. Stir in flour and cook for 2 more minutes.
Add milk, the spinach liquor, celery salt, pepper, garlic powder, and Worcestershire Sauce. Stir until blended. Add Velveeta chunks, and mix until melted.
Add spinach to pot and mix thoroughly. At this point, you could finish cooking by simmering on the stove for 15 minutes, or put it in a casserole and bake it later at 350º for about 30 minutes.
This recipe is easily made ahead of time and can be doubled or tripled. My mother-in-law always baked it with buttered bread crumbs or crumbled Cheez-Its on top.
Today, I served the spicy spinach as a hot dip for a meeting and everyone loved it. Most of my guests were surprised to hear it was made with Velveeta!
P.S. Tomorrow is my two-year blogiversary!! Please sign up to follow my posts! So grateful to Ann Shayne and Kay Gardiner for inspiring me to blog, through their shining example over at Mason Dixon Knitting!
The nooks! The crannies! I love this pie with its unique cheddar crumble topping. I make it when the weather first turns and apple trees in the area are weighed down with fruit. When I took this pie out of the oven, it looked so gorgeous and smelled so good I found myself humming, “You’re just too good to be true” in sheer anticipation of taking my first bite. Mom’s Apple Pie never disappoints.
This recipe calls for a single crust on the bottom and a streusel-style crumble made of cheddar cheese, butter, flour, sugar, and salt, on top. Every time I make it, I add a just little more cheddar as I try to figure out just how much cheddar is too much for I love getting a taste of cheddar in every bite! Right now, I’m up to 1⅓ cups or four ounces. Mom’s original recipe called for 1/2 cup of cheese.
Yield: One 9-inch deep-dish pie
Filling Ingredients:
1 pie crust (I love Trader Jo’s Pie Crust)
3 pounds apples, peeled, cored, and sliced (8 cups, or 2 pounds when cleaned)
¾ cup granulated sugar
1 tablespoon all-purpose flour
2 tablespoons cornstarch
1 teaspoon lemon zest
¼ teaspoon salt
1 teaspoon cinnamon
1/4 teaspoon ground nutmeg or ground cloves (optional)
Topping Ingredients:
1⅓ cups cheddar cheese (4 ounces), shredded
4 tablespoons (2 ounces) butter, chipped into pieces
½ cup all-purpose flour
¼ cup granulated sugar
¼ teaspoon salt
Instructions
Preheat oven to 425º. If you have a pizza stone, put it in the oven on the middle rack and let it preheat along with the oven. Starting the baking process in a very hot oven with a pizza stone helps to ensure a cooked bottom crust. Place a baking sheet on the oven rack beneath the pizza stone to capture any juices that bubble over.
Mise en place
Roll out pie crust and place in the bottom of the pie plate. Fold edges in and crimp to make it pretty. Set aside.
Peel and slice the apples with a paring knife, or try one of the modern conveniences out there for peeling and slicing. Set sliced apples aside.
Mix filling ingredients in a bowl. The apples should be at room temperature to ensure even cooking. Set aside.
Mix topping ingredients until the streusel forms small chunks. I mix the topping ingredients either in a food processor
Or in a bowl with a pastry blender or mixer. Set aside.
Put It All Together
Pour filling into the prepared, uncooked pie crust. Pack the apples down
.
Place pie on the pizza stone and set the timer for 15 minutes.
When the timer rings, spread the topping mixture evenly over the pie filling and decrease the oven temperature to 350º. Set timer for 30 more minutes.
When the timer goes off, the topping should be lightly browned. Place a piece of foil loosely tented over the top to slow down further browning of the streusel.
Cook for another 20-30 minutes. The interior of the pie isn’t done until you see the juices start to bubble over.
The pie on the left has a fine crumb. The one on the right was processed a little longer until it clumped. I like the taste and texture of the clumpier topping.
Voilà!
Finally, Waste Not, Want Not
My family and I get the apple slices; the chickens get the scraps.
As Dean Martin would croon, “When the stars make you drool, just like pasta fazool, that’s amore.“
From the minute I buy a cooked ham, I start thinking about the soup I’m going to make with the leftover ham bone. The soup I love to make with that ham bone is Pasta e Fagioli, AKA pasta and beans, a classic Italian comfort soup. And, once I start making the soup, forget it, I start humming Dean Martin’s song, That’s Amore. Ad nauseam.
I usually pick up a spiral-cut ham to have in the house for sandwiches during the holidays. This Easter, I didn’t have a full house or a ham, but it is so automatic for me to make (and want) a hearty ham bone soup after a holiday that I drove to our local Honey Baked Ham store Monday morning to see if they had any ham bones for sale in their freezer. I was in luck, they were having one of their post-holiday buy-one-get-one-free sales, and I was able to pick up two meaty bones for seven dollars.
Technique Time: How to Add Layers of Flavor to a Soup
One of the cooking techniques I’ve learned over the years is the benefit of slowly sautéing chopped vegetables and aromatics in olive oil to create a flavorful foundation for soups, sauces, and stews.
Depending on who taught you how to cook, this flavor base is known as a soffritto, a mirepoix, or the “Holy Trinity.” For example, the French flavor base is called a mirepoix and includes two parts onion to one part celery and one part carrot, all of it chopped and sautéed in butter or duck fat. The Italians start with a soffritto that includes carrots, onions, and celery often with the addition of garlic, fennel, and parsley, and all of it sautéed in olive oil. In Cajun cooking, they have the “Holy Trinity” which consists of 3 parts celery, 2 parts onion, and 1 part sweet bell pepper, all of it sautéed in butter or oil. It is helpful to know these ratios as you start to create your own recipes.
When making soups and even tomato sauces, you can add another layer of flavor by being intentional about what you use for the soup’s liquid base; the soup’s medium for flavor and heat. When you add raw or pre-roasted meat bones and simmer for a while, the bones’ marrow is released into the soup, and now you have enriched your soup or sauce even more.
Finally, when making soup, you can add yet another layer of flavor to the vegetables you choose to use, such as the stewed tomatoes, beans, and fresh greens I used in this recipe.
When you use this many layers of flavor, you’ll find you need to add a lot less salt, if any, to your recipe. I didn’t add salt to this soup because there is already plenty of it in the ham and cheese rind.
A few words on the main ingredients used to make Pasta e Fagioli.
The Beans
I start with a 20-ounce package of dried beans. The package comes with a seasoning packet that I have never used. In a pinch, you could use three cans of cooked beans, rinsed and drained.
Take a moment to admire how pretty the beans look as you rinse and inspect them for tiny rocks and dirt. I love the different shapes and textures.
Their color intensifies when rinsed, reminding me of pebbles rolling on the beach with the waves.
You will need to soak the beans for a few hours to soften them, and then partially cook them before you start making this soup.
The Ham Bone
Recently, I happened to be at my favorite meat market, Hampton Meats, in Hopkinsville, KY on the day they were butchering a pig. I’ve been there on days when half of a cow was hanging there, too. There is nothing like seeing an animal carcass hanging on a hook to make you take a moment to reflect on the source of your food. I have a copy of the “Meat Reference Manual” issued in 1942 by the U.S. Army for mess sergeants. I like the graphics of their meat charts and refer to them often.
Have you ever wondered why, when you get to the end of a spiral cut ham, getting the meat off the bone is no longer easy or pretty? It’s because the pig’s bulky ball and socket hip-joint are hidden in there. I dissect so you don’t have to.
The Greens:
Many of the cool weather greens growing in my backyard kitchen garden right now, such as kale, cabbage, chard, and spinach are suitable to use in soup because their leaves are thick and won’t disintegrate in the soup like lettuce would do. In the photo on the left, I’m growing “Alcosa” cabbage, a sweet and tasty variety of cabbage. I use the leaves while they are still young rather than letting them grow into a ball. In the picture on the right, I am growing “Winterbor” and “Red Russian” kale and “Bright Lights” chard. All will work well in this soup. Other choices that would work are spinach, collards, and escarole.
Ingredients:
20-ounce bag of dried beans, picked over and rinsed
5 stalks celery (1/2 pound), finely chopped
4 carrots (1/2 pound), finely chopped
1 large onion (1 pound), finely chopped
1 small head garlic (1 ounce), finely chopped
1/3 cup extra virgin olive oil
1 cooked and meaty ham bone, trimmed of visible fat
2 cans “Italian Recipe” stewed tomatoes, puréed first
½ of the heel of a wedge of Parmigiano-Reggiano cheese
2 whole bay leaves
12 cups water (3 quarts)
8 cups greens: cabbage, kale, chard, spinach (greens optional)
1 box ditalini pasta
Mise en Place:
Instructions:
1. To cook dried beans: Place rinsed beans in about 10 cups of water. Do not add salt to the water. Bring to a rapid boil, reduce heat and simmer for 1½ hours. They should still be somewhat firm, but edible. Drain and set aside.
2. Pull some of the meat off the ham bone to use to sauté the soffritto. Set aside.
3. Add olive oil to a large frying pan and get it started heating up. Next, add the soffritto, the carrots, onions, celery and garlic and pieces of ham. Sauté over medium-high heat for 15 minutes, frequently stirring, while vegetables become translucent and very lightly browned.
In a large soup pot add the sautéed soffritto, the partially cooked beans, the ham bone, the 12 cups of water, the puréed stewed tomatoes, the cheese rind, and the bay leaves. Bring to a boil over high heat. Once the soup comes to a boil, turn the heat down to low and let it simmer for one hour, stirring occasionally. Test the beans to make sure they are cooked before adding the greens.
Add the greens.
Cook for five more minutes. Turn heat off and remove soup pot from the hot burner.
Pull the ham bone out of the pot and place it on a cutting board. Pull the meat off the bone, cut it into bite-sized pieces, and return the meat to the pot.
Cook the pasta:
Put a pot of salted water on the stove top to cook the pasta according to the directions on the box. I never cook pasta directly in the soup because it drinks up all the soup’s liquid. Store the cooked pasta in a separate container from the soup, so the noodles do not become mushy.
To serve soup, put a scoopful of ditalini in each bowl, top with soup, and pass the grated Reggiano cheese!
Or, serve it without pasta.
LET’S STAY CONNECTED!
Follow my photos of vegetables growing, backyard chickens hanging out, and dinner preparations on Instagram at JudysChickens.
Never miss a post: sign up to become a follower of the Blog.


 This recipe calls for a single crust on the bottom and a streusel-style crumble made of cheddar cheese, butter, flour, sugar, and salt, on top. Every time I make it, I add a just little more cheddar as I try to figure out just how much cheddar is too much for I love getting a taste of cheddar in every bite! Right now, I’m up to 1⅓ cups or four ounces. Mom’s original recipe called for 1/2 cup of cheese.


