How to Cook Popcorn in a Paper Bag

I had no idea you could do this.

dsc_0530

Last week, I visited my friend, Nicole Maynard, author of a seductive new blog called, Our Year of Eating Local.  Nicole is a wife and the mother of two children. Together, their family of four is all in on a journey of eating locally sourced food every other week for one year. Her goals are “to raise awareness of the impact of our food choices on the environment, to better support local farmers and makers, and in so doing, to heal our planet.” She defines local as being within a 100-mile radius of 37215.

img_4080

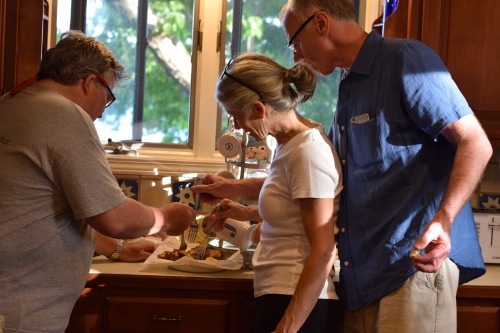
While I sipped a cup of coffee at her kitchen table, Nicole prepared locally grown popcorn in the microwave. I was in the middle of asking her where she had sourced the popcorn when she opened a BROWN PAPER BAG full of popcorn, poured it into a serving bowl, and placed it on the table. I interrupted her mid-sentence: “Wait a sec. Did you just cook popcorn in a lunch bag?” I was incredulous.

“Yes.”

“Did you use oil?”

“No.”

So, no special type of non-flammable paper bag, no oil in the bag to make the corn pop, and no additives to season, improve the color or preserve the popcorn. As if to add an exclamation point to my surprise, Nicole nonchalantly drizzled a light California olive oil over it and a little salt. It was perfectly prepared popcorn, simply made, and at a fraction of the cost of store-bought microwave popcorn bags.

dsc_0433

I stopped at the grocery store on the way home to pick up lunch bags.

How to cook popcorn in a brown paper bag.

Yield: 3½-4 cups popped corn (per 2 tablespoons or 1 ounce of corn)

Ingredients:
2 tablespoons popcorn kernels
1 brown paper lunch bag

dsc_0461

Instructions:

Place kernels in a paper bag. Fold bag top down three or four times. Do not use a staple. I recommend not using any oil, either; the kernels will pop perfectly well without it.

dsc_0452

Place bag upright in the microwave and use the “Time Cook” button to enter 1:50 seconds. This is the amount of time it takes to cook 2 tablespoons of popcorn in my microwave. Every microwave machine’s wattage is different so you may need to experiment with the cook time on yours.

dsc_0513

When you notice a slowdown of kernels popping, take the bag out. Don’t try to cook every last kernel or you will likely end up with a clump of muddy-colored, smoldering popped corn in the center of the bag. If it gets to this point, it might be best to toss the bag out, start over and cook for 15 seconds less the next time.

dsc_0430

You could add a little mild olive oil or melted butter and salt to the bag, shake it up, and have a “to go” single-serving snack. I tried the California extra virgin olive oil recommended by Nicole and liked it on the popcorn. It was much lighter in flavor than the Spanish olive oils I typically use.

dsc_0448

What Makes Corn Pop?

Popcorn kernels are seeds, and as seeds, each kernel has both water and carbohydrates in the form of starch to supply the seed with the energy needed to germinate. As the kernel heats up, the water turns to steam and the starch into a gelatinous consistency. As the temperature and pressure in the kernel rise further, the hull ruptures, the kernel explodes, the starch goo inflates, pours out, and expands like a balloon. The puffed-up goo retains its fluffy shape as it cools and you get popped corn.

Not all varieties of corn will pop. For most varieties, the outside shell is too thick. If you want to grow corn that will pop, make sure you buy “popcorn” seeds.

Meanwhile, Nicole and I did a little bartering during our visit. I gave her a bottle of locally made sorghum syrup (Cerulean, KY, 90 miles away) and she gave me a few bars of her homemade hand soap.

dsc_0497

Posts related to locally grown food:
How Canola Oil is Made (from plants grown locally)
Farming Equipment 101: Harvesting Winter Wheat
Raising Sorghum Cane to Make Sorghum Syrup
Growing Sweet Potatoes at Delvin Farms

LET’S STAY CONNECTED!

Follow my photos of vegetables growing, backyard chickens hanging out, and dinner preparations on Instagram at JudysChickens.

Never miss a post: sign up to become a follower of the Blog.

© 2014-2017 Judy Wright. All rights reserved. Photos and text may only be used with written consent.

Winter Floral Arrangements Using Greenery from the Yard

My friend Lou Ann and I like to make pretty things. We’ll be out walking, notice an abundance of pine cones on the ground, and the next thing you know we are making bright red pinecone wreaths together in her backyard. All of our joint projects using plant materials are under Lou Ann’s tutelage. She’s the design and DIY girl.

img_3967

This year, Lou Ann came over, and we made a holiday arrangement for my foyer. I photographed how she did it step-by-step, plant choice-by-plant choice.

I’ve included each step from cutting the plant stems in my yard to designing the arrangement on my kitchen table. All the greenery came from common foundation plants; nothing is extra-special or hard to find.

dsc_0628

Our first stopover in the yard was my rain garden which is full of perennials meant to attract pollinators for the vegetable garden. The rain garden was created by my talented friend, Jeremy Lekich, owner of Nashville Foodscapes. If you are interested in growing food and doing it in an attractive way using best permaculture practices, Jeremy is your man.

Lou Ann was instantly drawn to these dried stems of anise hyssop. Anise Hyssop is a “top three” plant for producing nectar and attracting bees, and as Jeremy informed me, it makes a wonderful tea used to cure low spirits or a broken heart according to Native American herbalism. Noted.

dsc_0564

The evergreen, Mahonia, with its striking, statuesque stalks topped by a whorl of prickly, hollylike leaves, was next. Mahonia is one of many drought-resistant [read, plants that can be ignored and still survive] evergreens in my yard. Lou Ann cut down one tall stalk.

dsc_0568 dsc_0572

Nandina is located nearby. It provides year-round interest in the garden because of its lacy sprays of shiny green leaves with a six-inch center stem full of red or gold berries. It, too, is drought-resistant. Lou Ann took a stem of each color.

dsc_0573 dsc_0574

Limelight Hydrangea: fresh or dried, it’s one of my favorite shrubs. Its pale limey-green flowers change from shades of pink to burgundy as they age during the summer and fall.

dsc_0579

Eleagnus:  I planted this evergreen two years ago after I saw it in a flower arrangement. I was drawn to the shimmering taupey-gray underbelly of the olive green leaves. The coloring of the underside of the leaves works magic light wise in an arrangement. Sadly, the nurseryman from whom I bought the plant referred to it as Ugly Agnes (perhaps because of the unruly way in which it grows) and that name has stuck.

dsc_0581

We picked stems of Sage from the herb bed for their silvery contrasting color.

dsc_0587

Next up was the wall of English Ivy, another evergreen. When Lou Ann had her floral design business, known as Sprig, she would often come by to pick a few of these extra-large leaves to line the vases of floral arrangements.

dsc_0592

Lenten Rose (aka Hellebore), Holly, and Pine: more evergreens. We used a few stems of each.

dsc_0595

dsc_0598

dsc_0600

Burning Bush: this deciduous flowering shrub has pretty red berries on pale grayish-brown stems. More contrast and color. Lou Ann cut a few stems of these, too.

dsc_0795

Deciduous Japanese Magnolia: this type of magnolia loses its leaves in the winter and begins the spring season with large pink flowers. The silvery, velvet-like buds for these flowers set in December. The buds add a pretty, soft color to the arrangement.

dsc_0607

Okra Pods: I am a huge fan of both burgundy and green okra, so I always grow both varieties in the veggie garden. Okra is a draught-resistant plant that gives you tasty food in the summer and strikingly pretty seed pods in the winter. More interest for the arrangement.

dsc_0614

Here is our collection of plant materials.

dsc_0611

We laid it all out on the kitchen floor.

dsc_0625

And then Lou Ann got busy.

dsc_0640

dsc_0652

dsc_0657

dsc_0659

dsc_0669

Ta Da!

dsc_0702

Next, we had to move the arrangement into the foyer. We decided it would be fun to add a few stems of Poinsettia flowers. When the stem of the poinsettia plant is cut, it leaks a milky white substance that can be irritating to skin. Lou Ann uses a lighter to cauterize the tip of the stem and stop the drips.

dsc_0721

Happy Holidays from Judy’s Chickens!

dsc_0732

You can follow Lou Ann and her fabulous photos of flowers, complete with their botanical names, on Instagram @labbrown

Other posts about floral arrangements made with plant materials picked fresh from the yard:

WWMD? A Bucket of Spring Veggies as a Centerpiece
DSC_0855

How to Make Crab Apple Jelly (and grow the crab apples)
Elephant Painting

LET’S STAY CONNECTED!

Follow my photos of vegetables growing, backyard chickens hanging out, and dinner preparations on Instagram at JudysChickens.

Never miss a post: sign up to become a follower of the Blog.

© 2014-2017 Judy Wright. All rights reserved. Photos and text may only be used with written consent.

How to Make Cork Bulletin Boards

Ten years ago we took our children to Sicily to explore my family’s roots. One daytrip found us driving up a scenic mountain road looking for the small town of Isnello, home of my great-grandmother on my father’s side. The winding country road was slow-going and more than once we had to wait for a herd of goats to pass. Along the way, we passed something very unusual — a grove of nude trees.

As we continued along the road, we saw more nude trees and stacks of bark on the ground.

We pulled over to investigate and suddenly realized we were looking at a cork tree farm. Cork oaks, Quercus suber, to be exact. We were all so excited to figure this out; it seemed like the light bulb went off in all of our heads at the same time. Where corks came from was just not one of those questions any of us had ever considered, and now the question and the answer were presented to us at the same moment. That was memorable.

Slabs of cork bark are harvested from cork oaks every nine to twelve years. The trees, which often live for 250-300 years, need to be 25 years old before their cork can be harvested. It is a good example of a renewable resource. The harvest from one cork tree can be used to make 4000 corks.

Here is a video that shows the production of corks from harvest to bottle cap. Section 4:45 on the timeline shows a drill punching out corks from a strip of bark. If you look closely at the corks, you can see the age lines of the bark, generally 9-12 years of tree growth.

I was a collector of wine corks long before seeing the cork oak grove simply because I loved the cork’s texture and graphics. Since visiting the grove, I’ve become incapable of throwing away a cork. I am that person who slips wine corks into her purse at dinner parties.

A year after our trip, I was in the middle of a kitchen renovation when the idea hit me to make a wall-sized corkboard on the wall above my cookbook shelves.

DSC_0519

My husband built the frame for the bulletin board using a very thin sheet of plywood for the backing and pine trim for the frame. I used a polyurethane stain as a finish.

cork art kitchen

The board is anchored into the wall studs with four screws, each of which is covered with corks that have pink nail polish painted on them so we can locate the screws should we ever want to remove the corkboard.

I made another corkboard for the space above my sewing machine nook.

DSC_0517

I did not frame it. Instead, I custom built it to fit into the cabinet space that surrounds it. The corks are glued onto thin plyboard which is fastened to the wall with screws.

Over the summer, I made four corkboards, one for each of the homes my sons and niece were moving into. They all wanted black frames. Each is two feet by three feet and uses about 500 corks. The frame and backboard weigh five pounds, and the corks weigh about six pounds. Before you take on this project, you’ll need to save a lot of corks.

IMG_0222

My husband built the frames, and another relative, Uncle Steve, who was visiting, puttied, sanded, and painted the frames. After I posted a plea for corks on Facebook, friends and family, near and far, either mailed boxes of corks to me or dropped them off at my front door. I am so grateful to the people who shared their stash with me.

Supplies You Will Need:
About 500 wooden corks (weighs about six pounds)
Plywood backing
Two six-inch strips of wood trim to build the frame (see photo)
Miter box and saw
Hot glue gun with a refill package of long glue strips
Cutting board and knife for trimming corks
Yardstick and pen to draw guidelines on the plyboard
Lightweight wood filler
Sanding block (fine)
Primer, spray-on works fine
Paint- I used one with a satin finish
Small paintbrush
Two eyelet screws
40-pound picture hanging wire

Instructions:

Buying the Backing and Frame Materials

To keep the weight down on the finished product, I use the thinnest sheet of plywood backing I could find. I usually ask the salesmen at Home Depot to cut the plywood down to the size I need.

On a slow day, I can often get him to miter-cut the trim pieces for me, too.

If we do the trim cuts at home, I add an extra length of trim in case we mess up on our cuts.

IMG_9913 DSC_0179

Building the Frame

My husband took the two six-foot long trim strips and used a miter-block to cut them down to the proper size which was previously measured to fit around the plywood exactly.

DSC_0192

He then used wood glue to attach the molding to the back board. He used clamps to keep the trim in place while it dried. You could also use a nail-gun to keep the frame in place, but you will have to come back and fill in the nail holes with putty.

IMG_9937

Putting a Finish on the Frame

First use wood putty to fill in the crevices of the mitered corners. Allow to dry and then lightly sand with a fine block sander.

IMG_9993

Apply a coat of white primer paint. Primer raises the fibers on wood, so once it is dry, you will need to sand the surface again. Wipe away the dust with a cloth.

IMG_0150

Use a paint brush to apply the paint. I tried using a can of spray paint, but I didn’t like the drip marks it left so I switched to regular paint.  Allow paint to dry overnight.

IMG_0168 IMG_0190

Applying the Corks

Draw horizontal guidelines across the plyboard, approximately every three inches, to help you lay out even rows of corks.

Start at the bottom of the board, two corks vertical followed by two corks horizontal. Choose corks that are the same length for each of the twosomes. When you get to the end of the row, you may have to use a knife to trim corks to make them fit.

I lay out an entire row of corks first and then come back with a hot glue gun to glue them into place. The corks should fit snuggly.

DSC_0311

I place all the corks with their graphics and words readable from the same direction, both vertically and horizontally. Thus, whether you choose to hang the finished board vertically or horizontally, the corks will all face the same direction.

Continue in this pattern all the way to the top of the plyboard.

IMG_0195

I usually need to do some finagling to make the last three rows of corks fit nicely into the frame. It is definitely like a puzzle at the end. This is not the time to be a perfectionist. Once you start pinning things on your finished bulletin board, nobody will notice what you did to make the corks fit.

DSC_0355

Installing the Hanging Wire

You will need two small eyelet screw and 40-pound picture hanging wire.

Lay the frame face down. Mark the frame on each side with a pencil one-fourth of the way down from the top corners. That’s about six inches down.

Make a small pilot hole over the pencil mark using a hammer and a nail one size smaller than your eyelet screw.

Screw the eyelet hooks into the pilot holes. The eyelet holes should face each other when properly installed.

Wrap the hanging wire through the eyelet hole a couple of times before running the wire across to the other eyelet screw.

DSC_0510

More Ideas:

My friend, Libba, sent me photos of the cork wall on the bar in her home. I love the design! It looks like it was sprayed with a coat of polyurethane.

IMG_3019

IMG_0524

Her cork board inspired me to make this one; my all-time favorite board.

I used large champagne corks for the round pieces.

I made it for a wall in my office/studio.

Thank you to all my friends who left corks at my door and who took time to mail their stashes to me: Wayne, Maribeth & Michael, Albie and Sara, Bill & Kim, Frances, Beth, Millie, Caroline, and the people I’ve missed. It’s nice to know I am not the only one who can’t throw away a cork.

Knitting, cooking, and crafts — my inspiration for all of it came from my mother.

DSC_0527

Related Posts
How to Make Gorgeous Birdhouse Gourds
How to Make Plant-Based Dyes
How to Block Print Fabrics (India, Part 2)
How to Make Indigo Blue Dye
How to Make a Freezer Thaw Detector
How to Make Artisan Bread the Easy Way

LET’S STAY CONNECTED!

Follow my photos of vegetables growing, backyard chickens hanging out, and dinner preparations on Instagram at JudysChickens.

Never miss a post: sign up to become a follower of the Blog.

© 2014-2019 Judy Wright. All rights reserved. Photos and text may only be used with written consent.

How to Make Catfish Traps: AKA Noodle or Jug Fishing

The first time I went to Lake Barkley, I sat on the edge of the lake in the quiet of the morning and watched an energetic family motorboat from one buoy to another, pulling in fish and laughing as they did so. I had never seen this way of catching fish, but I was hopeful this Rockwellian moment could one day be a part of my future. Indeed, being who I am, I went ahead and imagined my husband driving a boat full of grandchildren …

Later in the day, we met the family who had been out in the boat, our new neighbors, Pat and Dave Malone. They explained how to “jug” fish and showed us their morning catch. We were hooked. My recent enthusiasm for catfishing ensured a trip later in the day to Walmart to buy supplies. My husband’s curiosity and DIY nature ensured he would have the noodle lines rigged and set that evening. Luck secured a catch the following day.
lake barkley, ky july 4th week

The most common types of catfish in Lake Barkley are the scaleless Channel Catfish and the Blue Catfish. When the Channel catfish are young, their skin is greenish-gray with black spots. The spots go away as they age, and their skin turns gray. The fish on the right with a white belly is called a Blue catfish. The one on the left is a Channel catfish (thanks, Bruce!).
IMG_7720

Here are some facts about catfish that might help should you decide to go noodle fishing:

  • Catfish are nocturnal bottom feeders.
  • Their peak activity and eating time is from dusk to midnight.
  • They have cat-like whiskers called barbels (that do not sting).
  • Their barbels are receptors for taste, smell, touch, and wake-tracking prey.
  • Their razor-sharp dorsal and side fins can prick you.
  • Their flat heads make it easier to skim the lake floor for food.
  • They’ll attempt to eat anything, dead or alive, so this, the most foul-smelling bait on earth, is an excellent choice to lure them in.

Catfish do not have teeth. Instead, they use suction to pull food into their mouths as they swim.
IMG_7728 (1)

I’ve seen people catch catfish in two ways:.One method is to use a long trotline weighted down with evenly spaced weights and large hooks. This one had about 100 weights and hooks.
catfish

The other method is known as noodle fishing.

Here is how to noodlefish: In the late afternoon, place your premade collection of baited noodles in shallow water. The following day, go out and pull each noodle in. We usually catch two or three fish out of the twelve noodles we set. Sometimes, we have to search for the noodles if the wind, or a strong fish, has dragged one away. The hunt for a noodle that has drifted across the lake is part of the adventure.

How to rig a catfish noodle (makes 4):

Supplies:
DSC_0085

1 four-foot long yellow or orange swim noodle and a knife to cut it into twelve-inch segments.
duct tape, scissors, and a Sharpie marker
40 feet of thin, braided, polyester string and a lighter to burn and seal the ends
1 tape measure to measure the lengths of string
4 large fishing hooks
4 half-ounce casting sinkers (weights)
1 dry sponge
1 skewer to make holes in the noodle
1 jar of stinky catfish bait (we use Sonny’s Super Sticky Channel Cat Bait)

Instructions:
Cut a swimming noodle into four or five equal parts. Use bright yellow or orange noodles to spot them bobbing in the water from afar. Use colorful duct tape to make a stripe on one end to better distinguish your noodle stash from others. Or, just write on the noodle!
DSC_0092

Cut ten-foot-long lengths of string, one for each noodle. Use a lighter to melt and seal each end of string so it won’t unravel.
DSC_0104 DSC_0117

On one end, attach a giant fish hook. Use a bowline knot to secure the attachment.
DSC_0098

About 12 inches from the hook, attach a weight by making a loop with the string, running the loop through the weight’s clasp hole, and then pulling the weight through the loop of string. Next, tie a knot to secure the weight in place.
DSC_0101 DSC_0103

The finished hook and sinker should look like this:
DSC_0094

Now, for the other end of the string: Using the pointy end of a skewer, make a hole through the noodle as shown. Make a little slit on the skewer’s flat end with the edge of a scissor. Slide the string through the slit, thus creating a guide so you can run the string through the small hole. Knot the string around the noodle, as shown.
DSC_0126 DSC_0107 DSC_0110

Alternatively, you could just attach the string to the tube this way:
DSC_0116

Cut a sponge into little squares. Make extra squares to store in your tackle box. Secure one sponge on each hook.
DSC_0119 DSC_0124

With the hook and sinker attached, wind the string around the noodle, tuck the hook into the styrofoam for safety, and store until ready to fish.
DSC_0125 DSC_0132 (1)

How to noodle fish:

Before setting your noodles in the water, dip the hook with its dry sponge into the gooey catfish bait. Throw the baited noodle line into the water. Repeat until all the noodles are baited and tossed into the water. Invite others (such as guests) to do this stinky baiting job whenever possible. Thanks, Rex!

Throw each baited noodle into shallow water that is about eight feet deep. Since catfish are bottom feeders, you want the weighted hook to sink to their level.

The next day, get up early and check your noodles for fish. We use a mooring hook to grab the noodles. The noodles sometimes drift.,
:IMG_7683 IMG_7685 IMG_7689

Ta Da!
IMG_7735 (1)

How the pros do it

Compare our single hook method to how the pros do it … Early one summer morning, while we were out pulling in our scrappy noodle lines, we saw a husband and wife team hauling in one fish after another from a “trotline.” Mouths agape, we took our boat over to watch and visit.

The couple, experienced fishermen, had an interesting way of keeping their fish fresh. They had a long, thin, wooden tub in the center of their boat with a gasoline-powered engine that kept the water churning.
Screen Shot 2016-05-11 at 8.18.11 AM

We noticed the couple throwing the small fish (which looked huge to us) back into the water. They must have seen how impressed we were with what they called small because ten minutes later, they waved us over and gave us a bucketful of their “rejects.” We gushed with thanks.
catfish lake barkley

How We Cook Catfish

One weekend, my husband and visiting friends, Mary and Ed Carter, showed us how they prepare catfish. It’s become our traditional way of cooking it now. This recipe makes enough for four people when used as an appetizer. The fish was light, flaky, and delicious.

4  6-ounce catfish fillets (approximately)
1 cup garlic croutons, crushed
1 tablespoon Tony Chachere’s Creole Original Seasoning or seasoned salt
1 teaspoon lemon garlic pepper
canola oil
lemon slices for garnish

In a ziplock bag, crush the croutons into large crumbs. Add the fish and remaining seasonings. Gently toss until fillets are well coated.

Meanwhile, heat canola oil in a cast iron skillet (about 1 inch deep). When a drop of water sizzles in the oil, it is ready for the fish. Gently lay the fillets in the hot oil. When lightly browned and flakey, flip over and cook the other side. Serve hot.
DSC_0964

Squeeze with lemon juice before serving.
DSC_0007

Enjoy! Here is our Southern Living magazine-style photo moment.
DSC_0024

The Lake Barkley State Park and Marina has room and boat rentals and is ninety miles from Nashville.
Unknown

LET’S STAY CONNECTED!

Follow my photos of vegetables growing, backyard chickens hanging out, and dinner preparations on Instagram at JudysChickens.

Never miss a post: sign up to become a follower of the Blog.

© 2014-2023 Judy Wright. All rights reserved. Photos and text may only be used with written consent.