Raising Sorghum Cane to Make Sorghum Syrup

Last September, my husband and I were invited to watch a Mennonite family make sorghum syrup from stalks of sorghum we saw growing in a field all summer in Kentucky. The seeds were planted in April and the stalks were harvested from late August through September. While there are many varieties of sorghum grown, some for syrup, some for silage (animal feed), and still others for grain to be milled for flour, this family was growing their sorghum for syrup and silage.

The fields were gorgeous with their tall stalks, topped by a sea of golden bushy seed tassels. Up close, one can quickly see why sorghum is in the same grass family as corn, oats, and wheat; they all grow in the same way with long stems, broad leaves, and seed tassels full of kernels of millable grain.

Sorghum - Version 2

Sorghum cane usually grows from six to ten feet tall. It is exceptionally heat-tolerant, which may explain why it is often the last grass still green and standing in fields in the Southeast in September.

To harvest the cane, farmers strip off the leaves and remove the seed tassels. Next, the stalks are cut down as close to the ground as possible because that’s where most of the juice is found. The stalks are stacked on carts, and the carts are pulled by horses to the grinding shed.

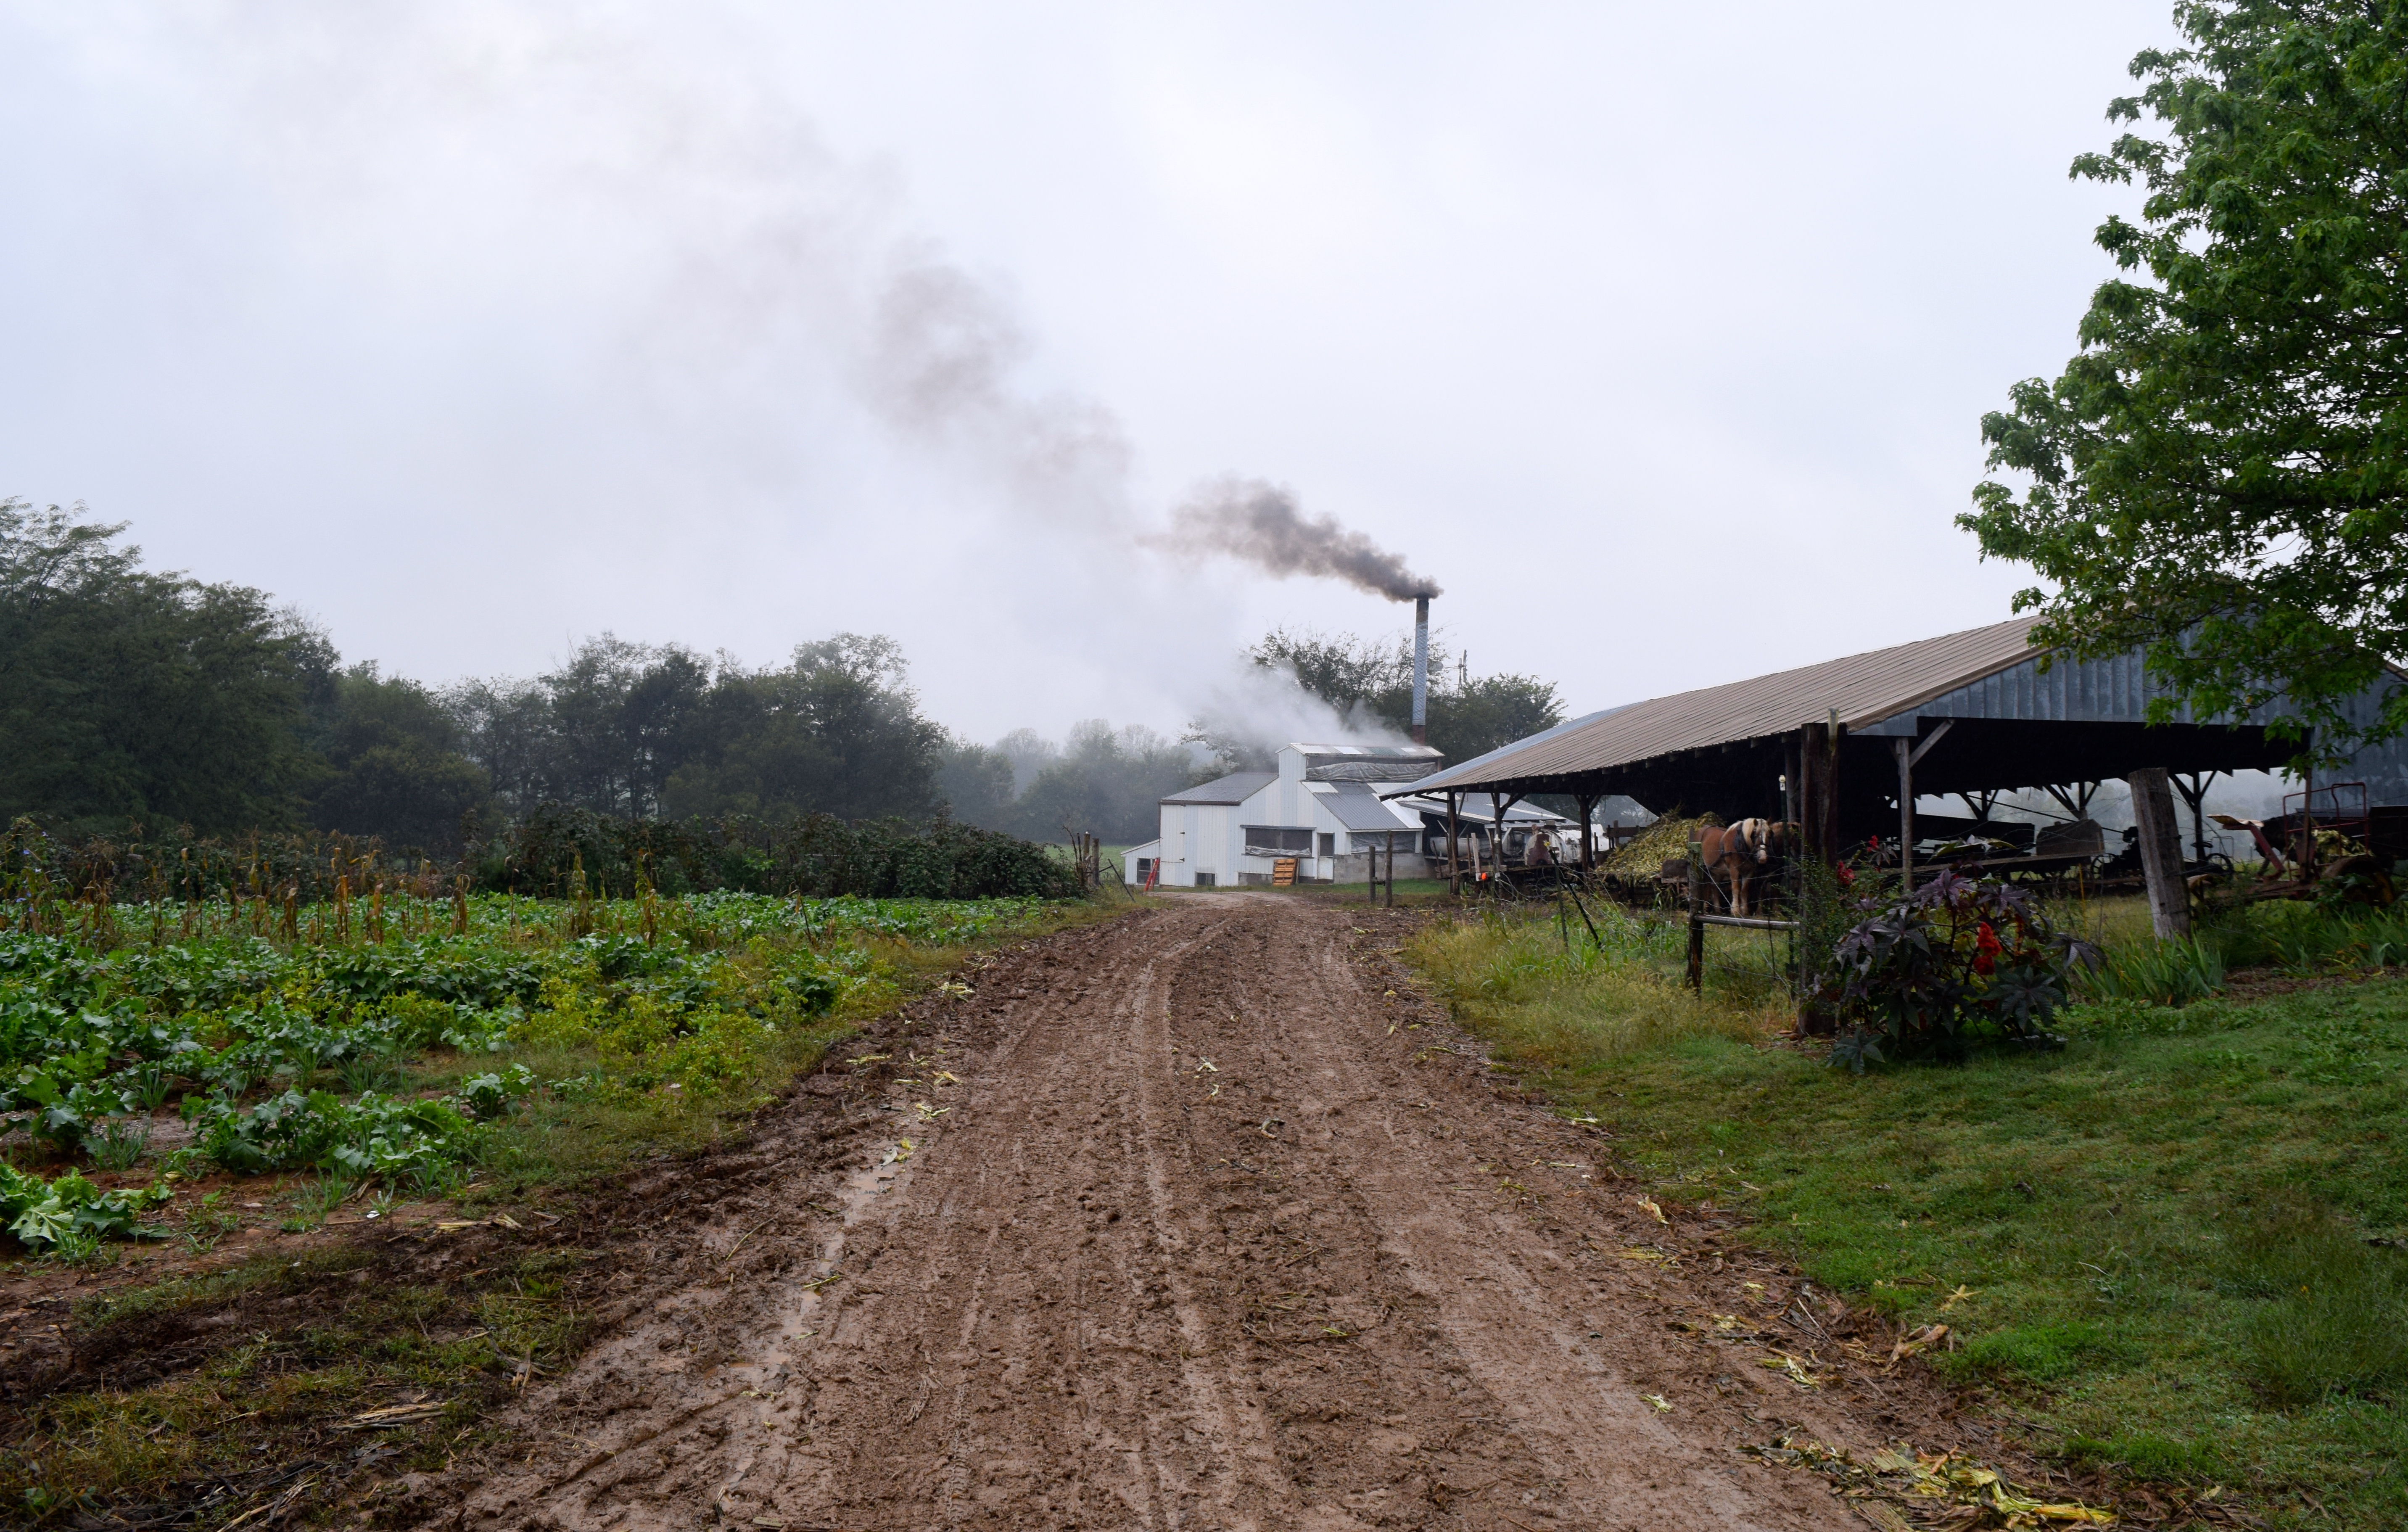
We had been to this farm many times to buy eggs and vegetables but had never been down this dirt road to the sorghum processing shed. Our farmer friend told us to head for the tall smokestack, and there we would find the men boiling down the syrup.

.DSC_0206

We passed an open shed on the right where the stalk grinder is located. Here, the sorghum stalks are fed into a set of rollers that press out the neon-colored juice.

Sorghum

If you have ever been to a historical demonstration of a sorghum pressing, you may have seen this same process, only back in the day, a mule was used to provide energy to pull the crank that rotated the rollers in the press. As the mule walked in a circle, sorghum juice poured from the press into a collection barrel. I found this image in a publication called Bittersweet.

1i3p24a

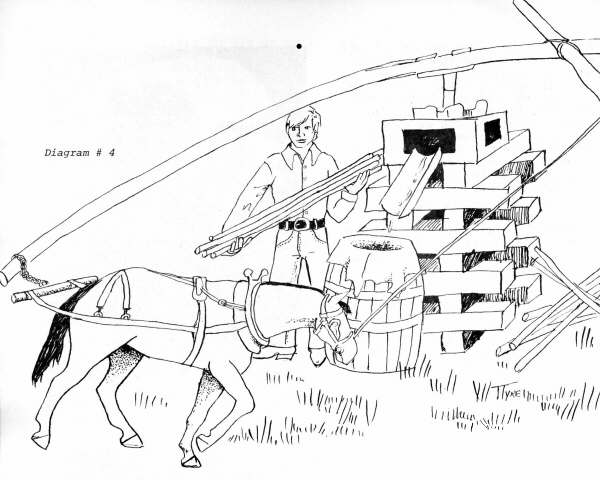
In Nashville, you can see a live demonstration of this process at the Music and Molasses Arts and Crafts Festival held annually in October at the Tennessee Agricultural Museum.

 events3

At the Mennonite farm, a diesel-powered conveyor belt moves the waste from the pressed stalks to a cart.

where the sweet-tasting scraps are enjoyed by the workhorses, who transport it to the compost heap.

..

There is beauty in the simplicity of this process.

Further down the road, we came to the cooking shed where the thin neon-green sorghum juice is cooked down to a thick syrup.

The pre-cooked juice is stored in the white tank located on the shelf on the left. The gray tank, on the right, is the boiler where steam is created to generate heat to cook down the syrup in the cooking pans located inside the white door.

Sorghum

On the backside of the building, you can see the wood-burning furnace that heats the water in the boiler to create steam. The younger generation of boys is tasked with keeping the fires stoked while the older men, in the building on the right, boil down the juice.

Sorghum

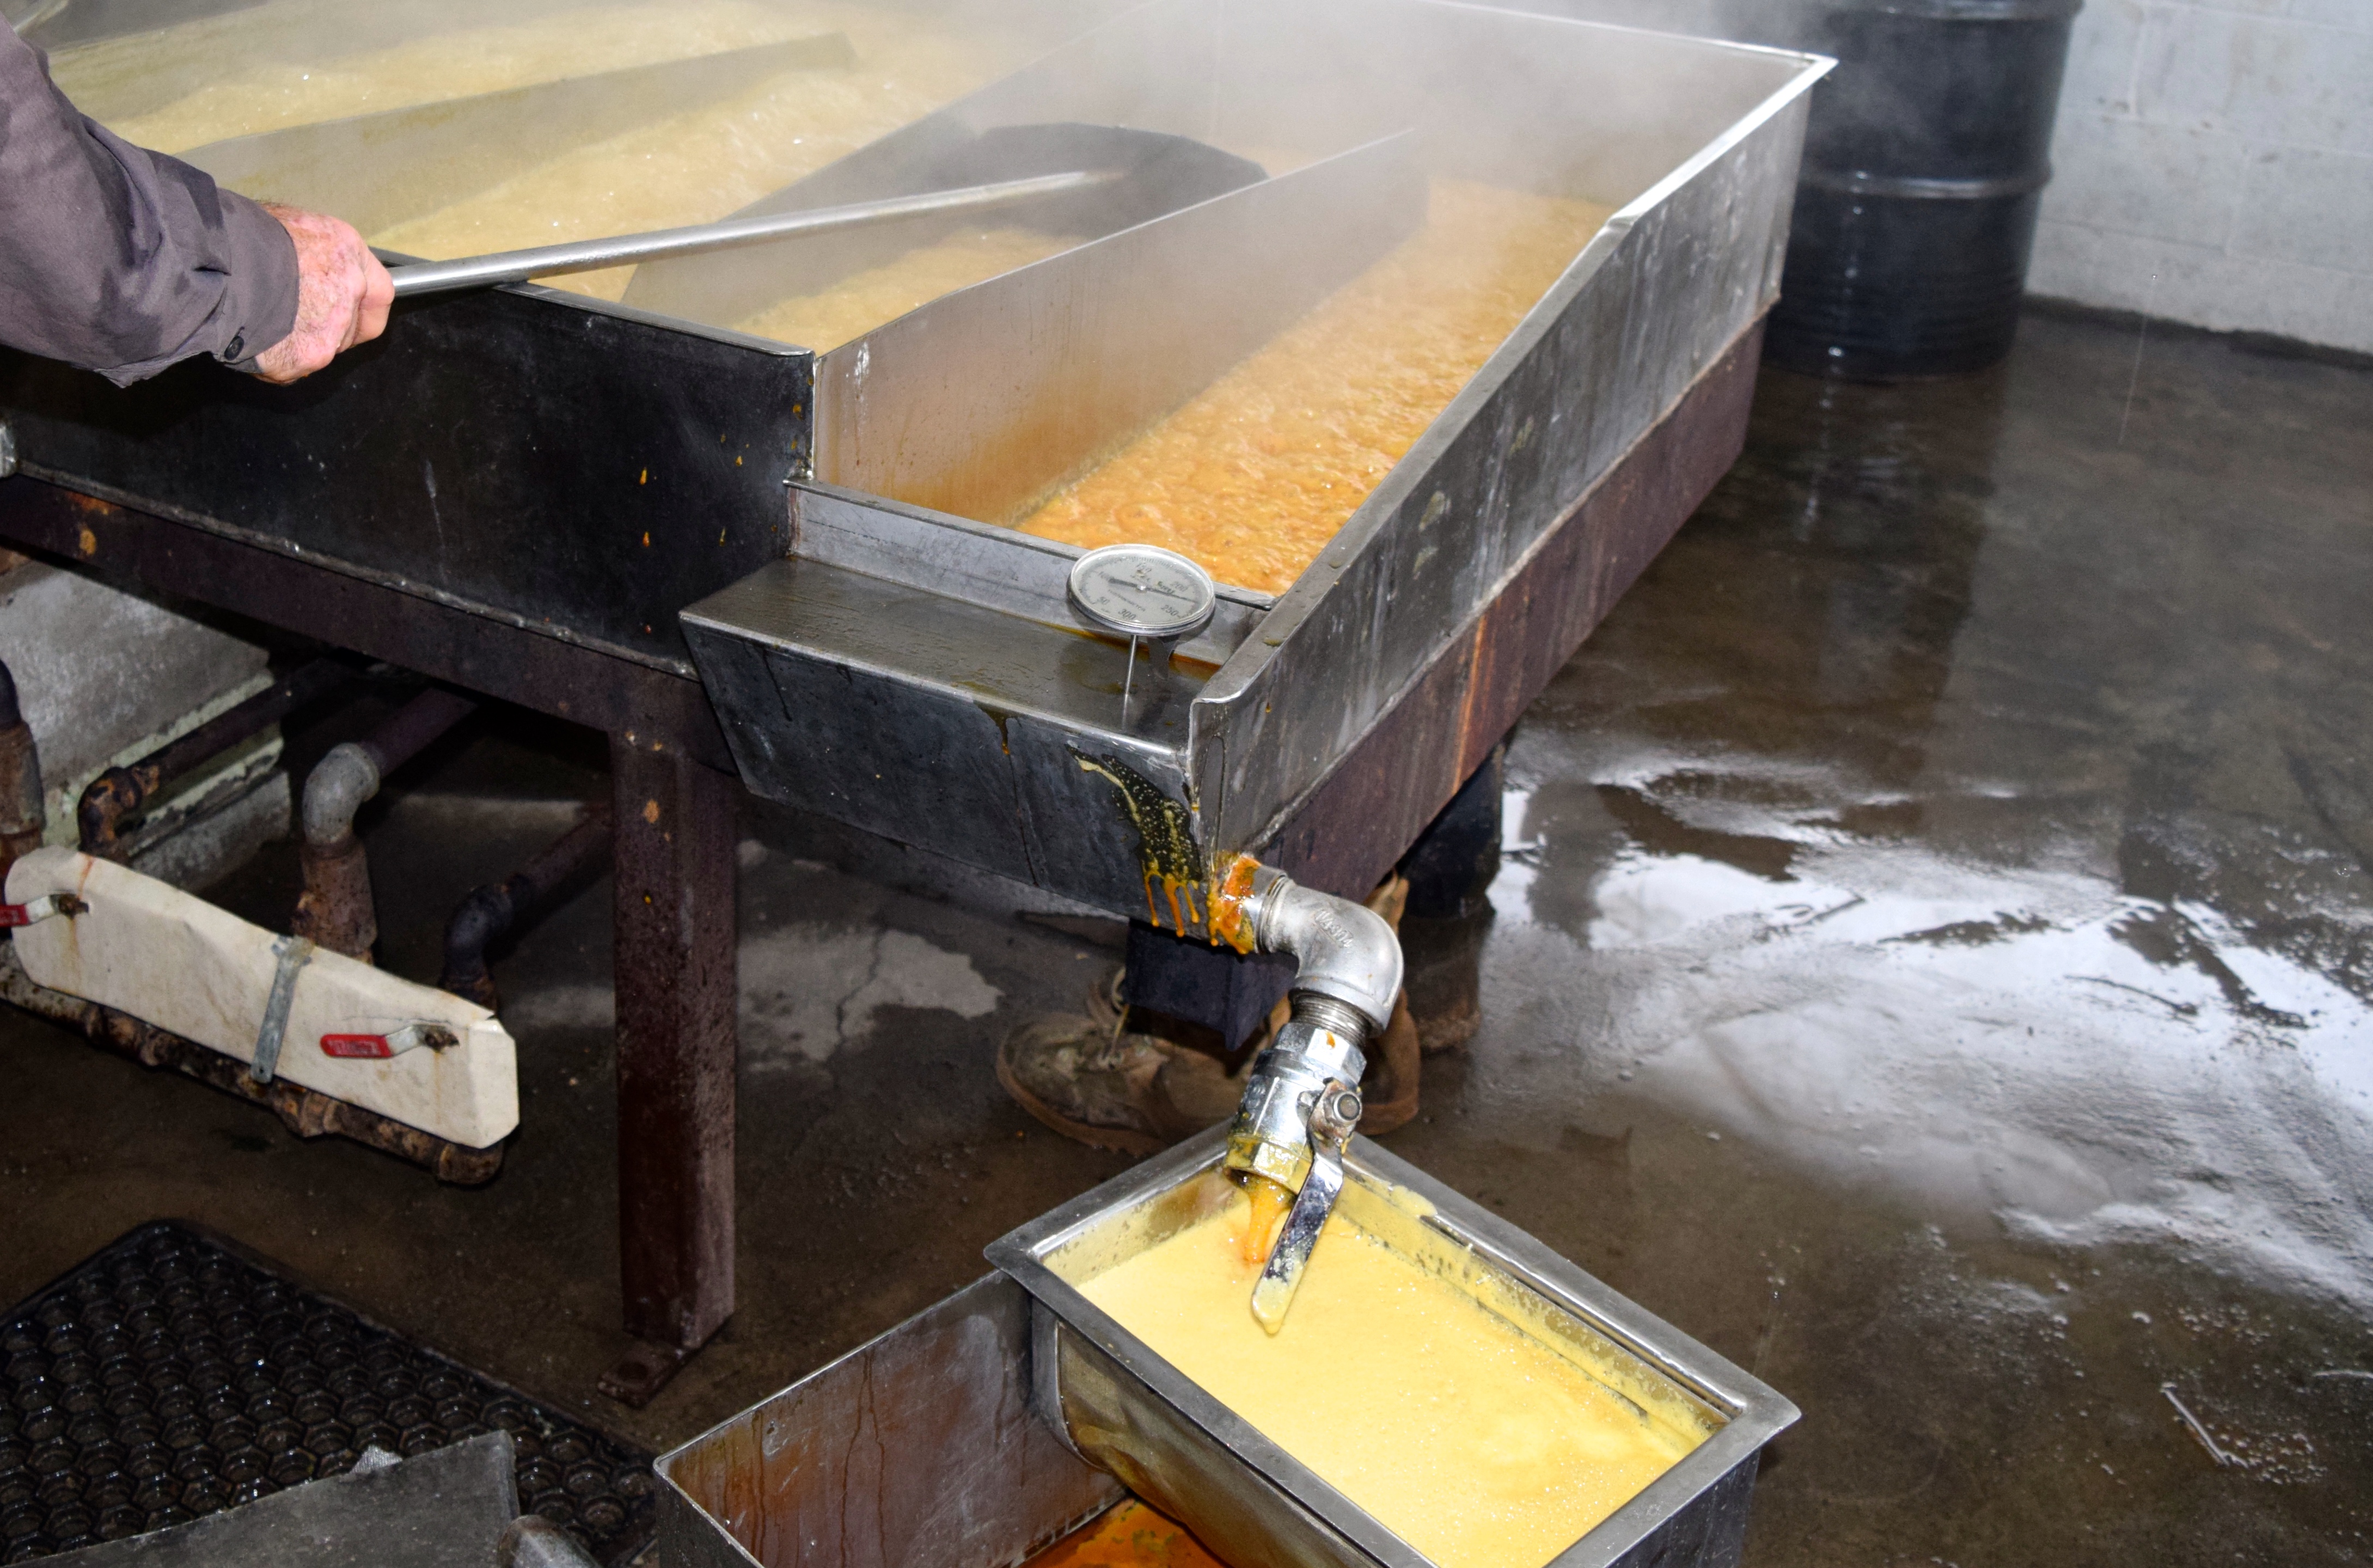
The steam, much hotter than boiling water, travels through pipes to the cooking room where it runs under a 75-foot maze of metal cooking trays. Ten gallons of juice will render one gallon of syrup. The steam in the room is created by the nine gallons of water boiled out of the juice. The steam is so thick you can barely see across the room.

Sorghum

The sorghum syrup starts out as a thin neon-green liquid loaded with not so tasty chlorophyll. The farmer uses a hoe-like tool to skim off the chlorophyll and other impurities on the liquid’s surface, as it boils up from the juice.

By the time the syrup reaches the end of the maze, it is ready to be filtered and jarred. Here the farmer scrapes the last bit of sweet foam off the syrup so there won’t be white foam streaks in the jar.

An old farmer I met in Nashville told me when he was growing up, there was a commercial sorghum mill in Crossville, and on the day they were cooking the syrup, all the mothers in town would send their kids to the mill with steel cups to scavenge the foam and bring it home. The mothers would use this gleaned sweetener to make cakes and biscuits. He said the foamy syrup was tasty and free!

Sorghum

The syrup drips through the filter into a barrel and from there is poured into jars of all sizes. It is sold in stores around the county.
Sorghum

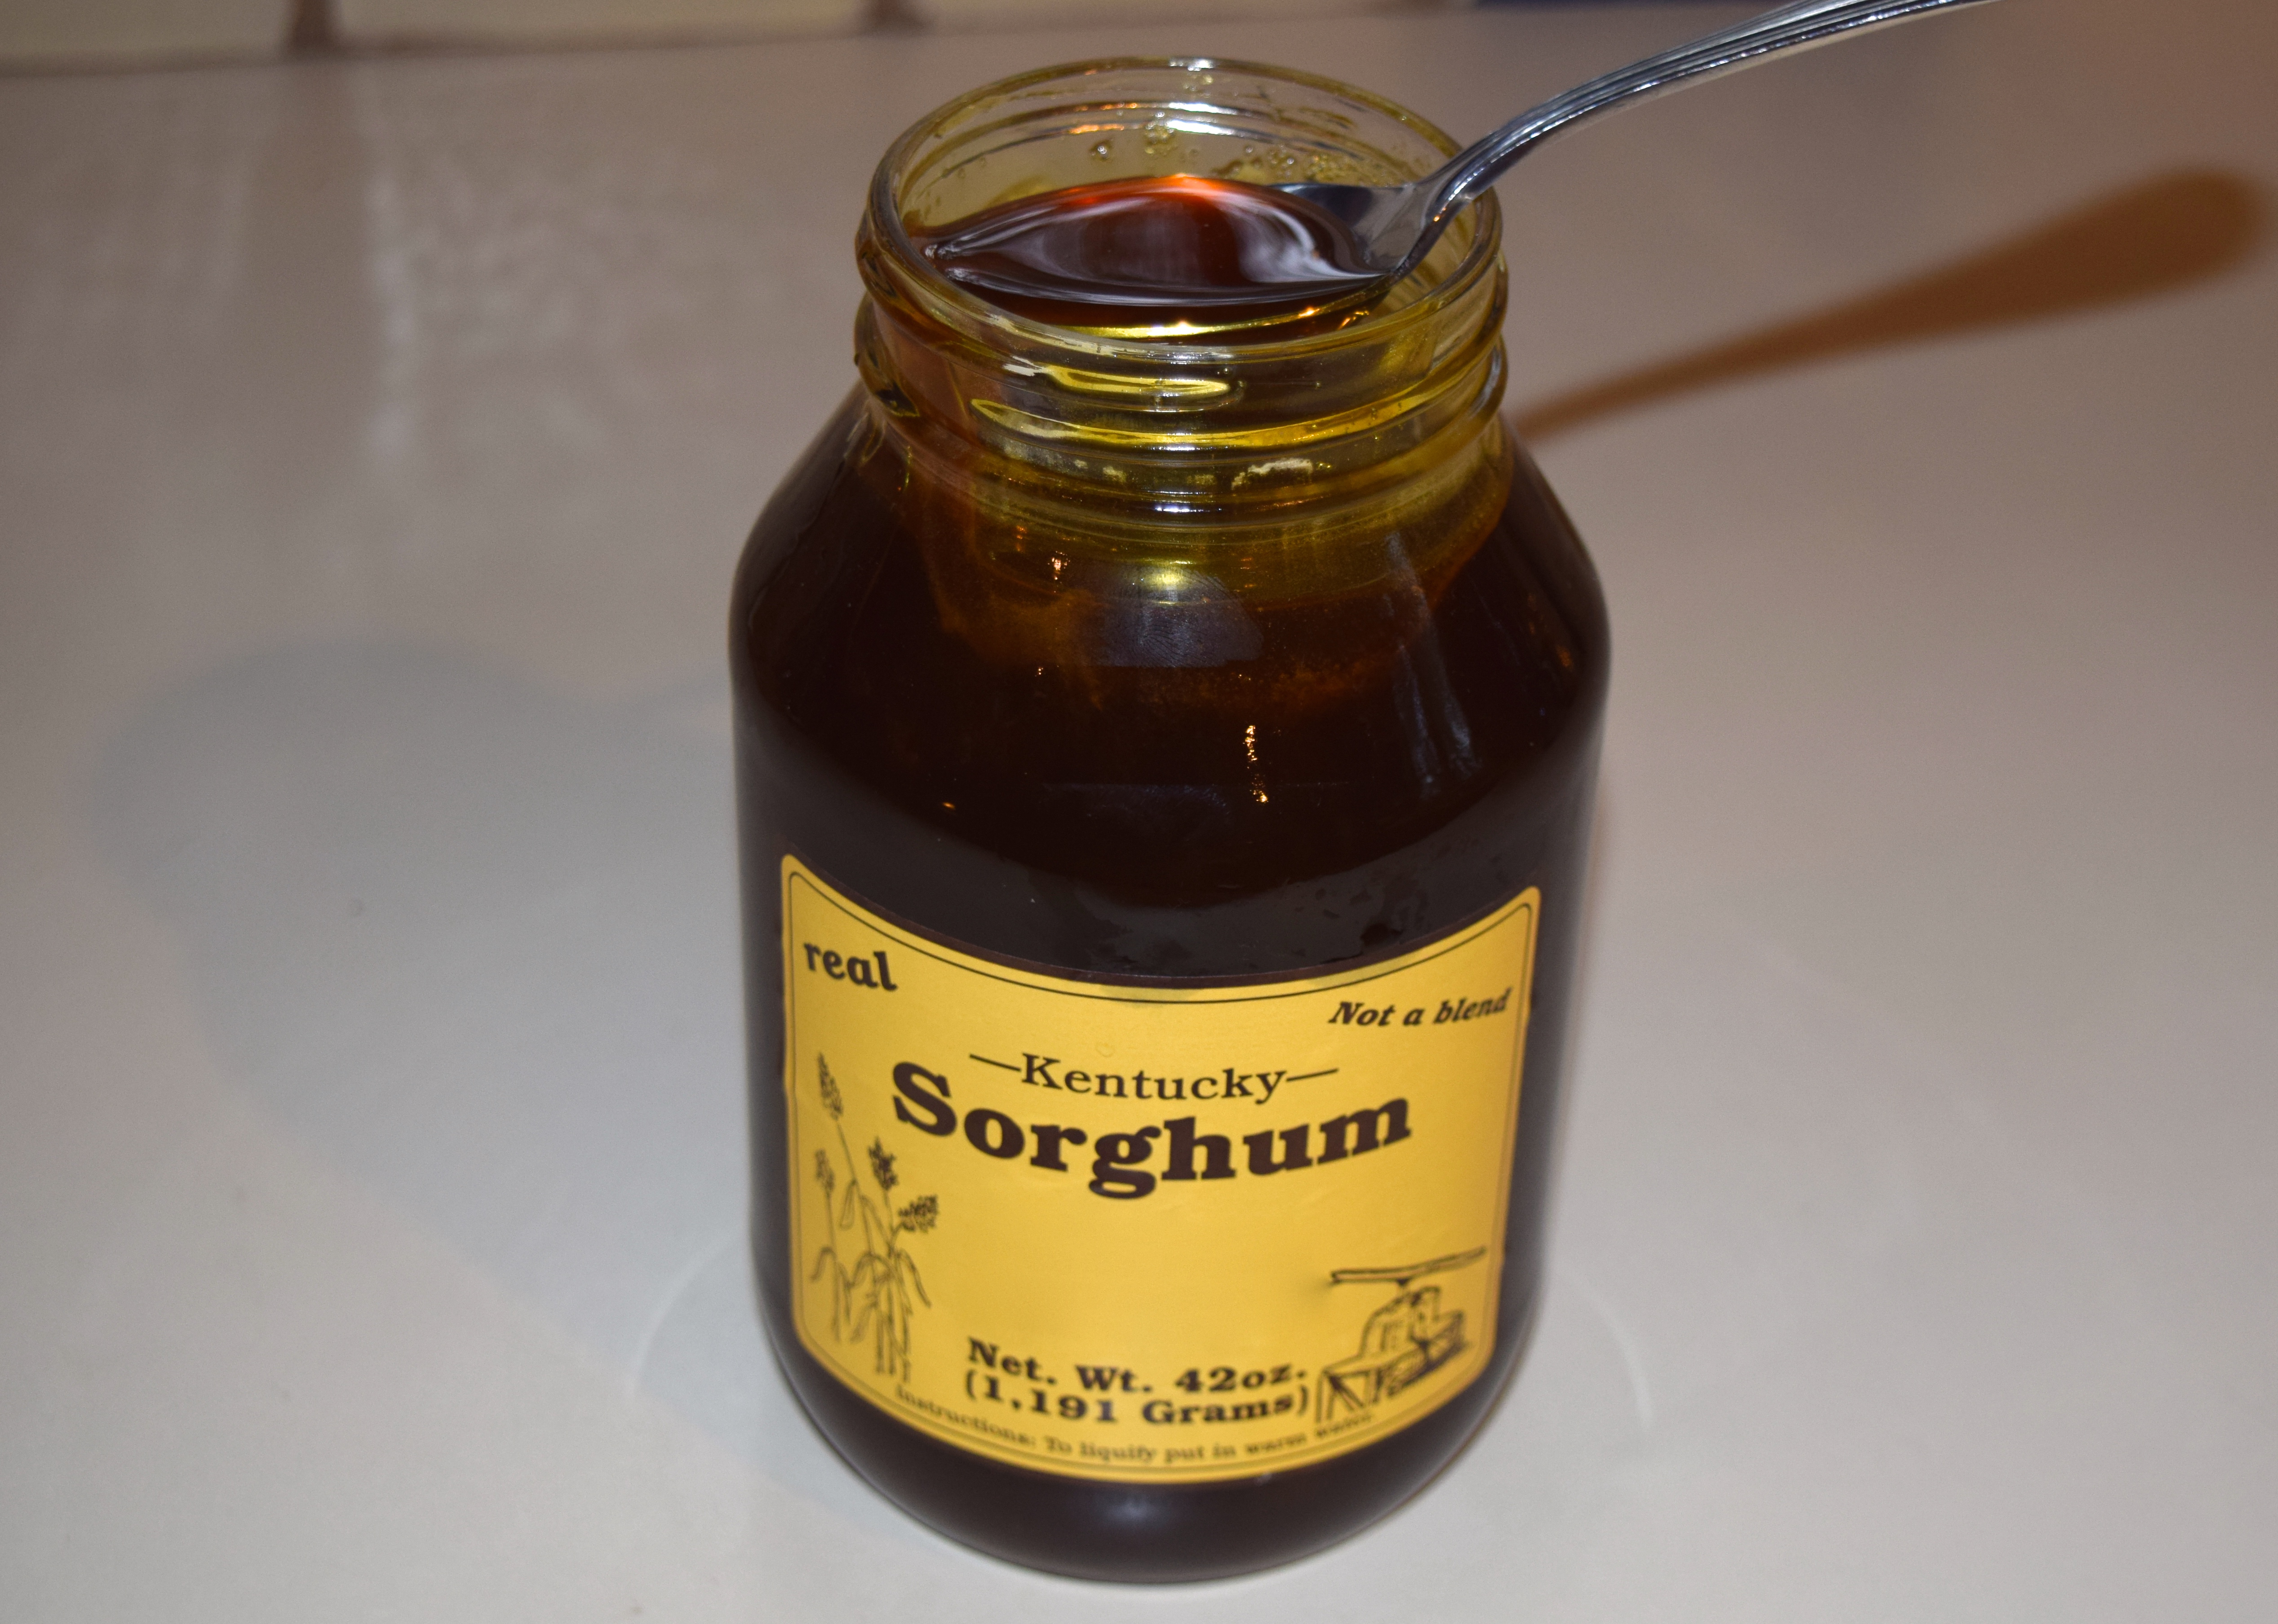
Sorghum is enjoying quite a renaissance lately. I see it frequently listed as an ingredient on many restaurant menus. You can use it in almost any recipe that calls for honey, molasses, corn syrup, or pure maple syrup. That includes both sweet and savory dishes. It is high in iron, potassium, and calcium and is 100% natural with no chemical additives.

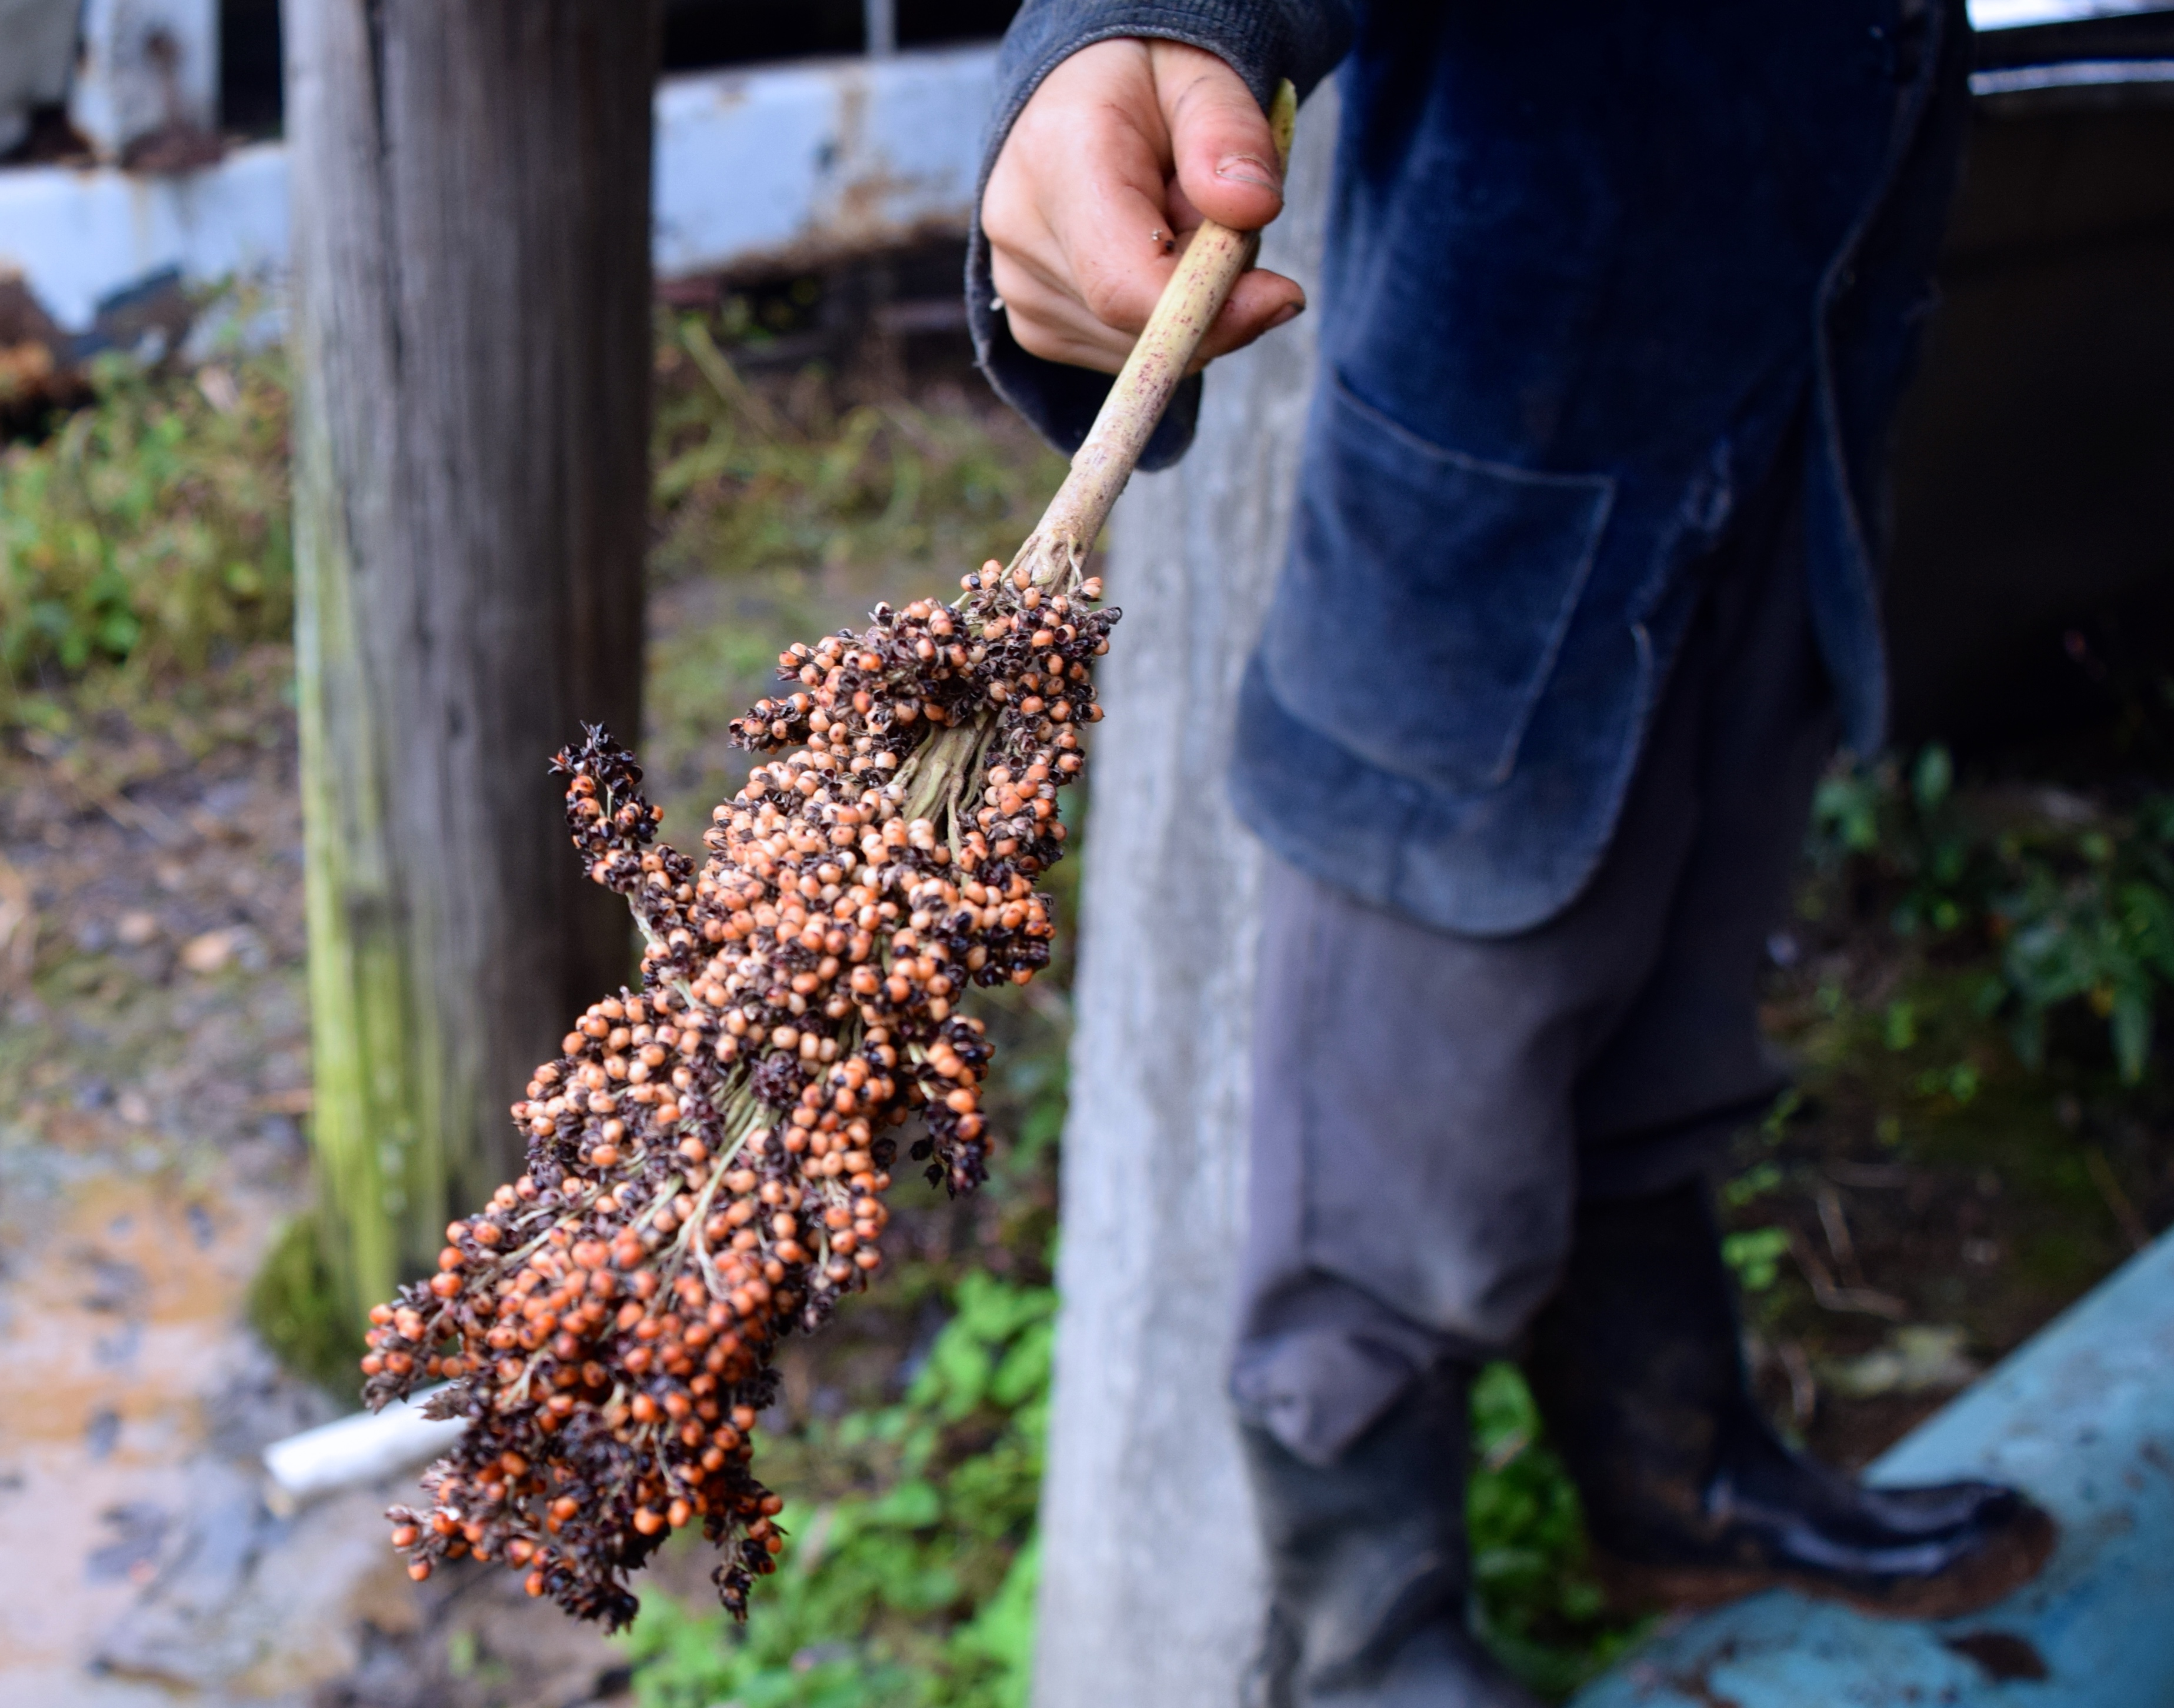
As we were getting ready to leave the farm, a young boy offered me a sorghum seed tassel. He had been picking off the kernels and eating them while we toured. I asked his dad if the seeds were good to eat. He told me, “Don’t eat them, PLANT them,” and he gave me a seed tassel. He instructed me to plant one red seed every six inches in the spring.

Sorghum

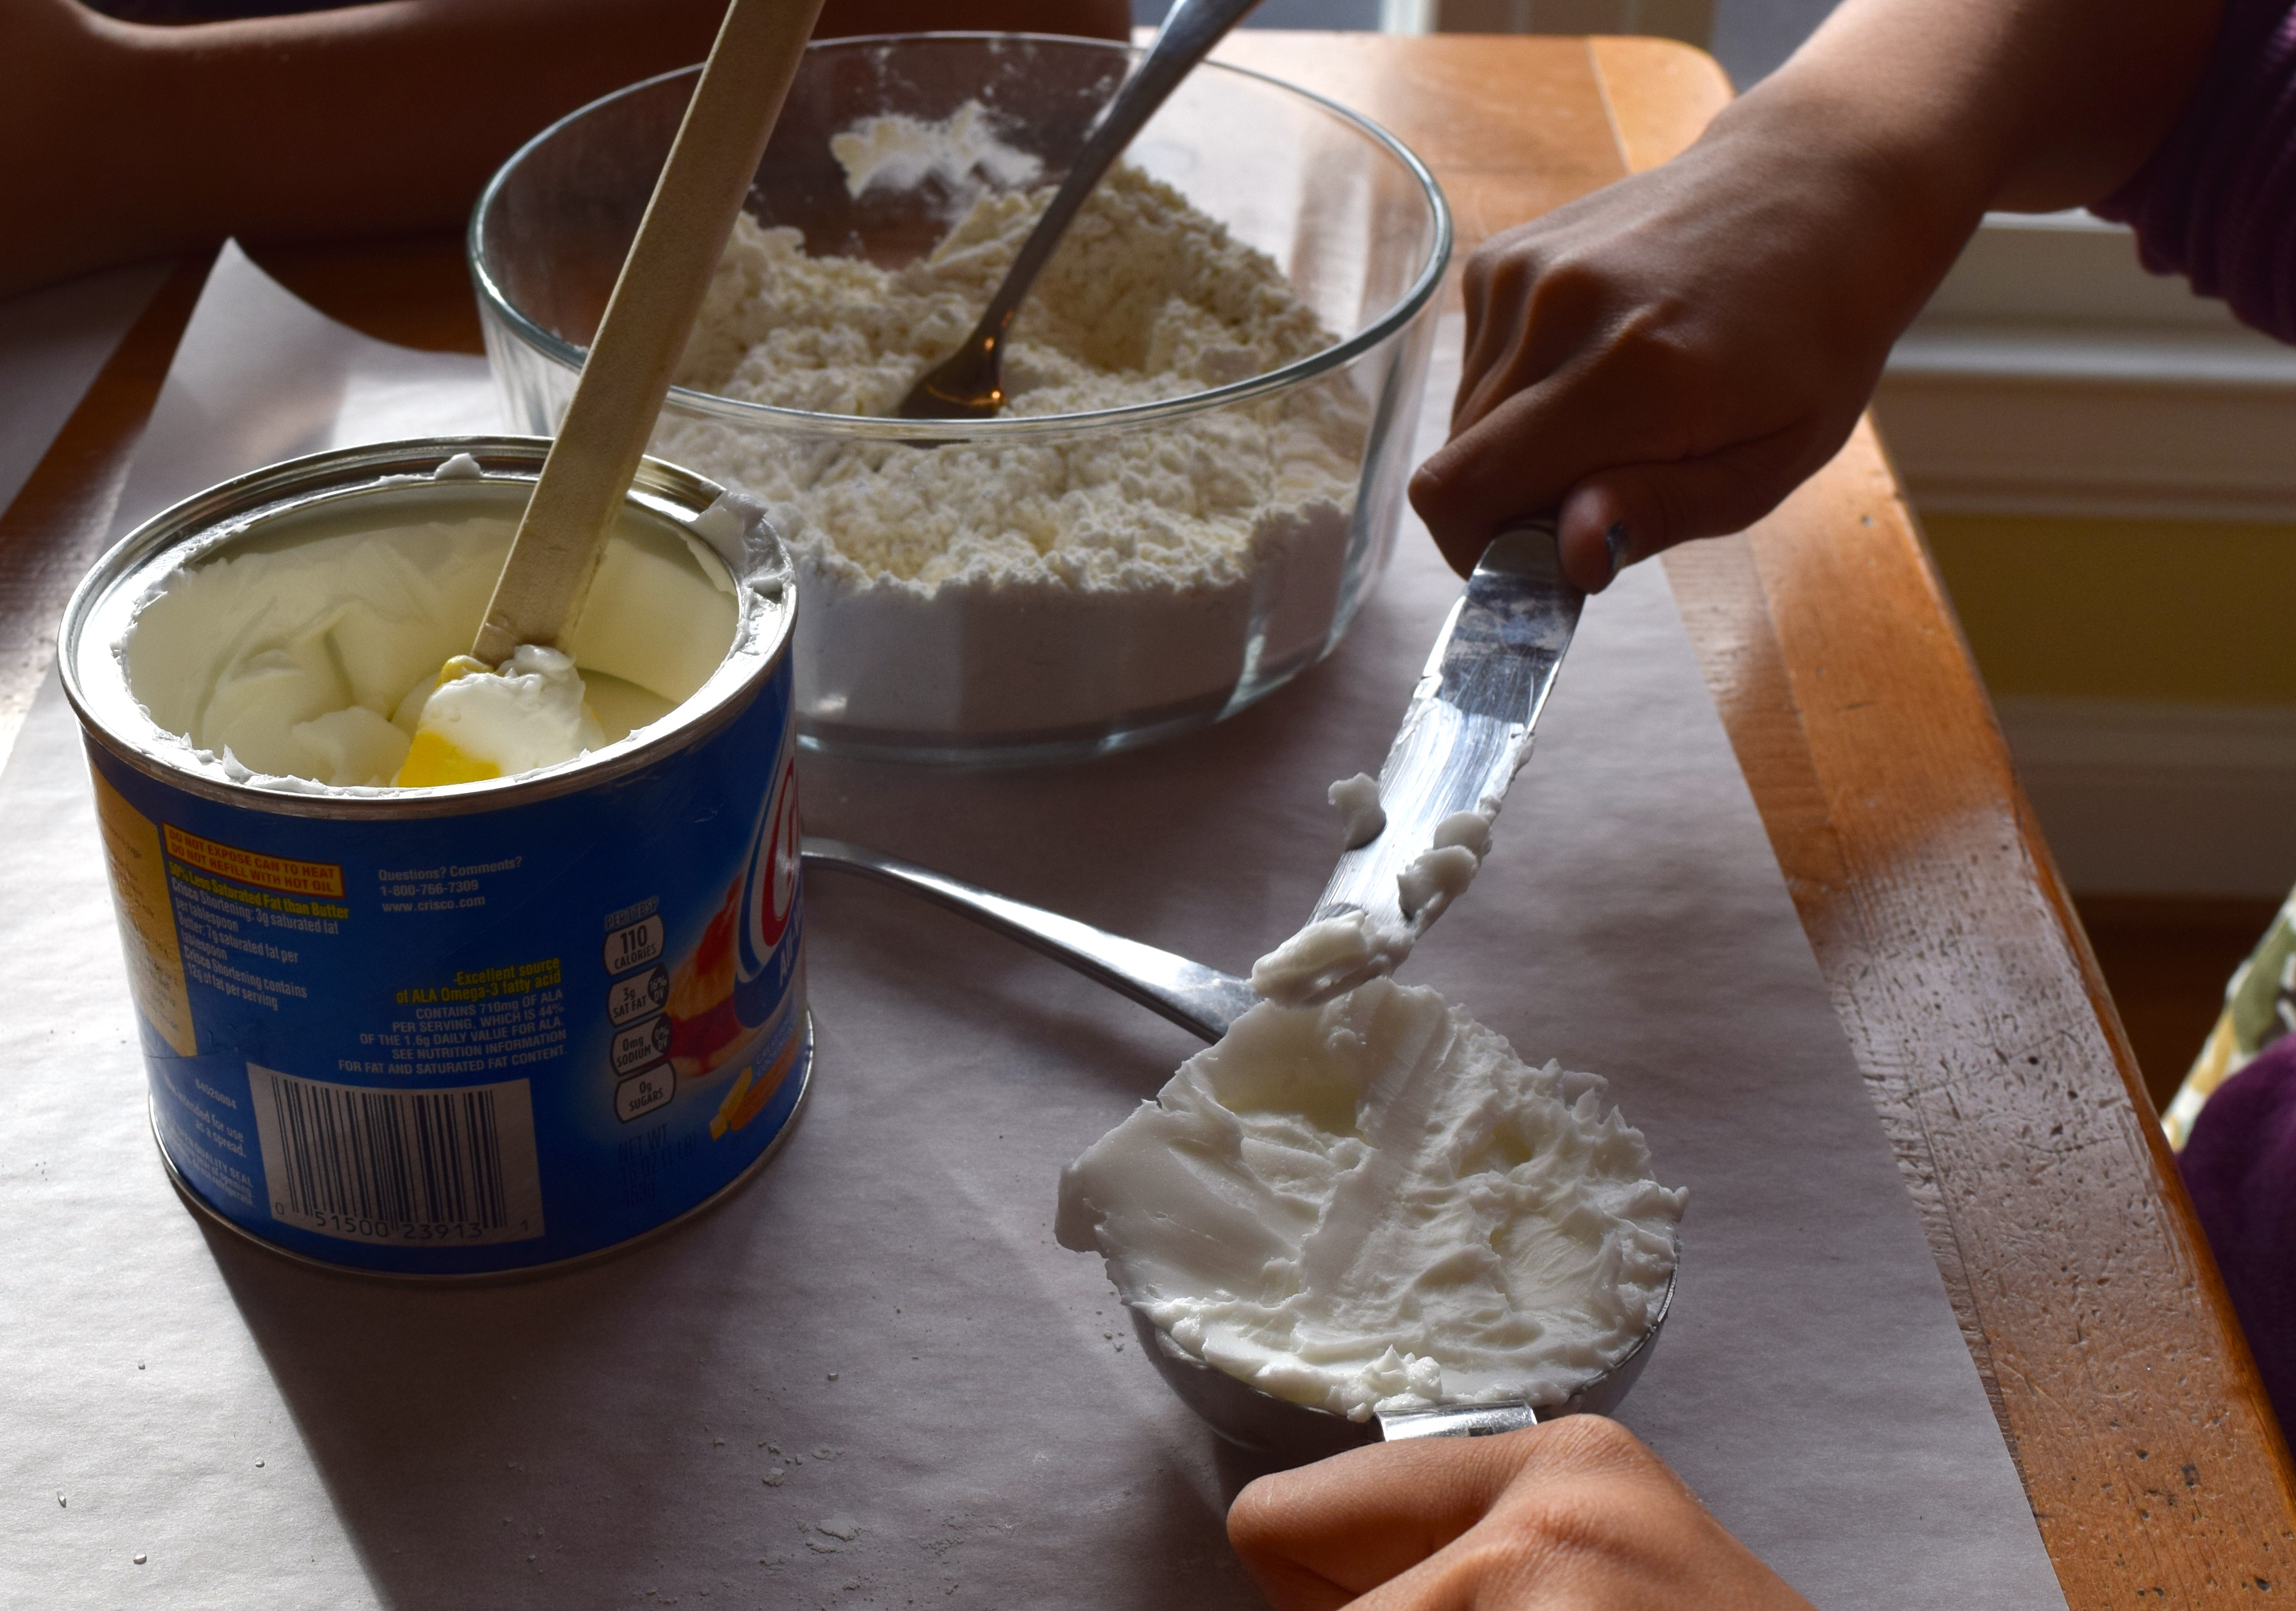
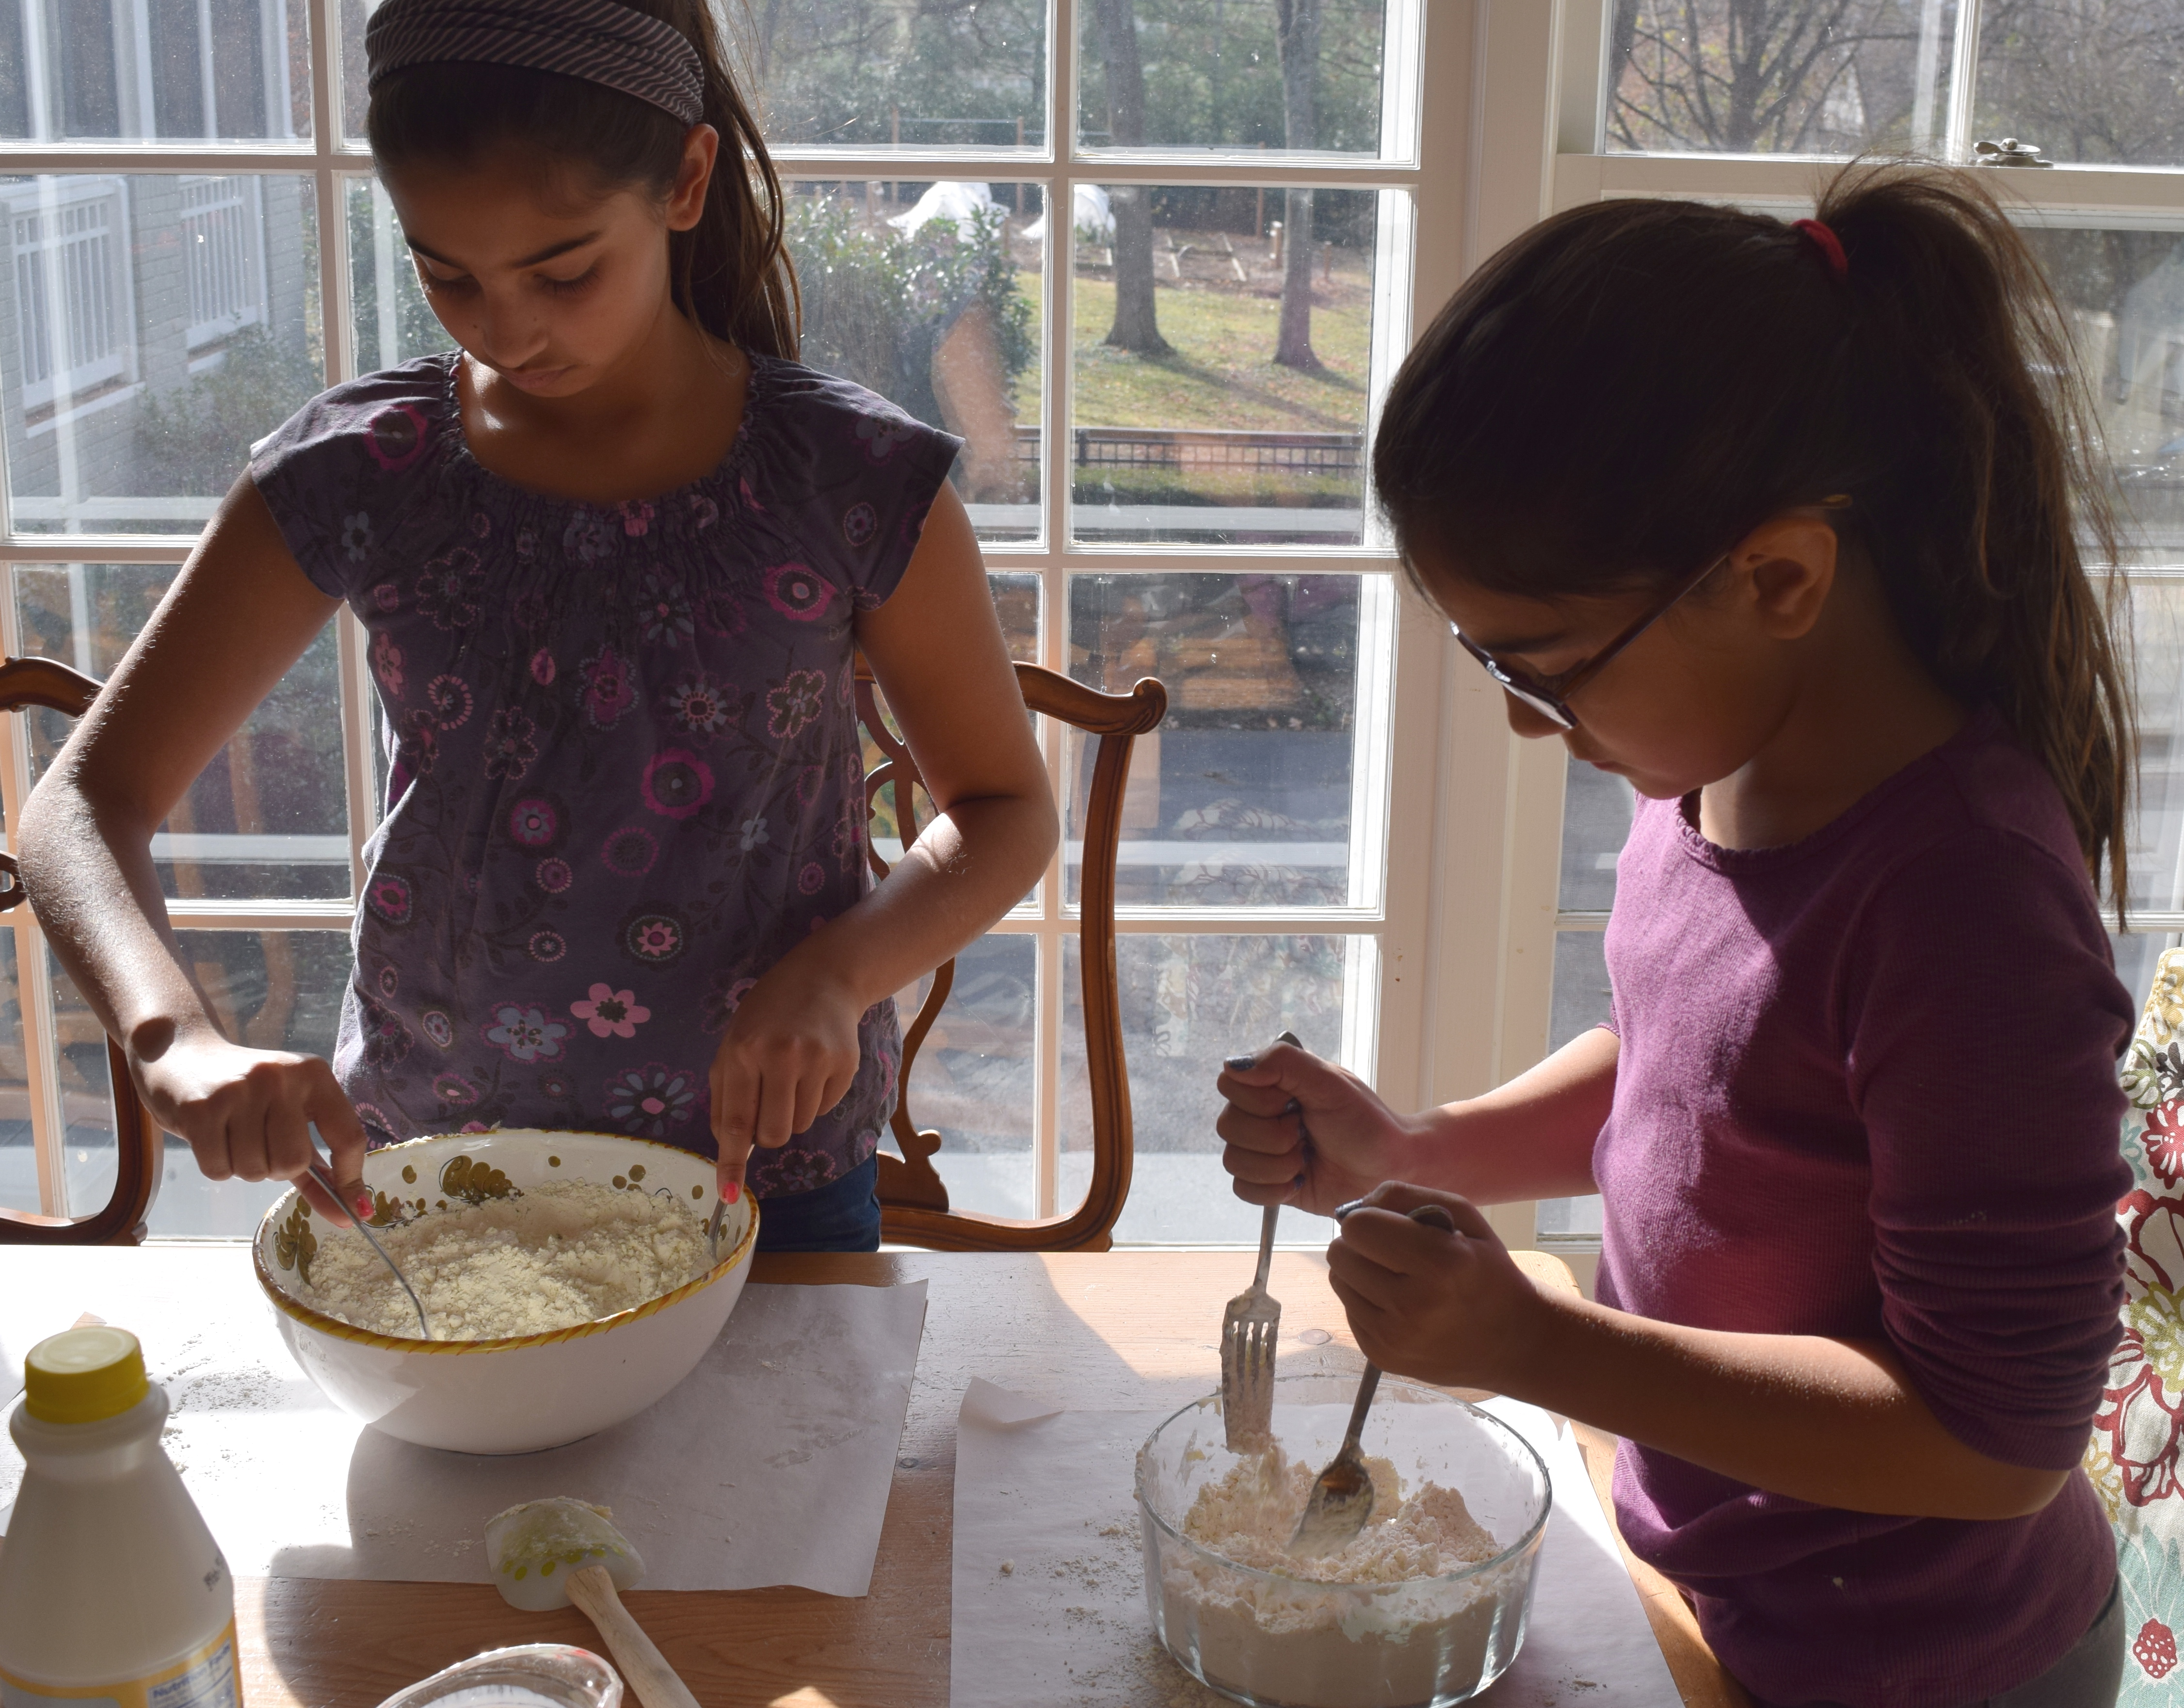
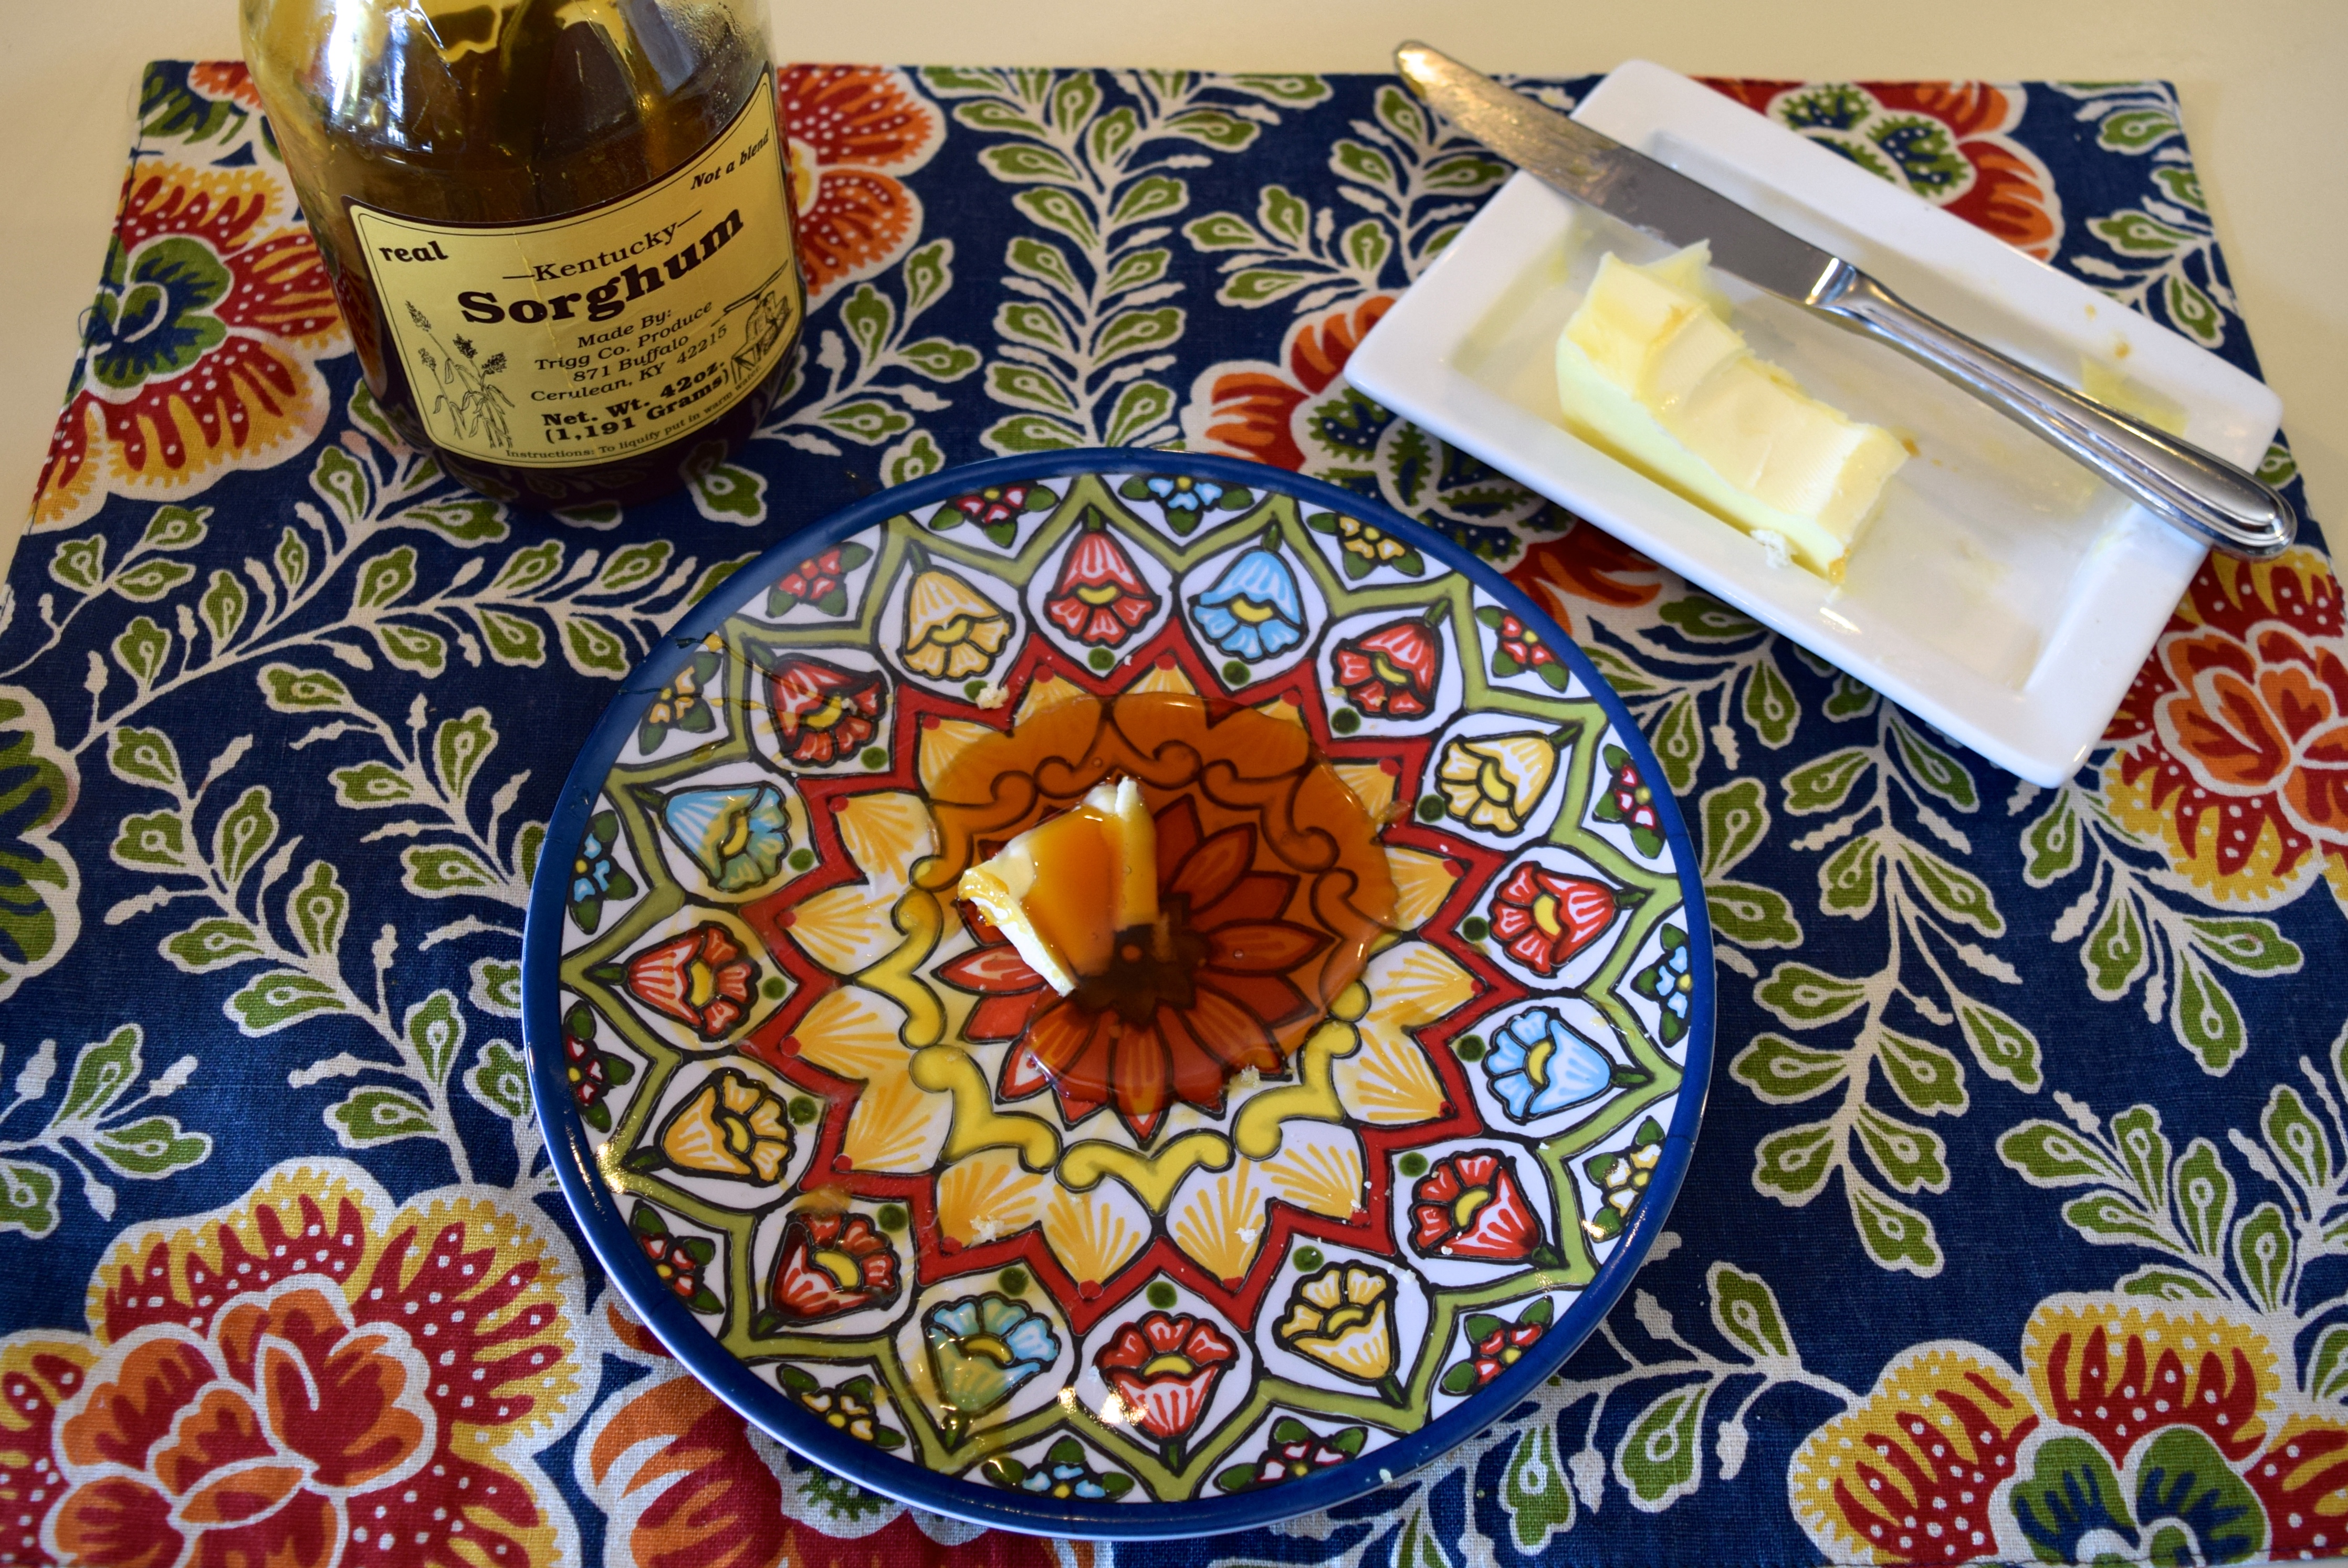
Our favorite way to enjoy sorghum is mixed with butter and spread on a biscuit! Check out my biscuit recipe here.

DSC_0280  DSC_0271

Related Posts on Commercial Farming:

If you enjoyed this post, please share and become a follower. When signing up to become a subscriber, be sure to confirm on the follow-up letter that will be sent to your email.

Follow Judy’s Chickens on Instagram and Pinterest @JudysChickens.

Always check my blog for the latest version of a recipe.

© 2014-2020 Judy Wright. All rights reserved. Photos, videos, and text may only be reproduced with the written consent of Judy Wright.

How to Peel an Orange (or Grapefruit) Lickity Split

oranges navel mary

When I was nine years old, my grandmother took her daughter, Rachelle, my cousin, Carol, and me on an airplane trip to Arizona to visit relatives. It was my first plane ride. We flew from Boston to Phoenix on TWA, “Traveling With Angels” I would tell everyone with a proud grin on my face. The flight was memorable for many reasons; chief among them were the perfectly coiffed  stewardesses who told us we could write all the letters we wanted, and they would send them for us via “Air Mail.”  That struck me as nothing short of amazing. They lavished us with decks of cards, airplane pins, books, and meals so noteworthy, my cousin and I both wrote to my mother to tell her what was served for lunch: steak, carrots, peppers, onions, rice with gravy, a salad with French dressing, a choice of milk or Coke, and a piece of apple pie.

TWA navel orange

What do I remember about Phoenix? Navel Mary. “Navel Mary” is the name we girls gave to our Great Aunt Louise’s next-door neighbor. Naval Mary had a grove of navel orange trees in her backyard. We visited every day. She taught us how to cut oranges, lickety-split. She probably could cut five of them in under a minute. Obviously, it made a big impression on me because here I am, fifty years later, writing about it. To this day, when my cousins and I talk about that trip, one of us will say, “Remember Navel Mary?”

How to cut an orange the Naval Mary, way:
oranges navel mary oranges navel mary  oranges navel mary oranges navel mary  oranges navel mary

Works for grapefruits, too!

oranges navel mary oranges navel maryoranges navel mary oranges navel mary

And, for other citrus fruits!

DSC_0236 Version 3

Related Story:
Grapefruit and Greens: A Refreshing Winter Salad

If you enjoyed this post, please share it with a friend and become a follower. When signing up, be sure to confirm the subscription on the follow-up letter that will be sent to your email.

Follow Judy’s Chickens on Instagram and Pinterest @JudysChickens.

Always check my blog for the latest version of a recipe.

© 2014-2020 Judy Wright. All rights reserved. Photos, videos, and text may only be reproduced with the written consent of Judy Wright.

Home Ec: How to Measure Ingredients Properly

There is nothing I like more than cooking with a room full of children who are eager to learn. I was so pleased these five young girls wanted to come over to learn how to make The Biscuit King’s biscuit recipe while visiting over Thanksgiving break. Their little adventure turned into a Home Ec lesson.

home ec making biscuits

Some of the things we talked about:

1) Wash your hands for the amount of time it takes to sing the Happy Birthday song.

2) Set out all your ingredients on the countertop before you get started.

3) In addition to lining roasting pans with parchment paper, you can place them under any workspace for easy cleanup. A box of 1000 sheets can be purchased for $40 at restaurant supply stores.
DSC_0049

4) How to measure dry ingredients:
Lightly spoon flour into a one-cup “dry measure” until it is heaped above the rim.
home ec making biscuits

Sweep the flat edge of a knife across the rim; what remains is a level cup of flour.
home ec making biscuits

Measure salt in the same way, carefully filling the measuring spoon so it overflows a little and then using a knife to level the top. Never measure directly over your mixing bowl, tempting as that may be.
home ec making biscuits

5) How to measure fats (Crisco, lard or butter):
Using a spatula, place a blob of shortening into a measuring cup and pack it in. Use a knife to remove the excess shortening.
home ec making biscuits

6) Mixing ingredients:
Using two forks, or a pastry blender to mix the fat into the dry ingredients.
home ec making biscuits

Mix until the flour feels crumbly and the pieces are about the size of baby peas.
home ec making biscuits

7) How to measure liquid ingredients:
“Liquid measures” are pitchers, made of glass or plastic, with a spout for pouring. To use, place the pitcher on a level surface, and measure liquid using the gradation marks on the side of the glass. Liquid measuring cups are used to measure volume not weight. In this case, we are measuring 8 fluid ounces of buttermilk.
home ec making biscuits

8) The girls stirred the ingredients together for 15-20 strokes, just enough to get all the ingredients moist. Do not overmix or the gluten protein in the flour will start to stretch and become sticky resulting in tough biscuits.home ec making biscuits

9) Each girl scooped their dough up and placed it on a sheet of floured parchment paper.
home ec making biscuits
The dough was a little too sticky to manage so the girls added more flour to their hands, the rolling surface, and the biscuit cutters. They rolled the dough out until it was ¾ of an inch thick.
home ec making biscuits

10) The girls used a floured 2-inch biscuit cutter to shape the biscuits. Some of the dough was a little too sticky so we dropped it by the spoonful onto the baking sheet rather than continue to add flour and mix further.
home ec making biscuits

This was fine. The biscuits were all delicious! Fantastic job, girls!
home ec making biscuits

On measuring flour:
Many of my grandmother’s old recipes list flour measurements in pounds instead of cups. Here’s a little cheat sheet to help you with pounds to cups conversions. dsc_0055

Special thanks to my lovely group of budding chefs who are in grades two through seven: Sirina, Amelia, Lara, Leela, and Ana! Special guest appearance by Alexander.

Other kitchen how-tos on the blog:
How to Tell If an Egg Is Fresh or Hard-Boiled
The Navel Mary Way: How to Peel an Orange
Cookie Scoops as a Unit of Measure
How to Make a Thaw Detector for the Freezer
Got Jellybeans? Your Sense of Smell
How to Clean the Splash Guard of Your Garbage Disposer

If you enjoyed this post, please share it with a friend and become a follower. When signing up, be sure to confirm the subscription on the follow-up letter that will be sent to your email.

Follow Judy’s Chickens on Instagram and Pinterest @JudysChickens.

Always check my blog for the latest version of a recipe.

© 2014-2020 Judy Wright. All rights reserved. Photos, videos, and text may only be reproduced with the written consent of Judy Wright.