Rachelle’s Italian Sausage, Onions, and Peppers

Dear Doris’s Italian Market and Bakery,

Please open a store in Nashville so I can get delicious homemade Italian sausage, sweet or spicy, with or without fennel, veal sausages, meatloaf mix and braciole-cut beef when ever I want them.
DSC_0236

And, please send Lester and his delightful butcher friends from the Boca Raton store, to the opening. They know stuff.
DSC_0250

Whenever I go to Florida to visit my family, I always make a trip to Doris’s and to Joseph’s Classic MarketAt Joseph’s, I buy the best sfogliatelle I’ve ever tasted
joseph's

and the best cannolis, with real cannoli cream.
1548163_10153779726690160_182987456_o

At Doris’s, I buy sausages galore: pork, veal and chicken, freeze them, pack them in my suitcase, and fly them home with us to Nashville. My husband goes with me to Doris’s because the store is so much fun to browse in, but he starts to shake his head when I start filling up the cart with pounds and pounds of sausages. Always the more practical one in the family, he wonders how I plan to get it all home. “Don’t worry honey,” I say, “I always find a way.”
DSC_0288

This year, because I was working on a recipe for a Portuguese stew, my sweet husband searched out and found fresh Portuguese linguica at Boca Brazil Supermercado. It’s one of the many reasons he is my Valentine and no other.
photo

I, meanwhile, am my grandfather Carl’s granddaughter — when he went to Sicily to visit relatives, ages ago, he brought home cured salami hidden from Customs inspectors in the toecap of a shoe that was packed in his suitcase. I thought that was strange as a child, but I totally get it, now.

A few weeks ago, when I was in Florida, Mom’s sister Rachelle made sausage and peppers for dinner on our first night in town. It’s her husband Steve’s favorite meal from childhood. Was it ever good! So good, we had to have a repeat performance later in the week so I could blog it.
DSC_0534

Part of the fun of making this dish was all of us going grocery shopping together to get the ingredients. As you can see, this recipe isn’t complicated.
DSC_0285

Because we didn’t live in a big city, with Italian markets, while growing up, my mother often bought pre-packaged Premio Italian Sweet Sausages. They are great in meat sauce and also excellent grilled. In Nashville, you can buy the Premio brand at Costco, five pounds for $12.00. The inhouse-made sausages at Doris’s are $3.50 a pound.
DSC_0087

Yield: Serves 6

Ingredients:
DSC_0298
2½ pounds Italian sweet sausage (8 links)
8 cups sliced sweet bell peppers (5 peppers)
5 cups sliced onions (3 medium)
1/3 cup olive oil
1 teaspoon garlic pepper
1 teaspoon sea salt

Mise en Place:
DSC_0378

Instructions:

This is truly the easiest recipe on the blog.

Prep veggies. Here’s Rachelle, favorite great-aunt to my children, chopping veggies.
DSC_0320 DSC_0351

Prep sausages: cut apart links.
DSC_0359

You’ll need two frying pans. One for the peppers and onions and one for the sausages.
DSC_0390

Sauté the onions, garlic pepper and salt in olive oil over medium-high heat until translucent and soft, about ten minutes.
DSC_0419

Add the peppers. Continue to sauté the peppers and onions over medium-high heat until the peppers start to soften, and then let them simmer over low heat while you cook the sausages.
DSC_0438

Sauté the sausages in 2 tablespoons of olive oil in a different pan.
DSC_0439

Brown on all sides over medium-high heat.
DSC_0445  DSC_0489

Slit sausages to allow heat to get inside. Cover pan and let simmer for 20 minutes over low heat.
DSC_0490

Add sausages to peppers and onions. Be sure to tap off as much fat as possible from the sausages before you add them to the peppers and onions.
DSC_0494 DSC_0510

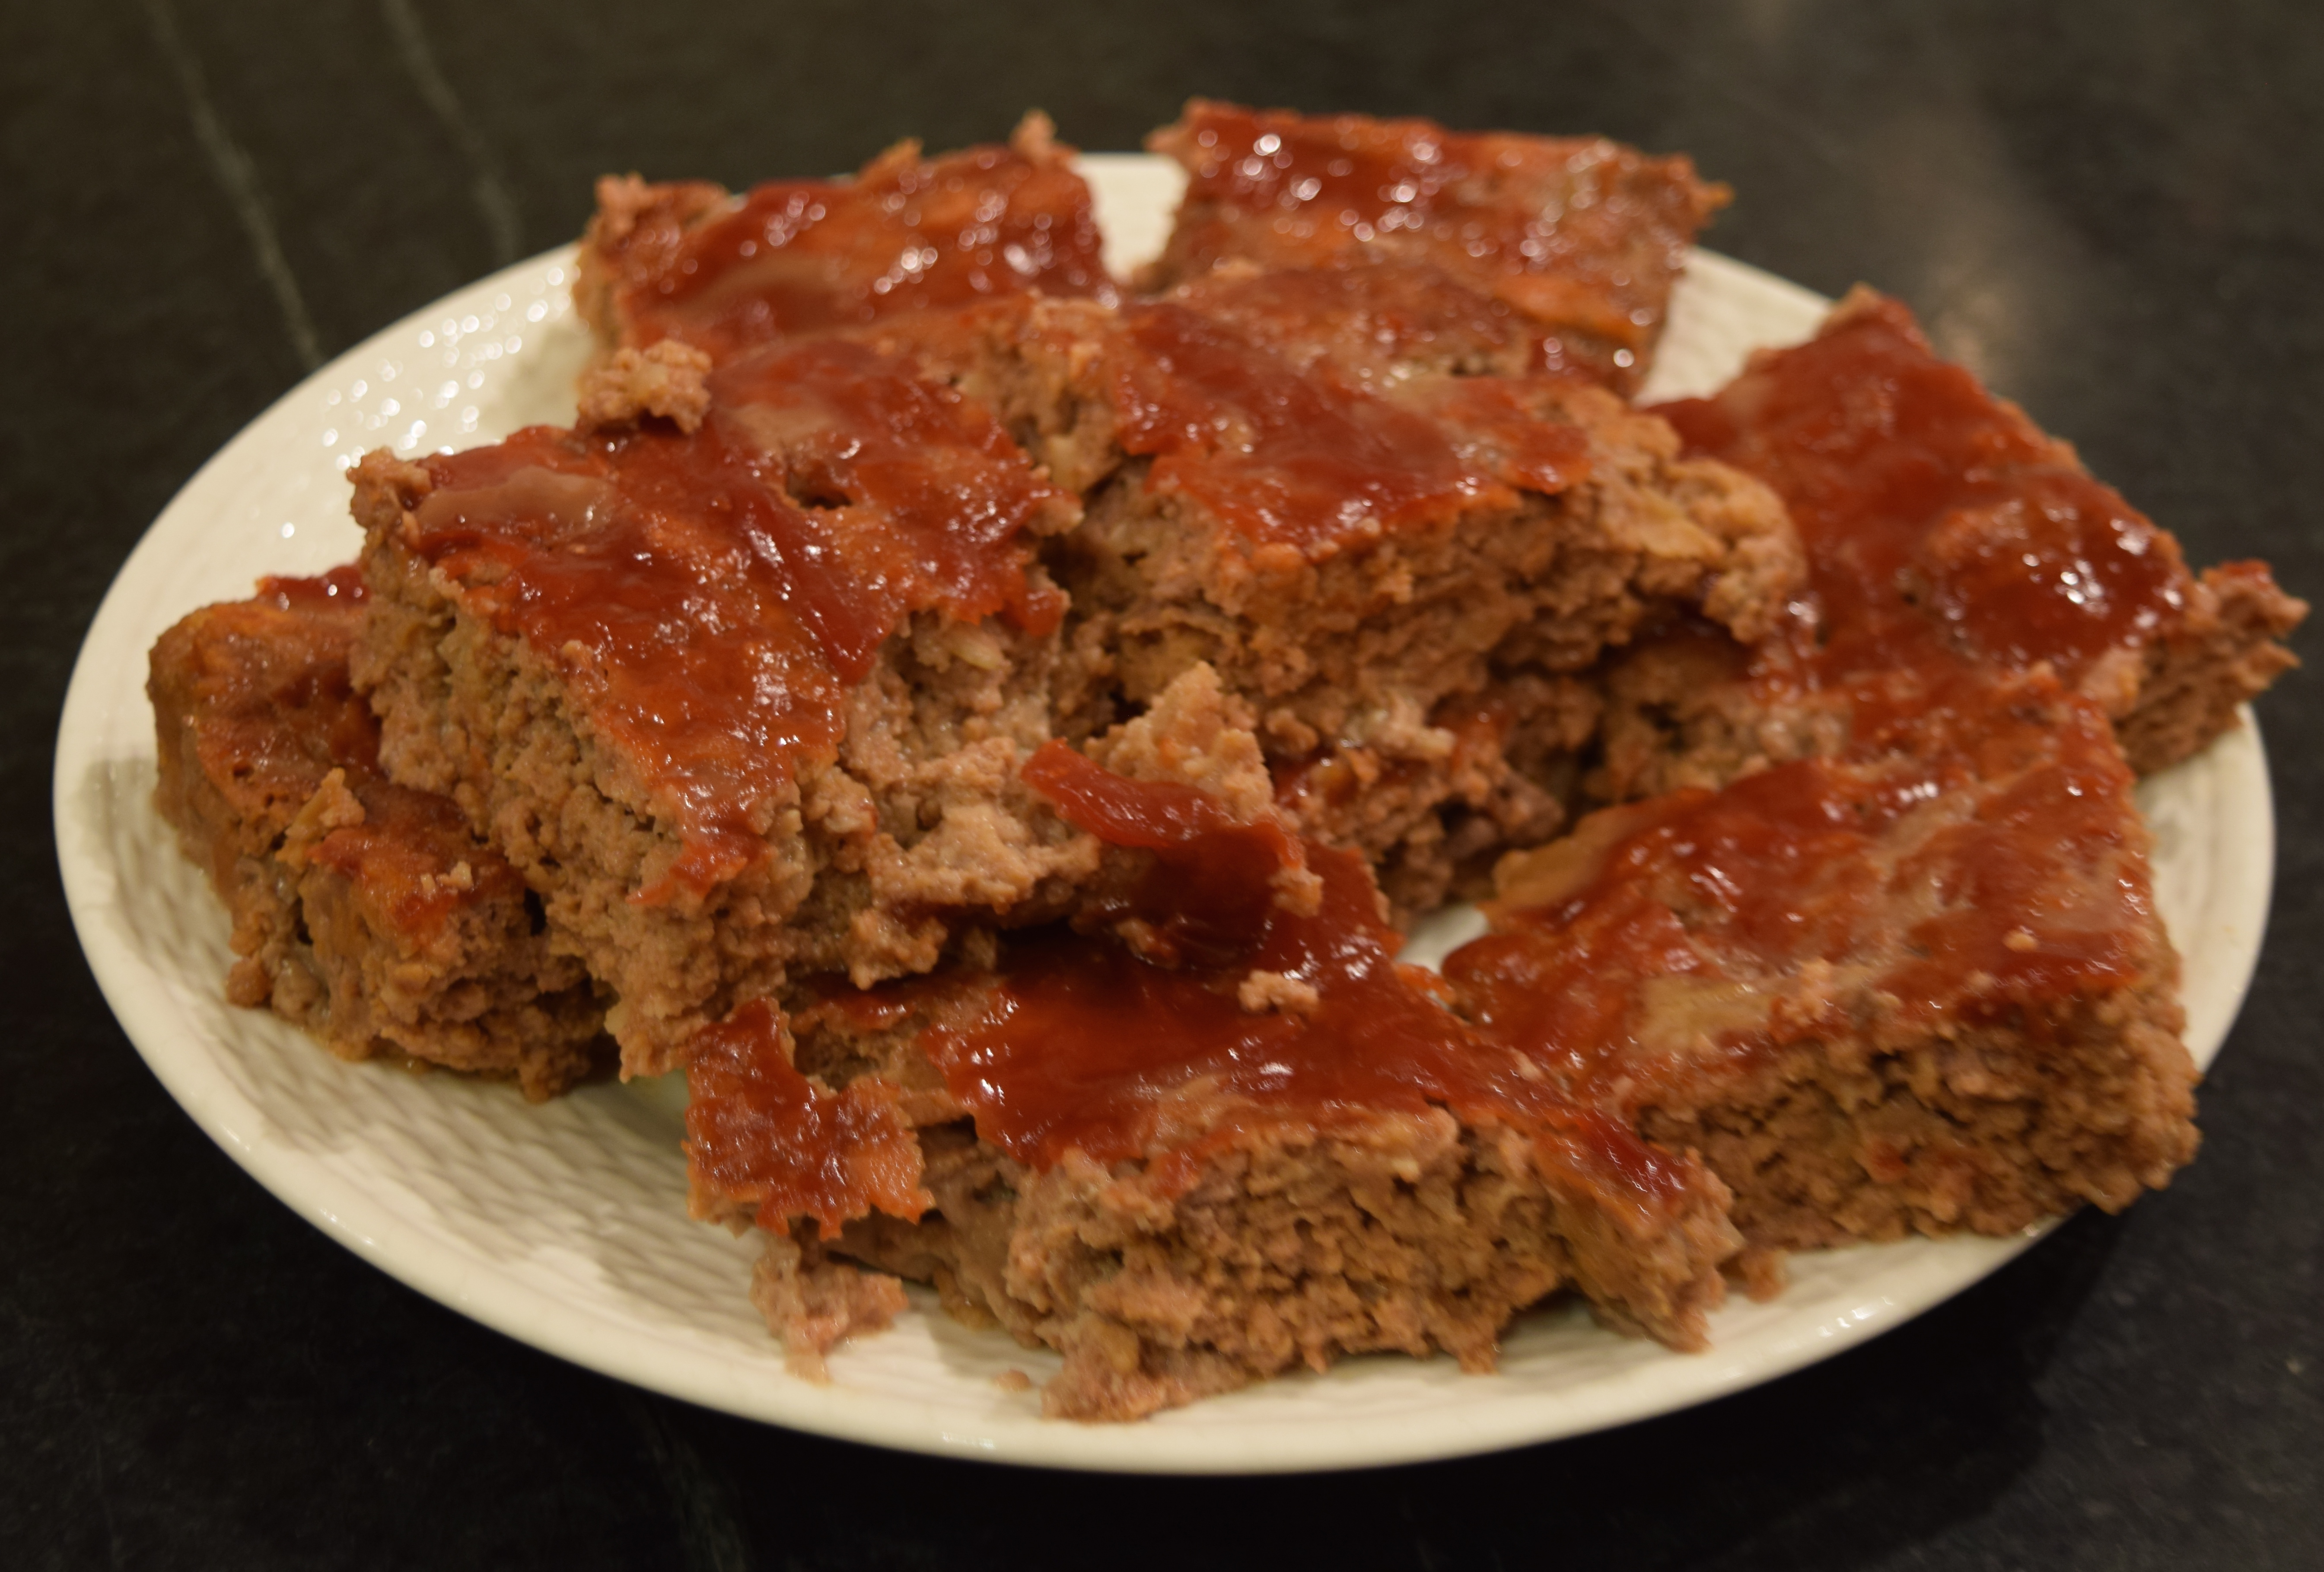
Saute together for 5-10 minutes. It will look like this when it is done.
DSC_0520

Can be served as is, or over pasta, or in a hoagie. It works for Whole30 if you skip the bread and pasta and serve it with a green salad.

Two family photos of Rachelle, just for fun:
Rachelle, my grandmother Marion, and my brother Chris. Rachelle and Grandma are visiting us in Baltimore and by the looks of their hair, they’ve been to Bridget’s Beauty Shoppe.
rachelle marion chris

This is a photo of Rachelle in Sicily with Granddaddy Carl and Grandma’s cousins Marianina and Salvatore. Rachelle was in high school at the time.

LET’S STAY CONNECTED!

Follow my photos of vegetables growing, backyard chickens hanging out, and dinner preparations on Instagram at JudysChickens.

Never miss a post: sign up to become a follower of the Blog.

© 2014-2017 Judy Wright. All rights reserved. Photos and text may only be used with written consent.


Roasted Spaghetti Squash, Asparagus and Chicken

I love roasted spaghetti squash and have been making it weekly for about three months now. I started eating it as a substitute for pasta while on the Whole30 nutritional program but continue cooking it simply because I enjoy it all dolled up as a vegetable. When I tell people how much I love spaghetti squash, the first thing they ask is how do I cook it. I roast it. I’ll show you how.

DSC_0378

How to Prep and Roast a Spaghetti Squash:

DSC_0682 (1)

Preheat oven to 425º

Cut the spaghetti squash in half lengthwise. Be careful, the squash surface is hard, and the squash tends to want to roll around making it a challenge to cut. To get started, I usually stab it with a knife and then pull the knife down to create a fissure across one side. Next, I turn the squash over and do the same thing on the other side.

DSC_0222 DSC_0226 DSC_0234

Use a large spoon to scoop out the seeds and fibrous pulp.

DSC_0693

Line a roasting pan with parchment paper and place the two squash halves on it. Drizzle olive oil on each half and use a basting brush to spread the oil over the interior.

DSC_0700

Turn the squash over in the pan and roast for 45 minutes to one hour. The squashes I have been using have each weighed about four pounds and were fork-tender in one hour. Smaller squash will cook in a shorter amount of time.

DSC_0703 DSC_0734

Remove from oven and turn the squash over. You’ll immediately notice the stringiness of the squash. Use a fork to scrape the sides and fluff the tender, caramelized pulp. At this point, it is an empty canvas for whatever you wish to do to flavor it, much like spaghetti.

DSC_0112 DSC_0113

This is one of my favorite ways to prepare spaghetti squash for a delicious, healthy, low-carb side dish, or if you want to make it an entrée, add cooked chicken.

Yield: 2 servings as an entrée

Ingredients:

DSC_0296

½ roasted spaghetti squash (3 cups or 1.5 pounds cooked squash)
2-3 tablespoons extra virgin olive oil
1 bunch asparagus (1 pound un-prepped)
1 bunch green onions (4 ounces un-prepped)
1 clove garlic, minced
2 cups cooked chicken, cut into bite-sized pieces
Sea salt and garlic pepper to taste. Start with ½ teaspoon of each and add more as desired.

Mise en Place:

DSC_0344

Use a fork to shred and toss the roasted spaghetti squash.

DSC_0322

Prep the asparagus and green onions.

DSC_0309  DSC_0314


Saute asparagus and onion in olive oil for about 5 minutes on medium-high heat. Add garlic and sauté for 3 more minutes.

DSC_0346

Stir in squash. Add sea salt and garlic pepper to taste. When I was just learning to cook, I hated to read the words “to taste.” I had no idea where to begin. My advice is to start with ½ teaspoon of salt and garlic pepper (¼ teaspoon if just using plain pepper without the garlic). Add more seasoning until it tastes good to you. We happen to use less salt than most people.

DSC_0351

I decided to make this an entrée for dinner and added grilled chicken.

DSC_0382

Sprinkle with Parmesan, if desired.

For a quick side dish, mix shredded squash with salt, garlic pepper, butter, and Parmesan. Another way to serve is to toss it with marinara sauce.

Cooked squash will last in the refrigerator for about 3-4 days before it turns mushy. Alternatively, store it in a bag and freeze until ready to use.

Buon Appetito!

DSC_0577

LET’S STAY CONNECTED!

Follow my photos of vegetables growing, backyard chickens hanging out, and dinner preparations on Instagram at JudysChickens.

Never miss a post: sign up to become a follower of the Blog.

© 2014-2017 Judy Wright. All rights reserved. Photos and text may only be used with written consent.


Perfect-Every-Time Roasted Salmon

To My Dear Twenty-Somethings,

I got your message at dinner the other night; you want me to blog about how to cook basic, everyday foods. For example, you want to learn how to prepare salmon.

DSC_0342

Salmon is an easy, quick dinner to prepare after work or on a busy day. It is also special enough to make for company. For these reasons, roasted salmon is a good, go-to recipe to have in your cooking repertoire. When cooking salmon, I keep it very simple. I don’t add sauces or special toppings. If you cook it properly, it will be moist and tender; less is definitely more with this food.

Yield: Serves 6-8

Ingredients:
2½ pounds salmon
3 tablespoons extra virgin olive oil
2 teaspoons McCormick’s Garlic Pepper
1 teaspoon sea salt
DSC_0383

Directions:
Preheat oven to 425º

Remove salmon from package and place on a parchment-lined baking sheet. This one inch thick, skinless fillet of Atlantic farmed salmon. I look for the thickest fillets.

Tuck thin edges under for even cooking, if needed. Drizzle salmon with olive oil and spread over the entire surface with a basting brush. Sprinkle with McCormick’s garlic pepper. Allow to marinate for 15 minutes while the oven heats up.

DSC_0315

Bake in a fully preheated oven for 10 minutes. Set a timer. By 10 minutes, the salmon’s surface should have lost its translucence. If not, put it back in the oven for 2 more minutes.

DSC_0404

Remove from oven and immediately cover with foil for ten minutes to finish cooking. The heat from the surface of the fish will transfer to the center of the fillet and finish the cooking process. This is called “carryover.” For a refresher on how heat transfer works in food, go here

To Serve
Adjust seasoning: add more salt to taste.
Squeeze lemon juice over top, if desired.
Salmon can be served hot, at room temperature, or chilled.

I served the cooled down salmon over a bed of mixed greens, chopped red onions, avocados, and orange and red tomatoes. Toss the salad with A Simple Everyday Salad Dressing from last week’s blog post.

Love,
Mom

DSC_0347

Related Posts
Brooks’s Pork Tenderloin Marinade
Mom’s Marinated and Grilled Lamb
Mom’s Roasted Lamb with Herb and Goat Cheese Topping
Lemony Grilled Chicken Breasts
Judy’s Mom’s Meatloaf

LET’S STAY CONNECTED!

Follow my photos of vegetables growing, backyard chickens hanging out, and dinner preparations on Instagram at JudysChickens.

Never miss a post: sign up to become a follower of the Blog.

© 2014-2018 Judy Wright. All rights reserved. Photos and text may only be used with written consent.

Judy’s Mom’s Meatloaf

For years, every time my mother made meatloaf, her favorite comfort food, I would stand by her side and write down each step she took to make it.

The problem for this recipe writer was she made it differently every time. Like for many experienced home cooks, Mom would grab various amounts of ketchup, mustard, eggs, and meat from the fridge, random amounts of stale bread from the bread bowl, a package of Lipton Onion Soup Mix and a heaping tablespoon of brown sugar from the cupboard. She would mix the ingredients together, add liquid until it felt right, and bake it for an hour in the oven. It consistently came out moist and delicious.

She used a package of soup mix for her seasoning because she needed a reliable way to know the salt and spice amounts were correct without taste-testing it beforehand. The brown sugar balanced out the spiciness from the mustards.

Many years later, when I started cooking dinner at The Nashville Food Project, I reworked the recipe to feed 50 people. That number grew to 100, and then to 150. You can find the scaled-up recipe by clicking on this link: Cook for a Crowd.

meatloaf tnfp

When we make meatloaf at The Nashville Food Project, we figure 25 servings per hotel pan. For 100 servings we portion out 24 pounds of meat and 24 cups of breadcrumbs between four pans and then add the rest of the ingredients.

IMG_2264

A few words about ingredients…

“Meatloaf Mix” is a pre-packaged mixture of beef, veal, and pork. I use it to make meatballs, too. For the moistest meatloaf, be sure to use meat that has 15% fat, any leaner will cause meatloaf to be dry. The meatloaf mix I use comes from Doris’s Italian Meat and Bakery in Florida

I use a range of 2-3 pounds of meat without changing the other amounts of ingredients in this recipe. I always use 1 egg per pound of meat, so if the package of meat weighs over 2.5 pounds, I would go up to 3 large eggs.

To make bread cubes or crumbs
Cut a stack of five slices of bread into small cubes to yield 2 cups of bread. Or, make breadcrumbs by pulsing stale bread in the food processor. Freeze extras to use later.

DSC_0861 DSC_0867

Yield: 8 servings (¼ pound per serving)

Ingredients:
2-3 pounds ground sirloin. If you can find it, use a Meatloaf Mix,
2 cups cubed bread (from about 5-6 slices)
2 large eggs (or 1 egg per pound of meat)
¾ cup milk or water
1 envelope onion soup mix
¾ cup ketchup
2 tablespoons mustard (try Dijon or spicy brown)
2 tablespoons brown sugar

Instructions:
Preheat oven to 350º.

Mix eggs, milk, soup mix, ketchup, mustard, and brown sugar in a large mixing bowl.

meatloaf

Add meat and bread crumbs and mix slowly for about 15 seconds. I use a mixer because I don’t like to get my hands greasy from the cold meat.

meatloaf

The less you handle meat, the more tender your meatloaf will be. It should look like this when it is sufficiently mixed.

meatloaf

If using 2 pounds of meat, cook in a large loaf pan or an 8-inch square pan. If using 3 pounds, place in a larger pan. Top lightly with ketchup. [I skip this step now.] Bake at 350º for 50-60 minutes.

meatloaf

The USDA recommends all ground beef, lamb, pork, and veal mixtures be cooked to 160º, and ground turkey or chicken to 165º. For meatloaf, you can take the meat out of the oven when the meat thermometer says 155º and rely on carryover heat to finish cooking it.

Heat Transfer, aka “carryover heat”, aka “allow meat to rest” — what do all these terms mean?
While meat is cooking in an oven, the meat’s surface temperature is hotter than its interior temperature. When the meatloaf comes out of the oven, a meat thermometer showed an interior meat temperature of 168º. We can assume the meat’s surface temperature was the same as the oven’s, which was 350º. The room temperature was 70º. According to the laws of heat transfer, when meat is taken out of an oven, its surface heat (350º) has to go somewhere to equilibrate with the temperature of the atmosphere (70º). Some of that heat will go into the room, and the rest will transfer into the interior of the meat, causing its internal temperature to rise slightly. In this case, the temperature rose from 168º to 176º in five minutes. That was an eight-degree difference. Not too noticeable in meatloaf, but the difference between medium and rare in a resting steak.
meatloaf meatloaf

Yummy, traditional SIDES!!

If you are going to make a meatloaf, you are going to need some sides. These are kid-friendly.

Old-Fashioned Mashed Potatoes


Kids’ Favorite Sautéed Carrots


Roasted and Mashed Cauliflower


Blanched String Beans with Vinaigrette


Perfect Rice Every Time!


Roasted Rosemary Sweet Potatoes


More comfort food:
Yummy Shepherd’s Pie
Sheet Pan Supper: Chicken, Artichoke, and Lemon
Sheet Pan Supper: Italian Sausage, Peppers, Onions, and Potatoes
50 Ways to Make a Frittata
Fresh Marinara Sauce with Pasta and Mozzarella

If you enjoyed this post, please share and become a follower. When signing up to become a subscriber, be sure to confirm on the follow-up letter that will be sent to your email.

Follow Judy’s Chickens on Instagram and Pinterest @JudysChickens.

Always check my blog for the latest version of a recipe.

© 2014-2020 Judy Wright. All rights reserved. Photos, videos, and text may only be reproduced with the written consent of Judy Wright.