When I was growing up, my stepfather’s favorite pie was strawberry rhubarb. I often made it for him when I was in town for Father’s Day. I grew to love it myself.

It is the perfect combination of sweet and tart tastes; right up there with my other favorite sweet and tart combo, Ricotta and Lemon Cookies.

Rhubarb is a perennial plant that is considered a fruit. It has pale green to crimson red stalks, depending on the variety, and green leaves that are poisonous to eat. The stalks look similar to Swiss chard.

Because the stalks are most often used in desserts, specifically pies, you will sometimes see rhubarb referred to as “pie plant” in older cookbooks.

This is my time-honored recipe for making this scrumptious dessert.
Yield: Makes one deep-dish 9″ pie
Ingredients:
6 cups hulled and quartered strawberries (2 pounds after hulling)
3 cups sliced rhubarb (1 pound, maybe 6 stems)
Zest of 1 lemon
1 teaspoon vanilla extract
¾ cup granulated sugar
¼ cup cornstarch
½ teaspoon salt
1 9-inch double pie crust
1 egg and a little sugar for the egg wash
Mise en Place:

Instructions:
Preheat oven to 425º
Prep the strawberries and rhubarb as shown.


Prepare the pie crust: I like to use Trader Joe’s frozen pie crusts. Once the crusts come to room temperature, which takes about 90 minutes, unroll one crust leaving it in its plastic packaging as you do. You’ll find that the dough breaks up into wide strips as you unroll it. Not a problem, just use a rolling pin to lightly rejoin the cracks while the dough is still sandwiched between the plastic. Next, remove the plastic covering from one side of the crust. Using the corners of the remaining plastic square, lift the crust, turn it over and plop it into the pie plate. Continue to leave the plastic on as you then press the pie crust down into the pie plate. Remove the plastic and the bottom crust is now ready for filling.


Put the strawberries, rhubarb, lemon zest and vanilla in one bowl and mix gently. Put the sugar, cornstarch and salt in another bowl and mix.

Gently mix the contents of both bowls together for about ten seconds.You don’t want it to become soupy. Pour mixture into the pie plate.


Roll out the second pie crust in the same way as described above. Remove one of the plastic coverings and use the corners of the remaining covering to position the top crust centrally over the bottom crust. There should be an overhang of dough. Next, remove the last plastic square and go around the rim of the pie and tuck the top crust edges in between the pie plate and the bottom crust. This should create a nice seal to keep the filling in the pie.


Flute the two crust edges together, using your fingers as shown in the pictures below, to make a pretty edge for your pie.


Using a fork, beat one egg in a small bowl. Use a pastry brush to spread the egg wash over the top of the pie all the way to the edge. If the egg wash puddles in the dimples in the crust, use a paper towel to mop them up. Lightly sprinkle sugar over the top.


Using a knife, cut small slits into the top crust to allow steam to escape as the filling cooks. Place the pie on a baking sheet to collect any juices that bubble out. Bake pie at 425º for twenty minutes on the middle oven rack. Best to set a timer. Lower oven heat to 350º and cook for about 45 – 50 minutes longer until crust starts to turn golden brown and you can see the juices bubbling.

This pie was so gorgeous, I started humming You’re just too good to be true, can’t take my eyes off of you …

Cool slightly and serve. Vanilla ice cream would be great with it. If you want the inside of the pie to be firm, you’ll need to refrigerate it until the filling cools down and sets.

Related Posts on Cooking with Strawberries
Oven-Roasted Strawberry and Rosemary Jam
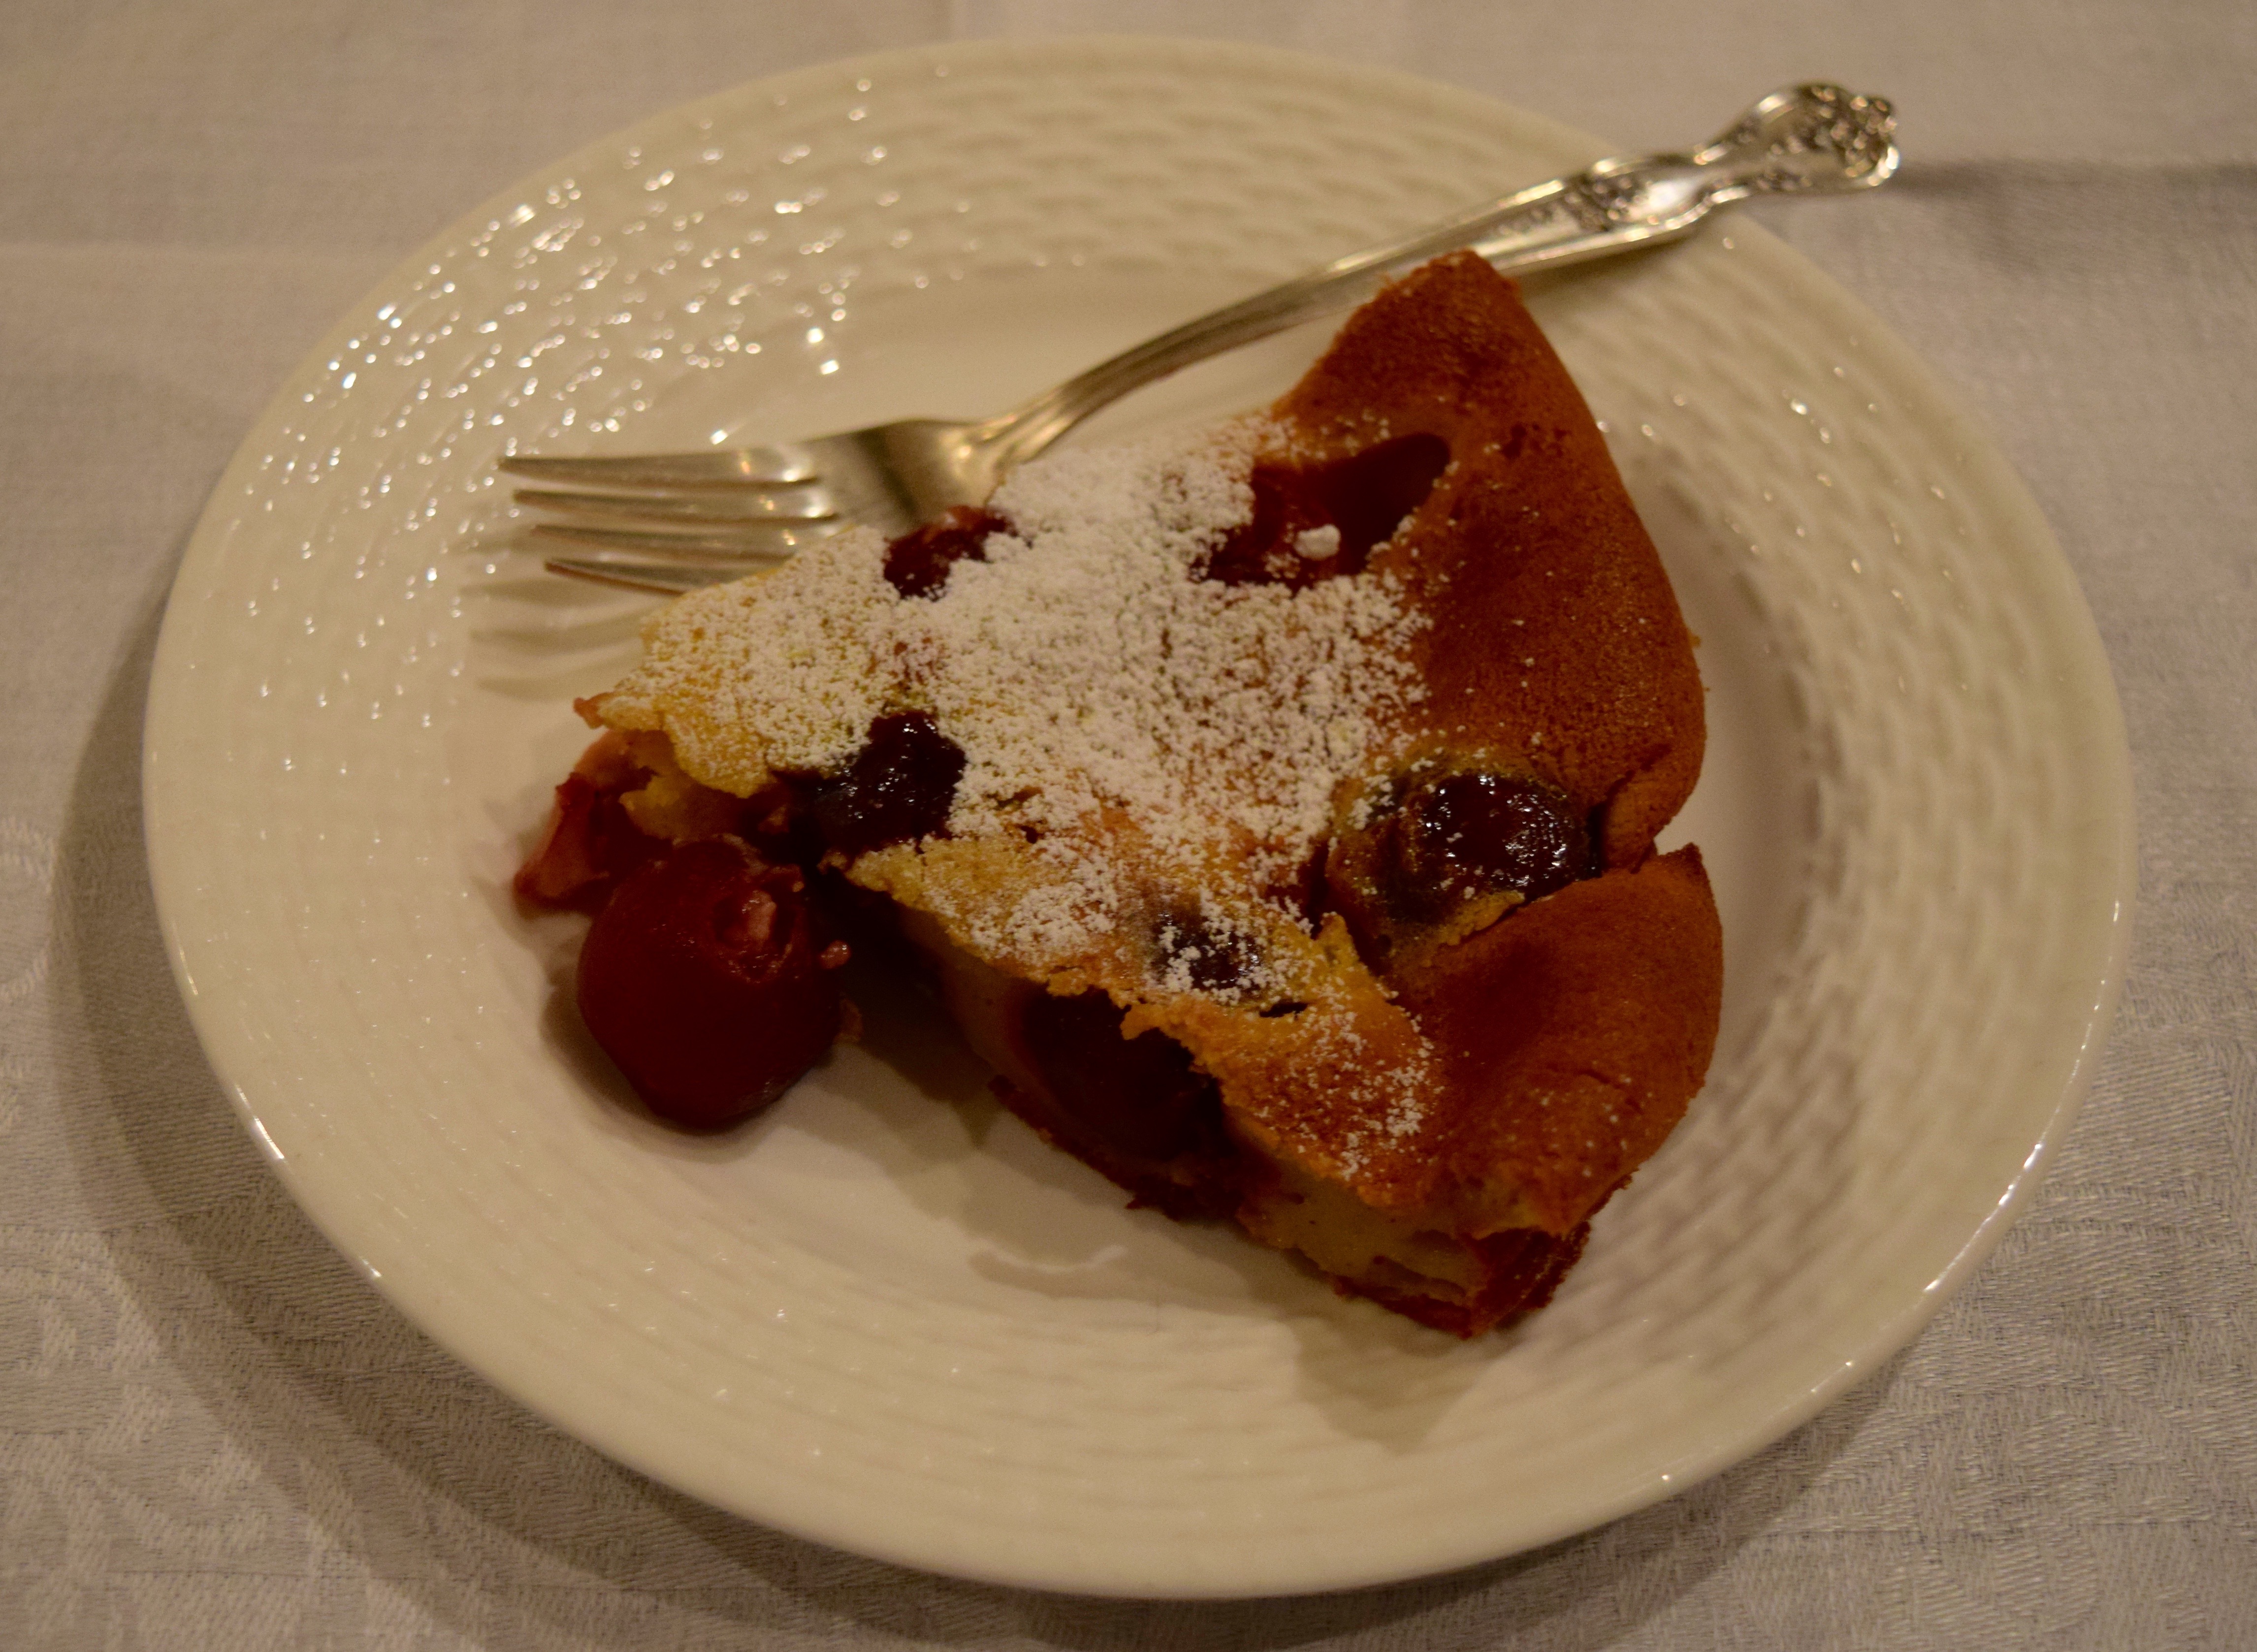
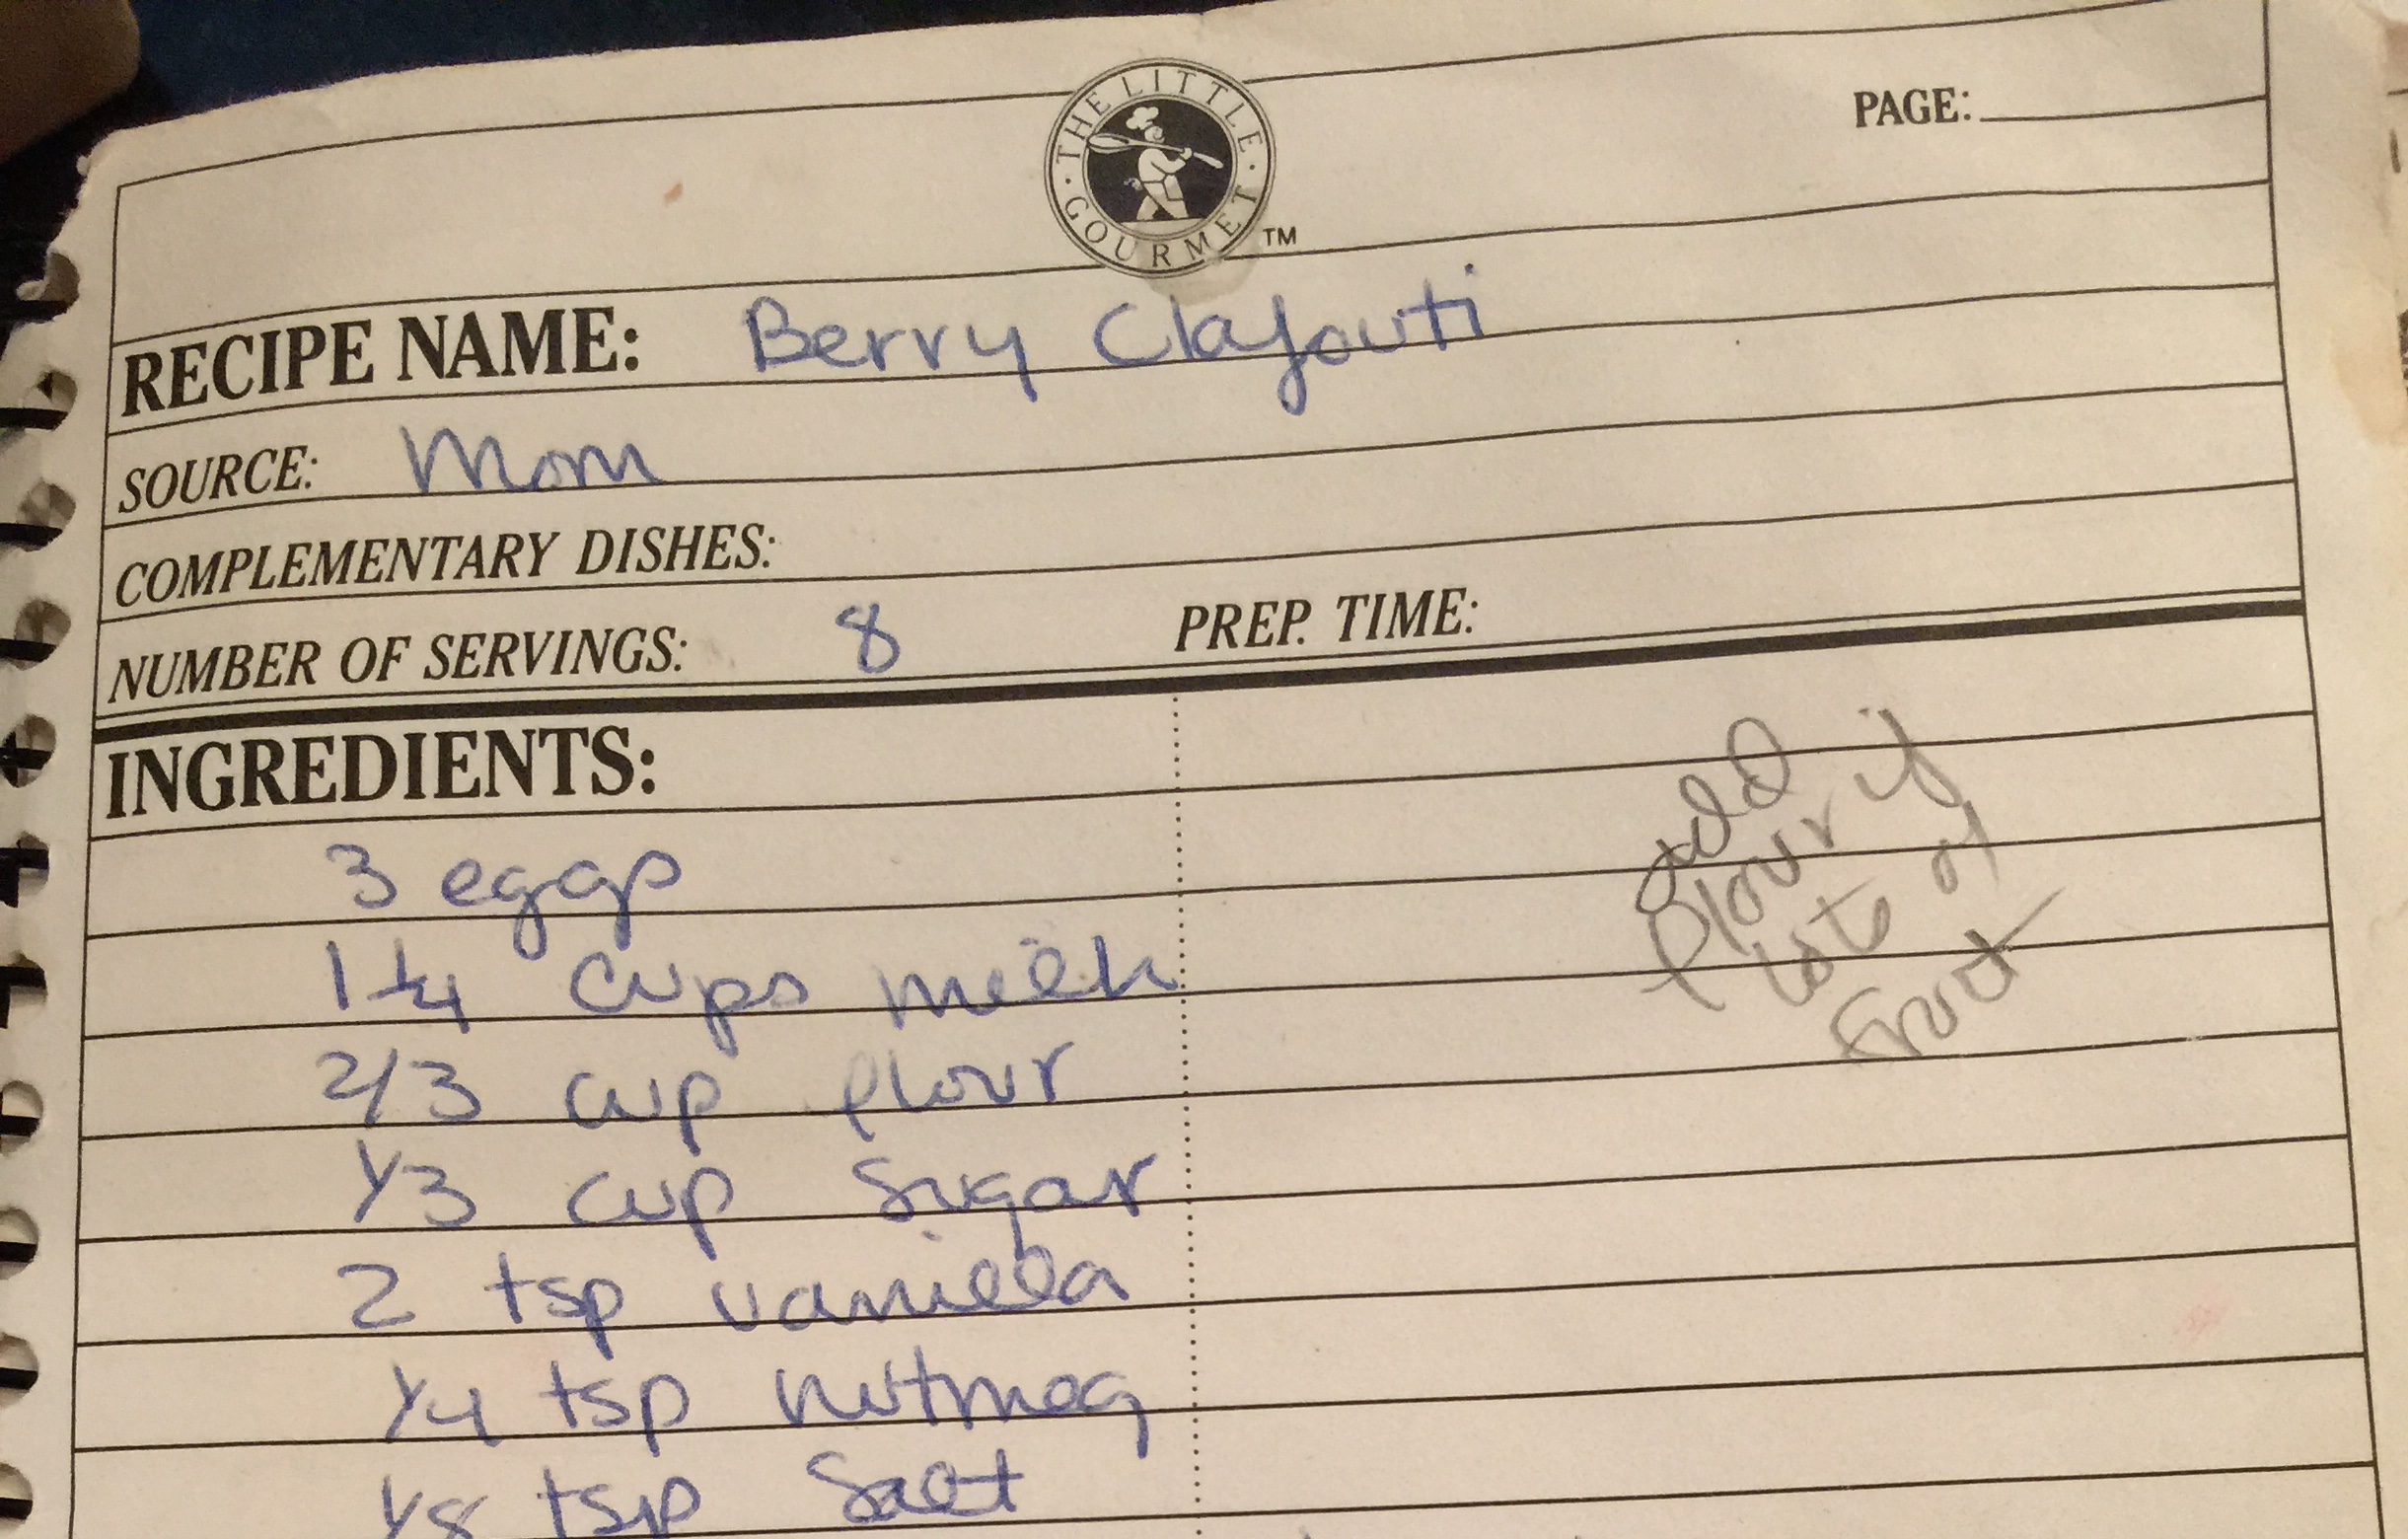
Very Berry Clafoutis
Related Pie Posts
Mom’s Apple Pie with a Cheddar Streusel Topping
Mrs. Walker’s Cranberry Nut Pie
Pumpkin Cheesecake Pie
Mom’s Pumpkin Pie
LET’S STAY CONNECTED!
Follow my photos of vegetables growing, backyard chickens hanging out, and dinner preparations on Instagram at JudysChickens.
Never miss a post: sign up to become a follower of the Blog.
© 2014-2017 Judy Wright. All rights reserved. Photos and text may only be used with written consent.


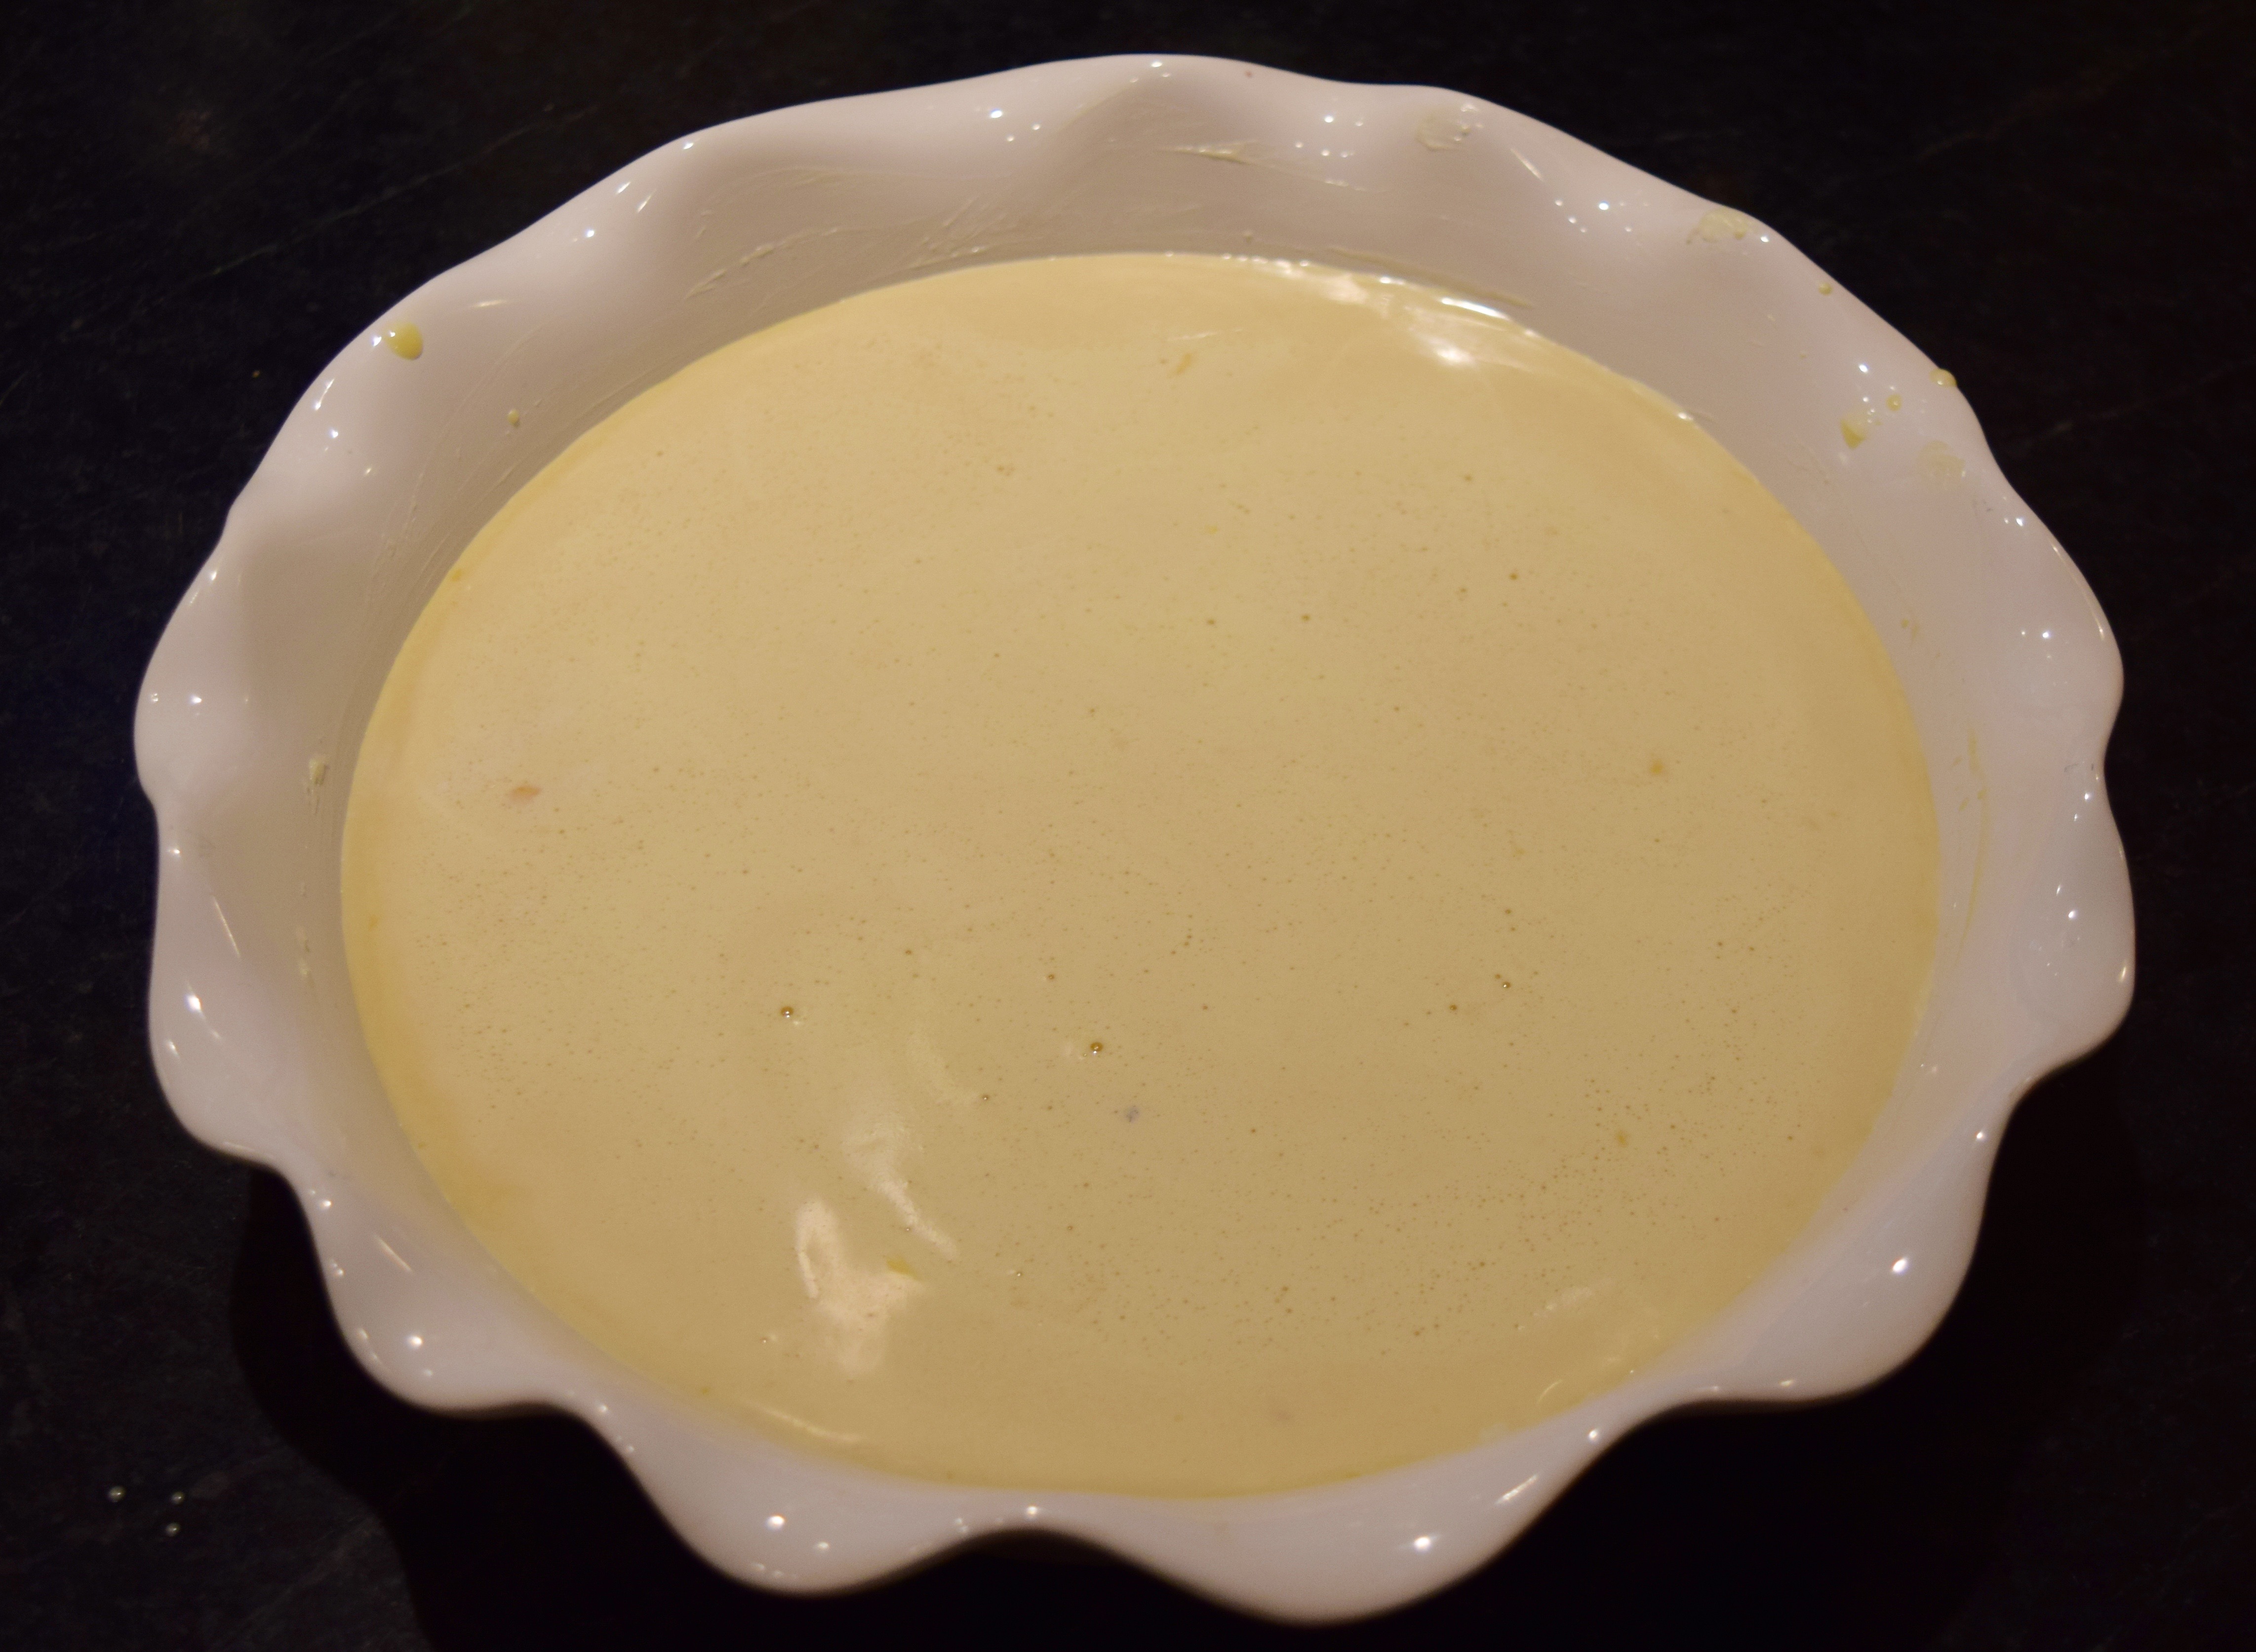

 Bake in a preheated oven for 45-55 minutes. The clafoutis should be lightly browned and puffed on top. Test for doneness by inserting a knife into the center. It will come out clean if the interior is cooked. If it doesn’t come out clean, cook for 5 more minutes. Let cool 10 minutes before serving. The pouf will settle down.