Pasta, Mozzarella and Marinara Sauce

When I have gorgeous homegrown heirloom tomatoes sitting on the kitchen counter, I can’t help but try to capture their beauty with photographs.

DSC_0690

Taking photos of tomatoes is what I was doing when my husband came home from work a few nights ago. He was hungry and there was no dinner in sight. He gently asked what we were going to eat. I lied and said I was just getting ready to make a marinara sauce. I asked him to go snip some basil. Marinara sauce only requires tomatoes, garlic, and basil and takes about ten minutes to prepare. I could have it made by the time it took the water to boil and the pasta to cook. Dinner.

Mise en Place:

Yield: 4 cups of sauce

Ingredients for the Marinara Sauce:
¼ cup extra virgin olive oil
6-8 cloves garlic, smashed and sliced (about one small head of garlic)
4 pounds of ripe tomatoes, cored, seeded and rough-chopped (about 8-9 cups)
2 teaspoons sea salt
¼ teaspoon crushed red pepper flakes or dash of cayenne pepper
15 leaves of basil, stacked and sliced (aka chiffonade)
2 teaspoons sugar (optional- use if tomatoes are acidic)

Ingredients for the Pasta:
8-12 ounces mozzarella, cut into one-inch cubes
1 pound pasta, cooked al dente
Grated Reggiano Parmesan cheese

Instructions:
Bring a pot of salted water to a boil. While waiting for water to boil, start prepping the vegetables.

Core tomatoes, slice in half (horizontally) and use your index finger to scoop out the seeds from each half. Next, rough-chop the tomatoes into 2-inch chunks. Note: If I have time, I sometimes do the extra step of peeling the tomatoes using the dipping them in boiling water method.

Smash, peel, and rough-chop the garlic.

Stack about 15-20 leaves of basil on a cutting board and slice into ribbons.

Pour the olive oil into a large sauté pan. I use a 6-quart pan. Warm the oil over medium heat and add the garlic. Sauté for about one minute until the garlic just starts to change color. Do not brown the garlic. If you do, discard it and start over.  Add the tomatoes.

DSC_1384

Add salt and a pinch of red pepper flakes or cayenne pepper.  Cook on medium heat for about 8 – 10 minutes. Turn heat off and stir in basil. Taste and adjust seasoning. Delicious! You could eat with a spoon!

.

Meanwhile, cook the pasta according to package directions. If all goes according to plan, the pasta, and tomato sauce will be ready about the same time. Add pasta to a serving bowl. Add the mozzarella chunks and marinara sauce. Mix together and serve hot.

DSC_0796

Pass the grated Reggiano Parmesan!

DSC_0814

Here is a marinara sauce I made using only cherry tomatoes. It was sweet and delicious.

DSC_0954

To see which varieties of regular tomatoes I am growing, check out this post and to see which varieties of cherry tomatoes, check this one.

Related Posts on Italian Style Cooked Vegetables
Grandma’s Italian Fried Cauliflower
Pasta e Fagioli, aka Pasta and Bean Soup
Roasted Spaghetti Squash with Asparagus and Chicken
Roasted Ratatouille
Amazingly Delicious Sautéed Carrots
Spiralized Zucchini (aka Zoodles) with Marinara Sauce
Baked Ziti with Eggplant

LET’S STAY CONNECTED!

Follow my photos of vegetables growing, backyard chickens hanging out, and dinner preparations on Instagram at JudysChickens.

Never miss a post: sign up to become a follower of the Blog.

© 2014-2017 Judy Wright. All rights reserved. Photos and text may only be used with written consent.

Tomatoes: The Crown Jewels of the Summer Kitchen Garden

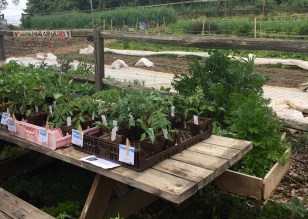
The hustle and bustle of getting my vegetable garden planted over the last several weeks came to a halt yesterday (albeit temporarily — gardening never ends) when finally, I got my tomatoes in the ground. After a fun few days spent chasing down favorite plant varieties at local garden centers, I felt a peaceful sense of satisfaction as I dug that last hole in the ground and planted a Green Zebra tomato, scored from Gardens of Babylon at the Farmers Market. That the big planting happened on Earth Day made my gardening day even more special.
vegetable gardens vegetable gardening

This year, I am on a mission to get more than 5-10 tomatoes from each tomato plant. To that end, I chose plant varieties based on flavor, growth habit, success in prior years, and color. I even rebuilt my tomato bed to offer stronger vine support, did a soil test at the Elmington Agriculture Center, and then amended the soil based on the results.

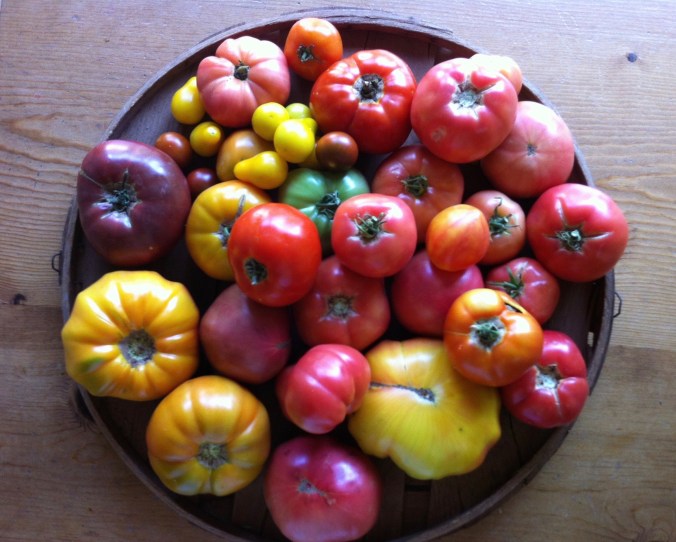
The plants I chose to grow are Cherokee Purples, San Marzanos, Hughs, Bradleys, German Queens, a Mr. Stripey, and a Green Zebra. To see my choices for cherry tomatoes, check out my post, The Full-Bodied Cherry Tomato.

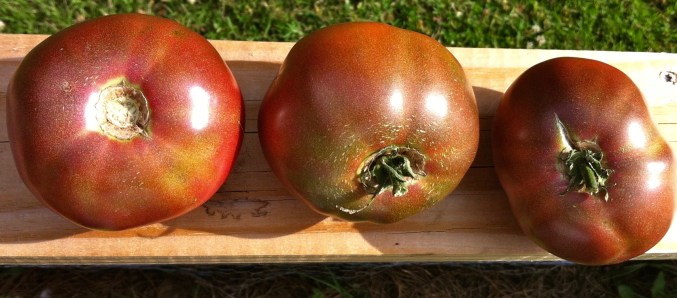
Cherokee Purples (6 plants): Indeterminate. Heirloom. Very sweet and large fruit. Their color is a dusty rose with what looks like purple bruises. When very ripe, and deep purple, they are gushingly good. They are my favorite tomato.
DSC_0107 lake barkley, ky july 4th week

San Marzanos (4 plants): Indeterminate. Heirloom. A meaty, deep red “paste” tomato. They have a thicker flesh and fewer seeds than the regular Roma tomato. They are sweet and low acid. This variety is my favorite for cooking.
IMG_3870

Hughs (2 plants): Indeterminate. Heirloom. Strong, sweet flavor and very meaty.  I first tasted this tomato last summer while cooking at The Nashville Food Project. I’ve been lusting for them ever since. I’m grateful TNFP’s Garden Director, Christina Bentrup, saved two young seedlings for me from Project Growa popular Nashville vegetable plant CSA. The tomatoes are pale yellow and large.
TNFP tomatoes IMG_7166

Bradleys (2 plants): Semi-determinate. Heirloom. Fruit is pinkish-red and ranges in size from 7-10 ounces. This was my favorite tomato to grow until I learned about Cherokee Purples. They are sweet with just the right amount of acidity. As with other determinate varieties, they set their fruit and then they are done for the season.
bradley3

Mr. Stripey (2 plants): Indeterminate. Heirloom. Fruit is large and very sweet. Their color is yellow with pinky-red undertones. These tomatoes are luscious. I love them sliced and in a sandwich. I tend to photograph them a lot!

tomato art vegetable gardening

German Queen (1 plant): Indeterminate. Heirloom. Fruit is sweet and low-acid. They are large and pinky-red with green undertones in the shoulders.  Great for slicing. This photo is from Bonnie Plants
tomato-heirloomgermanqueen-m

Bush Early Girls (2 plants): Determinate. Hybrid. I planted these just to watch their growth habit. They are advertised as an extra-early variety, compact at 18 inches tall, productive and bred for disease resistance. This photo is from Burpee Seed Company.
prod000981

Green Zebra (1 plant): Indeterminate. This tomato is the result of four heirlooms bred together. I grow it for its two-tone vertical stripes in shades of green which begin to become slightly pale yellow at maturity. The fruit is small, the flesh is pale green, and the flavor is mild. I grow them to round out my color palette.
tomatoes walkers RI Tomatoes

The Growth Habit of Tomatoes: everything you need to know is on the plant’s label!
IMG_6697 IMG_7195

Determinate & Indeterminate

Simply put, there are two types of growth habits for tomato plants: determinate where the plant bears all of its fruit at one time and indeterminate, where the plant bears fruit all season long right up to the last frost.

Determinate Varieties:
Also known as bush and patio tomatoes, this variety grows on one main trunk to a pre-determined height of two to four feet and sets a finite number of fruit. They should not be pruned. They produce tomatoes for a concentrated time span of four to six weeks and then they are finished for the season. This makes them great for commercial growers who can plan on one harvest for the season.

Indeterminate Varieties:
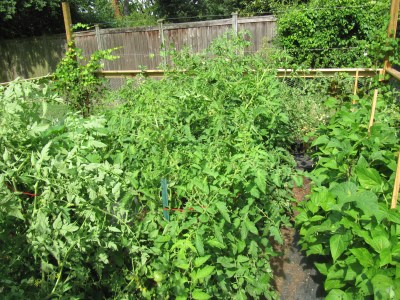
If you think of indeterminates as vines that need to be staked and pruned, it may help you plan ahead on how you are going to accommodate their unwieldy growth habit. Tomato vines grow like a weed and, left unpruned, will eventually topple over from the weight of their continuously growing stems, leaves, and fruit. I found this picture of my tomato garden taken on June 4, 2012. There are no subsequent photos of this garden. You know what they say; History is written by the victors. This kind of unpruned growth is unsustainable.

vegetable gardens vegetable gardening

Suckers! This brings us to the topic of pruning suckers, those new vines that grow in the crotch of the 90-degree angle formed by new leaf growth off of the main stem. Left unpruned, the new vines that they grow into, can each grow from 3-10 feet, depending on who you talk to! This year, my plan is to snip those suckers. I found an informative article on the topic of pruning tomatoes at Fine Gardening. Check out the article. I’m a believer now that I understand what is going on.
tomato sucker tomato sucker

Heirloom and Hybrid
Heirloom varieties are plants that have been around for at least 50 years and are either open or self-pollinated.

Hybrids are plants that have been bred for disease resistance, heat tolerance, fruit size, and flavor. “F1” on a plant label means it is the first generation of the cross-mating of two different parent plants. The next generation of hybrids will become known as F2, F3, etc. Hybrids that have withstood the test of time can become known as heirlooms after 50 years.

Open-Pollinated or Self-Pollinated
How a flower is pollinated is important to know if you intend to practice seed saving, otherwise, you do not need to consider it when growing tomatoes.

Open-pollinated (OP) flowers require insects or wind to move the pollen from the male to the stigma of the female. Once fertilized, the plant will set fruit in the ovary of the plant.

Self-pollinated flowers have both male and female parts in the same flower and do not need bees to set fruit. They are often referred to as the “perfect” flower. Have you ever noticed how flowers on a tomato plant point down? That’s nature’s way of assuring self-pollination through gravity alone.
DSC_0595 (1)

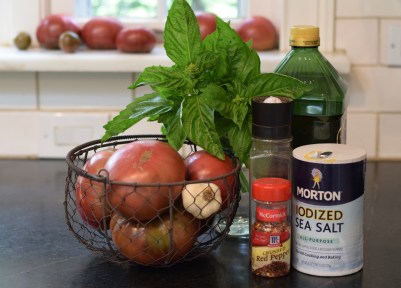
Now for a little tomato joy — last summer, these tomatoes, became a pie! This recipe and hopefully many more will come about once my huge tomato crop starts to roll in!
 

Tomato Update: May 6

DSC_0913

LET’S STAY CONNECTED!

Follow my photos of vegetables growing, backyard chickens hanging out, and dinner preparations on Instagram at JudysChickens.

Never miss a post: sign up to become a follower of the Blog.

© 2014-2017 Judy Wright. All rights reserved. Photos and text may only be used with written consent.

The Full-Bodied Cherry Tomato

IMG_2299

Whether you are a seasoned farmer or a first-time vegetable gardener, planting cherry tomatoes in your garden will give you a lot of joy and bang for your buck. The flavor in a cherry tomato is intensely sweet, and their gorgeous color and shape will make any salad or salsa more beautiful. They will also start producing before your regular-sized tomatoes ripen and will continue to produce right up until the first frost in October. Their only limiting factor is their fruit grows on vines, and those vines tend to spread so they will need a structure upon which to climb. I like to grow them along the chicken wire fencing that surrounds my kitchen garden.

My dependable faves in the cherry tomato category are Juliettes, Sun Sugars, or Sun Golds, whichever you can find, Yellow Pear, and Matt’s Cherry Wild — in that order of preference. To give you an idea of sizes and colors, take a look at this photo taken last summer on July 6th.

IMG_1377

Juliette’s are like small Romas, meaty, packed with flavor and not overly sweet. They are the first tomato to ripen in the spring and the last to produce in the fall. They are big; I often cut them in half when I put them in a salad. If I only grew one cherry tomato, this would be the one.

tomatoes fall garden

Sun Sugars are a golden orange color when ripe and grow as a cluster of grapes on a vine. They are very similar to Sun Golds. They are intensely sweet and tend not to crack.

DSC_0091

Yellow Pear. Their name says it all. Another tomato with great color, shape, and taste.

DSC_0377

Matt’s Wild. They are tiny, deeply red in color, and intensely sweet. They grow like a cluster of grapes on a vine. They are so small; they hardly ever make it to the dinner table as we often pop them in our mouth right off the vine.

DSC_0595

This year, I’m going to add one more variety to the mix, the Black Cherry. My reason for wanting them is to round out my tomato color palette. Here is a picture of Black Cherry tomatoes from Johnny’s Selected Seeds website.

88G

Happy planting, but please wait to plant until after the last frost date for your area; the tomato plant’s leaves are very tender, and the plant will wilt and likely die if there is a frost.

LET’S STAY CONNECTED!

Follow my photos of vegetables growing, backyard chickens hanging out, and dinner preparations on Instagram at JudysChickens.

Never miss a post: sign up to become a follower of the Blog.

© 2014-2017 Judy Wright. All rights reserved. Photos and text may only be used with written consent.

Chicken Cacciatore

What’s in a name? In common parlance, this dish is known as chicken cacciatore. Isn’t that a little odd: half the name in English, and the other in Italian? I’m guessing the name was conjured up by Italian-American restaurateurs hoping to entice Americans into their doors. In Italy, the dish is known as pollo alla cacciatora and translates in English to chicken, hunter’s style. Cacciare is the verb to hunt in Italian.

This dish is traditionally made with tomato sauce

but sometimes, I leave the tomatoes out.
img_3922

Cooking “alla cacciatora” includes the step of sautéing wild game in an acidic liquid such as wine, vinegar, or lemon juice to tame the gamey-ness of the meat. If the cook is sautéing rabbit, the dish is called coniglio alla cacciatora, and if wild duck, it’s anatra selvatica alla cacciatora.

A few words about ingredients: Make sure the bay leaves are fresh. They should have a woodsy, fragrant smell when you open the package — every time you open it. If they are no longer fragrant, it’s time to get a new package.

Chicken cacciatore is typically served over polenta, wide flat noodles, or rice.

Ingredients:
DSC_0592

2-3 bell peppers (1 pound), cut into bite-sized chunks
1-2 sweet onions  (1 pound), sliced
1-ounce garlic cloves (about 1 small head of garlic), smashed and peeled
½ cup olive oil
1 teaspoon sea salt
¼ teaspoon cayenne pepper
cracked pepper

3 pounds boneless, skinless, chicken thighs, cut into 2-inch pieces
½ teaspoon sea salt
1 teaspoon black pepper
½ cup all-purpose flour

3 stems rosemary leaves
3 stems oregano leaves
4 bay leaves
1 cup white wine

3 cans “Italian Style” stewed tomatoes
1 cup chicken broth
1 pound mushroom, sliced

Mise en Place:
DSC_0661

Mise en Place Instructions:
Prep peppers and onions: Remove the core, stem, and seeds, slice mushrooms.
DSC_0657

Prep garlic: Smash garlic cloves and peel.

Prep chicken thighs: Rinse, pat dry, trim fat and cut into 2-inch chunks DSC_0410

Prep herbs: Separate leaves from stems, use a scissor or knife to mince leaves. Never chop a bay leaf!
DSC_0643

Prep mushrooms: I like to use an egg slicer.
DSC_0623

Cooking Instructions:

Coat bottom of a 12-inch heavy-bottomed deep pan with olive oil. Warm the olive oil over high heat until it is hot, but not smoking. Add peppers, onions, garlic, salt, and cracked pepper to the oil and sauté for 5-7 minutes, stirring regularly. Turn heat off and set aside.
DSC_0683

If I am making this in the summer when fresh tomatoes are abundant, I add chopped tomatoes to the peppers and onions and omit the canned tomatoes.

In a separate bowl, season the chicken pieces with salt and ground pepper. Add flour and mix well. Do not do the step ahead of time because the chicken pieces will absorb the flour and clump together.
DSC_0685

Brown chicken evenly on all sides for about 5-10 minutes on medium-high heat. Stir often, so the chicken does not stick to the pan.
DSC_0698

Add the herbs and wine to the browned chicken and stir. Bring to a boil and simmer for 2 minutes.
DSC_0700

Add the bowl of sautéed vegetables and tomatoes to the chicken. Bring to a boil. Cover and simmer for 10 minutes.

Add mushrooms and broth (to thin liquid), cover and simmer for 30 minutes.

Let rest for at least 15 minutes before serving. This dish tastes even better the next day making it a great make-ahead dish.

LET’S STAY CONNECTED!

Follow my photos of vegetables growing, backyard chickens hanging out, and dinner preparations on Instagram at JudysChickens.

Never miss a post: sign up to become a follower of the Blog.

© 2014-2019 Judy Wright. All rights reserved. Photos and text may only be used with written consent.