Lily’s Red Velvet Cake

I enjoy making special-request cakes for loved ones on their birthdays. I was especially delighted when my son asked me to make a red velvet cake for his girlfriend, Lily, when she turned 21. I browsed through several cookbooks looking for a good recipe. My first three attempts were not pretty. The turning point came when I added strong coffee to the batter. It boosted the chocolate flavor in extraordinary ways. Now I look for reasons to make this cake!

This year, I gussied up the cake for Christmas Eve with pomegranate seeds and rosemary sprigs! So pretty!

While researching red velvet cakes, I learned the Adams Extract Company, maker of food coloring and flavor extracts, is credited with making this cake popular during the Depression. As a marketing strategy, the company placed point-of-sale tear-off Red Velvet Cake recipe cards under the grocery store shelf’s food coloring bottles. The idea took off, and Red Velvet Cakes became all the rage.

Cake Ingredients:
DSC_0084
2 cups granulated sugar
1 cup canola oil
2 large eggs, room temperature
1 cup buttermilk, room temperature (not low-fat)
2 teaspoons vanilla extract
1 ounce (2 tablespoons) red food coloring
1 teaspoon white distilled vinegar
½ cup freshly brewed warm coffee
2½ cups all-purpose flour
1 teaspoon salt
1 teaspoon baking powder
1 teaspoon baking soda
3 tablespoons unsweetened cocoa powder

Mise en Place:
DSC_0085

Instructions:
Preheat oven to 350º. Place a cooking rack in the center of the oven.

Prepare Cake Pans with Liners:
Grease two 8 or 9-inch cake pans or a bundt cake pan with cooking spray or butter. Dust insides with flour. Tap pans upside down over a trash can to remove excess flour.
Red Velvet cake

If making a layer cake, line the pans with parchment paper (waxed paper will work) as extra insurance the cake will not stick to the pan. Even when I grease the living daylights out of cake pans, some cakes still want to stick to the bottom. This is one of them. Liners guarantee they will drop out easily.

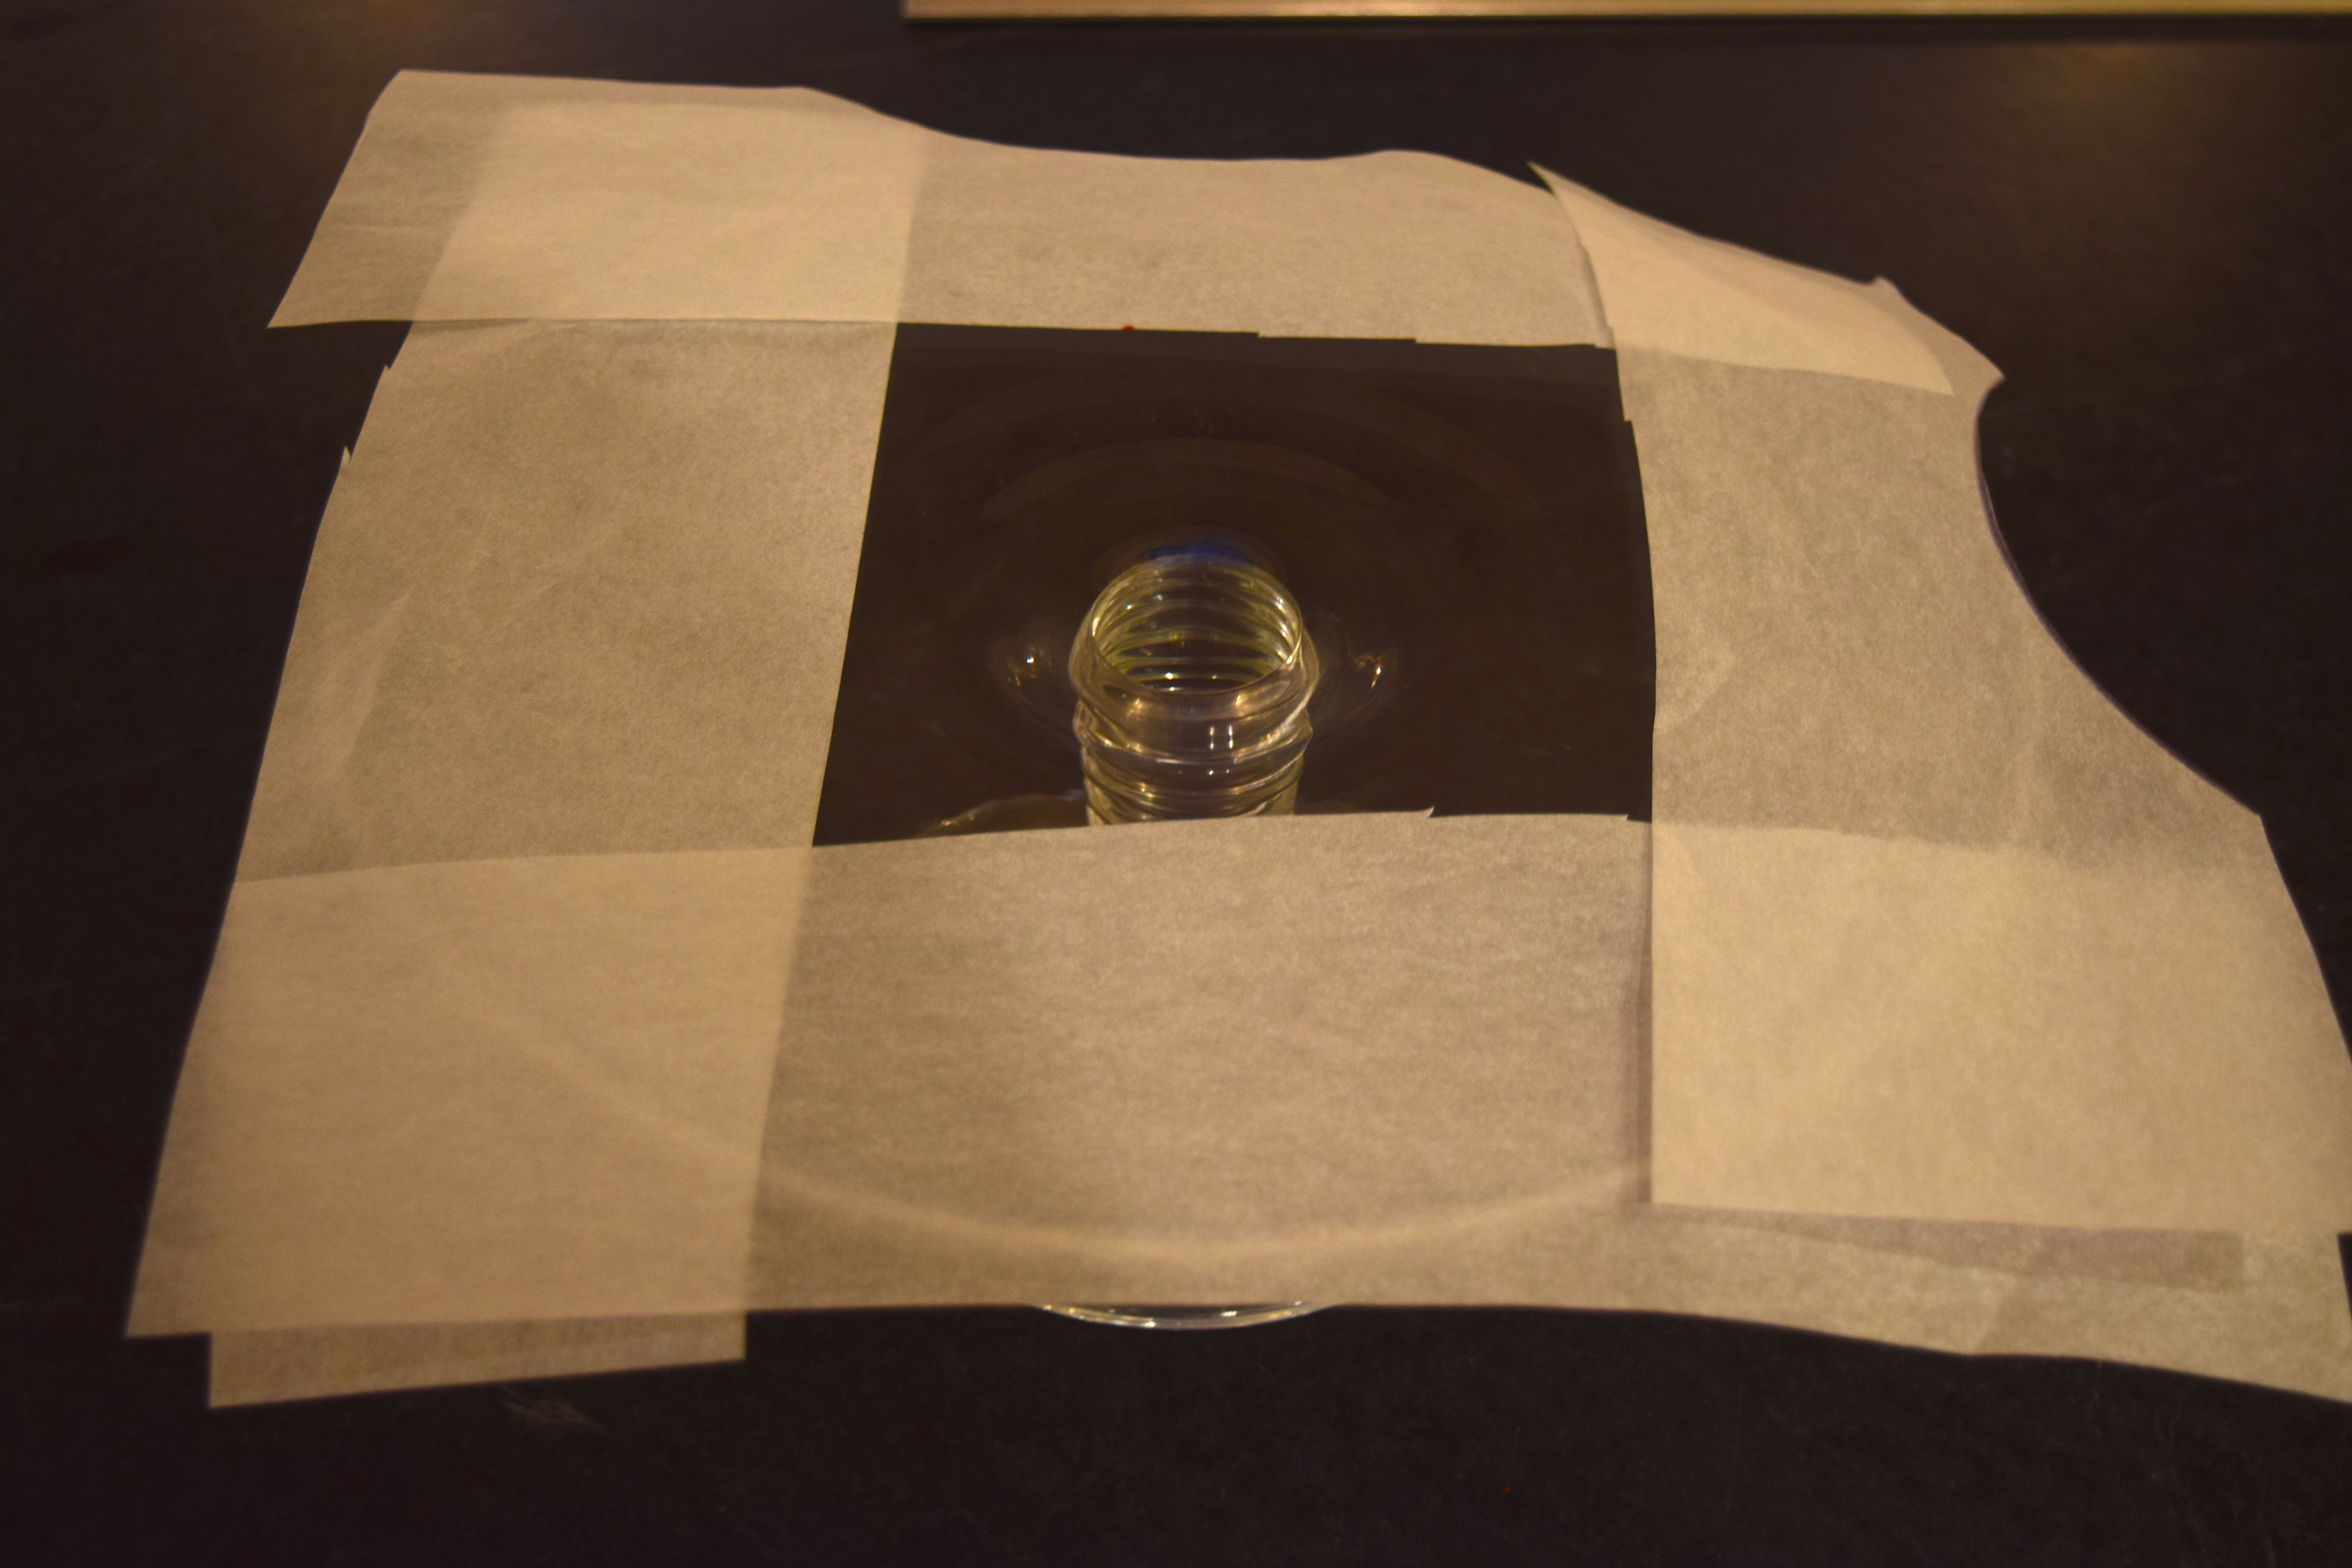
How to Make Liners for Cake Pans:
Draw an outline of the cake pan on two sheets of parchment. Cut out the paper disks. If you trim to just inside the outline, your disks should fit nicely inside the pans. Place a liner inside each pan.
 Red Velvet cake

Make the Cake Batter:
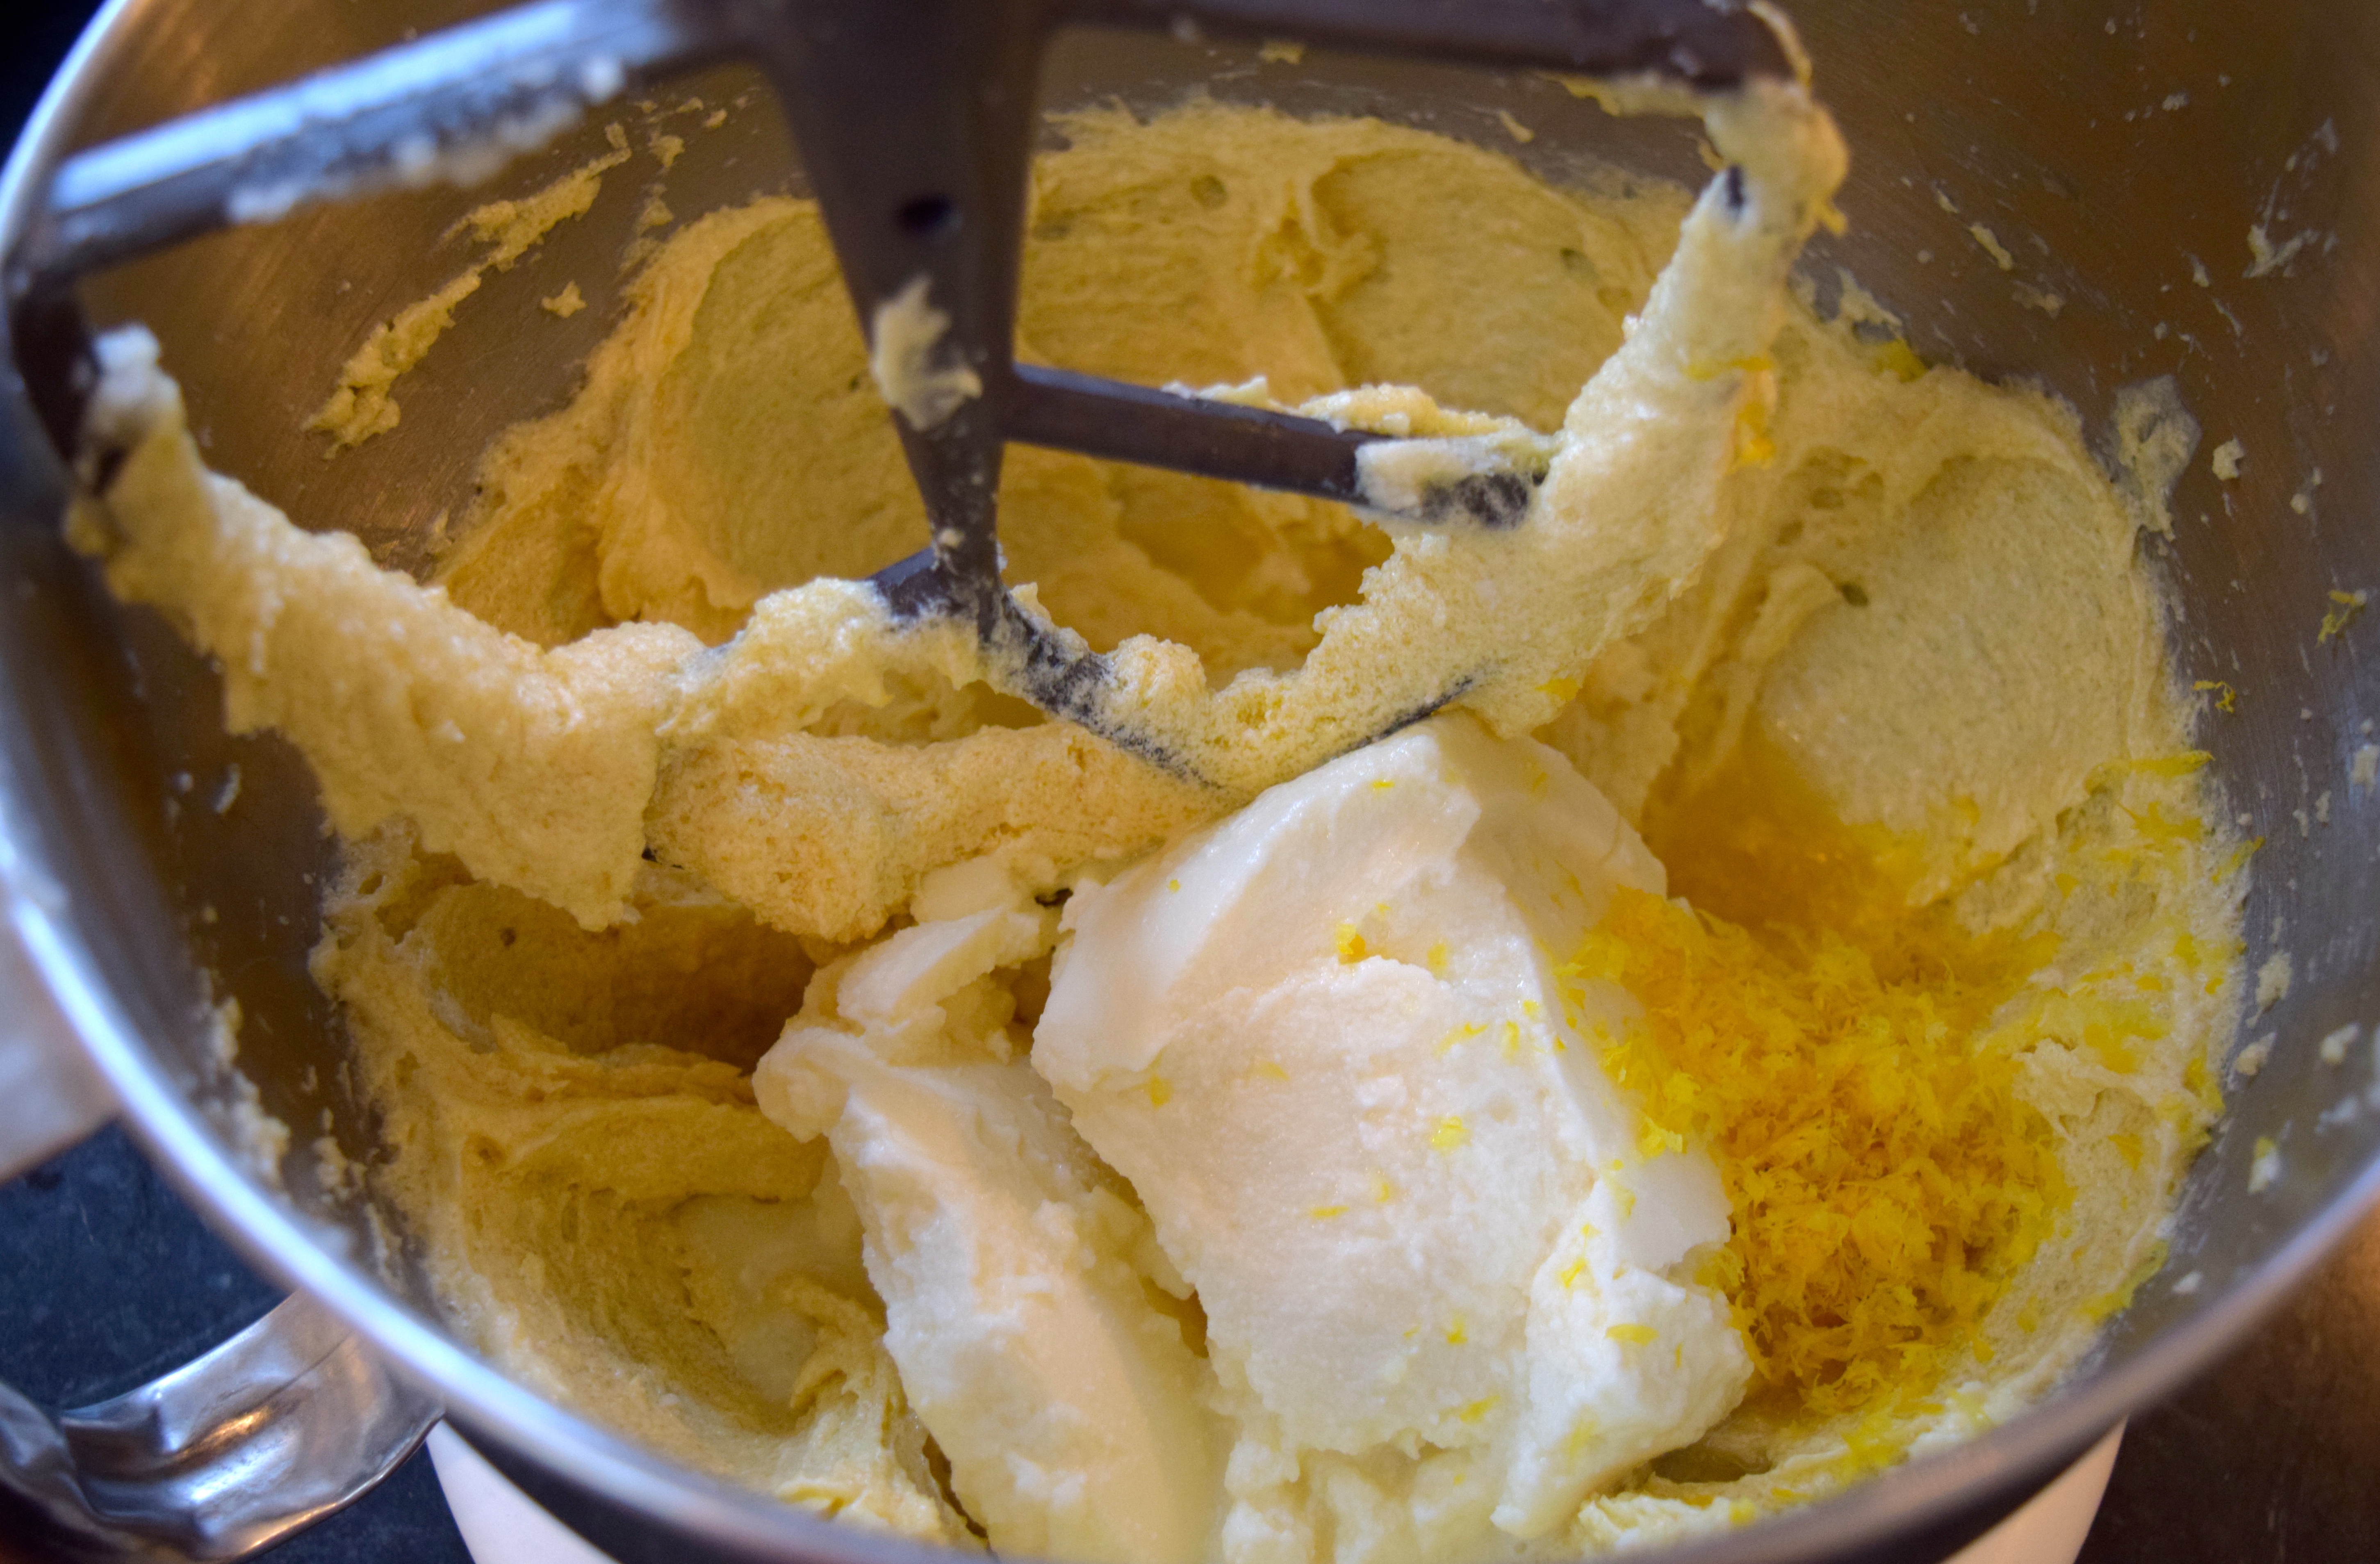
Beat together the oil, sugar, and eggs for three minutes at medium speed.
DSC_0090

Add the rest of the wet ingredients to the mixing bowl: buttermilk, vanilla, food coloring, vinegar, and coffee. Mix on medium-low speed for one minute. The batter should appear smooth. Beware, any speed higher than medium-low will cause red batter to spread all over you and your kitchen!
Red Velvet cake

In a separate bowl, mix dry ingredients with a whisk: the flour, chocolate, salt, baking soda, and baking powder. Spoon one-third of this dry mixture at a time into the mixing bowl and stir at low speed until the flour disappears. Scrape the sides of the bowl with a spatula as you mix. Mix until dry ingredients are fully incorporated into the batter.
red velvet cake  Red Velvet cake

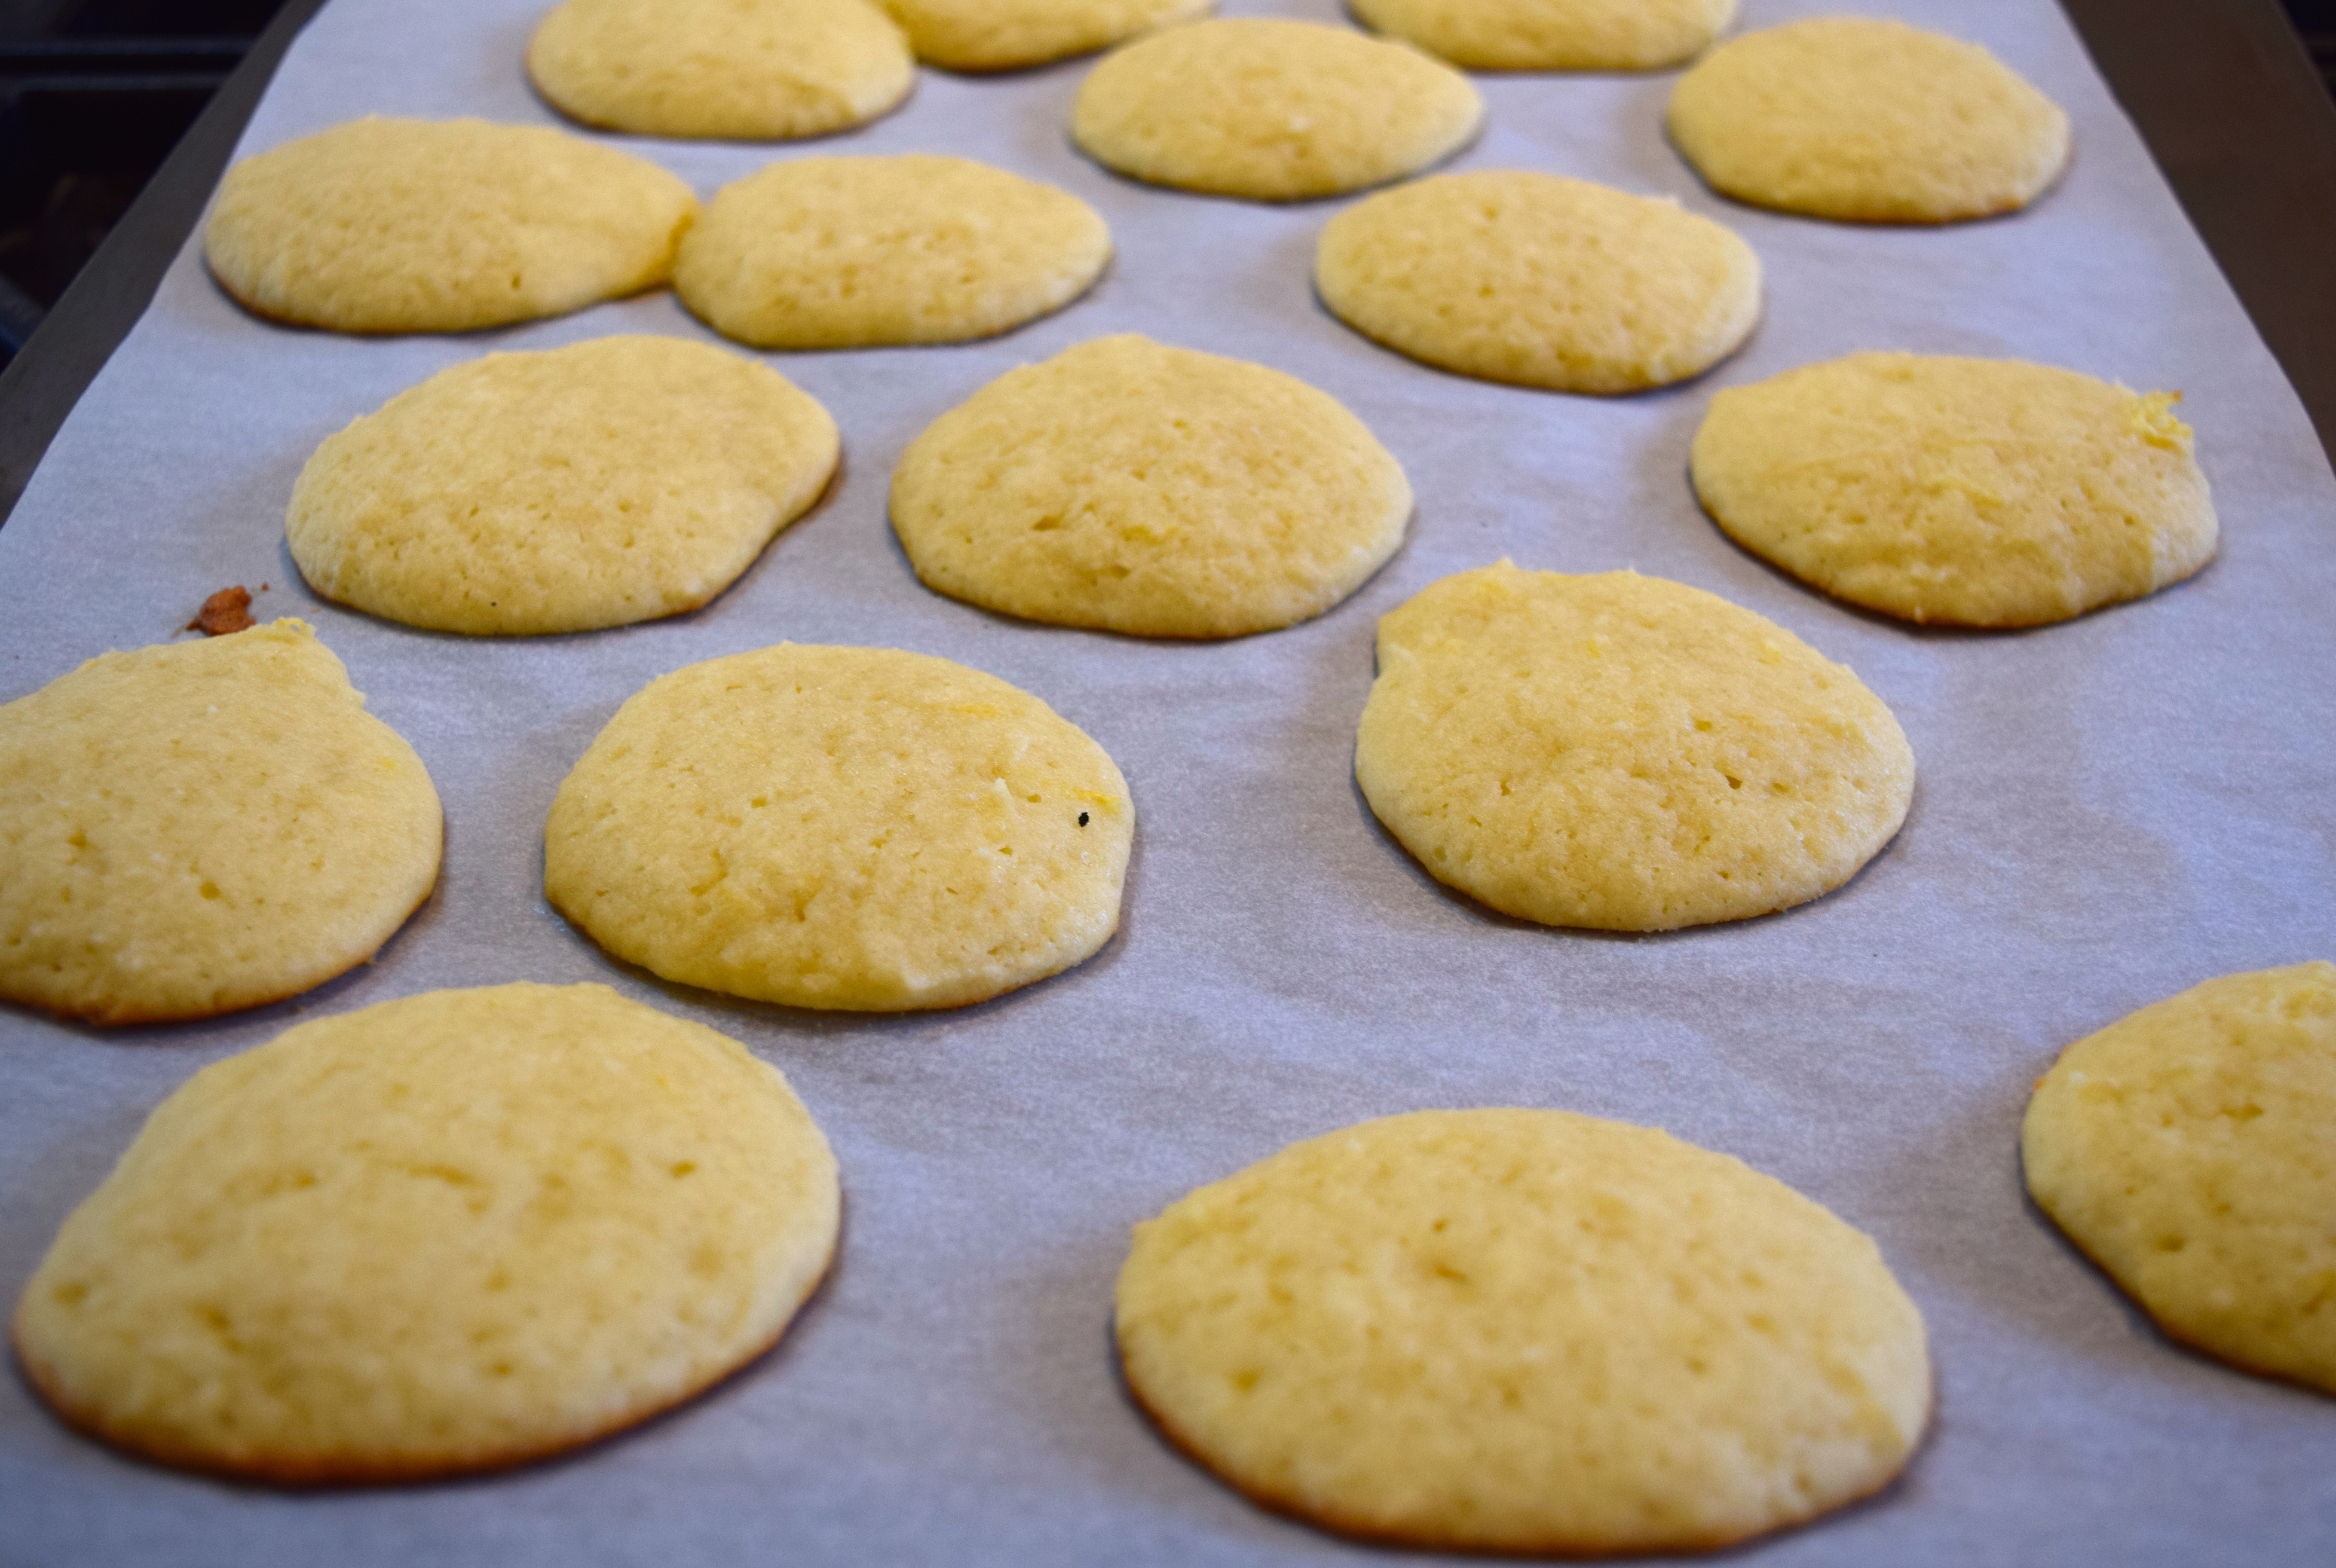
Pour batter evenly into the two prepared pans.
Red Velvet cake

Place pans on the middle rack of the oven and bake for 25-30 minutes, rotating pans halfway through cooking. Use a knife to check cake centers for doneness. If the knife comes out clean, the cake is done. If not, set the timer for five more minutes and recheck. Be sure to test each pan. When done, remove pans from oven and cool for 5 minutes.
Red Velvet cake

Next, run a knife around the edges of the pans to release cakes from sides. Turn pans upside down on a cooling rack and peel off the parchment paper. Invert cakes and cool to room temperature. Once cool, store in plastic bags until ready to use or frost them.
Red Velvet cake Red Velvet cake

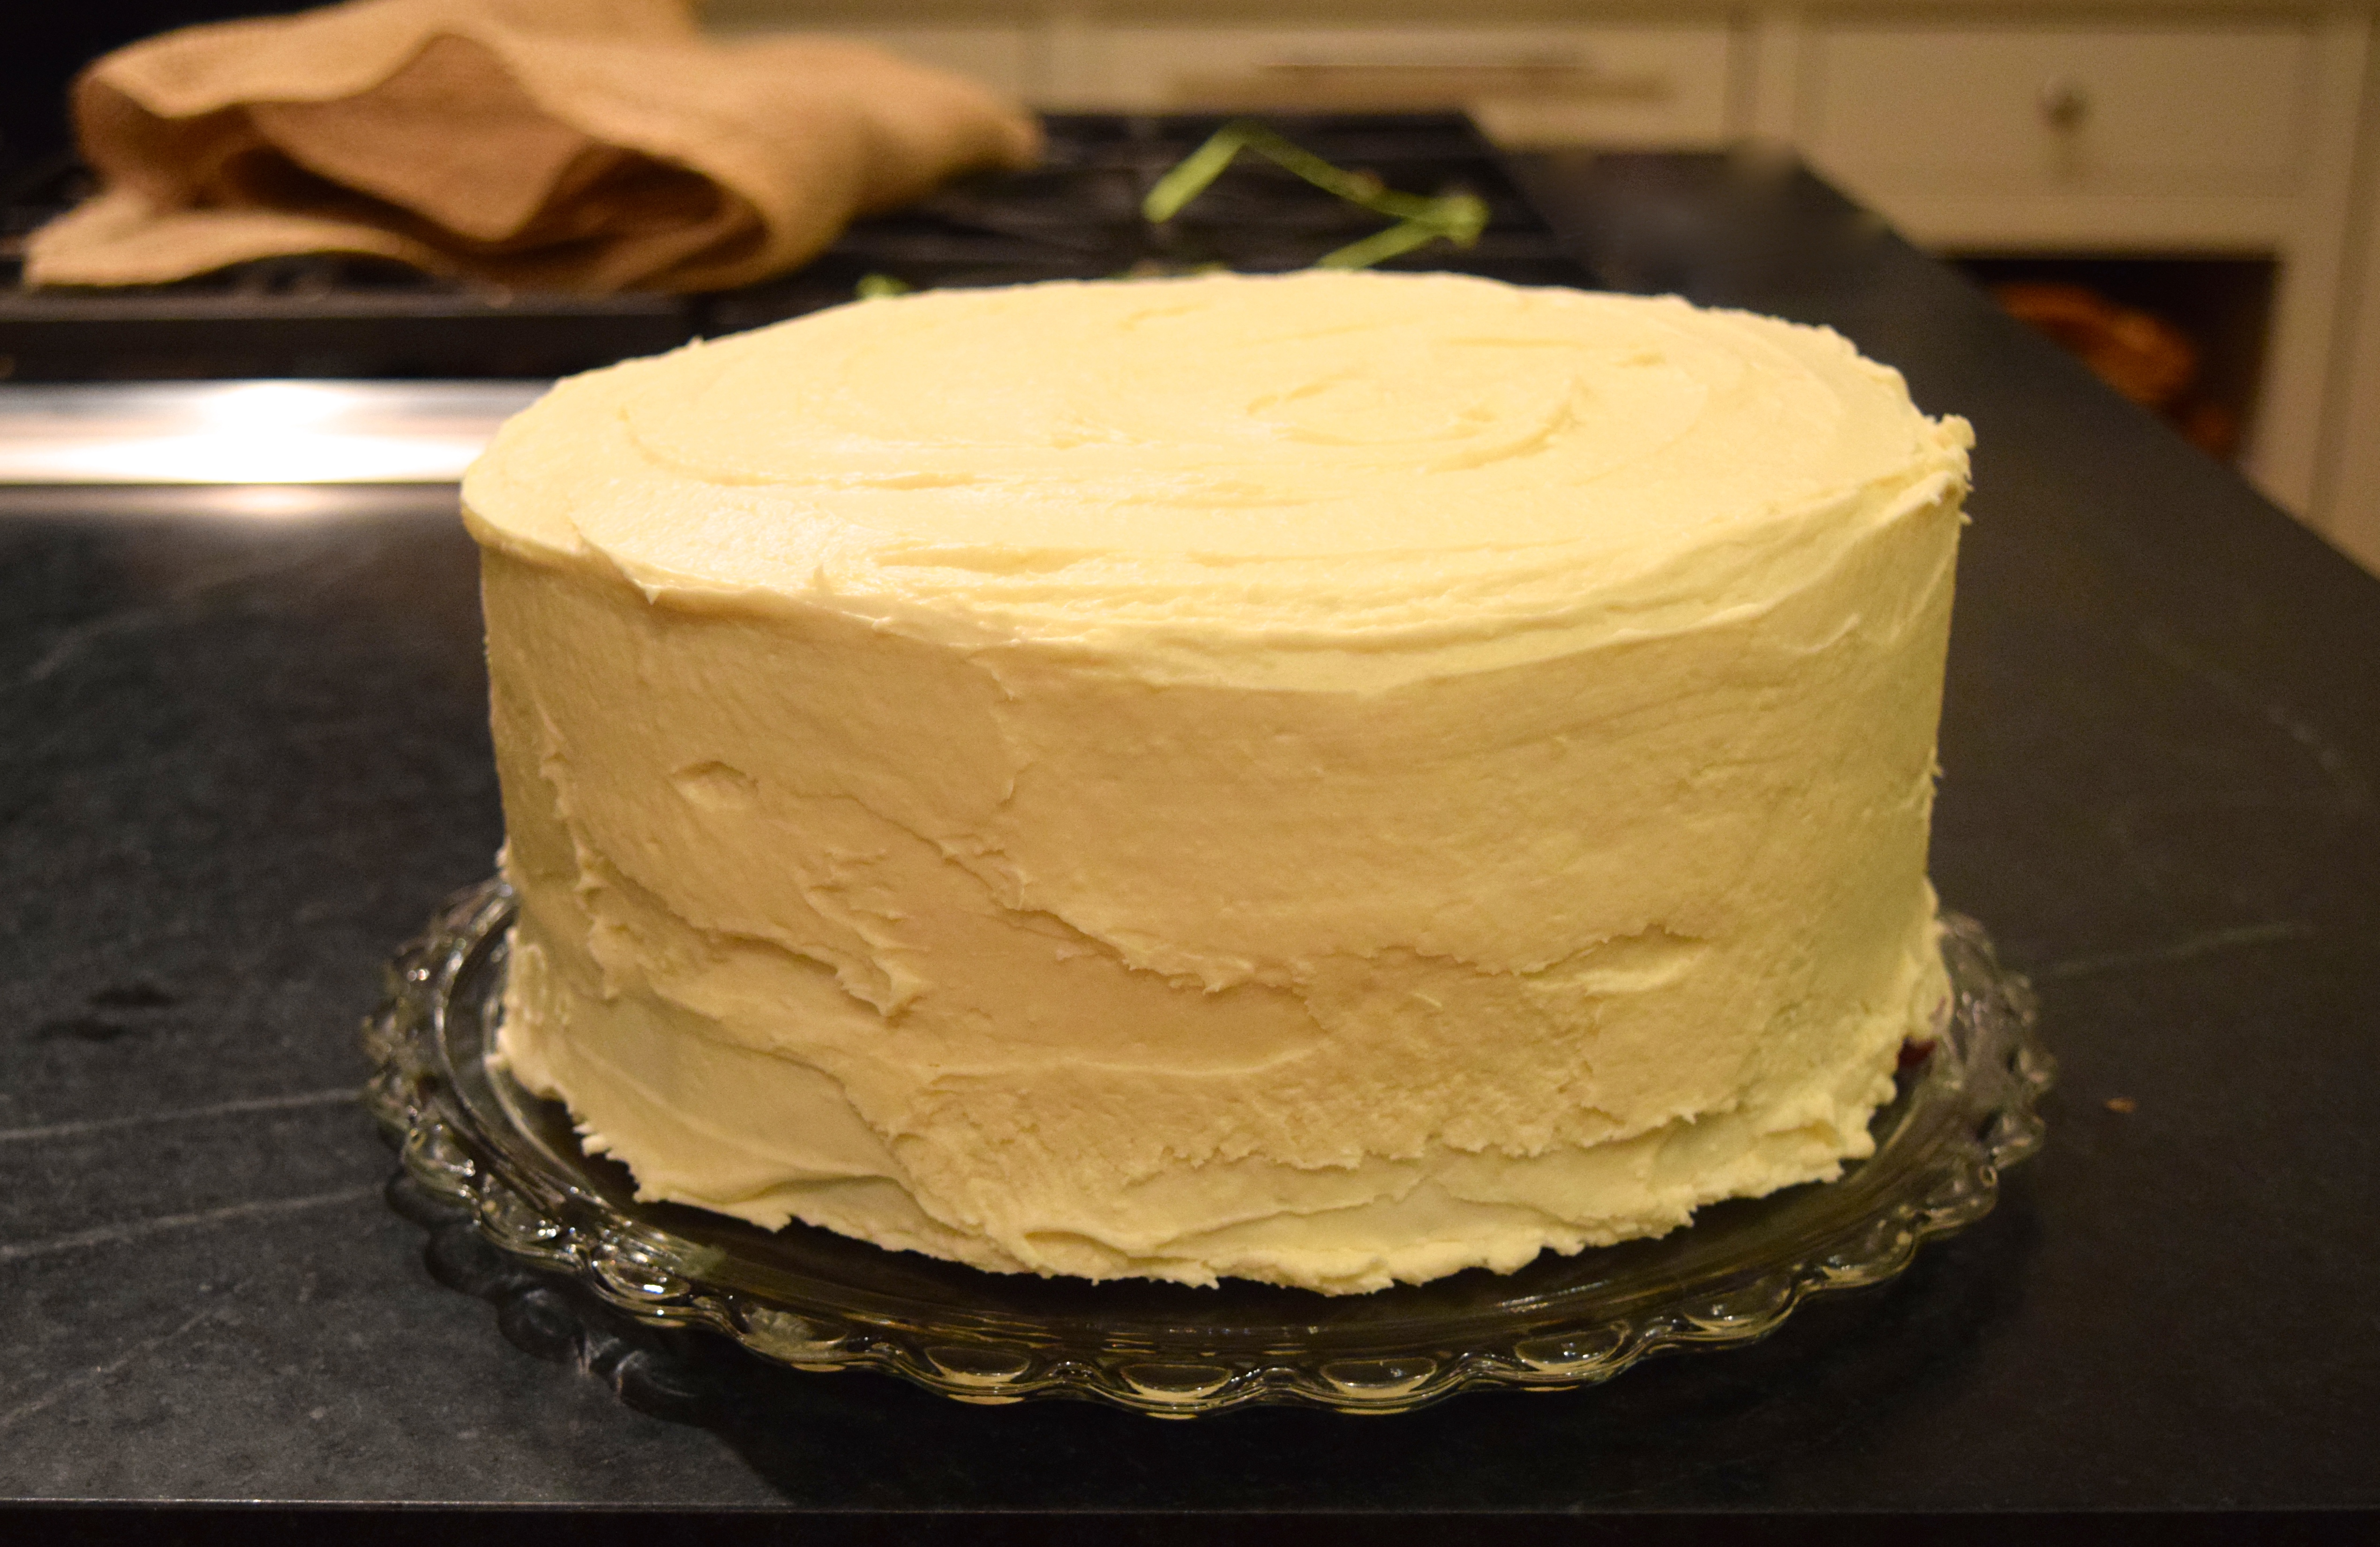
Butter and Cream Cheese Frosting

Ingredients:
DSC_0124

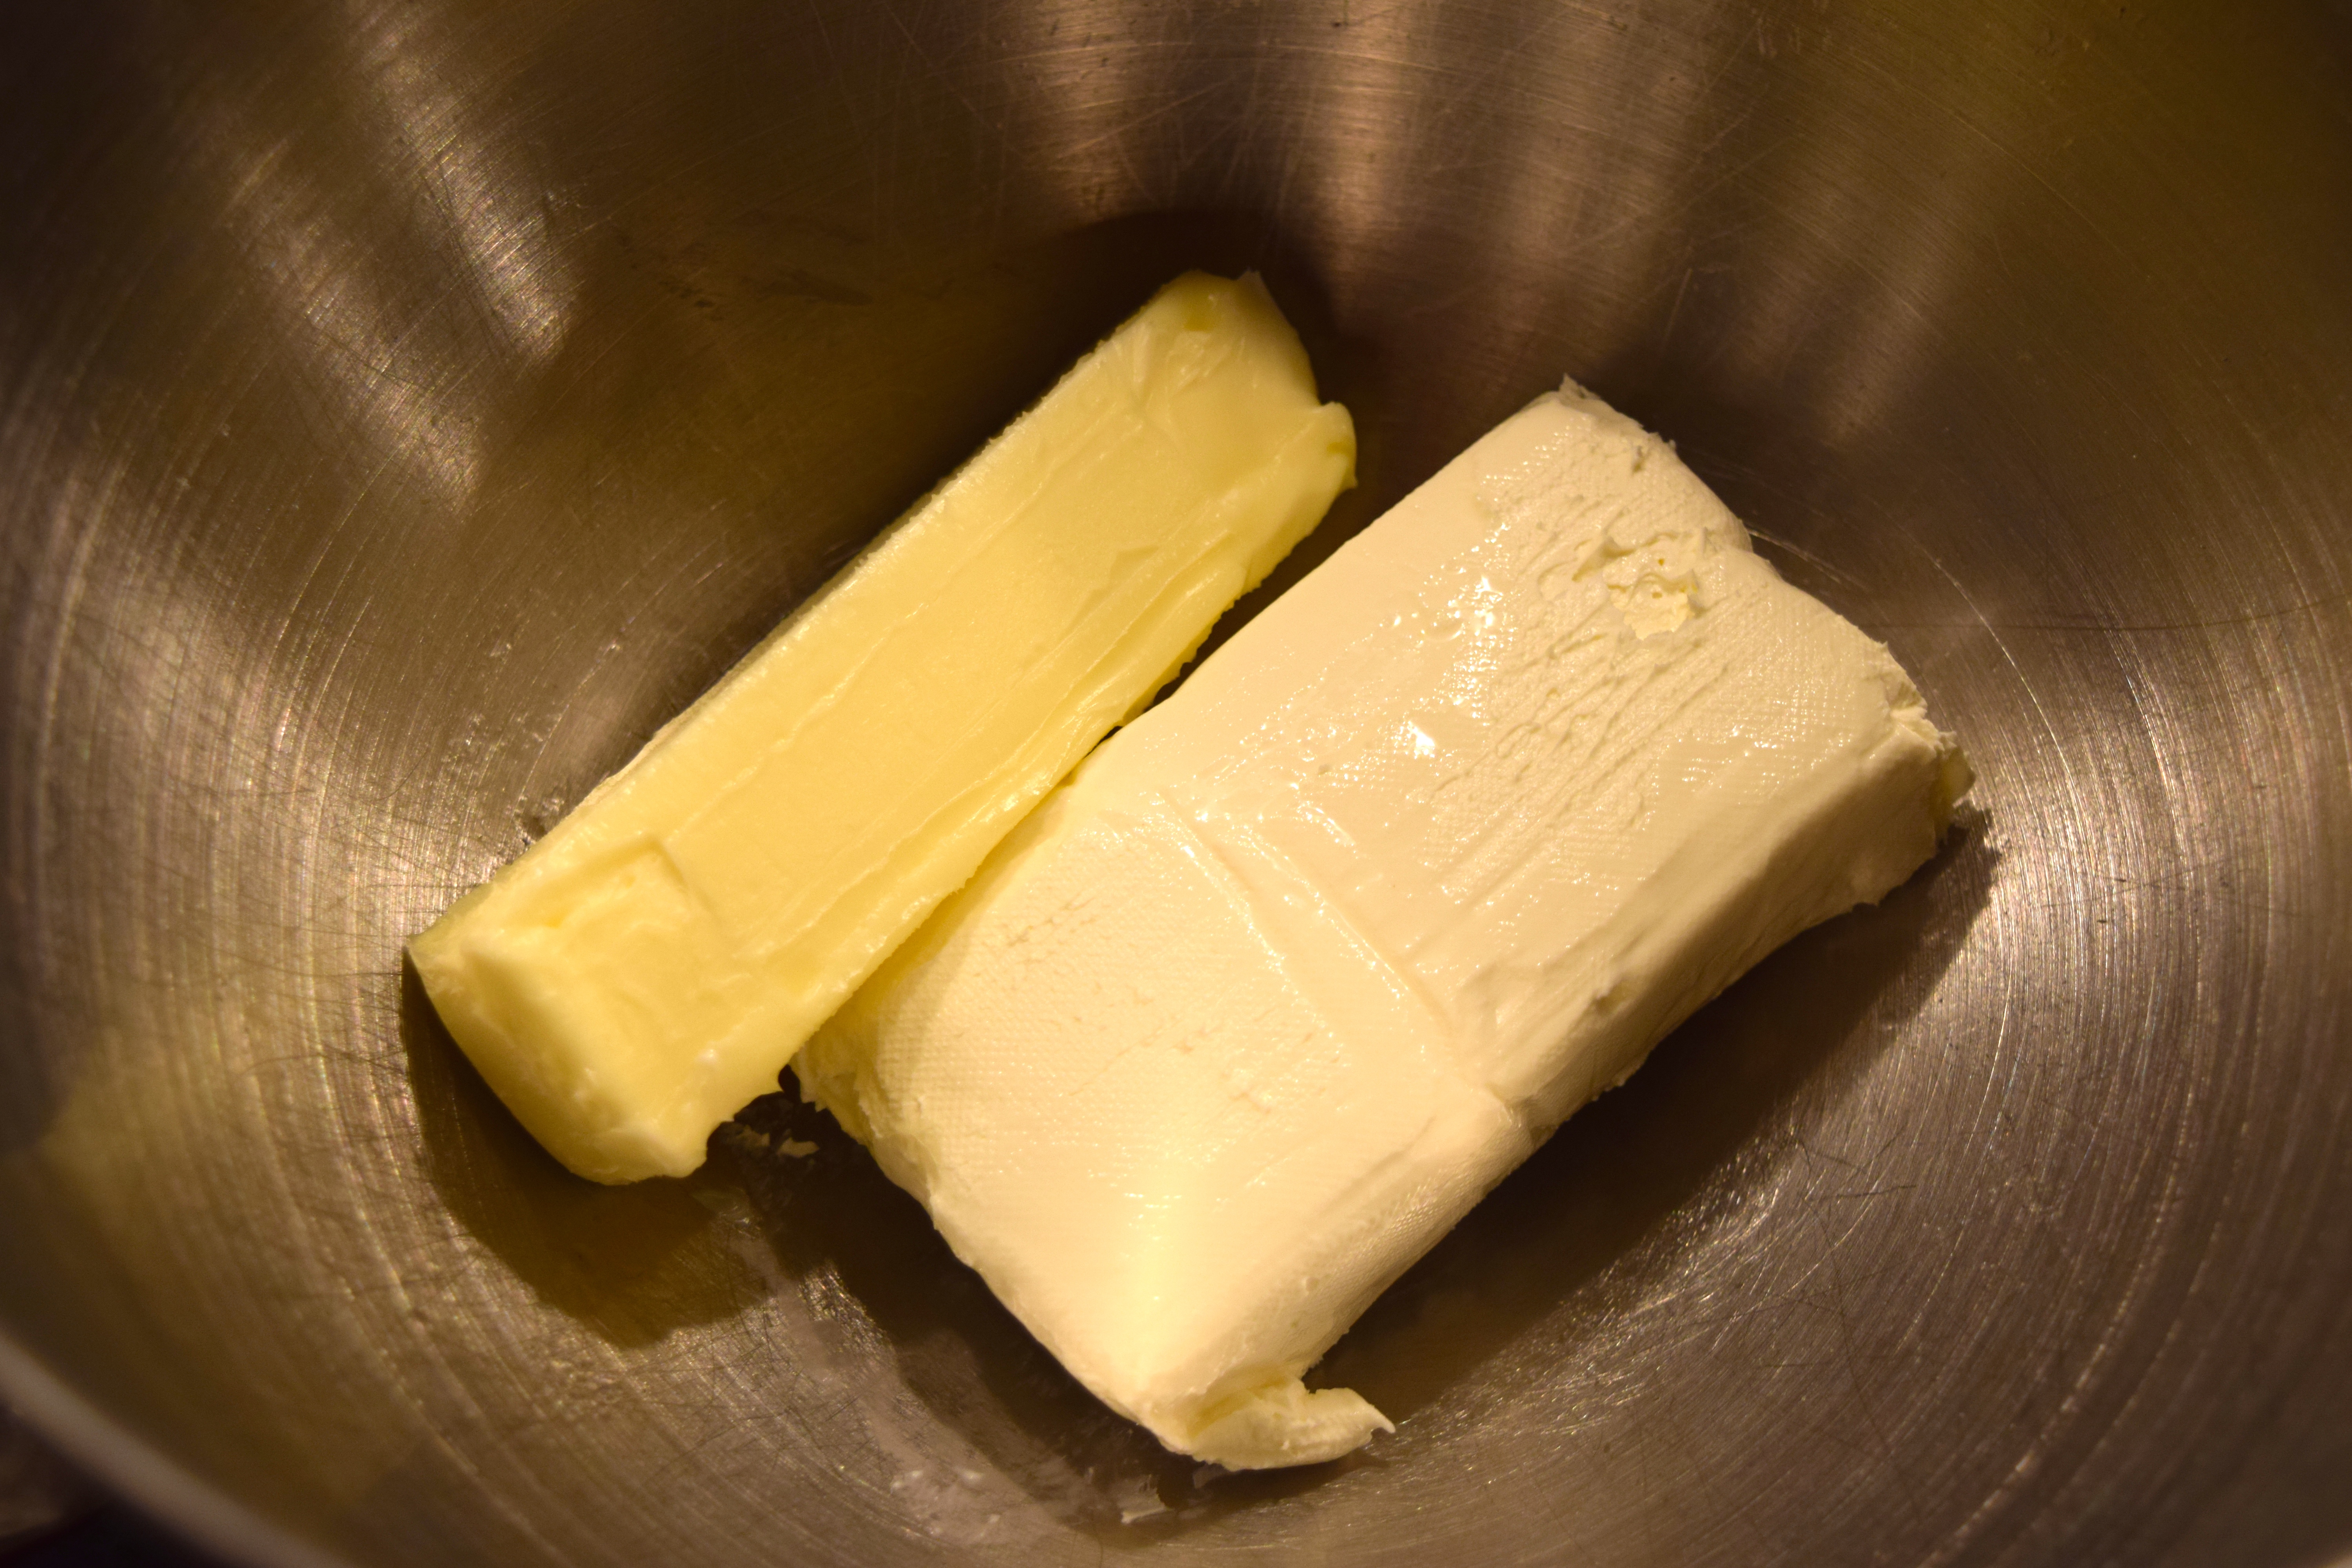
1  8-ounce bar cream cheese, softened
½ cup  (1 stick) butter, softened
1  teaspoon pure vanilla extract
3¾ cups (1 pound box) confectioners’ sugar
2-3 tablespoons whole milk

Instructions:
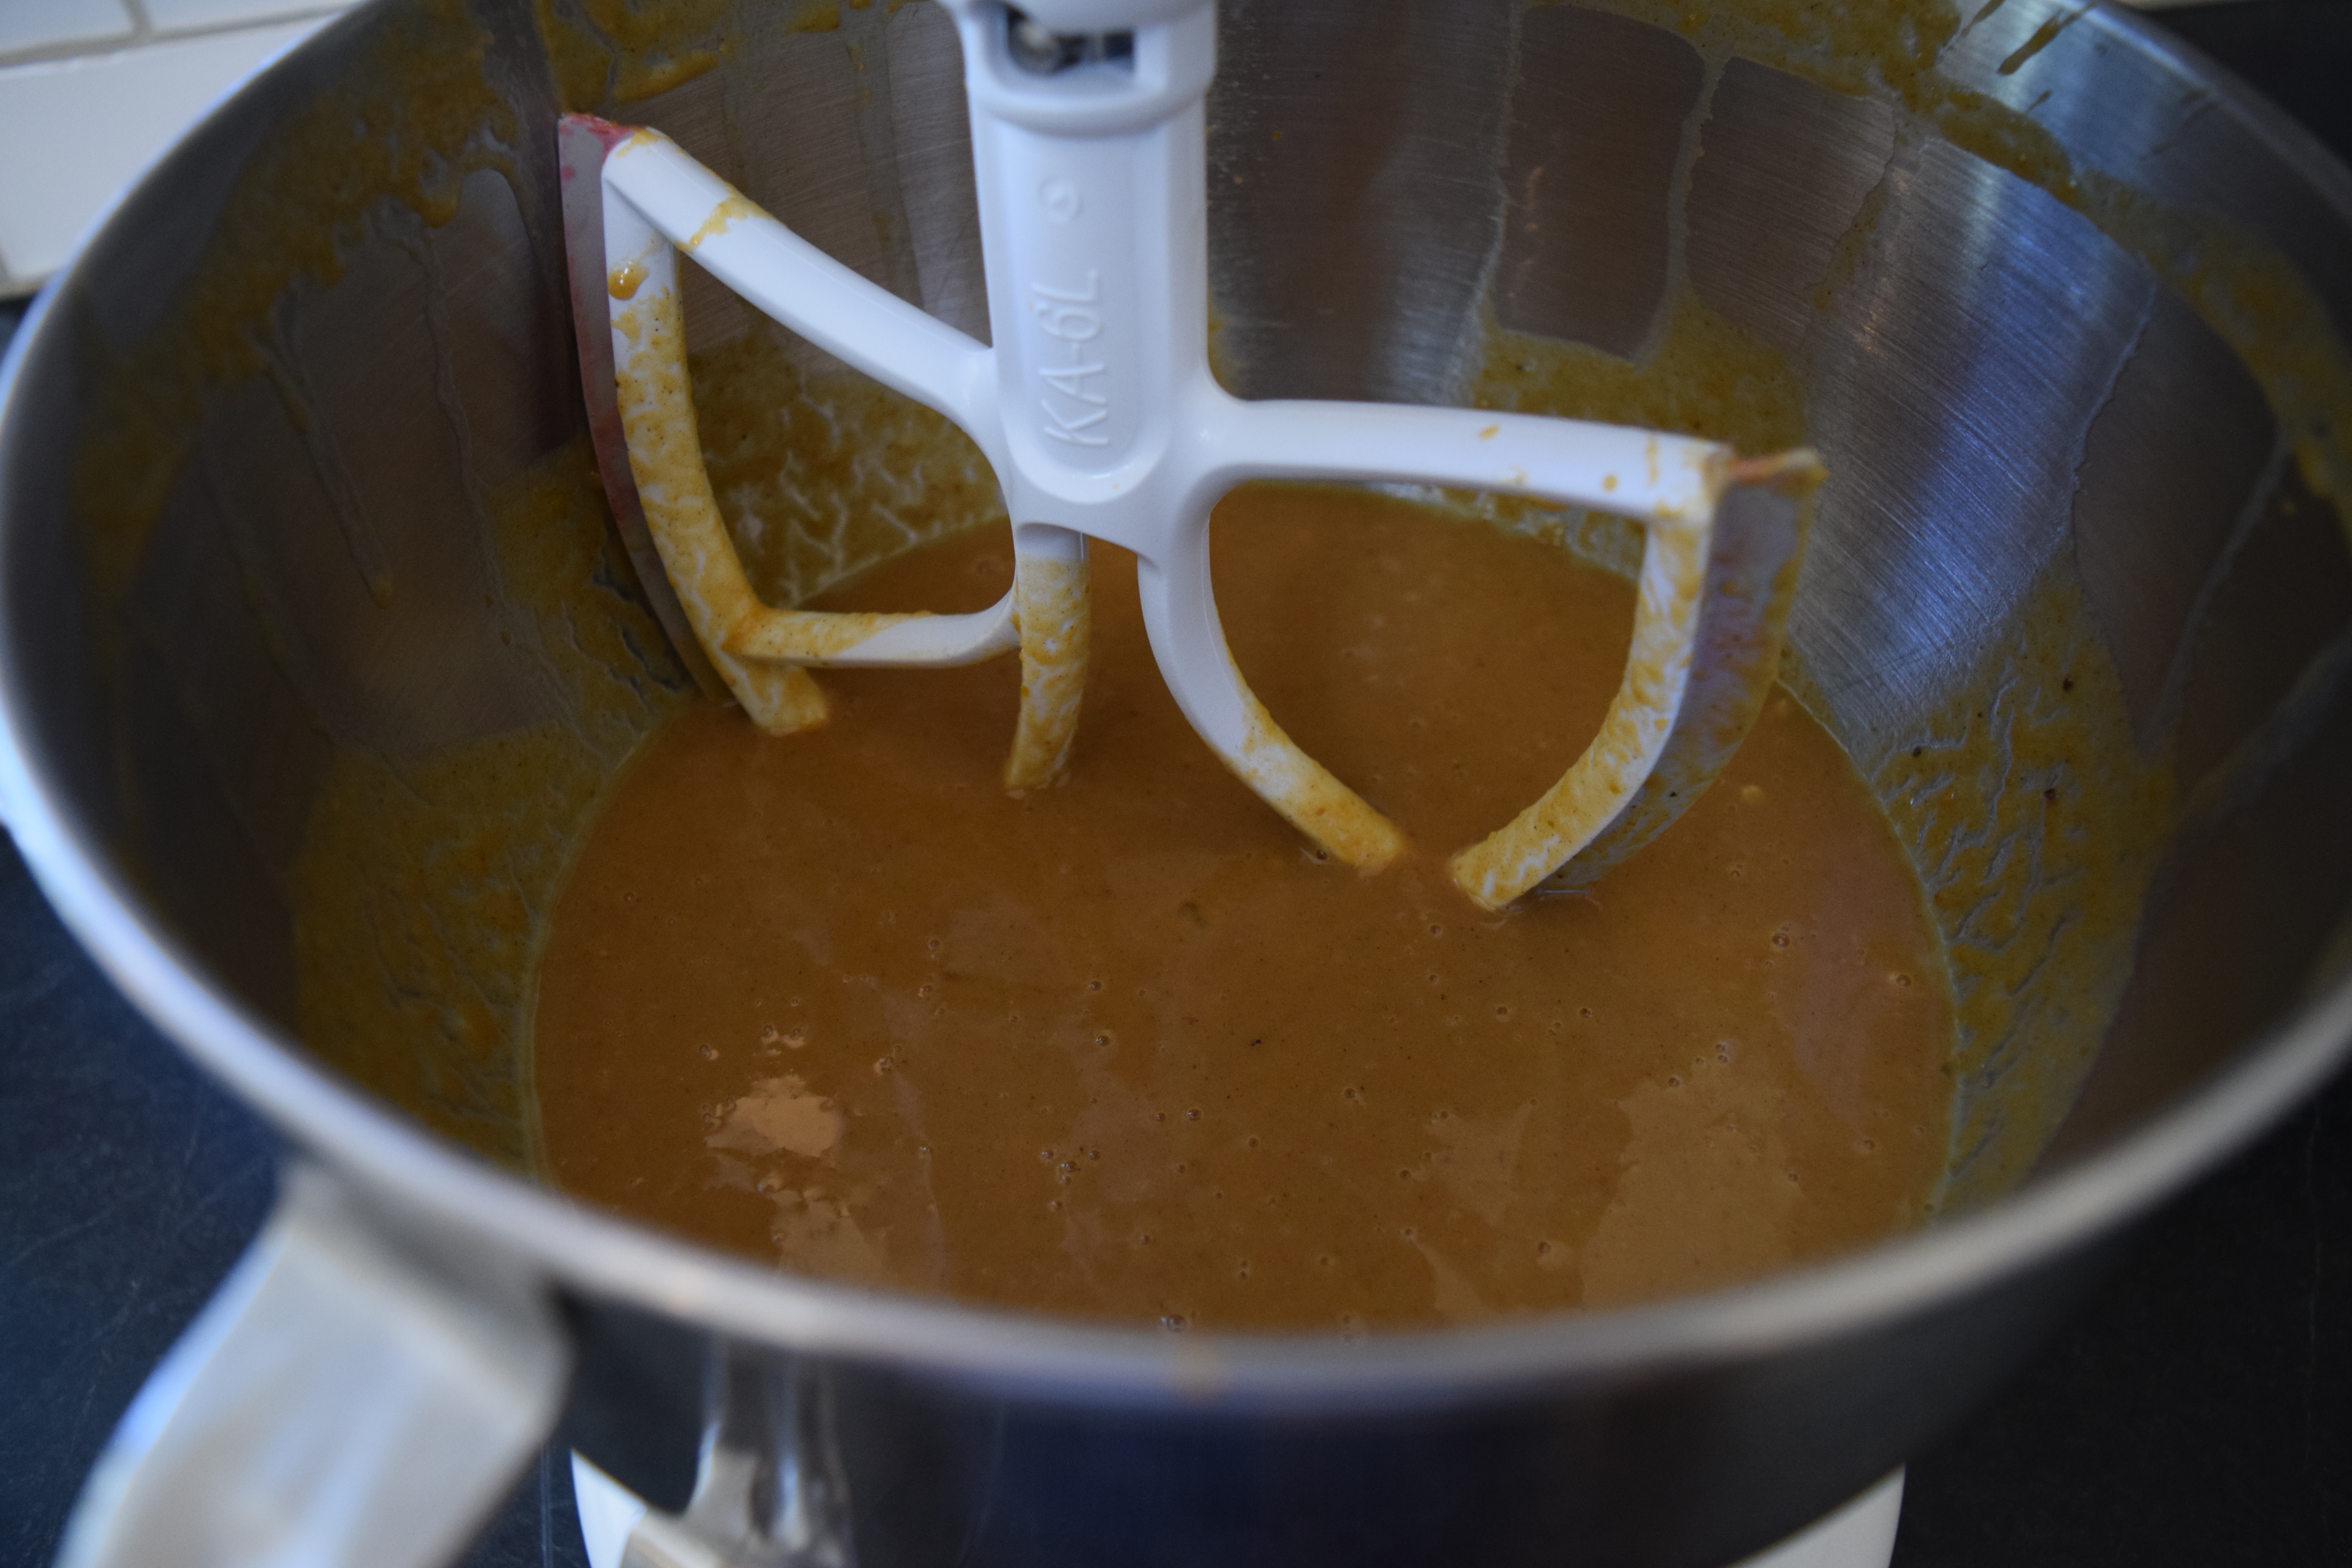
Beat butter and cream cheese together in a mixing bowl on medium-high speed until smooth.
frosting Red velvet cake

Add sugar and beat until fluffy.
frosting Red velvet cake

Add vanilla and beat 30 seconds more. Add milk, one tablespoonful at a time, to thin frosting to desired spreading consistency.

frosting Red velvet cake
How to Frost a Cake
Line the edges of a cake plate with parchment paper or plastic wrap.
Red velvet cake
Place the first cake layer down. Scoop up 25% of the frosting and spackle it across the top with a long metal icing spatula.
 Red velvet cake
Place the top cake layer, smooth side up, over the frosted layer. Place the remaining frosting on top and use it to frost the sides and top of the cake.
IMG_5417
DSC_0048
Remove liners from cake plate. Let frosted cake sit for an hour or two before serving so flavors can meld. I like to serve this cake chilled.

Recently, I needed an elegant cake that would serve twenty. I decided to make a taller version of the cake by preparing one and a half recipes. This gave me three 9-inch layers. I increased the frosting recipe by half. The cake looked beautiful and regal on the dessert buffet. Sadly, I didn’t get a photo.

Triple Decker Cake Ingredients List
(I’ve done the math for you –and for me)

3¾ cups all-purpose flour
1½ teaspoon salt
1½ teaspoon baking powder
1½ teaspoon baking soda
4½ tablespoons unsweetened cocoa powder
3 cups sugar
1½ cup canola oil
3 large eggs, room temperature
1½ cup buttermilk, room temperature (not low-fat)
3 teaspoons vanilla extract
1½ ounce red food coloring
1½ teaspoon white distilled vinegar
¾ cup freshly brewed, plain, warm coffee

IMG_5377

I LOVE when readers send photos of their creations from the blog. Here’s one from our friends-who-are-family, Markham and Cati, who made red velvet cupcakes for Valentine’s Day. I couldn’t love them more!

Other Great Cakes
Chocolate Birthday or Valentine’s Day Cake

A Cake for All Seasons

Mom’s Monkey Bread, circa 1970

Marion’s Crazy Good Pumpkin Bread with Chocolate Chips

Old-Timey Vanilla Bunny Cake

If you enjoyed this post, please share it with a friend and become a follower!

Follow Judy’s Chickens on Instagram and Pinterest @JudysChickens.

Always check my blog for the latest version of a recipe.

© 2014-2021 Judy Wright. All rights reserved. Photos, videos, and text may only be reproduced with the written consent of Judy Wright.

Italian Ricotta and Lemon Cookies

How do I love thee? Let me count the ways.
I love that the sweet equals the tart.
I love the cakey center and the crunchy crust.
You are irresistible and please the crowds.
You are Italian, so you are a cookie after my own heart.
You gladden the heart of my brother, Charles, too.
For that, I will continue to make you all the days of my life.

DSC_0344

RECIPE TIPS

Mise en Place:
There is a fancy cooking term called, mise en place (me-zahn-plahs)It means to “put into place” which in the kitchen means to measure all the ingredients ahead of time so they are ready to go when you start cooking. I’m frequently in a rush and don’t bother to do this extra step, but today, I decided to give it a try. It was so calming! I plan to make this a regular practice.
ricotta lemon cookies

How to Zest and Juice a Lemon for your Mise en Place:
As part of my mise en place strategy, I did all the prep work on my lemons first. I used a fine-holed Microplane grater to zest the lemon peel. Adding lemon zest to batter is a great way to add intense flavor to whatever you are making. Be careful not to grate past the yellow peel as the white pith below it is bitter.
ricotta lemon cookies

Next, slice the lemons in half and squeeze the juices out using a lemon squeezer.
fullsizeoutput_1f53

You could make your own ricotta using this recipe: How to Make Whole Milk Ricotta. It is surprisingly easy.

Lemon Ricotta Cookies

Yield:  4 dozen

Ingredients:
ricotta lemon cookies
2½ cups all-purpose flour
1 teaspoon salt
1 teaspoon baking powder
1 stick butter, softened
2 cups granulated sugar
2 large eggs (a large egg equals 2 ounces, do not use xl eggs)
15-ounces whole milk ricotta cheese, room temperature
1 lemon, zested
3 tablespoons fresh lemon juice (juice of one 4-5 oz lemon)

Glaze:
1½ cup powdered sugar
1 lemon, zested
3 tablespoons fresh lemon juice (juice of one 4-5 oz lemon)

Mise en Place:

ricotta lemon cookies

Instructions:
1) Preheat oven to 375º

2) Line three cookie sheets with parchment paper. If you don’t have parchment paper, lightly grease the baking sheets with canola oil.

3). In a large mixing bowl, cream together the butter and sugar on medium speed for two minutes. Beat for two full minutes as this will incorporate air into the batter which will make for a lighter cookie.
ricotta lemon cookies

4) Add eggs and beat for 30 seconds.

ricotta lemon cookies

5) Add the lemon zest, lemon juice, and ricotta and beat for one minute on medium speed. Be sure to use a spatula to incorporate the ingredients that have settled onto the bottom of the mixing bowl into the batter.

ricotta lemon cookies

6) Add the flour, baking powder and salt mixture and stir (the lowest speed on a mixer) for a minute. Do not overmix or whip. We don’t want to awaken the gluten in the flour, so the batter becomes elasticky. We want the cookies to have a cake-like texture.

7) Use a tablespoon to drop the cookie dough onto the pan. Use about one heaping tablespoon of dough for each cookie.

ricotta lemon cookies

8) Bake for 15-20 minutes. After 10 minutes of cooking, rotate your cookie sheets in the oven. Cookies are done when the bottom edges just start to darken.

ricotta lemon cookies

Leave cookies on the pan to cool for 10 minutes. Peel cookies off the parchment paper and place directly on a wire cooling rack so the bottoms can air dry and become crisp.

Mise en Place for Glaze:

1) Mix together powdered sugar, lemon zest, and lemon juice in a small bowl and stir.

ricotta lemon cookies
2) When cookies are cool, use a knife to spread a thin layer of glaze over each one. Let glaze harden for at least three hours before stacking.

DSC_0293

Most Popular Holiday Recipes:

Grandma’s Italian Fried Cauliflower


Baked Ziti with Eggplant


Cranberry and Hot Pepper Jelly Brie Bites


Mrs. Walker’s Cranberry Nut Pie


Italian Sesame Seed Cookies


My Favorite Rollout Butter Cookies


Mary’s Award-Winning Chocolate Chip Cookies


How to Fold A Tree-Shaped Napkin


Check out Holiday on the MENU for more recipes.

If you enjoyed this post, please share it with a friend and become a follower. When signing up, be sure to confirm the subscription on the follow-up letter that will be sent to your email.

Follow Judy’s Chickens on Instagram and Pinterest @JudysChickens.

Always check my blog for the latest version of a recipe.

© 2014-2020 Judy Wright. All rights reserved. Photos, videos, and text may only be reproduced with the written consent of Judy Wright.

Mom’s Pumpkin Pie

It is not Thanksgiving without pumpkin pie.

DSC_0679

A few years ago, when my son was a Vanderbilt student, I asked if he wanted to invite friends over from school who couldn’t get home for Thanksgiving. About ten of his friends joined us. He asked if they needed to bring any food. I told him we had the meal covered, but if anyone enjoyed cooking and wanted to bring something, they should feel free to do so.

A few days later, he sent me an email with a headcount and said his friends had dessert covered. Wonderful. As I scrolled further into his letter, I noticed a copy of the letter he had sent his friends. It said, “My mother said if it’s part of your wellness to cook during the holidays, feel free to bring a dessert, otherwise just bring yourselves.”  Part of your wellness, how nicely put. Cooking is part of MY wellness.

On Thanksgiving Day, as everyone arrived, the desserts were dropped off in the kitchen — coconut cake, brownies, chocolate chip cookies, mint ice cream. Alas, there was no pumpkin pie, my favorite. So now we get to the point of the story, my mother’s pumpkin pie. It is so easy; I was able to prep it with ingredients I had on hand in the amount of time it took to preheat the oven. The pie cooked while we ate dinner. No one was the wiser, and I had my beloved pumpkin pie.

Yield: Makes one 10-inch pie or one 9-inch deep-dish pie.

Ingredients:

3 large eggs
½ cup granulated sugar
½ cup packed light brown sugar
1 tablespoon all-purpose flour
½ teaspoon fine salt
½ teaspoon ground nutmeg
½ teaspoon ground allspice
1 teaspoon ground cinnamon
1¾ cups pumpkin purée (15-ounce can)
1½ cups warm milk (heat for one minute in the microwave)

Instructions:

1) Preheat oven to 450º

2) Prepare pie crust. If you are using a 10-inch pie pan, you may need to roll the crust a little more to stretch it to fit better. I like to use Trader Joe’s Pie Crusts.

Technique Time: How to arrange a TJ’s pie crust into a pie pan:

Once the crust comes to room temperature, which takes about 90 minutes, unroll it retaining the plastic sheets. You will find that the dough breaks up into wide strips as you unroll it. Not a problem; use a rolling pin to rejoin the cracks while the dough is sandwiched between the plastic sheets. Next, remove the plastic covering from one side of the crust. Using the corners of the remaining plastic square, lift the crust, turn it over, and plop it into the pie plate. Continue to leave the plastic on as you press the dough into the pan, then remove the plastic. 
DSC_0254 DSC_0258

Tuck crust edges under and crimp to make pretty.
dsc_0458

3) Prepare Pumpkin Filling: Blend all ingredients together in a mixing bowl for one minute on medium-low speed. Be sure to warm the milk as this will decrease the cooking time. Scrape the sides and bottom of the mixing bowl with a spatula as you blend the ingredients together.
DSC_0601

Pour filling into prepared pie crust.

For best results, cover the pie rim with foil or a Pie Crust Protector until the last 15 minutes of baking. While the pie is cooking, take a look at this post about must-have cooking tools, Stocking Stuffers: Tools for the Cooking Life

4) Bake for 10 minutes at 450º. Turn oven down to 350º and cook for 45-55  minutes, depending on whether you are using a regular or deep-dish pan. To check for doneness, prick the center of the pie with the tip of a knife. It should come out clean. If not, let the pie cook five more minutes and test again.

This pie is delicious served warm from the oven or cold from the refrigerator (for breakfast!).

My friend, Renée, skips the pie crust altogether and pours the pumpkin batter into small ramekins for single-serving desserts.
DSC_0078

Happy Thanksgiving!

Other Desserts for Thanksgiving:
Mrs. Walker’s Cranberry Nut Pie
Mom’s Apple Pie (with a cheddar streusel topping)
Pumpkin Bread Pudding (with caramel sauce and whipped cream on top!)
Pumpkin Cheesecake Pie
Marion’s Crazy Good Pumpkin Bread with Chocolate Chips

If you enjoyed this post, please share it with a friend and become a follower. When subscribing, be sure to confirm the subscription on the follow-up letter sent to your email.

Follow Judy’s Chickens on Instagram and Pinterest as @JudysChickens.

Always check the blog for the latest version of a recipe.

© 2014-2020 Judy Wright. All rights reserved. Photos, videos, and text may only be reproduced with the written consent of Judy Wright.