Very Berry Clafoutis

Clafoutis: noun  [klah-foo-tee]  a tart made of fruit, especially cherries, baked in a thick, sweet batter.

DSC_0726

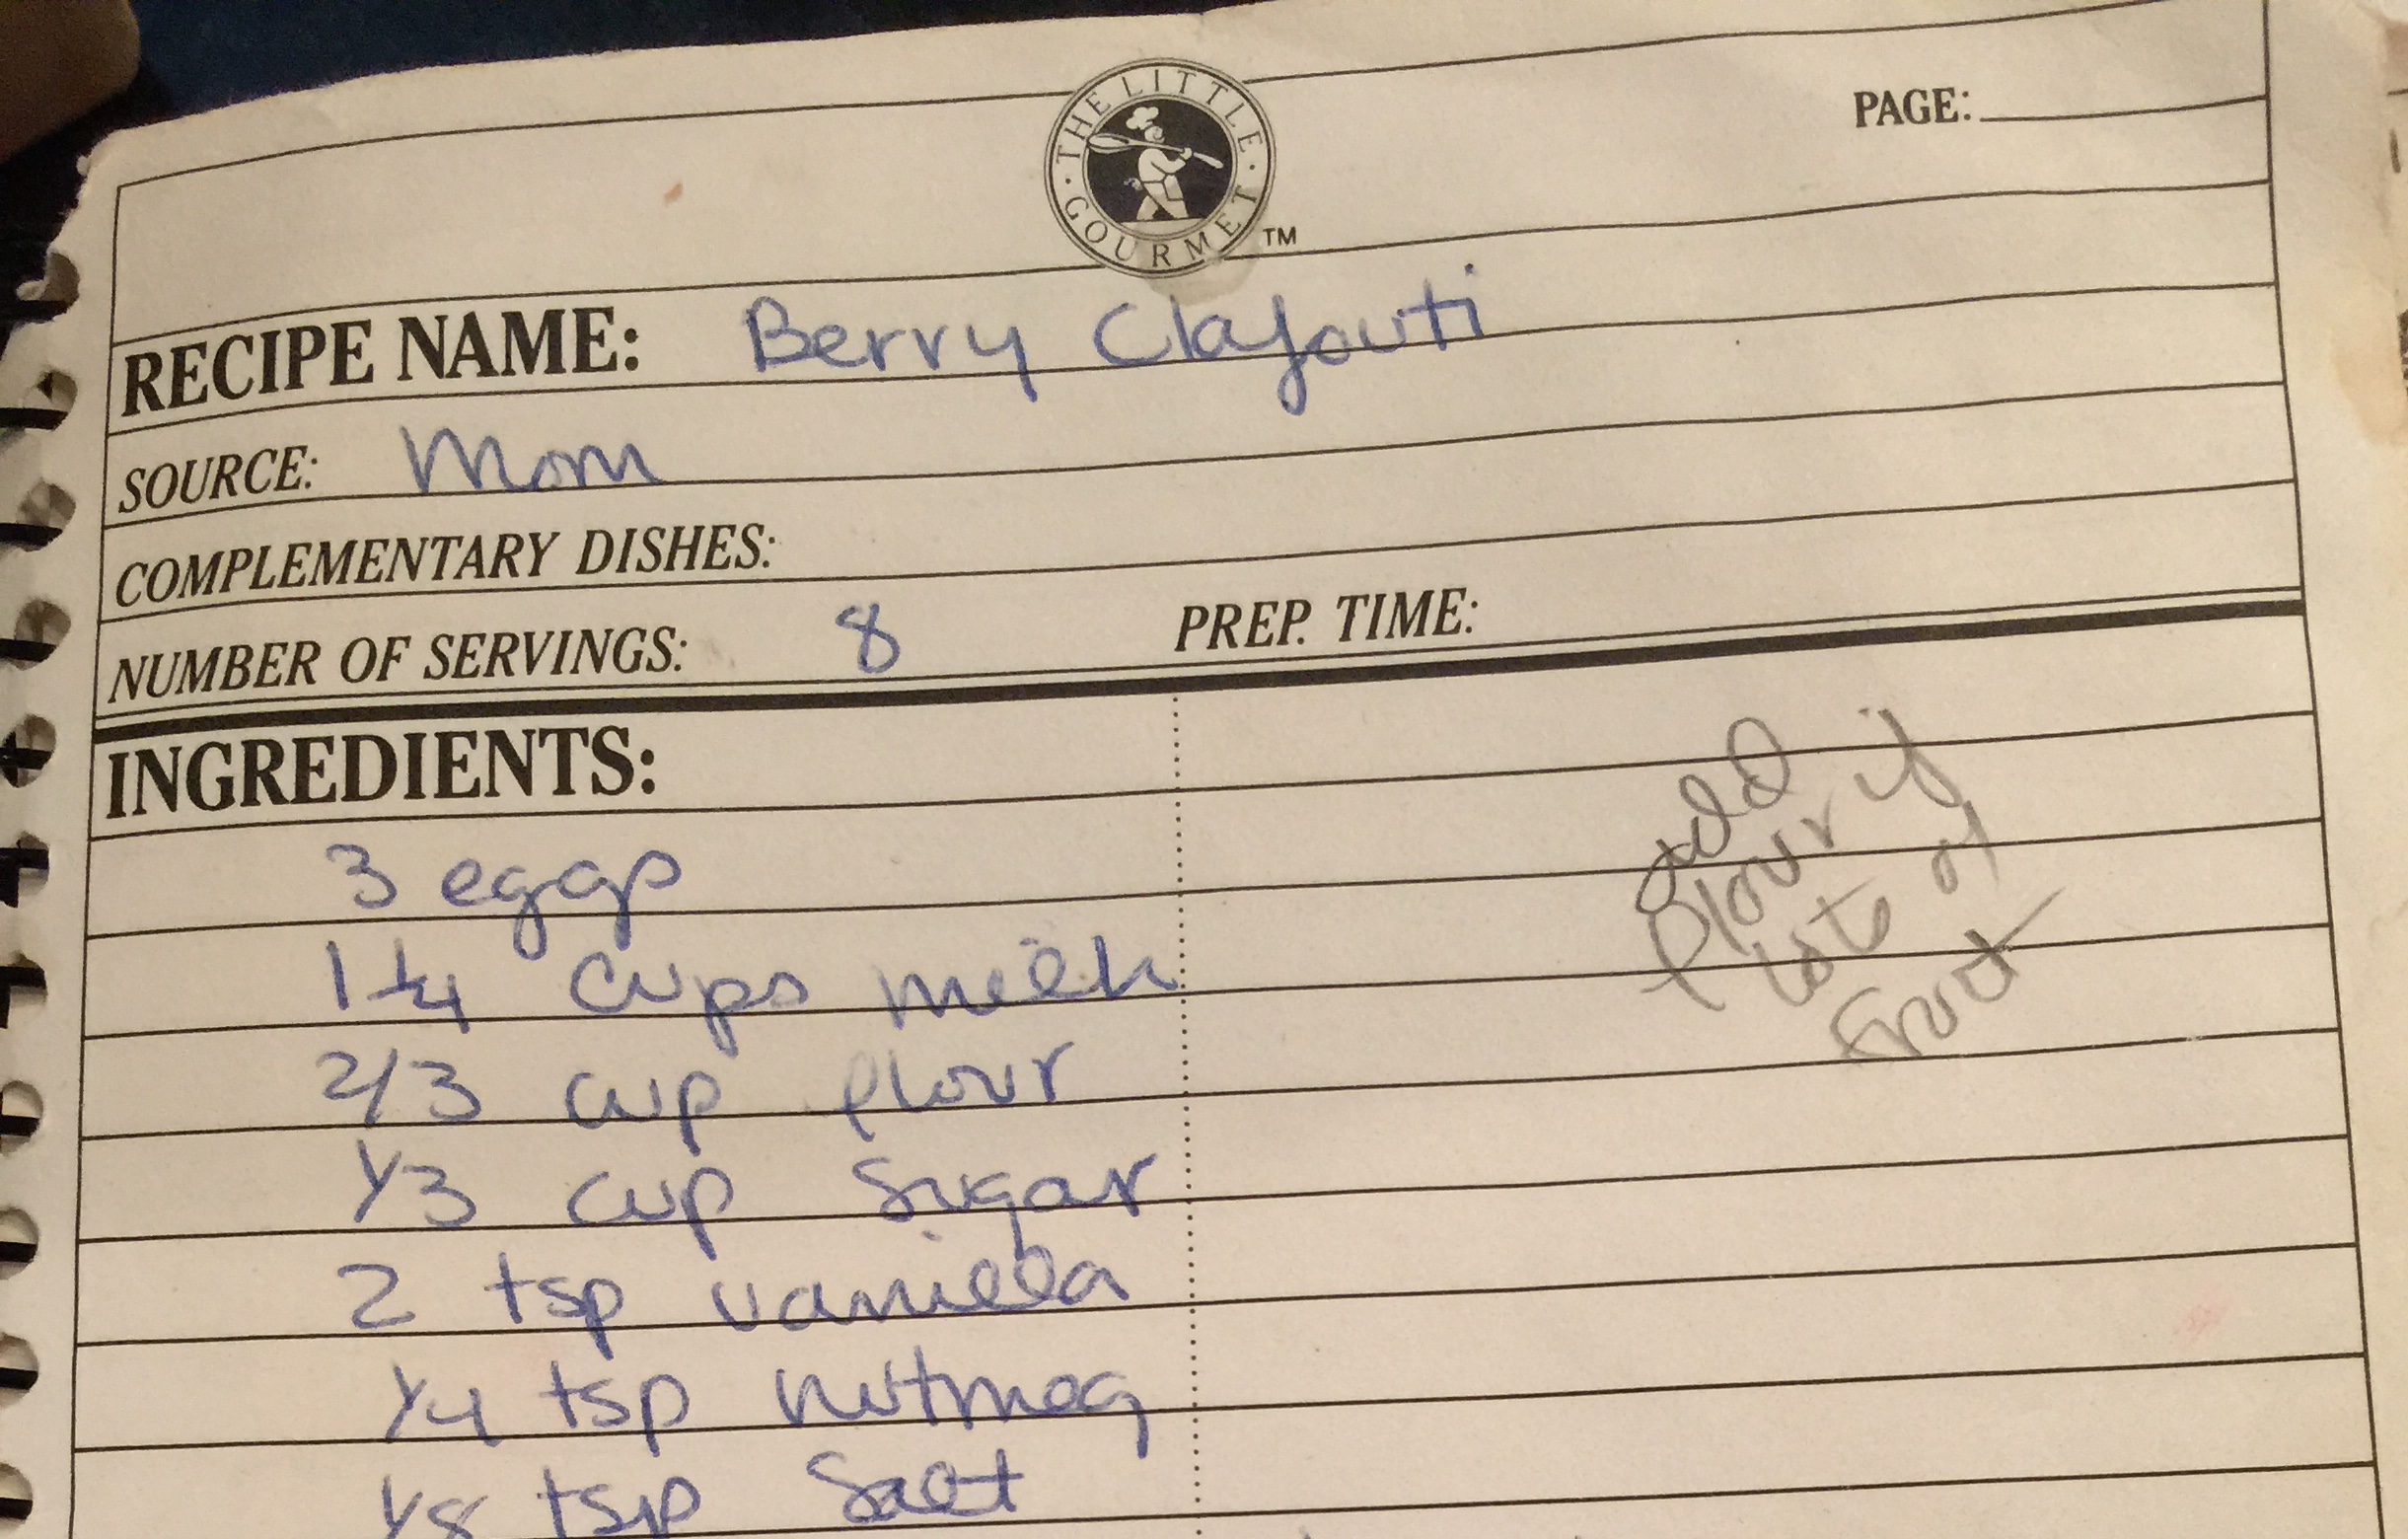
My mother gave me this berry clafoutis recipe about twenty-five years ago after I had picked blueberries with my boys while visiting her in Rhode Island. She had written the recipe on a piece of scrap paper. There are scraps of paper like this all over her kitchen. Mom suggested I make a clafoutis with the blueberries. I had no idea what a clafoutis was, but I made it. It was delicious … and easy. Over the course of that summer, I baked clafoutis of every variety: strawberry, blackberry, pear, apple and plum. They all worked. Little did I know I would be making this recipe for the rest of my life.

Recipes like this, that really work and are beloved, go into a spiral-bound recipe book I was given as a wedding gift over 30 years ago. I travel with this notebook. If there was a fire in the house, after getting the people out, I’d grab this notebook next. Before holidays, I often get emails from relatives asking for specific recipes from this book, like my Grandmother’s cranberry chutney recipe and my mother’s pumpkin pie recipe. My Auntie Terry once emailed me, while she was traveling, to ask if I could send her her  fried cauliflower batter recipe. I love how my role as keeper-of-the-recipes keeps me connected to my family.

IMG_1424

This recipe is probably the simplest and quickest one @judyschickens. It tastes good hot out of the oven for dessert, or cold the next morning for breakfast. If you want to serve it at a dinner party, you can make it taste a little richer by substituting cream for some of the milk and by sifting confectioner’s sugar over the top after you have baked it. The best part is you can make it with ingredients you already have in the house: eggs, milk, flour, sugar, vanilla and fruit, which makes it perfect for a last-minute dessert on a summer evening.
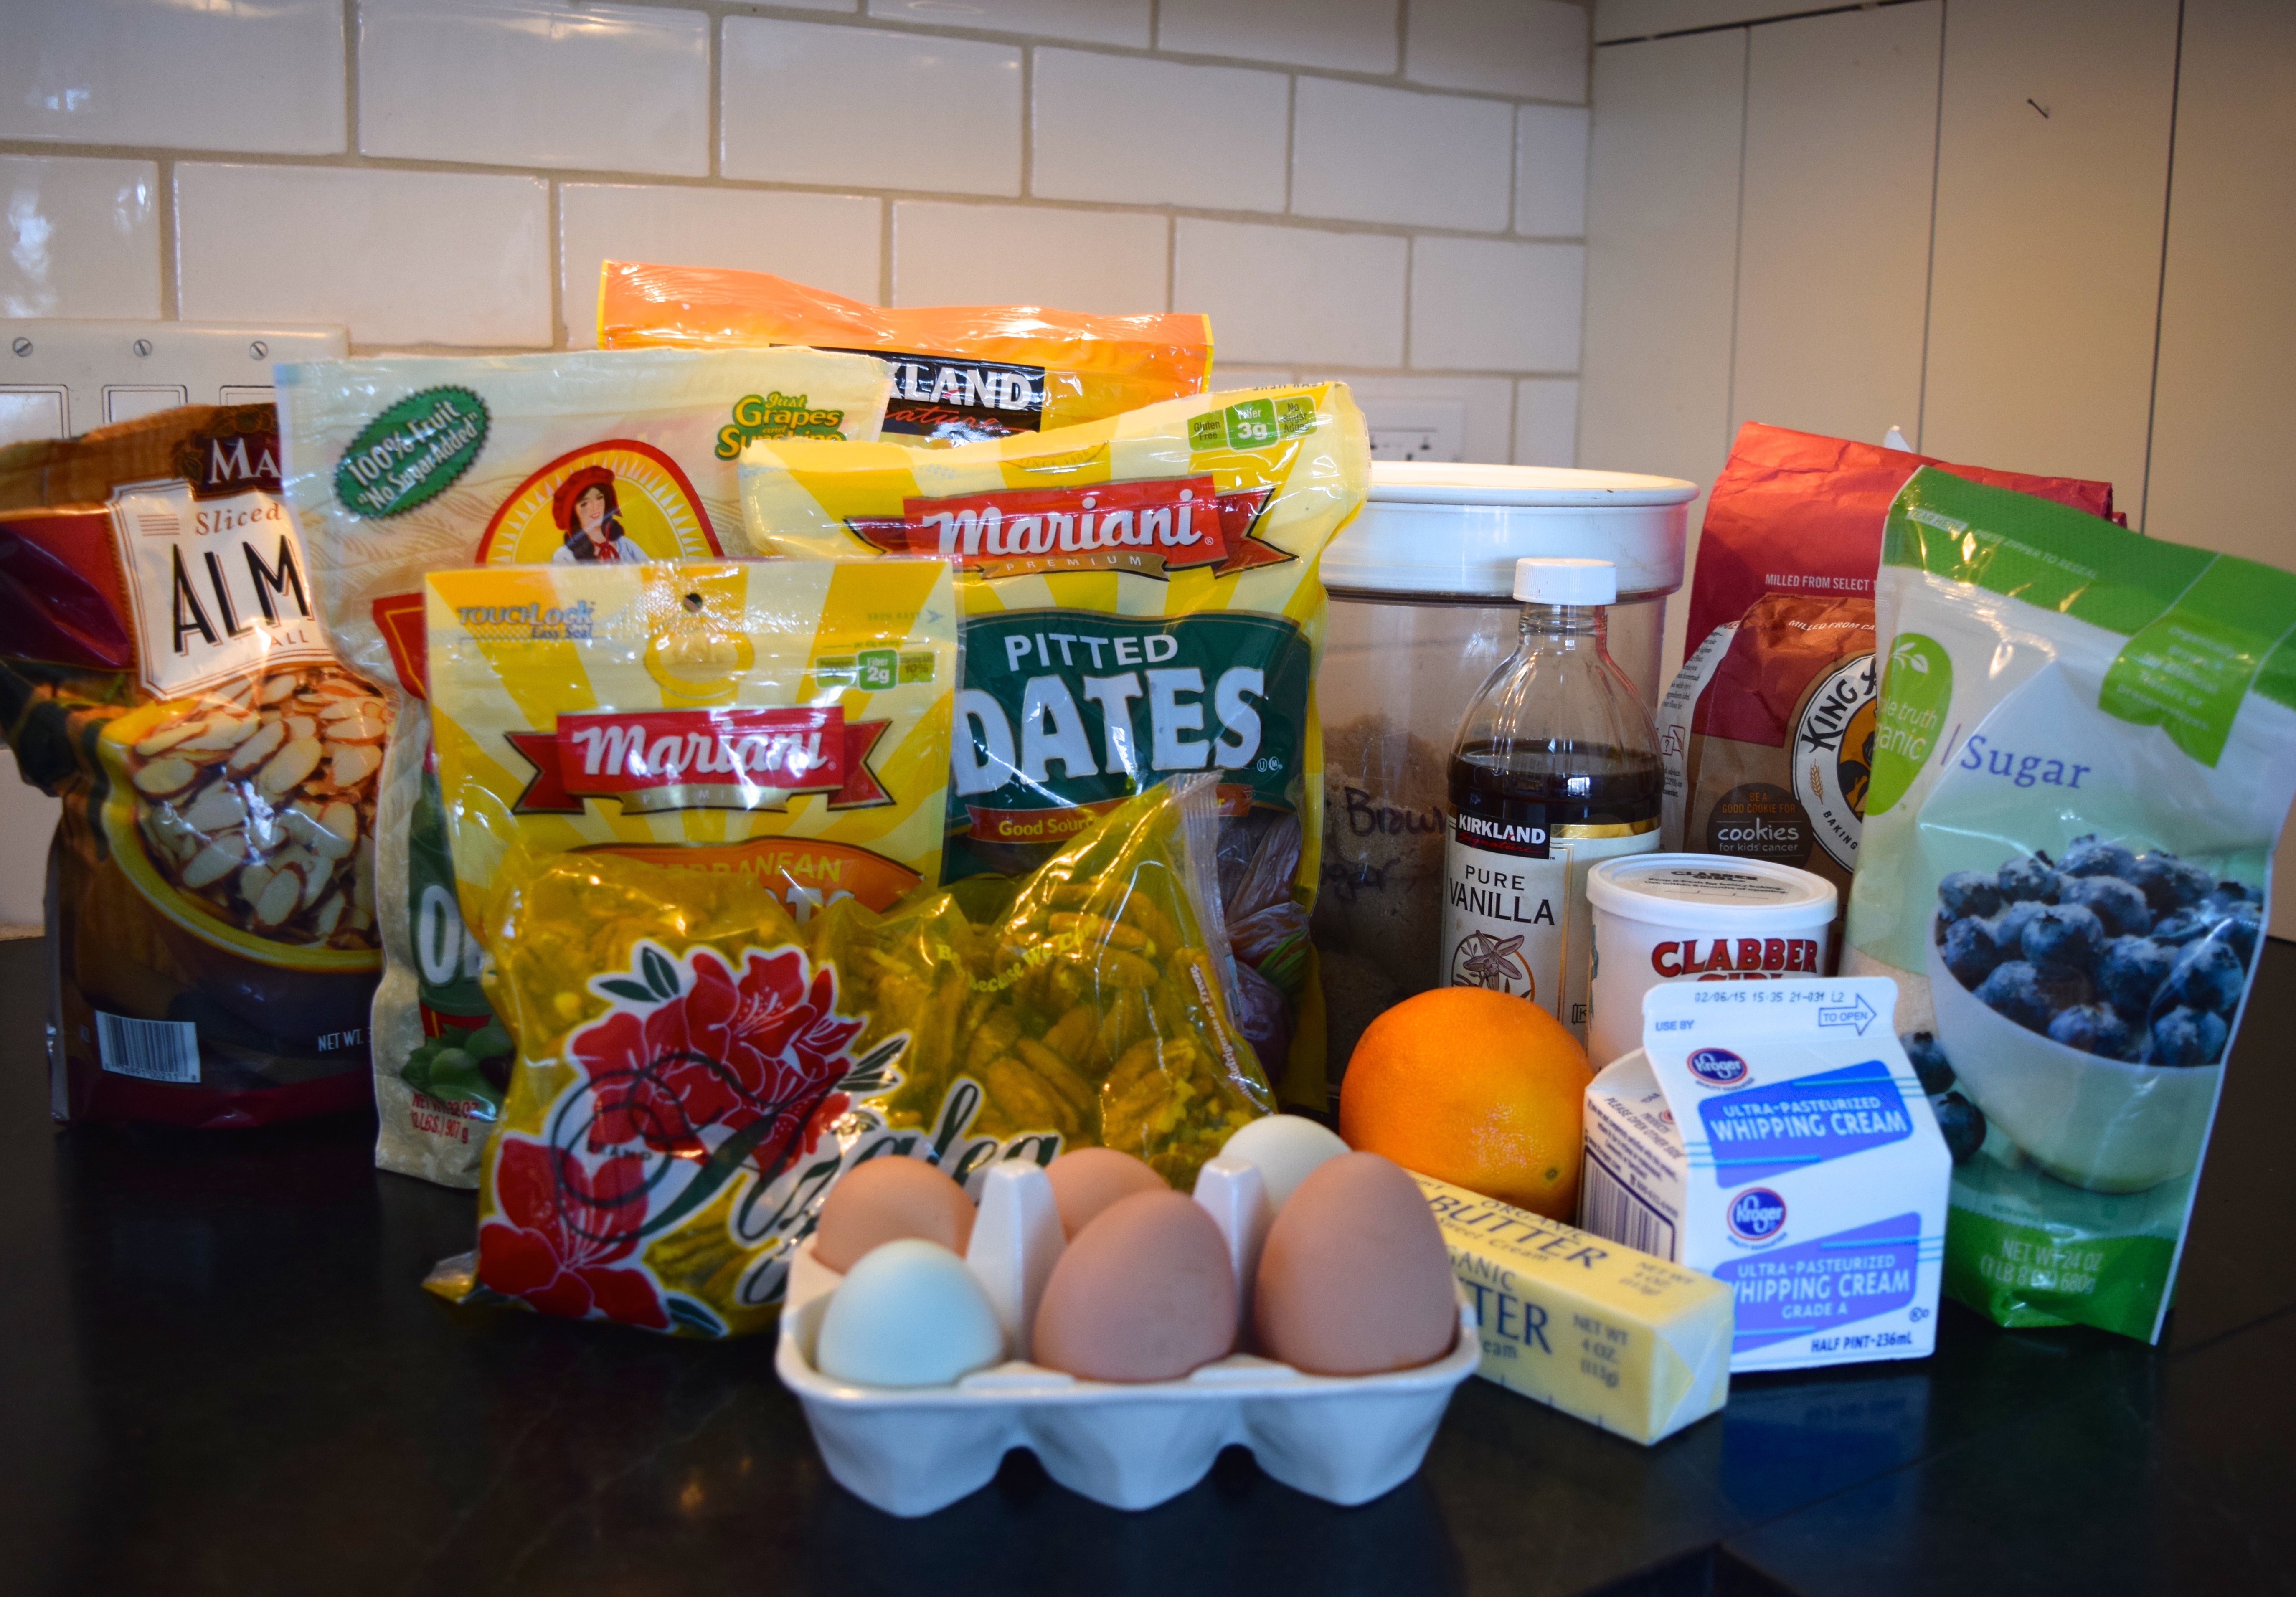
 Ingredients:

DSC_0637

3 large eggs. *I had a very small egg from my chickens that I threw in!
2/3 cup flour
1/3 cup sugar
2 teaspoons pure vanilla extract
¼ teaspoon ground nutmeg
1/8 teaspoon salt
1¼ cups milk, or a combination of milk and cream
2 cups fruit. If you use apples or pears, peel, core, and slice thinly.

Instructions:
Preheat oven to 350º
Generously butter a 9-inch pie plate

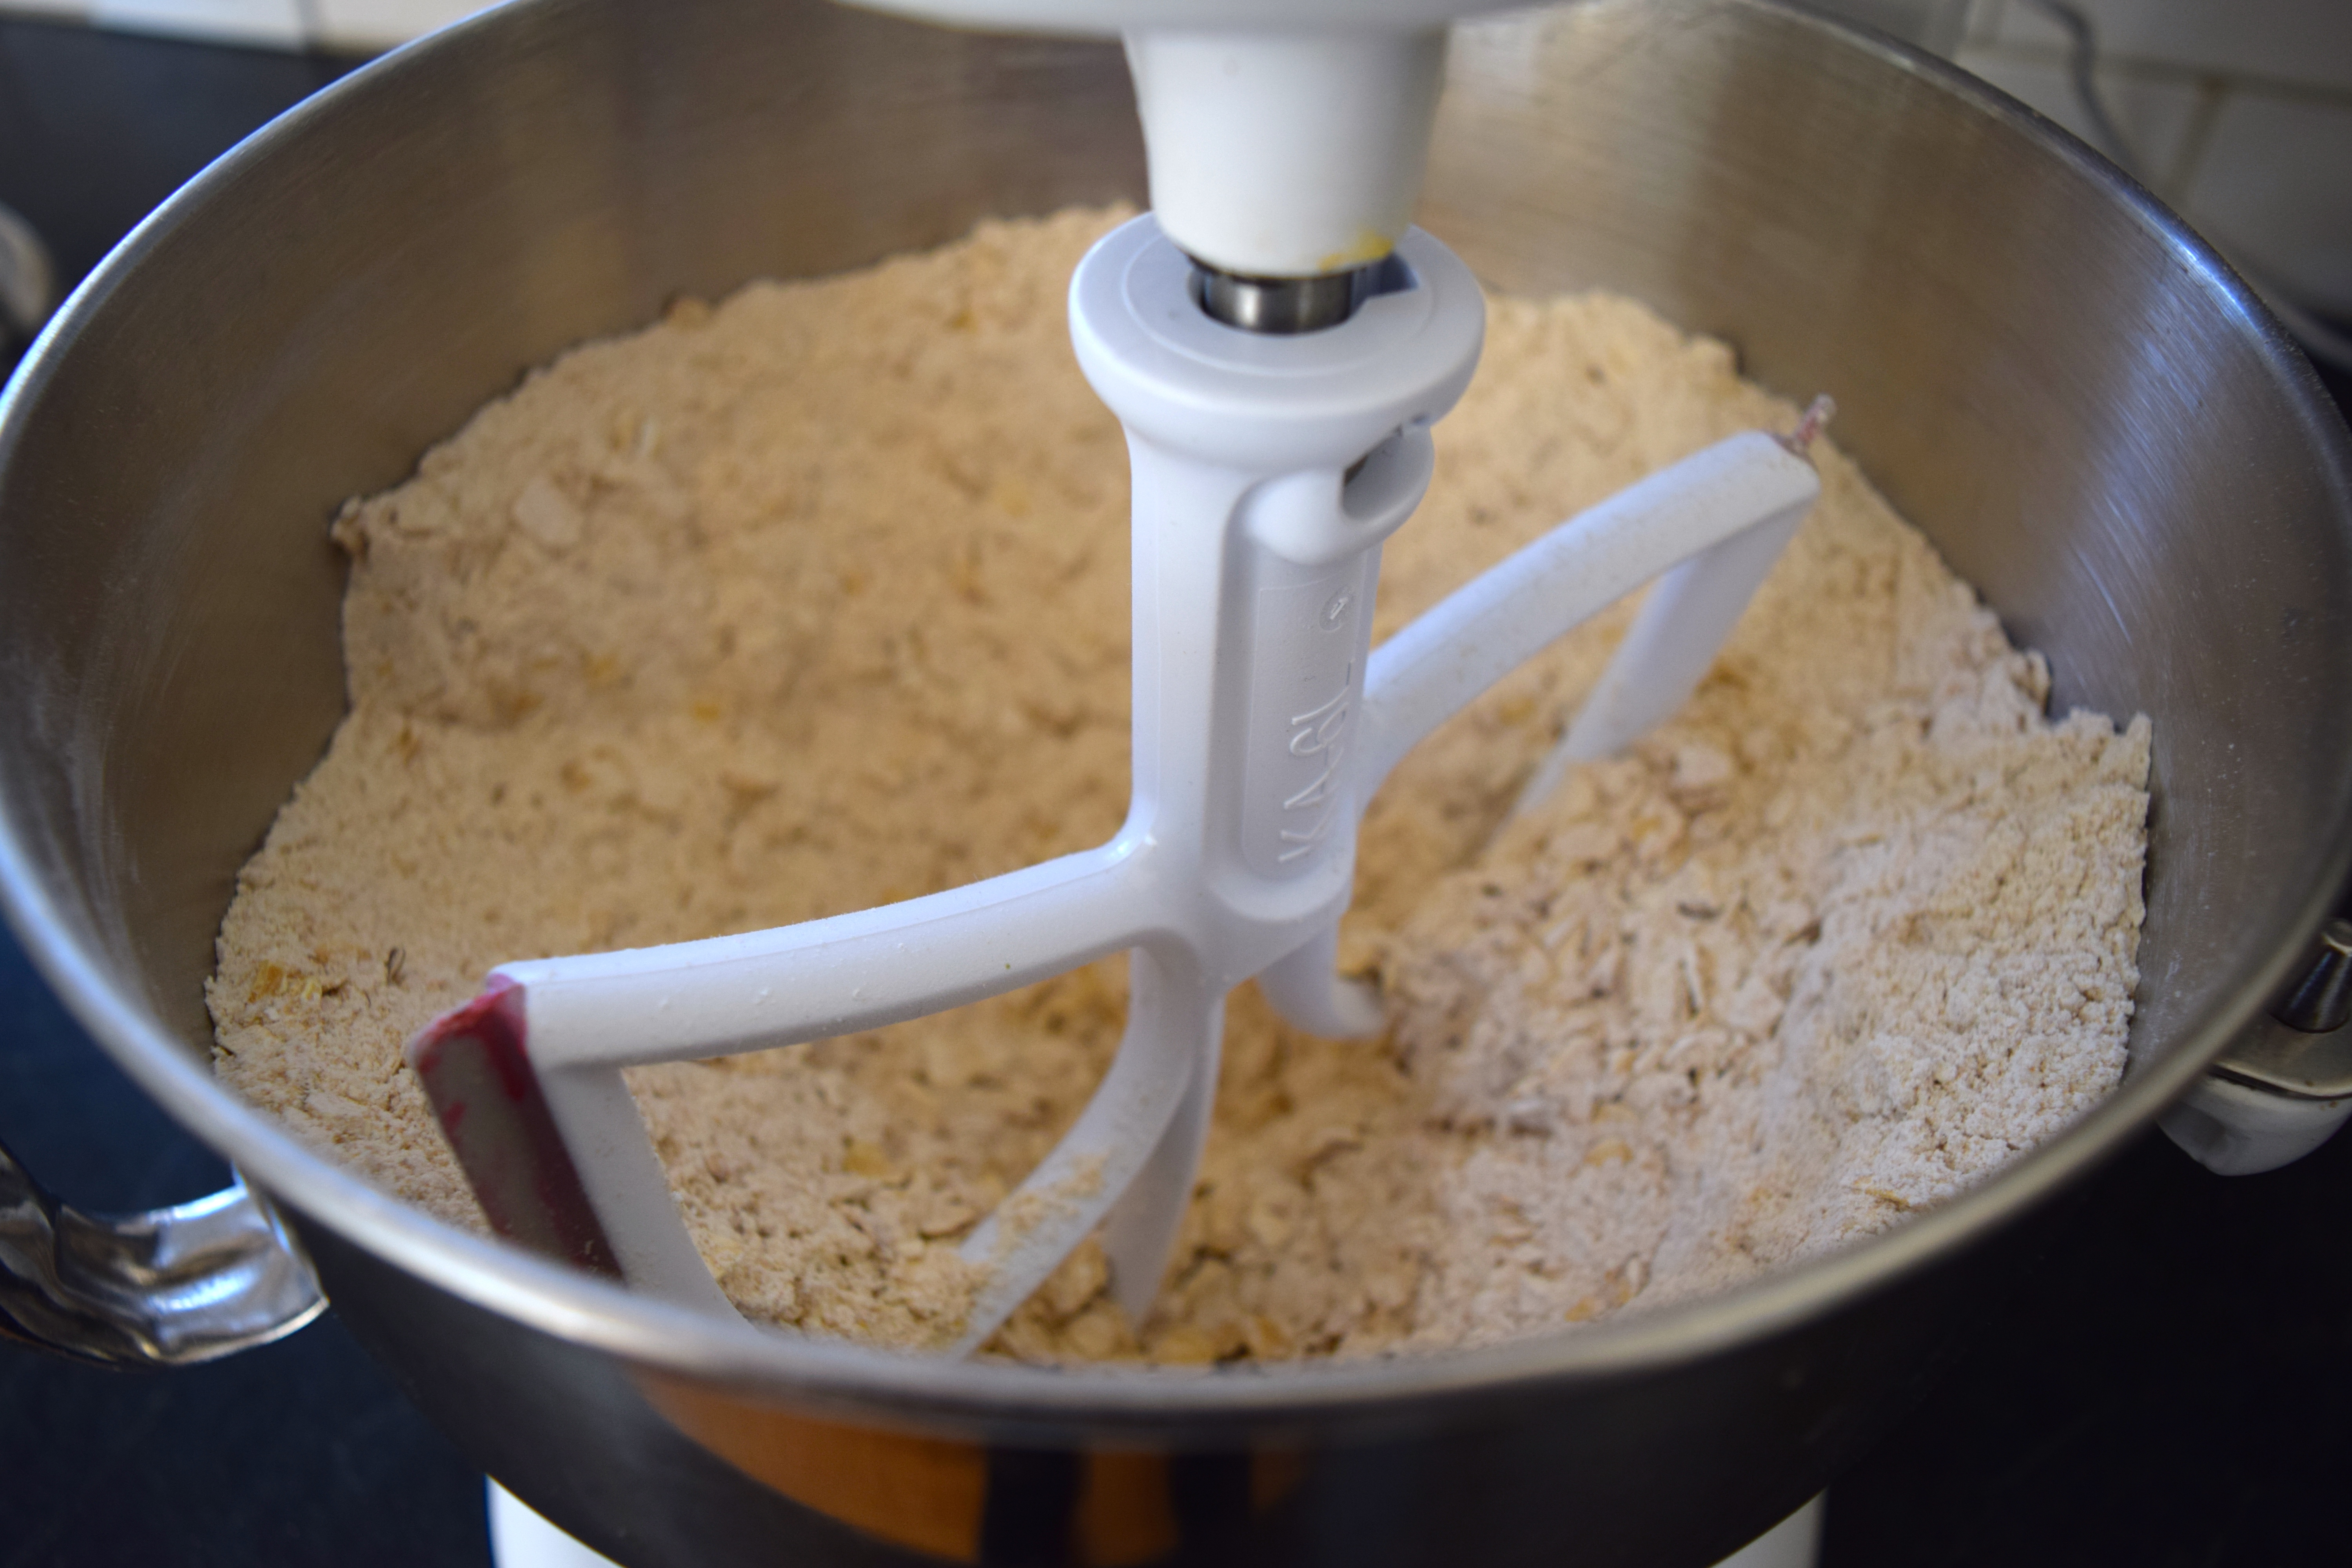
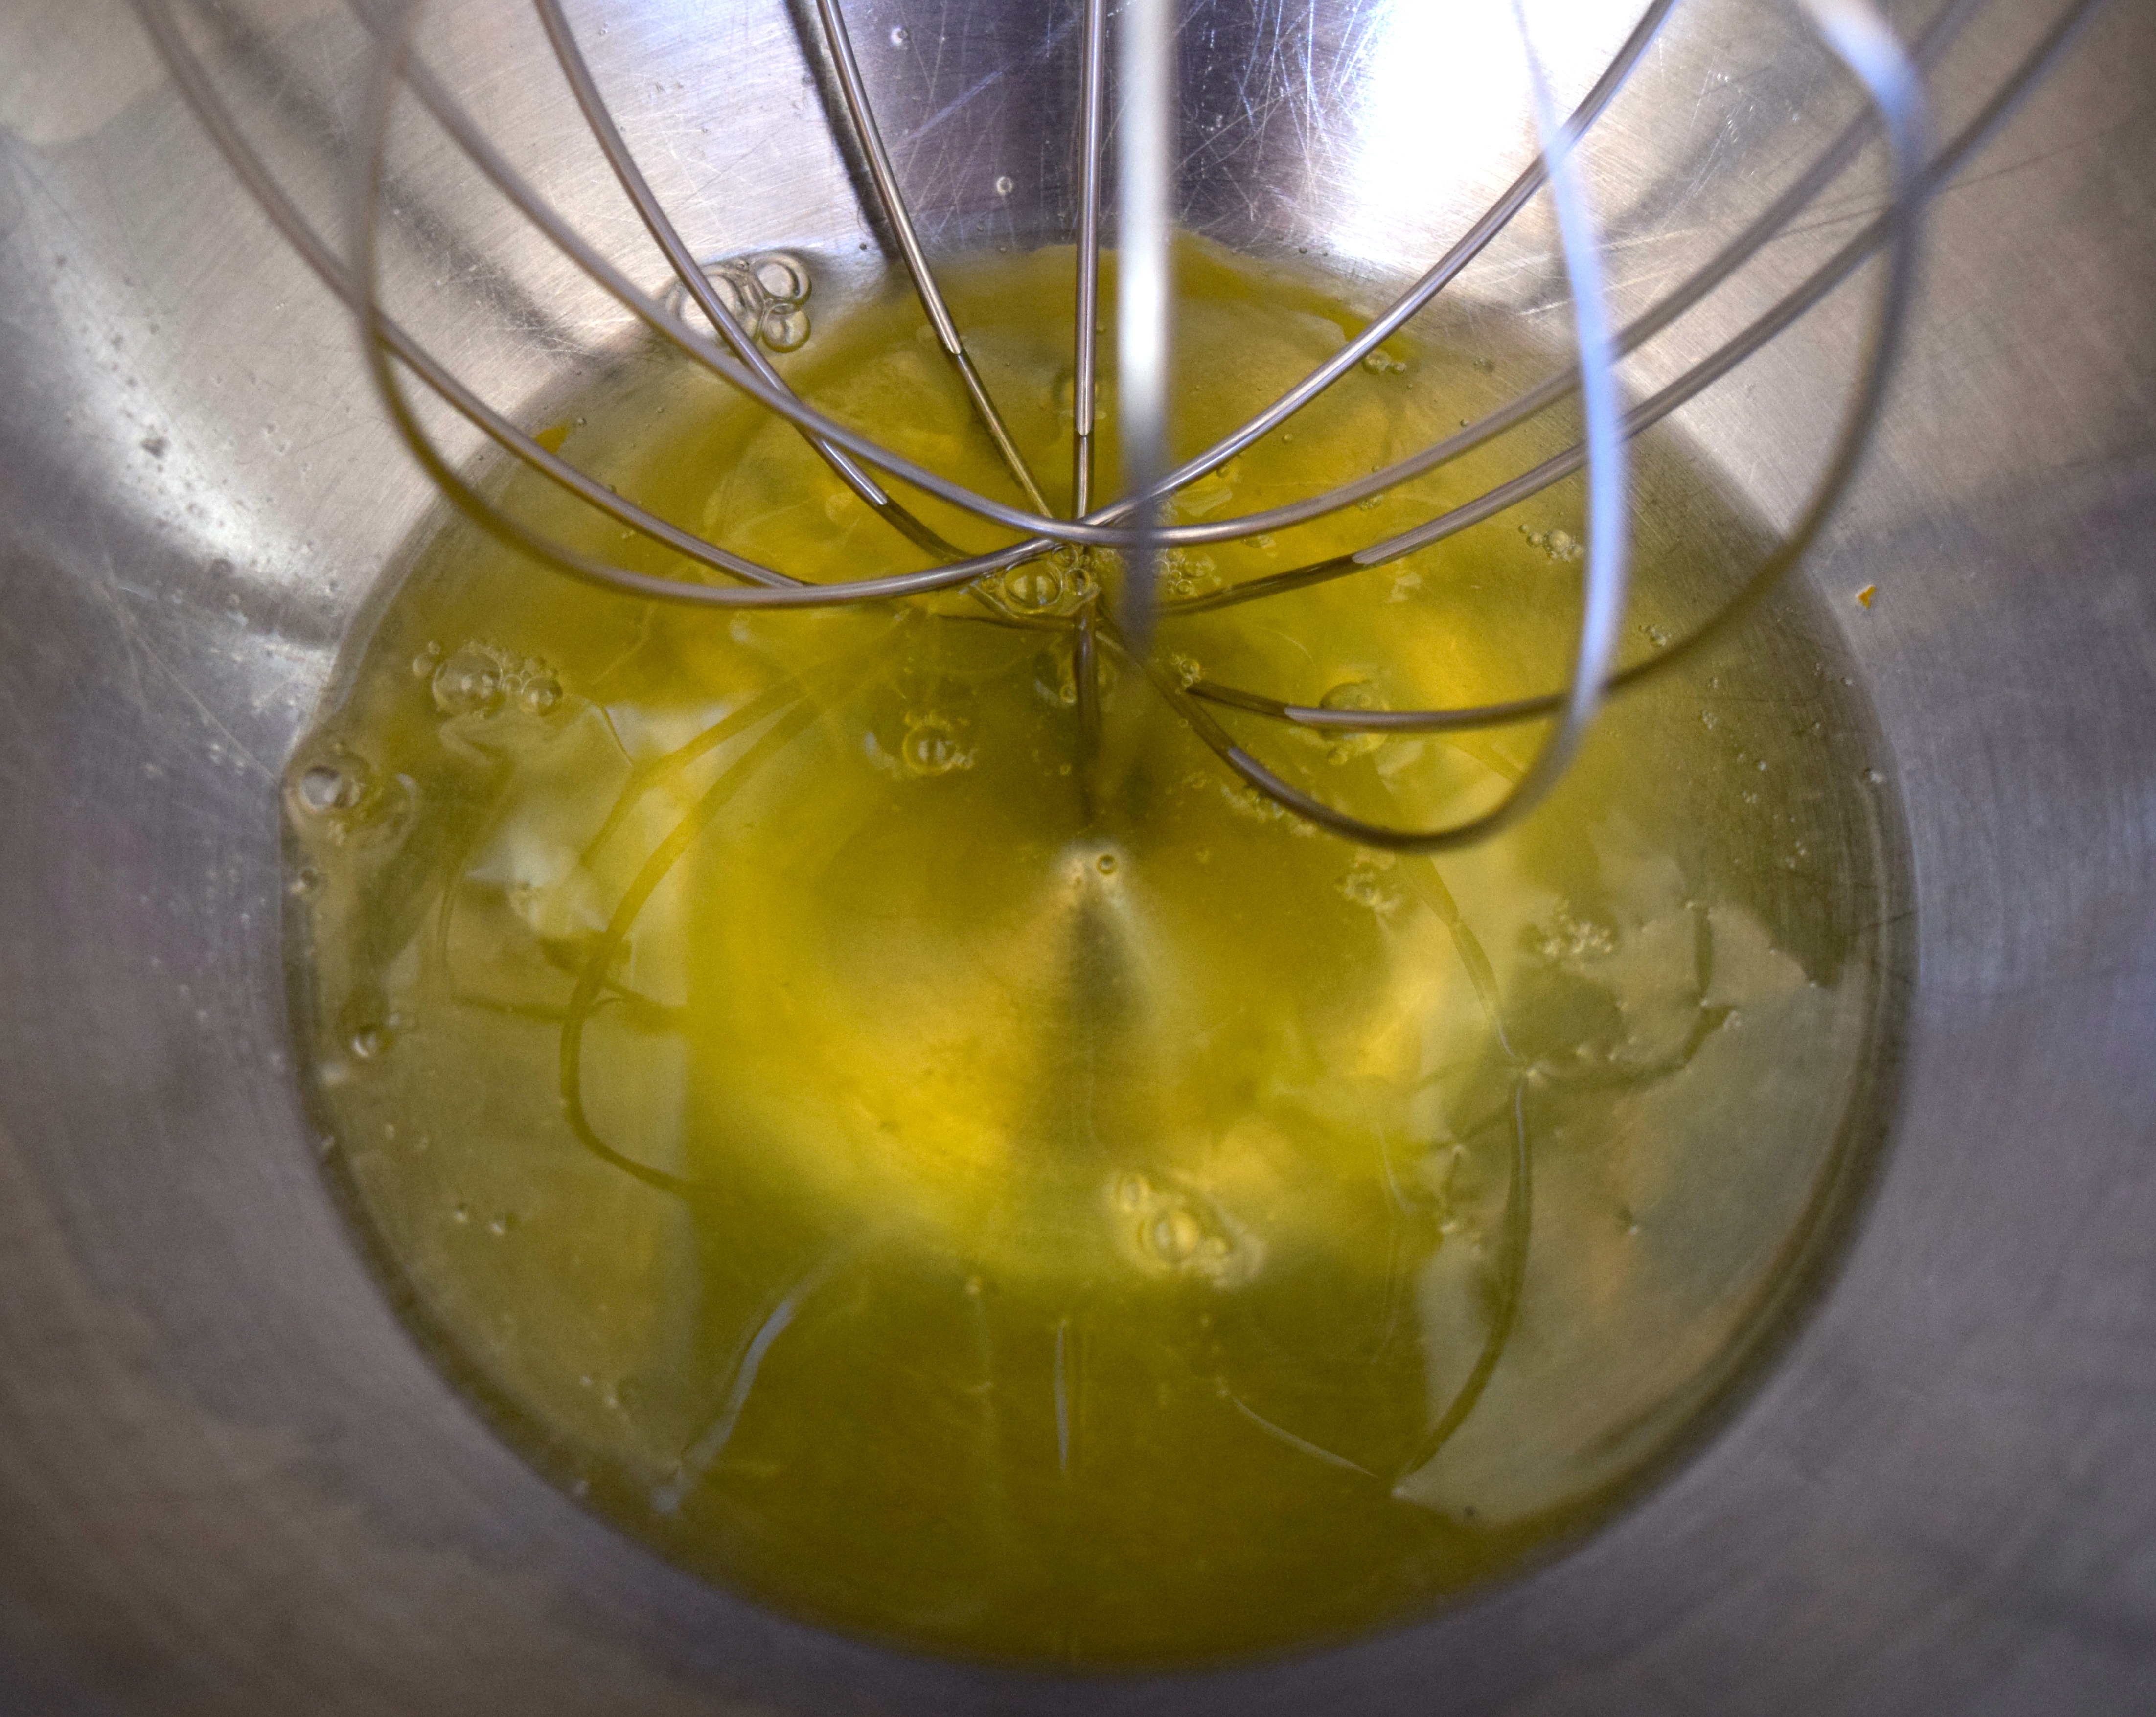
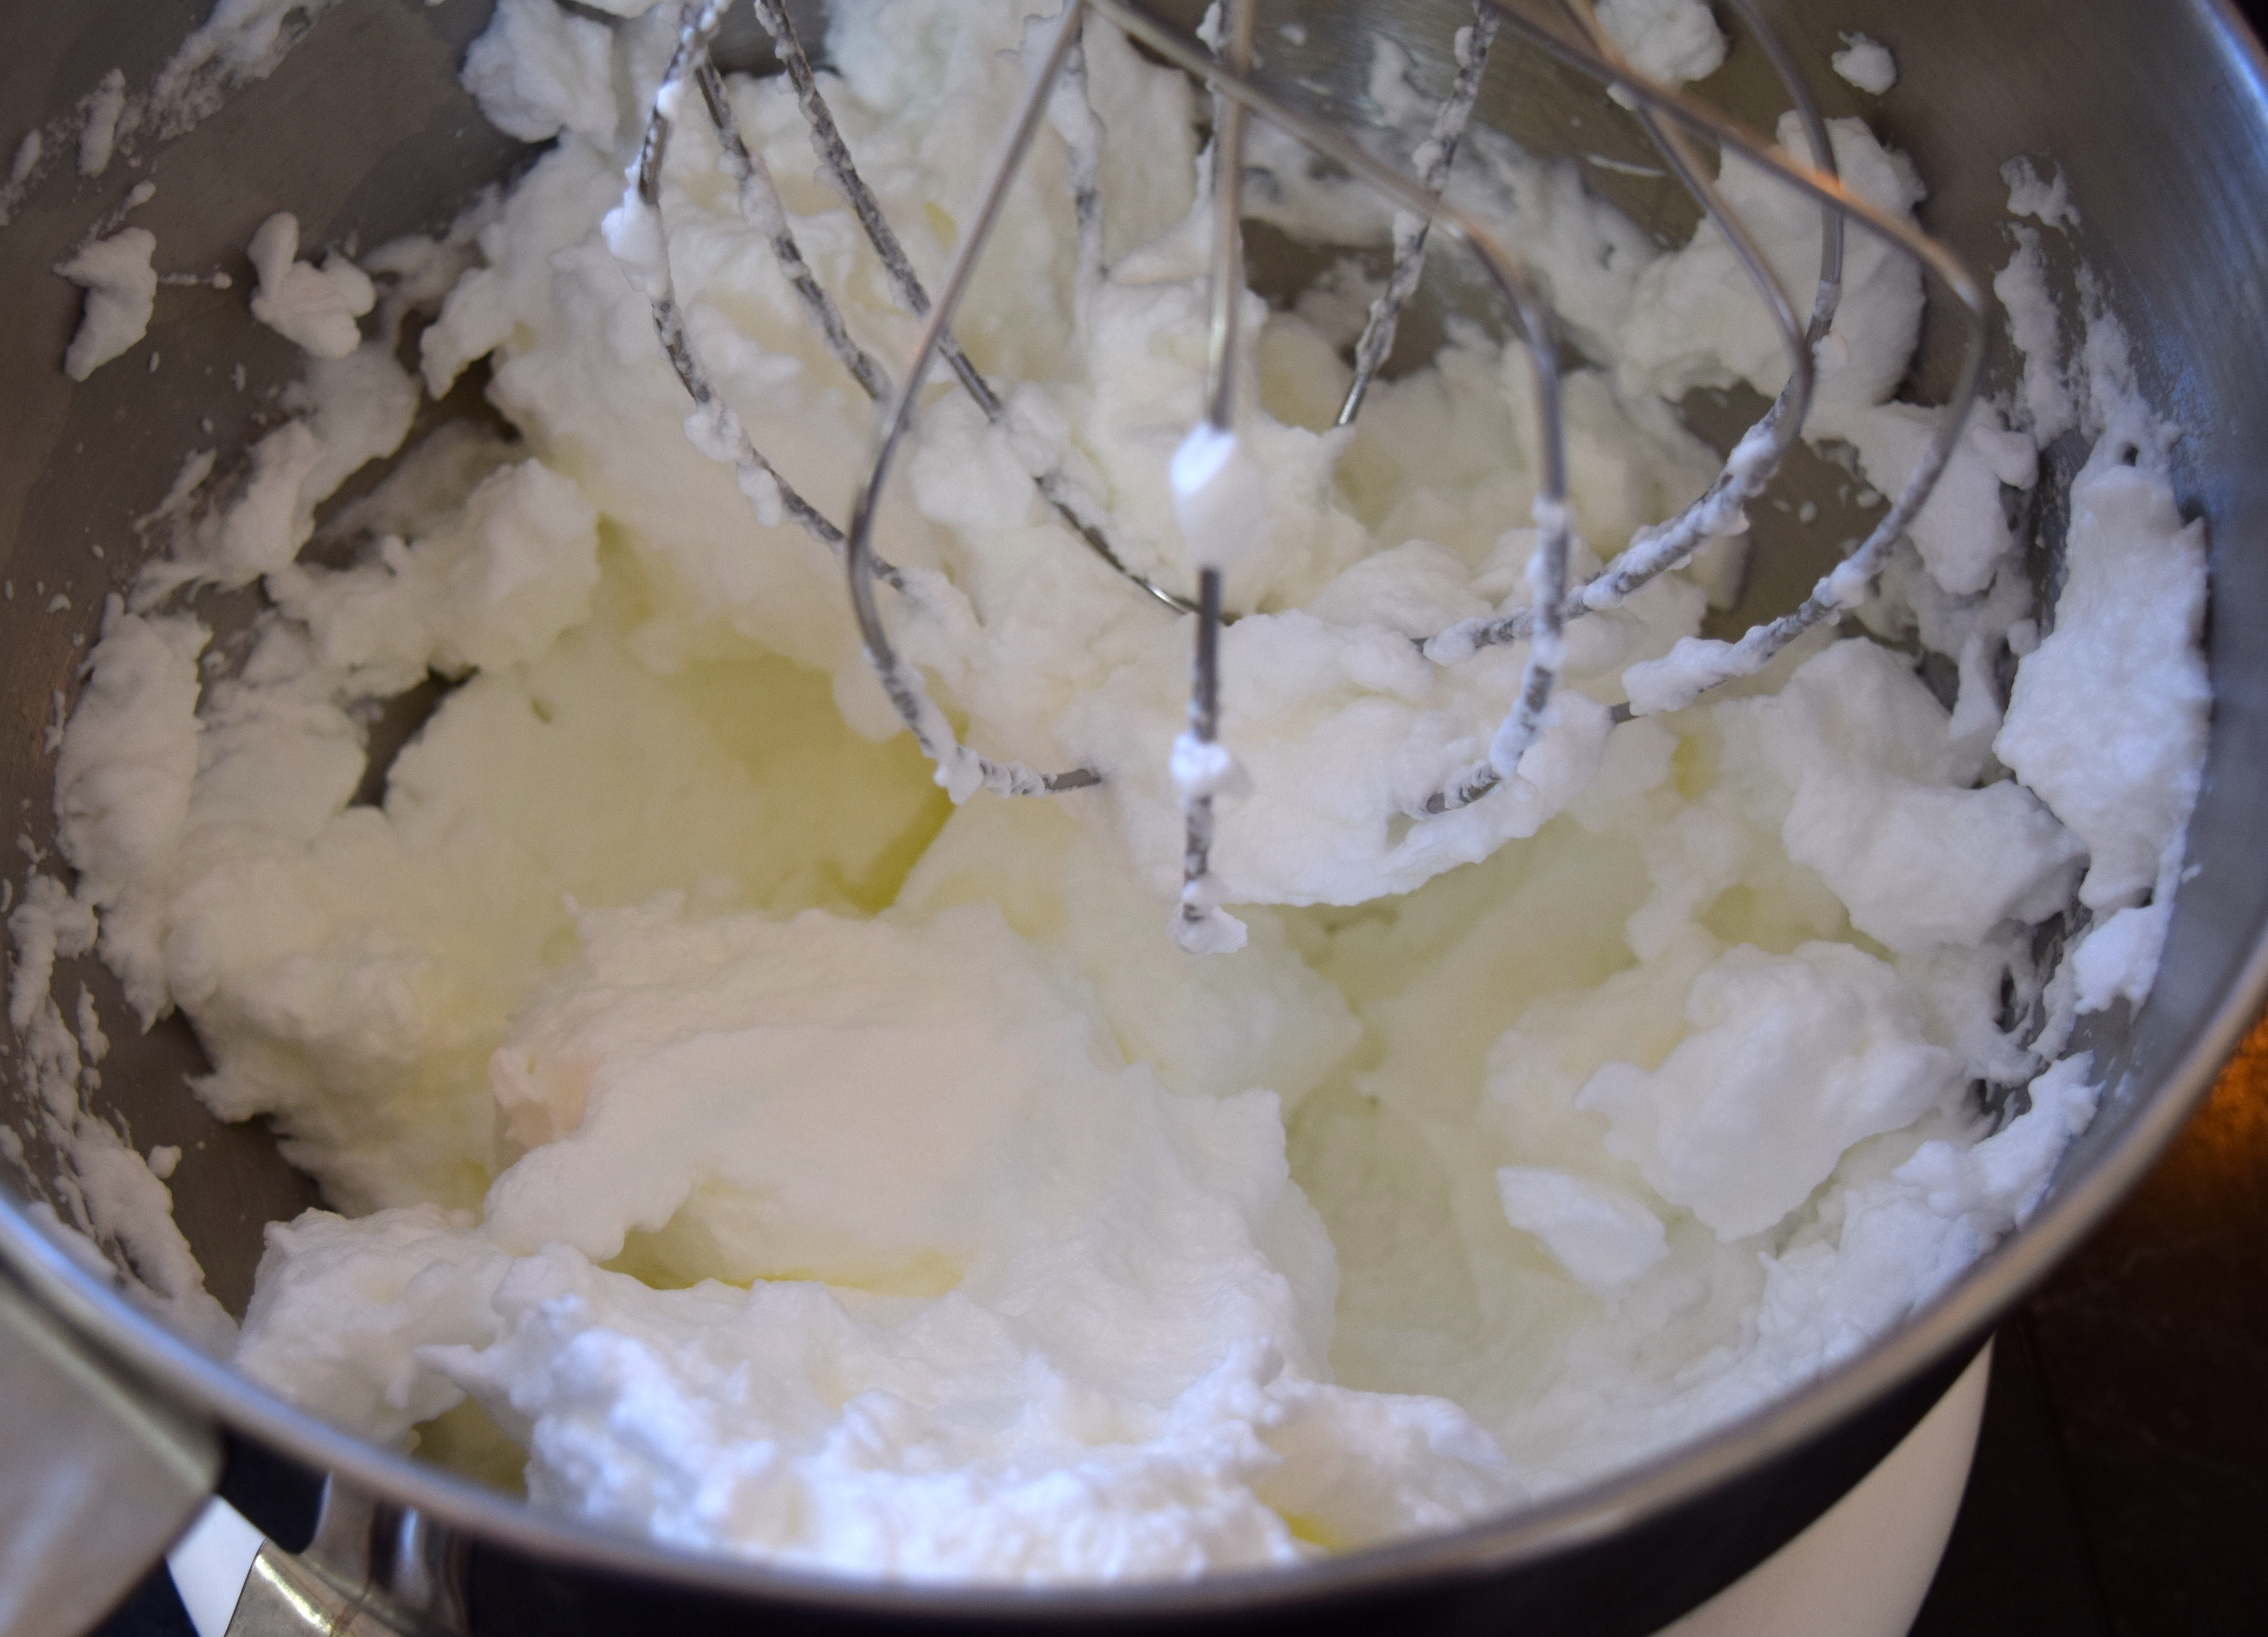
You can make this batter in a food processor, with a mixer, or in a bowl with a whisk or fork. Just be sure to add the milk after you have mixed the other ingredients or the flour will form clumps.

Beat eggs for about 30 seconds. Add flour, sugar, vanilla, nutmeg and salt.

DSC_0640

Mix until smooth, about 30 seconds.

DSC_0641

Add milk and mix on slow speed until batter is well blended, about 30 seconds.

DSC_0642

Pour batter into a buttered pie pan.

DSC_0643

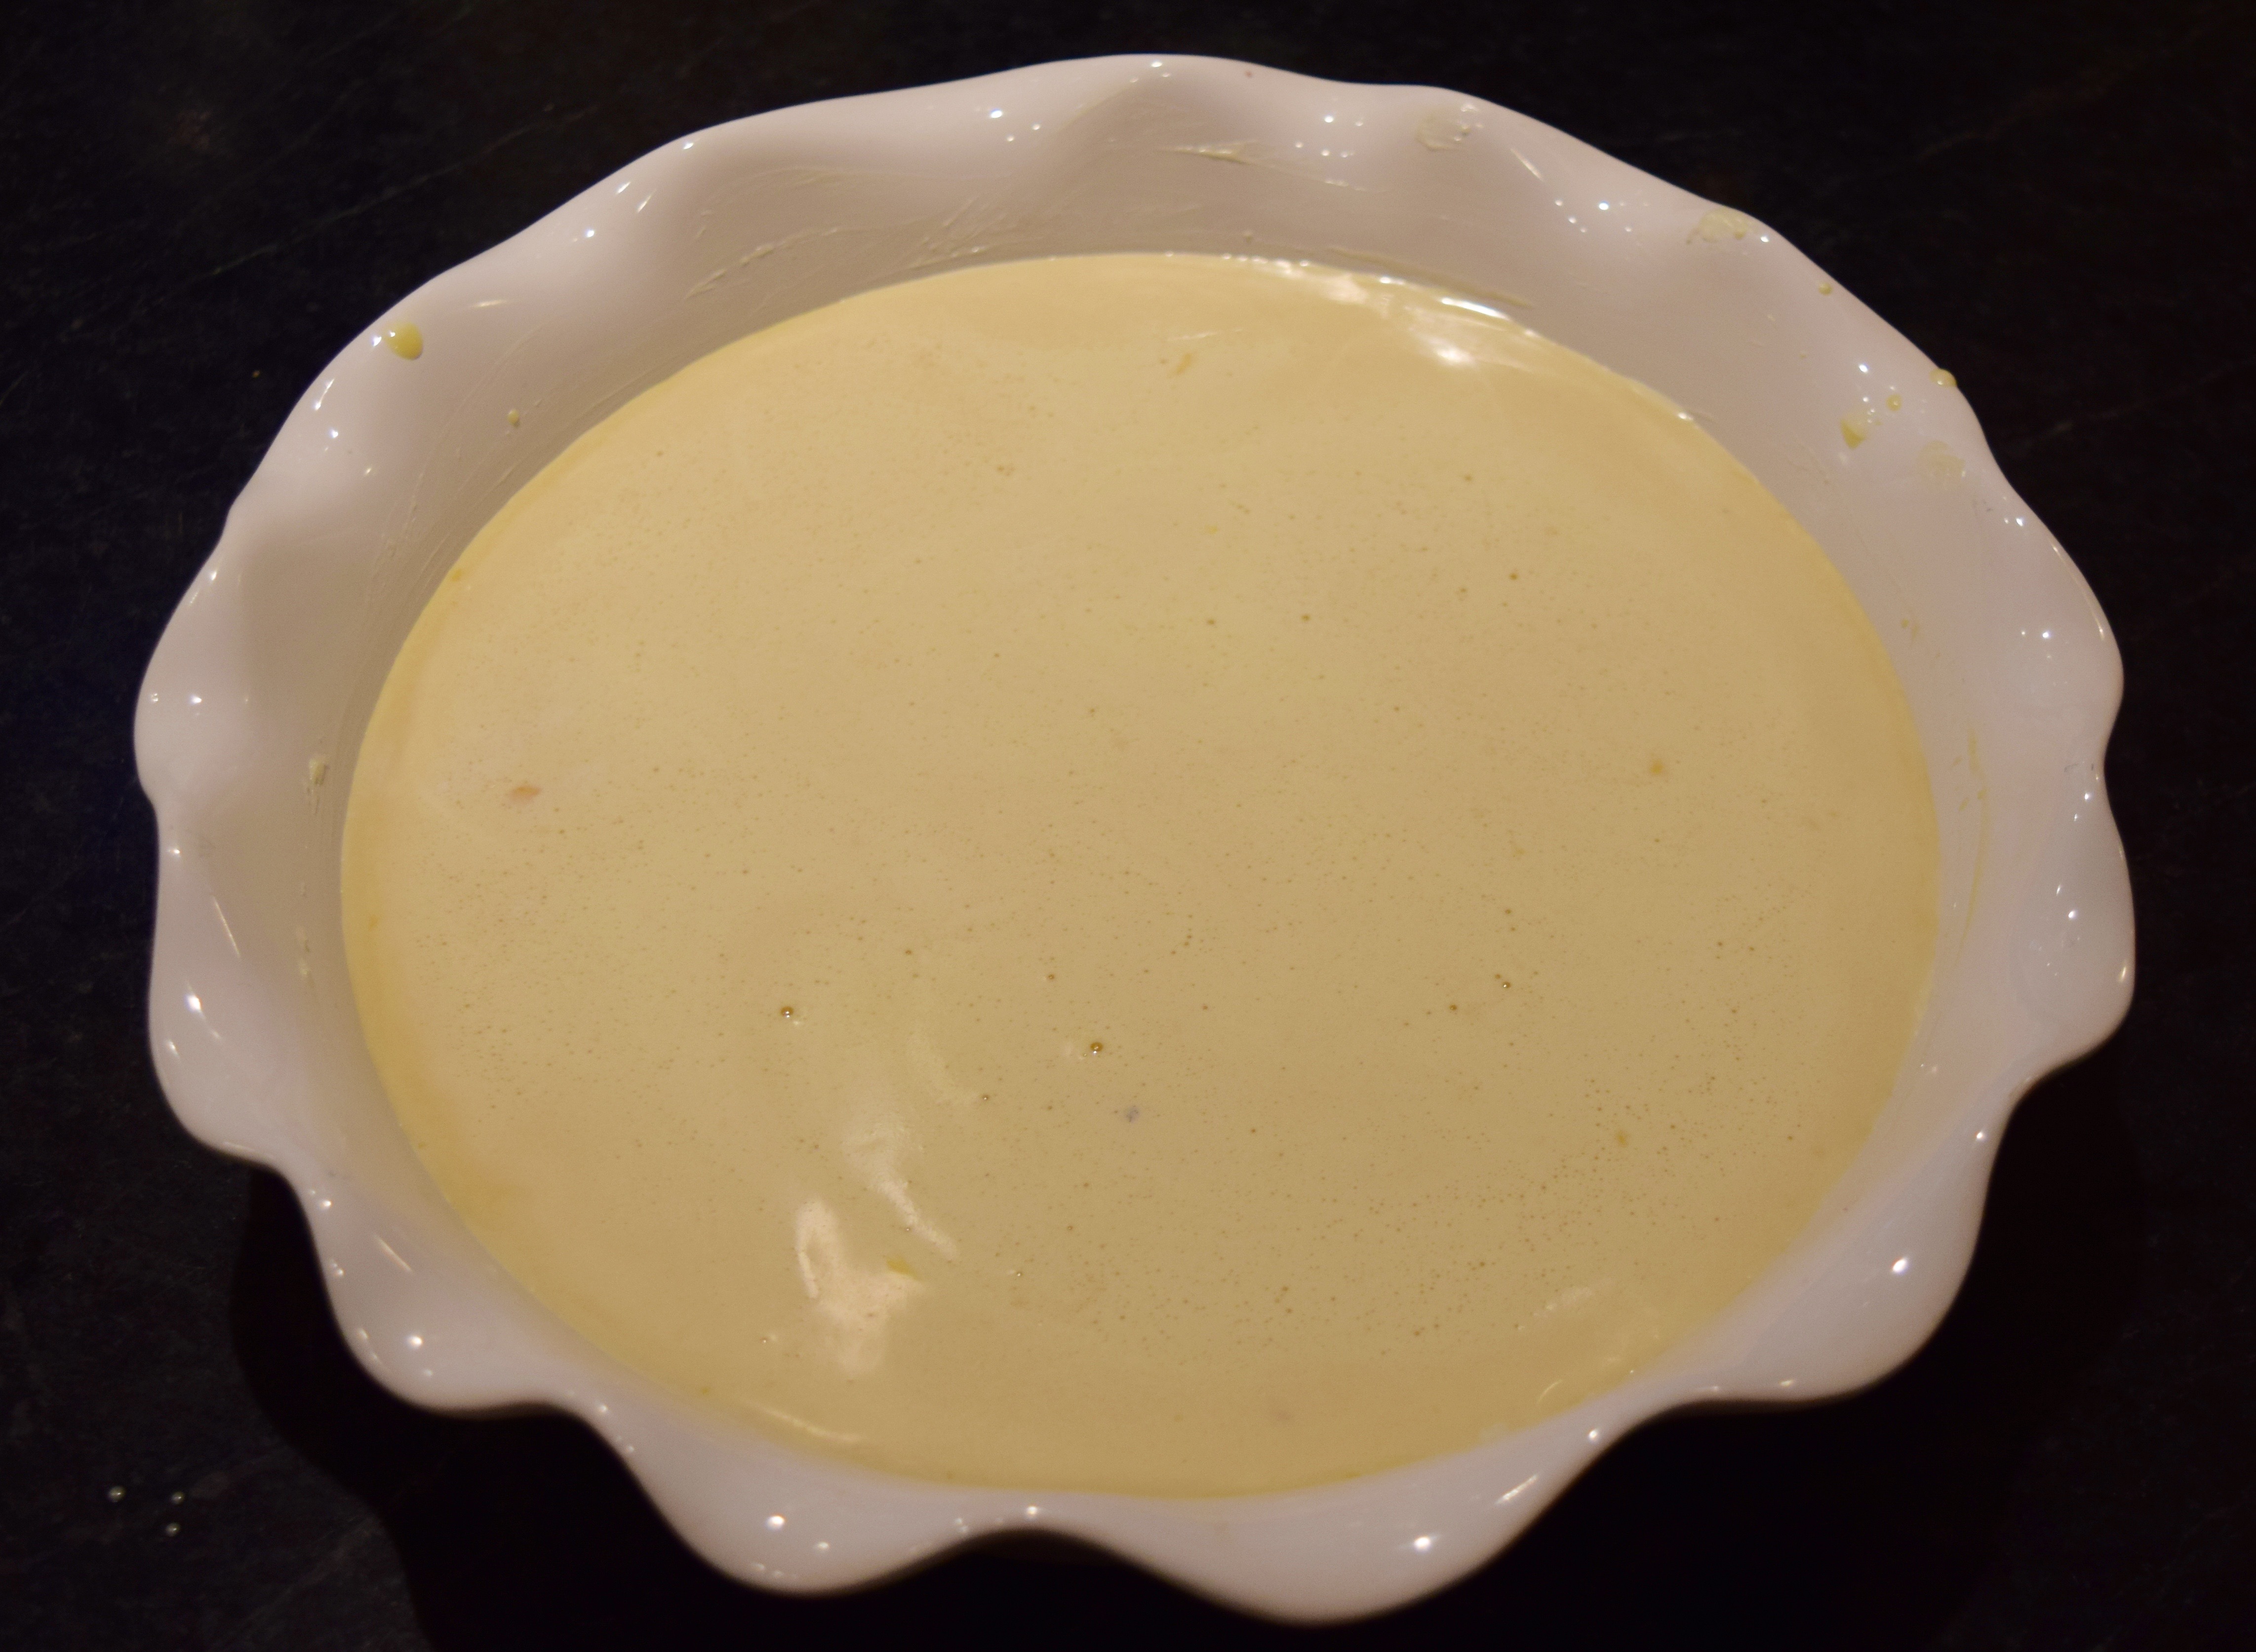
Add fruit. Be sure to dry the fruit after washing it. Adding wet fruit to the batter sometimes causes water to pool on the surface as the clafoutis cooks. If that happens, I open the oven door, lay a paper towel over the top, just for a second, and mop up the excess moisture, and then continue baking.

DSC_0644 DSC_0657Bake in a preheated oven for 45-55 minutes. The clafoutis should be lightly browned and puffed on top. Test for doneness by inserting a knife into the center. It will come out clean if the interior is cooked. If it doesn’t come out clean, cook for 5 more minutes. Let cool 10 minutes before serving. The pouf will settle down.

Clafoutis-Making, Part 2

My Aunt Rachelle and I were cooking dinner together last week and decided to make clafoutis using cherries that were already in the refrigerator. We made a mess cutting the pits out of the cherries. While it didn’t impact the taste of the clafoutis one iota — it was still gone in sixty seconds — it wasn’t very pretty.

IMG_1533

Last night, I was determined to try a cherry clafoutis again and this time make it pretty. That called for a quick stop at Williams and Sonoma to pick up a cherry (and olive) pitter. This time, I was making the clafoutis with Rachelle’s daughter, Elizabeth. We couldn’t wait to get home and try the cherry pitter. What a great tool! Knowing my husband likes to study how mechanical devices work, I tried to Tom Sawyer him into pitting the cherries, but he didn’t take the bait. No worries, the pitter makes quick work of removing cherry pits.

DSC_0685 DSC_0686

In this clafoutis version, I substituted one 8-ounce carton of heavy cream for 1 cup of the milk and used ¼ cup of 2% milk for the remainder.

DSC_0717

The results were spectacular, albeit more calories! The fat in the batter made the clafoutis rise sky-high before it settled back down as it cooled. It looks very different from the photos of the strawberry and cherry clafoutis shown above. Here it is sprinkled with confectioner’s sugar. This version makes for a lovely dessert.

Version 2

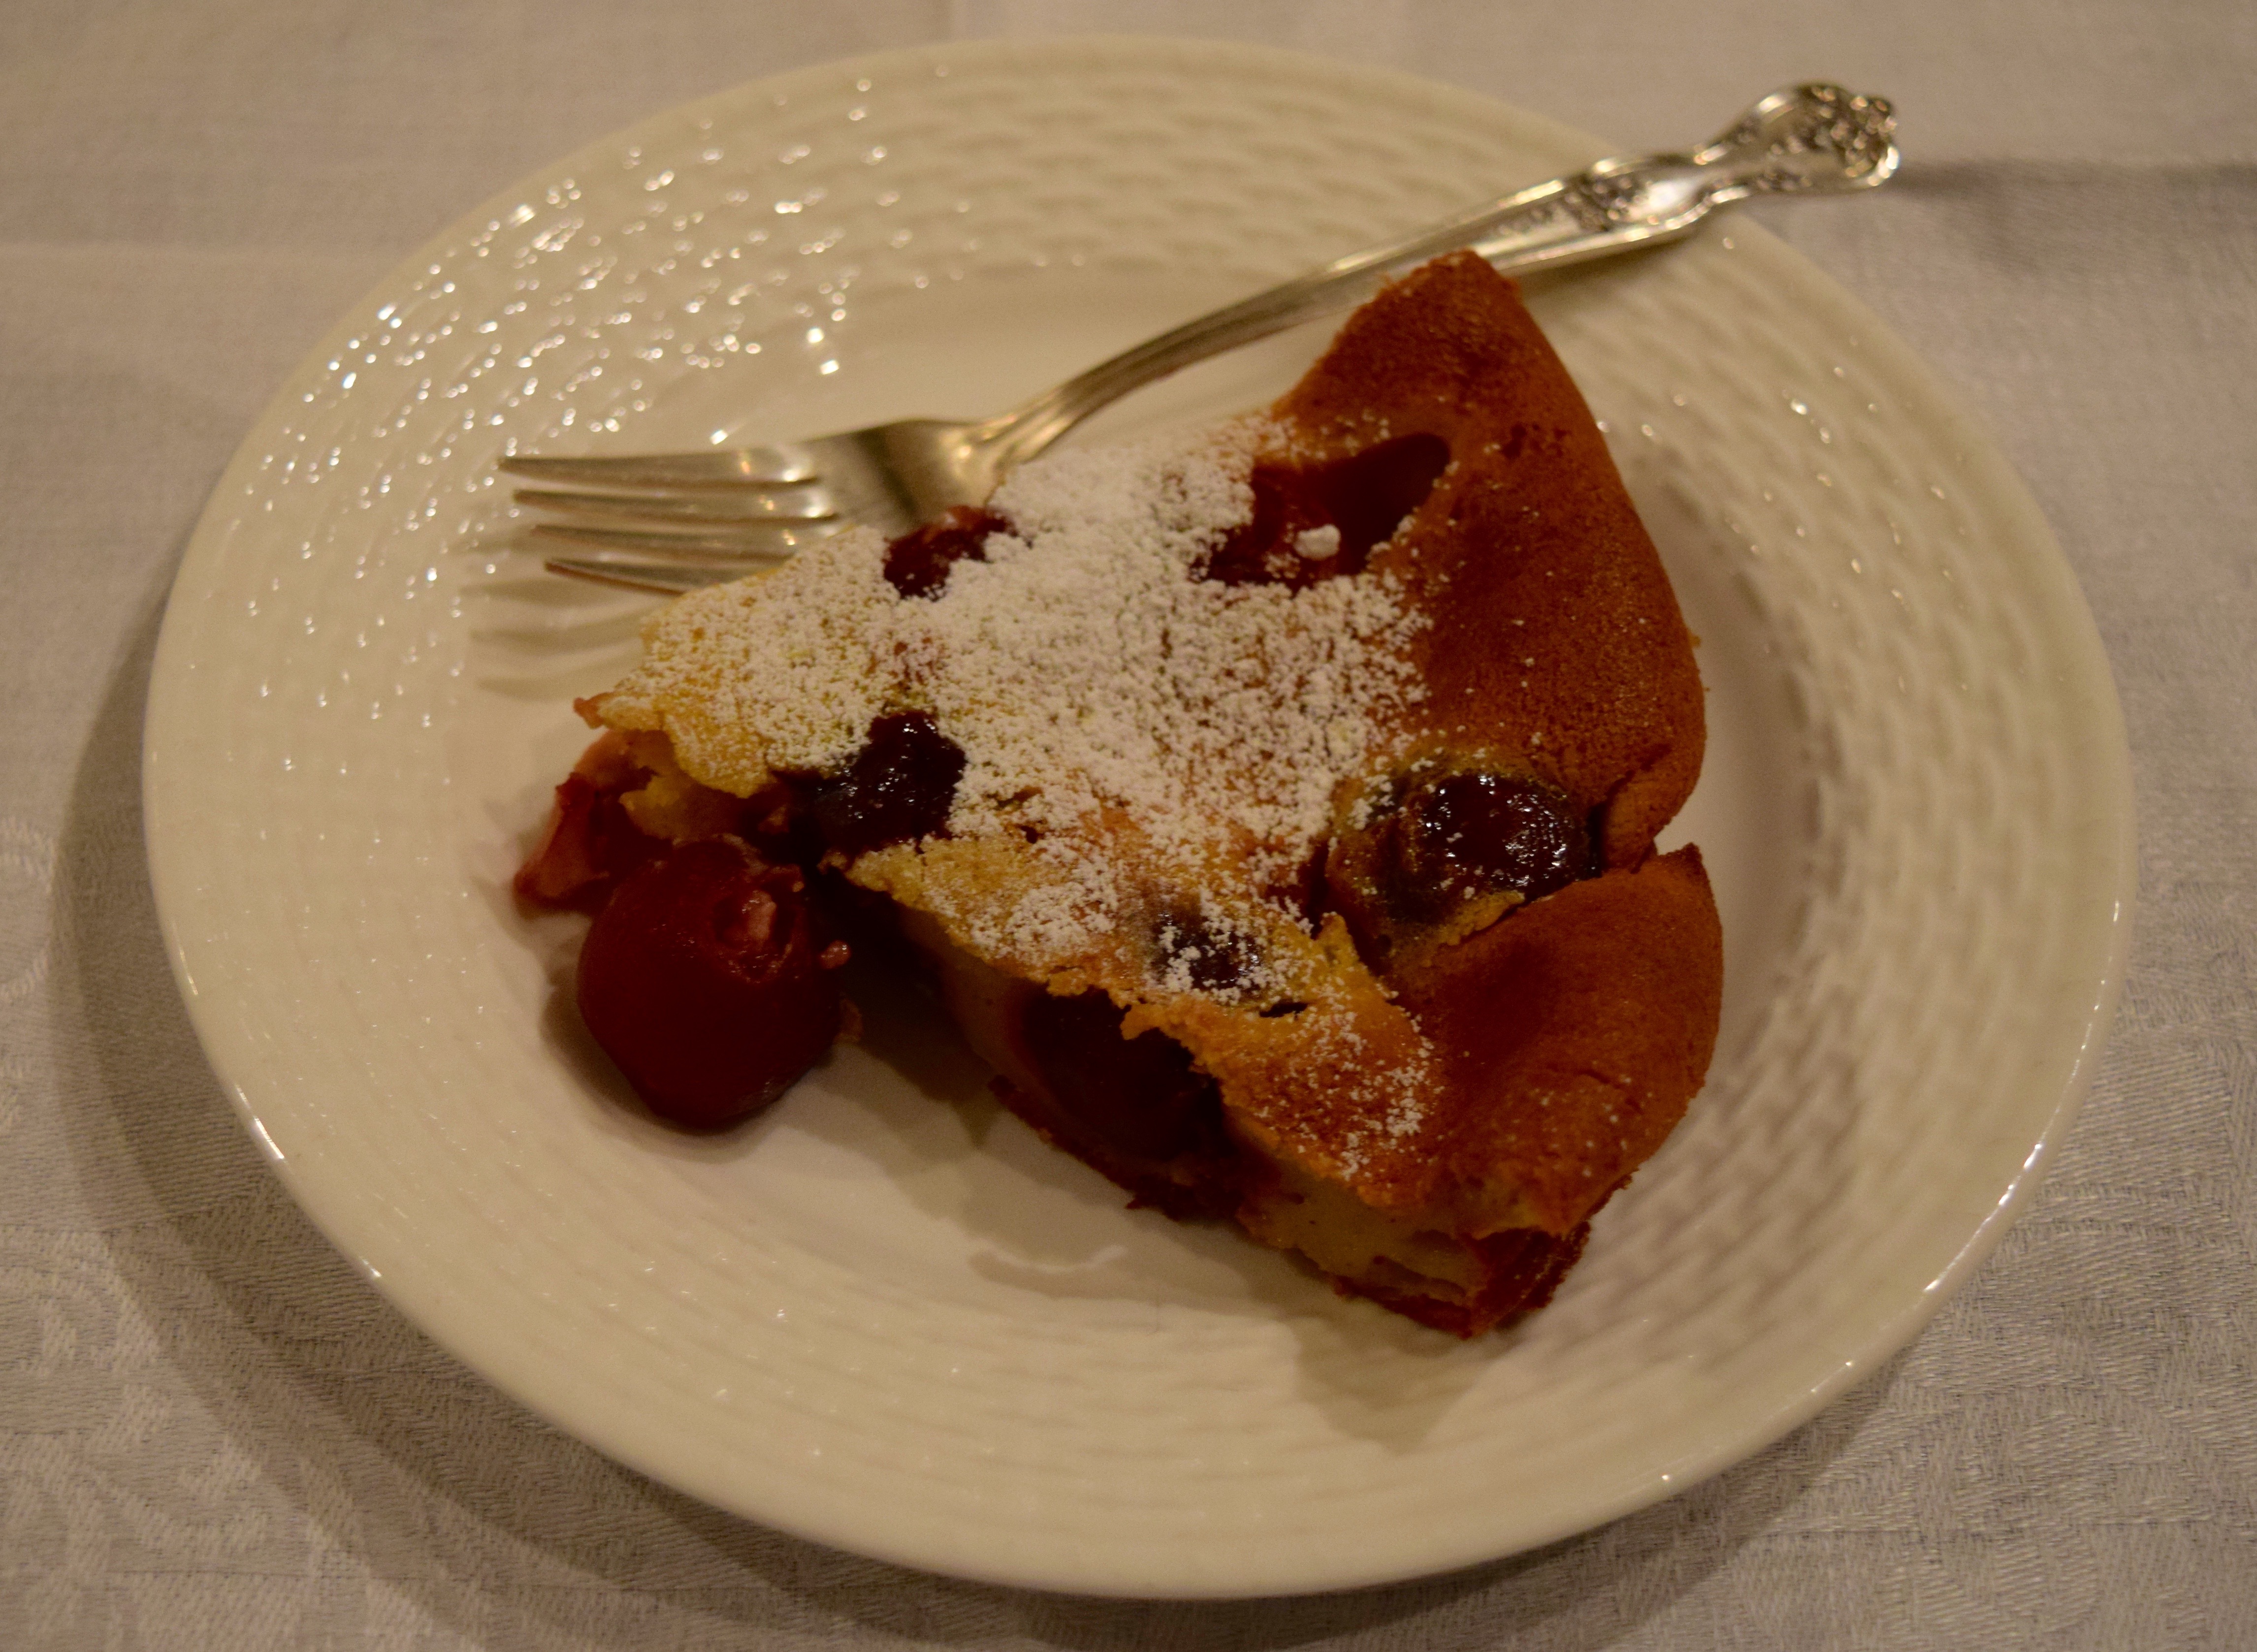
So, clafoutis are a crustless “tart made of fruit, especially cherries, baked in a thick, sweet batter.”

Hope you enjoy!

LET’S STAY CONNECTED!

Follow my photos of vegetables growing, backyard chickens hanging out, and dinner preparations on Instagram at JudysChickens.

Never miss a post: sign up to become a follower of the Blog.

© 2014-2017 Judy Wright. All rights reserved. Photos and text may only be used with written consent.

Fruit and Nut Bread

Okay, it’s a fruitcake!

I’ve been trying to figure out another name for this outrageously delicious bread that does not conjure up cross-sections of red and green candied cherries. Instead, these are the beautiful fruits and nuts that go into this bread.

Whenever I serve this bread, almost everyone asks for the recipe. I have been making some variation of it since I first adapted it from The Silver Palate Good Times Cookbook, or “Silver Palate 2” as we called it back in the Eighties.

Every December, around Christmas time, I pull out all the half-used packages of dried fruit and unsalted nuts, weigh out 52 ounces of fruit and 28 ounces of nuts, and make this bread. The only dried fruit that is a must-have in the bunch is the prunes. You could say this is how I clean out my pantry every year.

Yield: Makes 3 loaves or 8 mini loaves

Ingredients:
fruit nut bread

52 ounces dried fruit: prunes, dates, cherries, raisins, and/or apricots
28 ounces nuts: pecans, almonds, and walnuts
½ cup all-purpose flour
6 eggs, room temperature, separated
½ cup granulated sugar
½ cup brown sugar
grated zest of one orange
6 tablespoons butter, melted
5 tablespoons whipping cream
2 tablespoons vanilla extract
½ teaspoon almond extract
1½ cups whole wheat flour
2½ teaspoons baking powder

Instructions:

Prepare oven and pans:
Preheat oven to 325º.

Spray three 9x5x3 loaf pans lightly with cooking spray. Line each pan with aluminum foil. Butter the foil liner. We do this tedious process because the bread needs to cook for a long time at a low temperature. The foil keeps the loaves from drying out and sticking to the pans. As a test, I made two regular loaves and three mini loaves. I didn’t use foil on the mini loaves, and the bread stuck to the pans. I’m a believer. The reason you spray the pan before lining it with foil is for easy release of the foil-lined loaves after they have baked. These steps are all necessary. Believe me, I’m not one for make-work.
fruit nut bread

Measure fruit and nuts:
I keep large bags of dried fruits and nuts in the pantry. When it comes time to make this recipe, I pour a good mix of them into a bowl placed on a digital scale and keep adding more until the scale reads 3 pounds, 4 ounces. Then I pour in the nuts until the scale reads a total of 5 pounds.

Technique Time: Zeroing out a scale
A digital scale is a good tool to have in the kitchen. I recommend this one by OXO because it can weigh items up to 11 pounds. You’ll need to weigh the mixing bowl first and “zero out” that weight before adding the fruits and nuts. To do this, place the large empty bowl on the scale. This bowl weighs 5 pounds and 2.5 ounces. Push the “zero” button. The scale is now ready to show the weight of just the ingredients in the bowl.
fruit nut bread fruit nut bread fruit nut bread

Here is a list of the fruits and nuts I typically use :
16 oz prunes + 5 oz cherries + 6 oz apricots (cut each in half) +
fruit nut bread fruit nut bread fruit nut bread

8 oz raisins + 17 oz pitted dates (cut each in half) = total of 52 oz.
fruit nut bread fruit nut bread

As for the nuts, I typically use 16 oz pecans + 8 oz walnuts + 4 oz slivered almonds = a total of 28 oz.

Next, add ½ cup of all-purpose flour and mix with your hands to break up the fruits that are stuck together. Make sure every morsel of food is dusted with the flour. This helps keep them from sinking to the bottom of the pan while baking.
fruit nut bread

Prepare the batter

Separate the eggs into whites and yolks.

Beat egg whites on high speed in a clean, dry, mixing bowl until the whites puff up and form peaks. Don’t overbeat the egg whites. Use a rubber spatula to gently move the beaten whites to another bowl. Set aside.
fruit nut bread fruit nut bread

Next, add the eggs and sugars to the mixing bowl. There is no need to wash the bowl first. Cream ingredients together for 2 minutes on medium-high speed.
fruit nut bread

Add the grated zest of one orange. To learn more about zesting citrus, go here.
fruit nut bread

Add melted butter, heavy cream, vanilla, and almond extract to the batter and mix for one minute on medium speed.
fruit nut bread

In a separate small bowl, use a whisk to mix the whole wheat flour and baking powder.
fruit nut bread

Add flour mixture to batter and stir gently for 30 seconds until ingredients are well-blended. Do not over mix.

Now you have a bowl of batter and a bowl of stiff egg whites.
fruit nut bread

Fold egg whites gently into the batter and blend until just mixed. This process of “folding in” the fluffed up egg whites makes your batter lighter.
fruit nut bread fruit nut bread

Stir batter into the bowl with the fruits and nuts.
fruit nut bread

Pour batter evenly into three loaf pans. Use your fingers to create a mound down the midline of each loaf pan.
fruit nut bread

Bake loaves covered with a sheet of foil for the first 40 minutes.
fruit nut bread

After 40 minutes, remove foil and bake for another 40 minutes.  Loaves will be medium brown in color when done. Oven temperatures vary, so check the color at 30 minutes. You can’t rely on the knife test to check for doneness because it continues to come out with crumbs on it, even when the loaves are done.
DSC_0059

This bread freezes well. I found one in my freezer that was one and a half years old. When I thawed it, I was prepared to throw it out, but instead, it was perfectly delicious.

For other holiday ideas, check out the Holiday menu on the taskbar.

Other Quick Breads:
Marion’s Crazy Good Pumpkin Bread with Chocolate Chips
Ellen’s Most Moist Zucchini Bread
Cranberry Muffins with Orange Zest and Pecans
The Biscuit King

Follow Judy’s Chickens on Instagram and Pinterest @JudysChickens.

If you enjoyed this post, consider becoming a follower. Be sure to press “confirm” on the follow-up letter sent to your email address.

© 2014-2020 Judy Wright. All rights reserved. Photos, videos, and text may not be reproduced without the written consent of Judy Wright.

Raising Sorghum Cane to Make Sorghum Syrup

Last September, my husband and I were invited to watch a Mennonite family make sorghum syrup from stalks of sorghum we saw growing in a field all summer in Kentucky. The seeds were planted in April and the stalks were harvested from late August through September. While there are many varieties of sorghum grown, some for syrup, some for silage (animal feed), and still others for grain to be milled for flour, this family was growing their sorghum for syrup and silage.

The fields were gorgeous with their tall stalks, topped by a sea of golden bushy seed tassels. Up close, one can quickly see why sorghum is in the same grass family as corn, oats, and wheat; they all grow in the same way with long stems, broad leaves, and seed tassels full of kernels of millable grain.

Sorghum - Version 2

Sorghum cane usually grows from six to ten feet tall. It is exceptionally heat-tolerant, which may explain why it is often the last grass still green and standing in fields in the Southeast in September.

To harvest the cane, farmers strip off the leaves and remove the seed tassels. Next, the stalks are cut down as close to the ground as possible because that’s where most of the juice is found. The stalks are stacked on carts, and the carts are pulled by horses to the grinding shed.

We had been to this farm many times to buy eggs and vegetables but had never been down this dirt road to the sorghum processing shed. Our farmer friend told us to head for the tall smokestack, and there we would find the men boiling down the syrup.

.DSC_0206

We passed an open shed on the right where the stalk grinder is located. Here, the sorghum stalks are fed into a set of rollers that press out the neon-colored juice.

Sorghum

If you have ever been to a historical demonstration of a sorghum pressing, you may have seen this same process, only back in the day, a mule was used to provide energy to pull the crank that rotated the rollers in the press. As the mule walked in a circle, sorghum juice poured from the press into a collection barrel. I found this image in a publication called Bittersweet.

1i3p24a

In Nashville, you can see a live demonstration of this process at the Music and Molasses Arts and Crafts Festival held annually in October at the Tennessee Agricultural Museum.

 events3

At the Mennonite farm, a diesel-powered conveyor belt moves the waste from the pressed stalks to a cart.

where the sweet-tasting scraps are enjoyed by the workhorses, who transport it to the compost heap.

..

There is beauty in the simplicity of this process.

Further down the road, we came to the cooking shed where the thin neon-green sorghum juice is cooked down to a thick syrup.

The pre-cooked juice is stored in the white tank located on the shelf on the left. The gray tank, on the right, is the boiler where steam is created to generate heat to cook down the syrup in the cooking pans located inside the white door.

Sorghum

On the backside of the building, you can see the wood-burning furnace that heats the water in the boiler to create steam. The younger generation of boys is tasked with keeping the fires stoked while the older men, in the building on the right, boil down the juice.

Sorghum

The steam, much hotter than boiling water, travels through pipes to the cooking room where it runs under a 75-foot maze of metal cooking trays. Ten gallons of juice will render one gallon of syrup. The steam in the room is created by the nine gallons of water boiled out of the juice. The steam is so thick you can barely see across the room.

Sorghum

The sorghum syrup starts out as a thin neon-green liquid loaded with not so tasty chlorophyll. The farmer uses a hoe-like tool to skim off the chlorophyll and other impurities on the liquid’s surface, as it boils up from the juice.

By the time the syrup reaches the end of the maze, it is ready to be filtered and jarred. Here the farmer scrapes the last bit of sweet foam off the syrup so there won’t be white foam streaks in the jar.

An old farmer I met in Nashville told me when he was growing up, there was a commercial sorghum mill in Crossville, and on the day they were cooking the syrup, all the mothers in town would send their kids to the mill with steel cups to scavenge the foam and bring it home. The mothers would use this gleaned sweetener to make cakes and biscuits. He said the foamy syrup was tasty and free!

Sorghum

The syrup drips through the filter into a barrel and from there is poured into jars of all sizes. It is sold in stores around the county.
Sorghum

Sorghum is enjoying quite a renaissance lately. I see it frequently listed as an ingredient on many restaurant menus. You can use it in almost any recipe that calls for honey, molasses, corn syrup, or pure maple syrup. That includes both sweet and savory dishes. It is high in iron, potassium, and calcium and is 100% natural with no chemical additives.

As we were getting ready to leave the farm, a young boy offered me a sorghum seed tassel. He had been picking off the kernels and eating them while we toured. I asked his dad if the seeds were good to eat. He told me, “Don’t eat them, PLANT them,” and he gave me a seed tassel. He instructed me to plant one red seed every six inches in the spring.

Sorghum

Our favorite way to enjoy sorghum is mixed with butter and spread on a biscuit! Check out my biscuit recipe here.

DSC_0280  DSC_0271

Related Posts on Commercial Farming:

If you enjoyed this post, please share and become a follower. When signing up to become a subscriber, be sure to confirm on the follow-up letter that will be sent to your email.

Follow Judy’s Chickens on Instagram and Pinterest @JudysChickens.

Always check my blog for the latest version of a recipe.

© 2014-2020 Judy Wright. All rights reserved. Photos, videos, and text may only be reproduced with the written consent of Judy Wright.

Oats, Sorghum, Ginger and Cranberry Cookies

My son is leaving town after a nice visit home and I have a need to send him off with his favorite cookies. Will this ever change? He said they are so hearty he eats them for breakfast. I like the way he is thinking; hearty sounds like a meal instead of a dessert. I would have seconds in that scenario.

text

One of the key ingredients in this recipe is ginger, a spice that imparts heat and sweet at the same time. Usually, I use ground ginger, but since I had fresh ginger root in the fridge, I decided to grate it and see how it affected the taste.  The change was mind-blowing. Between the ginger and the sorghum, this is one very flavorful cookie.

Yield: 3 dozen large cookies

Ingredients:   
sorghum oat cookies     
2 cups whole wheat flour
2 cups all-purpose flour
1 tablespoon baking soda
1½ teaspoons salt
½ cup sugar
1½ teaspoons ground ginger or 1½ tablespoons freshly grated ginger
4 cups old-fashioned oats
1 cup butter, softened
1 cup sorghum (could substitute honey or molasses)
2 tablespoons water
2 large eggs, lightly beaten
1½ cups raisins, Craisins, or dried cherries
1 cup walnuts or pecans, chopped (use sunflower seeds if allergic to nuts)

Topping mixture: you’ll need a small bowl of water, and a little sugar and salt

Prepare oven and baking pans:
Preheat oven to 350º.
Line three baking sheets with parchment paper, or grease pans with canola oil.

Mise en Place:
sorghum oat cookies

To melt butter: Place butter in a tempered-glass liquid measuring cup. Melt butter in the microwave for 20-30 seconds. If little flecks of butter remain after melting, that is okay; better to let them melt on their own than risk overheating and causing the butter to separate into fat, water, and milk solids.
Sorghum oatmeal cookies

To prepare chopped nuts:  I won’t dirty the food processor for just one cup of nuts. Instead, place the measured amount of nuts in a baggie and use a meat mallet to crush them into small pieces.

Sorghum oatmeal cookies

To grate fresh ginger: As a general rule, when substituting fresh spice for a dried amount, use triple the amount of fresh. This recipe calls for 1½ teaspoons of ground ginger; I grated 1½ tablespoons instead. Know that 3 teaspoons = 1 tablespoon. Also, you can store unpeeled ginger root in the freezer.

First, peel the ginger root and then grate. I used a fine-holed Microplane grater. The ground ginger will be very moist.
DSC_1016.jpg ginger cookies sorghum ginger cookies sorghum

To prepare eggs: Always break eggs in a separate bowl before adding to batter and then inspect for tiny broken shells or a foul-smelling yolk.

Measuring the flour: For a refresher course on how to properly measure dry ingredients, check out my post, Home Ec 101. As an FYI, I spooned the flour into the measuring cup and then leveled it off with a knife (or my finger!). If you scoop the measuring cup directly into the flour sack, it packs the flour into the cup. If you do that four times, for the required four cups of flour, you could add as much as one full cup of flour to this recipe.

Finally, make the cookies!
Into a large mixing bowl, add the dry ingredients: the flours, baking soda, salt, sugar, ginger, and oats. Mix on slow speed for about 30 seconds.
Sorghum oatmeal cookies

Add the liquids: sorghum, melted butter, water, and eggs, and mix on low-medium speed for about one minute.
Sorghum oatmeal cookies

Turn the machine off and use a spatula to scrape the sides of the bowl. Add the Craisins and nuts and mix on slow speed for another 15 seconds. Over-mixing the flour could result in tough cookies.

Use a tablespoon or a cookie scoop to make golf ball-sized portions of dough.
DSC_0079

Place 12 balls of dough on each cookie sheet. Lightly press the balls with a fork placed on the dough in two different directions to create a criss-cross pattern.
sorghum cookies sorghum cookies

Using a pastry brush, brush the tops of each cookie lightly with water followed by a sprinkle of sugar and a touch of salt.
Sorghum oatmeal cookies

Bake cookies for 8 minutes and then rotate cookie sheets on oven racks. Set a timer. Cook for about 7 more minutes, or until just lightly browned. Best to err on the side of “I think they’re ready,” than “Ugh, too hard” when determining doneness. Place cookies on wire racks to cool. Cookies will harden as they cool.
sorghum cookies – Version 2

Other cookie recipes:
3 Ingredient Peanut Butter Cookies!!!
Mary’s Award-Winning Chocolate Chip Cookies
My Favorite Rollout Butter Cookies
Italian Sesame Seed Cookies
Italian Ricotta and Lemon Cookies

Here are a few other recipes that use sorghum:
Sorghum, Oats, and Cranberry Granola
The Biscuit King
Roasted Butternut Squash, Brussels Sprouts, and Cranberries
Raising Sorghum Cane

If you enjoyed this post, please share and become a follower. When signing up to become a subscriber, be sure to confirm on the follow-up letter that will be sent to your email.

Follow Judy’s Chickens on Instagram and Pinterest @JudysChickens.

Always check my blog for the latest version of a recipe.

© 2014-2020 Judy Wright. All rights reserved. Photos, videos, and text may only be reproduced with the written consent of Judy Wright.